
Julia over at Splitcoast has a great challenge for us today! Use Transparencies in your project. I don’t know if I am good at using them, but I sure love to do so. I like to use them on scrapbook pages as well as cards. A long time ago I found transparency book instructions on Two Peas in a Bucket. I made two and then never made one again. When I saw Julia’s challenge I knew I wanted to make another.
This book is very simply. You start out with two 4″ x 8″ sheets of transparencies and two 4″ x 8″ designer paper pieces. Take your two sheets of designer paper and tape them together back to back, so you have one sheet with the same design on both sides. Fold in half.
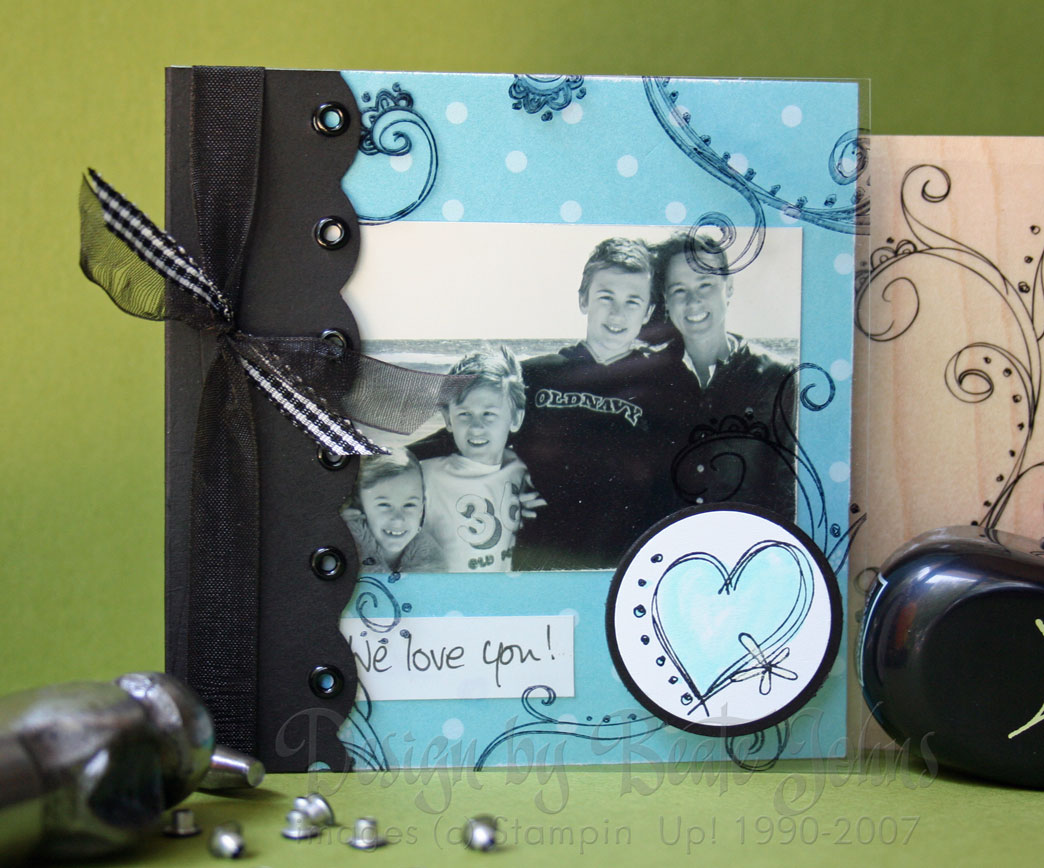
Fold both transparencies in half. The designer paper will be sandwiched in between the transparency sheets. I used Petals and Paisley Designer paper. I just love that paper.
I stamped the transparencies with the swirl from Doodle this. I made accents with Doodle That.
The spine is made from a 2 1/2″ x 4″ piece of black cardstock. I scored it in half, punched a scallop border with the corner rounder on both ends.
After I had stamped the outer transparency, I lined up the score line of my spine and of my transparency. Next I punched eyelet holes in the center of each scallop and set the eyelets.
The pages are held together by black organdy ribbon from Stampin’ Up!
I got the border idea from Alli Miles, who got her inspiration from the Fancy Pants stamp packing. I kept the packing myself because it looked so pretty. Head over to her blog if you haven’t been there yet. Besides showing off gorgeous artwork, she also has a blog candy drawing going on right now.
If you are interested in seeing the inside pages as well as it’s back, click on more.
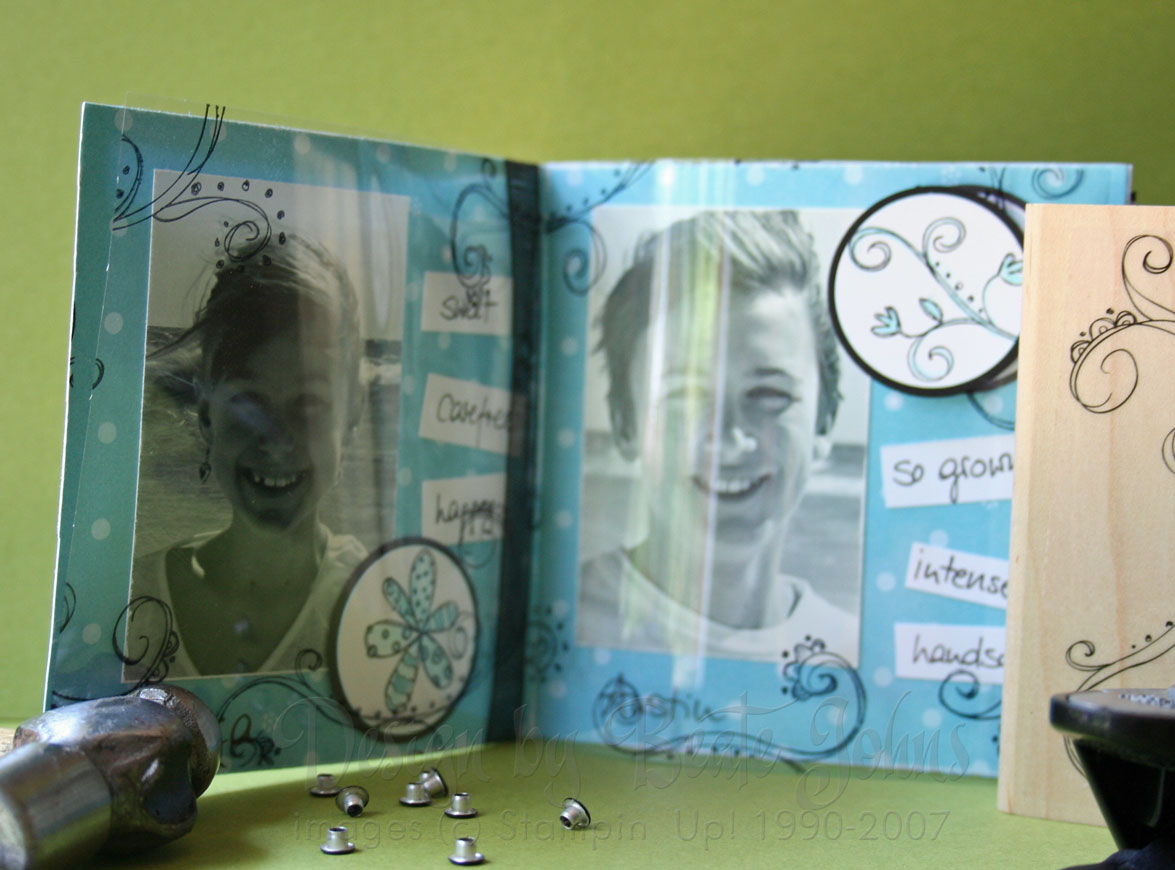
Sorry about the glare. It’s very hard to get a shot without it when you have to pages of transparencies next to each other.
The circular accent on the front and on Austin’s page are on top of the transparency. On the backside of the transparency is then another black circle with a smaller white one. I stamped another Doodle That image on the white circle and added some journaling in black.
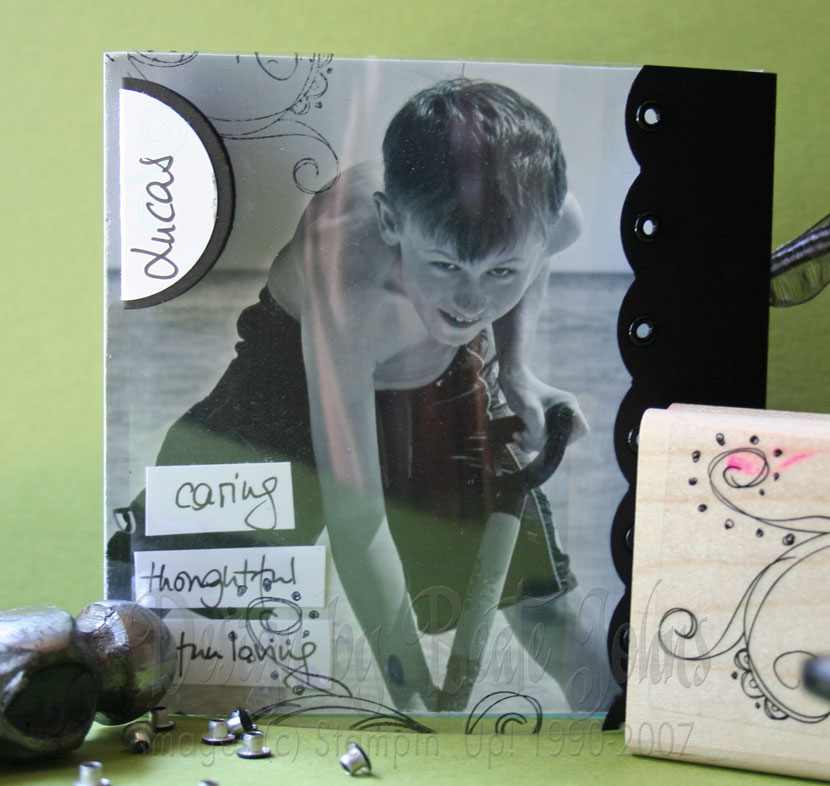
I love that shot of Lucas. I think the book might have looked better if I had used more bigger sized photos. But I worked with what I had at home. All photos as well as the designer paper are sanded a bit on the edges with Stampin’ Up!’s sanding block . I don’t know why…I just like to age my projects.
I hope you like how it turned out. I really do! Wohooo…..my Mojo has found me!!!!! Big grin and happy dance!
Beate
35 Responses to “Way to use it Challenge”
Sorry, the comment form is closed at this time.


What a gorgeous book! I really need to get back to some scrapbooking. My girls are getting so big and my pictures just sit in the computer!
This looks like a super cool project (great for Mother’s Day gifts)! Those pics of your kids are just gorgeous (having beautiful subjects to photograph doesn’t hurt). Love that scalloped spine down the edge.
Silly question for you, are the transparancies on both the inside and outside? Could you use one 4 x 8 piece of double sided paper to make the book (if it is a CS weight) for a somewhat different look?
TIA!
Linda
I would say it’s back alright – this book is amazing! I love your stuff and make my brain start thinking in directions it has never gone before – LOL! *HUGS* Alex
I just thought of another question for you Beate regarding the eyelets. The book appears to open from where you scored it, but your eyelets are offset from the center. Did you punch the eyelets on the black piece first and then add the black piece to your book, tying it all together with ribbon! Sorry for all the rudimentary questions. This would be a great tutorial (hint hint).
Linda
I love this idea! And how simple – would make a great Mother’s Day gift for Grandma~! Thanks for sharing!
What an amazing book! You think of everything! I have to go get some Transparencies now. I hope mine turns out as cute as yours!!
love what you did with this challenge! Love the detail of the eyelets in the scallop edge. Great job with the flourishes!
What a beautiful project!!! And thanks for the details of “how to do it”. I love that bordering idea with the eyelets. Very cool!
Can I say you just ROCK! I just left a message in your SCS gallery but had to come to your blog to read the details!!! I think I will be working on one of these super cute books too. Thanks for the inspiration and I just LOVE what you did with “Fancy Pants-esk” design. Thanks for your kind compliments.
Alli
Beate, it’s beautiful! I totally have to give this a try soon! Love it, love it! Hugs to you, girl.
Amy
Love the book. And I especially love the border. I am always so inspired by you. Thanks for sharing.
Betty
Beate, you saved the day! I need a present for my Dad for Father’s Day and this will definitely be the trick!!!!! You rock — thanks for sharing!
Susanna
Beate, it’s just beautiful!! Thanks for sharing it!
Totally awesome in my book!
What a nice book! Being a retired teacher, I’m familiear with how versatile transparency paper can be. I like what you did with it here! Thanks for sharing!
Wow! This is gorgeous and the pics are wonderful.
What a wonderful gift idea. I think my mom would love something like this and Mother’s Day is just next week… The gears are turning now. 🙂
Looks fabulous. Thanks for all the tips.
This is FABULOUS Beate!! 🙂 Love everything about it!! I need to try that transparency thing…guess I should buy some first! Ha. You did such a terrific job on this!
Wow this is just so beautiful! Love the scalloped edges with the eyelets! Glad your mojo found you!!!!
This is gorgeous! I can’t wait to try this out myself. Thank you for sharing.
Jenn
Wow! I love this. What a great idea for Mother’s day. Thank you, now I know what to give my Mom (hopefully she doesn’t read my comment, LOL!!).
really gorgeous, Beate!!! …and so are those kiddos 🙂
Heh there!! So i read this and said..so what if my house looks like crud and my parents arrive tomorrow morning..why not go play…so i reach down to where my transprencies normally live..they aren’t there..SO i search for about an hour in every bin and drawer I have..in comes my husband and says..what are you doing..i explain my problem..he goes..OH I needed those for my presentation! GRRRR!!! Anyway..I will have to go and get some tomorrow! Great book! The kids always look so amazing!
xoxo
ronee
This is fabulous! I am so trying this tomorrow!!
Fabulous book. Yup. I’d say you have your mojo back.
This is fabulous, Beate! I *love* everything about it!!! Thanks for sharing the directions with us! 😉
What a beautiful project and what a gorgeous family!
Gina K.
oh Beate-you always make such gorgeous pages!
Sweet family picture. Is that the beach in the bkg? haa … i bet you are tan girl! That’s a gorgeous project. I have trouble getting my corner rounder to punch scallops. It doesn’t want to punch through and I bought a new one and the same problem. I tried to sharpen it with foil, no luck. Do you have the same issue? Mojo’s back in full swing! 🙂
Oh, this is just bliss. This is the sort of thing I always want to make and never get around to doing. So when my printer is fixed, lol, I’m going to print the instructions and make one for my mom.
As always, you are a true inspiration! 🙂
A S T O U N D I N G!!!! The book is soooooooooooooooo BEAUTIFUL!!
The photos are GREAT also. I thank you for sharing your awesome gift with us each day.
HUGS & TFS
Brilliant!!! Thanks for jump starting me, Beate (and re-introducing my Mo to my Joe!!)
Just Gorgeous!!!!!!
WOW not only are you a great paper artist/stamper but you have wonderful photography- do you take your own pics?
I just found your blog and i like it so well i am inspired to go blogger-style with my ideas.