
Click on more if you are interested in seeing a quick tutorial for this fun project. Think Mother’s Day present, think Teacher gift! This is great for any occasion. I can’t wait to make my next one.
The images in the tutorial are thumb nails. Click on them to see a bigger picture.
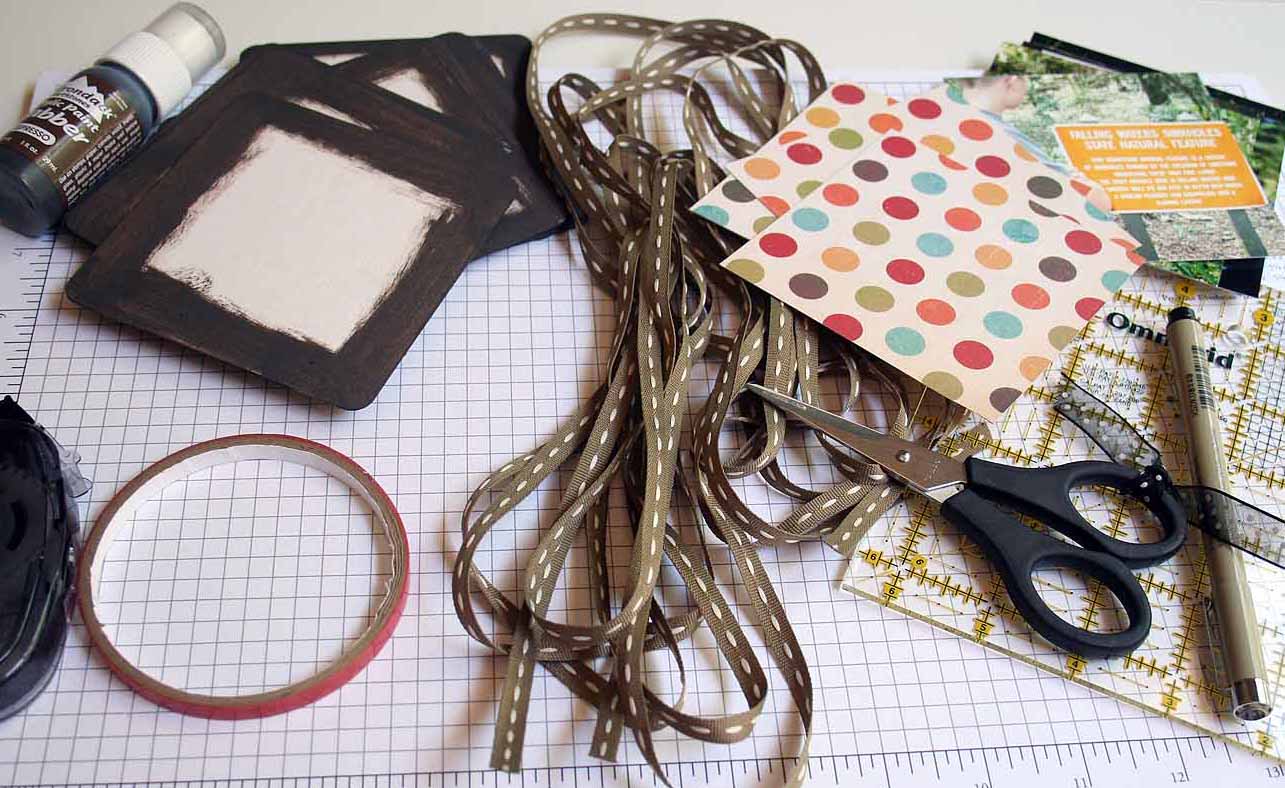
Supplies:
- 12 light or medium weight coasters
- 12 3 3/4″ squares pictures and/or patterned paper
- Sticky Tape
- 3 strands of ribbon about 45″ each
- embellishments
- ruler
- marker
- scissors
- regular adhesive
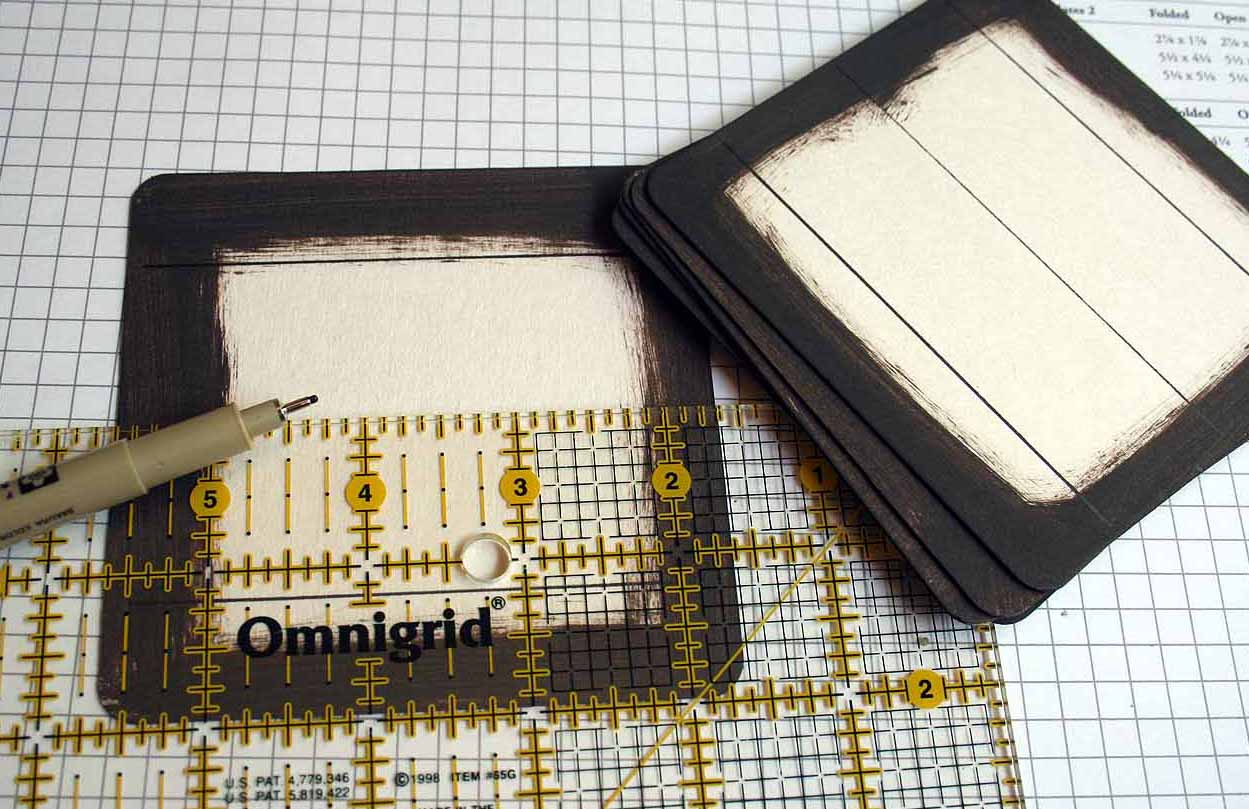
Step one:
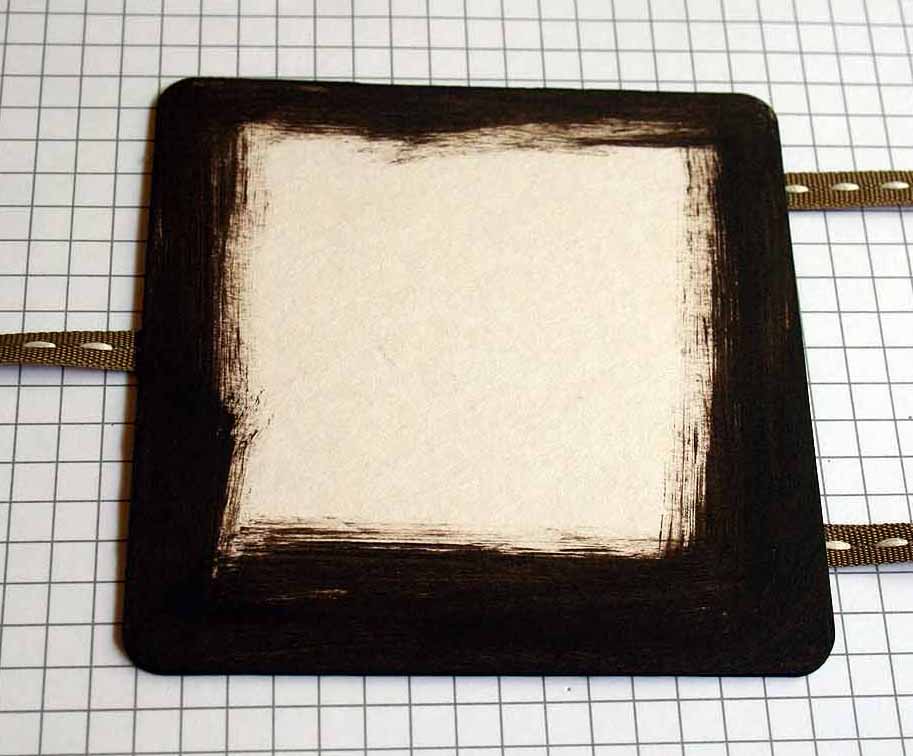
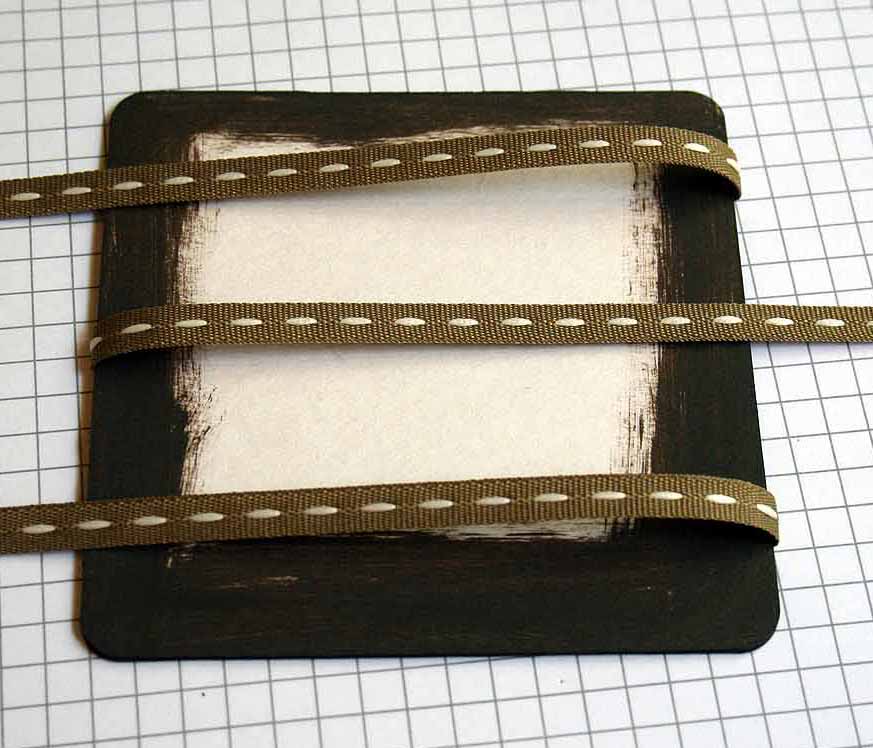
Mark 6 coaster on one side at 3/4″, 2″ and 3 1/4″. Keep your other 6 coasters blank.
(Before starting this project, I added Expresso Adirondack Acrylic Paint to the edges of my coasters.)
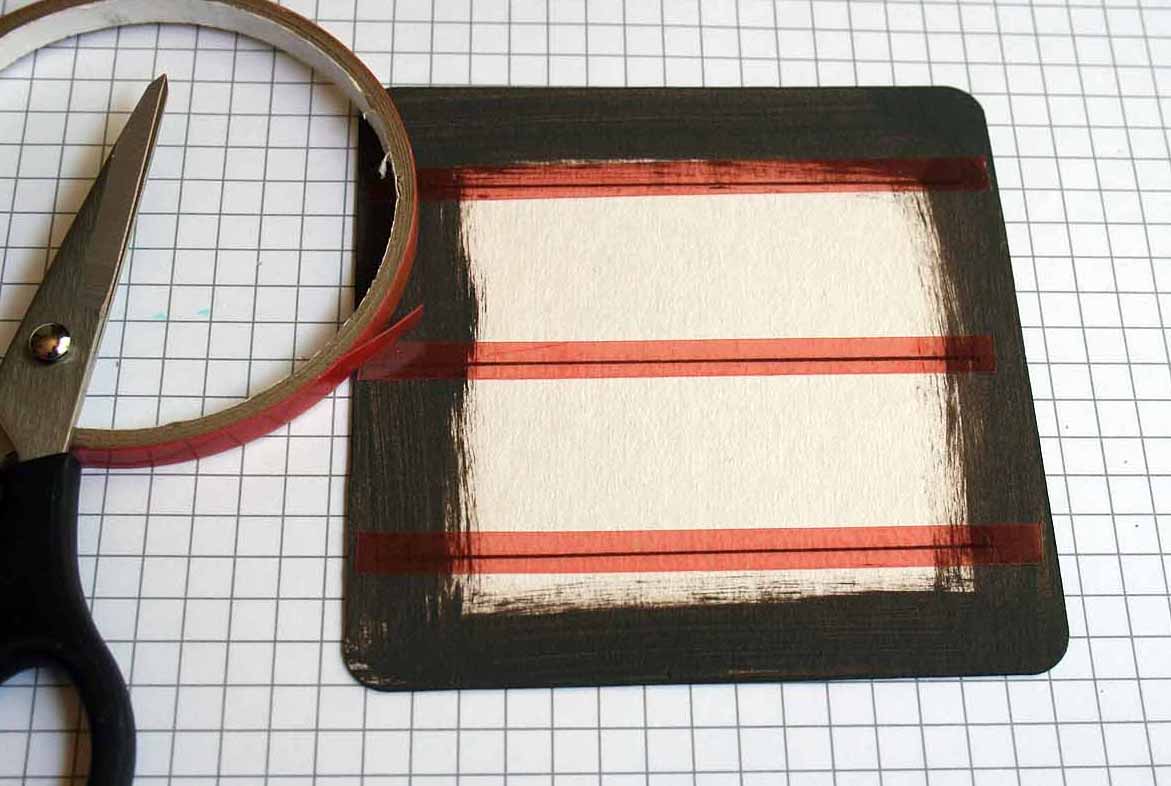
Step two:
Take your first marked coaster and add sticky strip over the lines you made earlier.

Step three:
Tape your ribbon down as shown. Top ribbon going to the right, middle to the left and bottom ribbon to the right.
Step four:
Take an unmarked coaster and tape it down on top of the first coaster to sandwich the ribbon in between the two.
Step five:
Take your ribbon and fold it over your unmarked coaster.
Important!!!! Don’t tape it down. Just fold it over.
Step six:
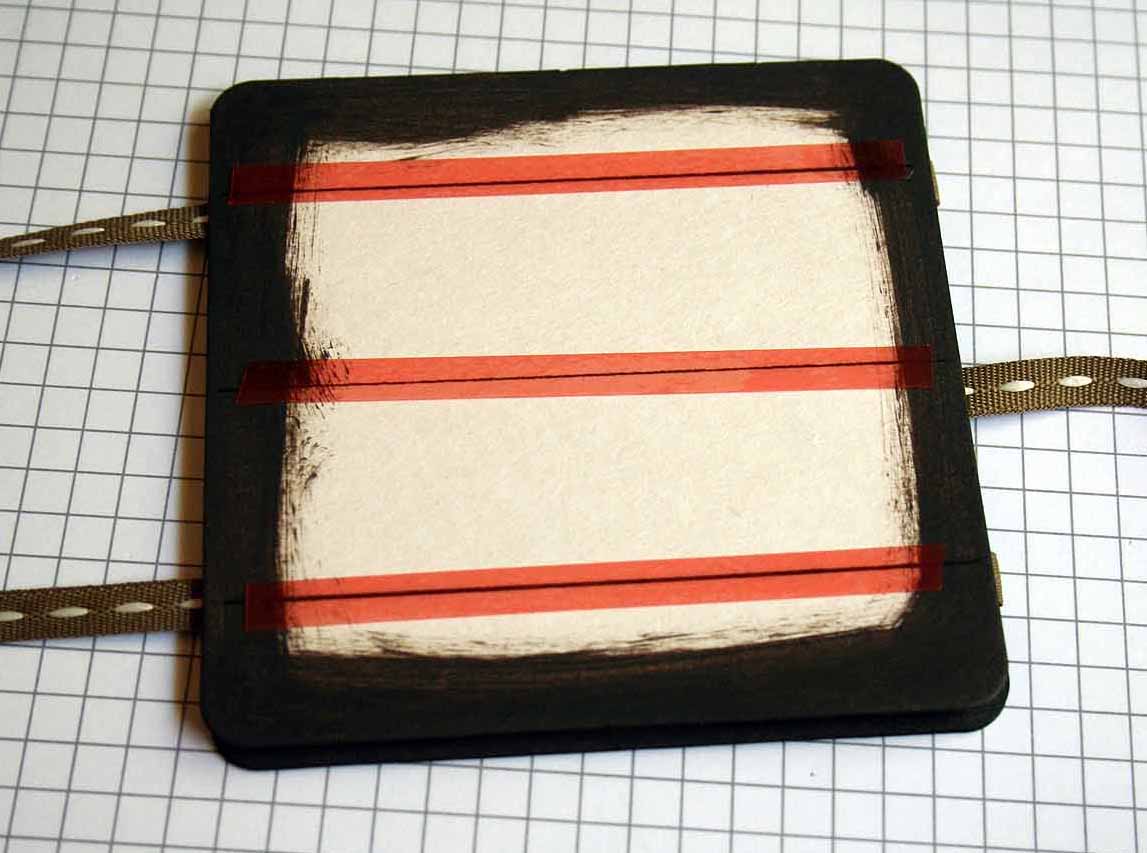
Take a marked coaster and lay it on top of your previous coaster. Add tape again over the your lines. Tape down ribbon.

Step seven:
Repeat step five and six until you are on your last marked coaster. Tape your ribbon down and cut off the leftover ribbon. Then tape your last unmarked coaster over that.

Step eight:
Decorate the front.
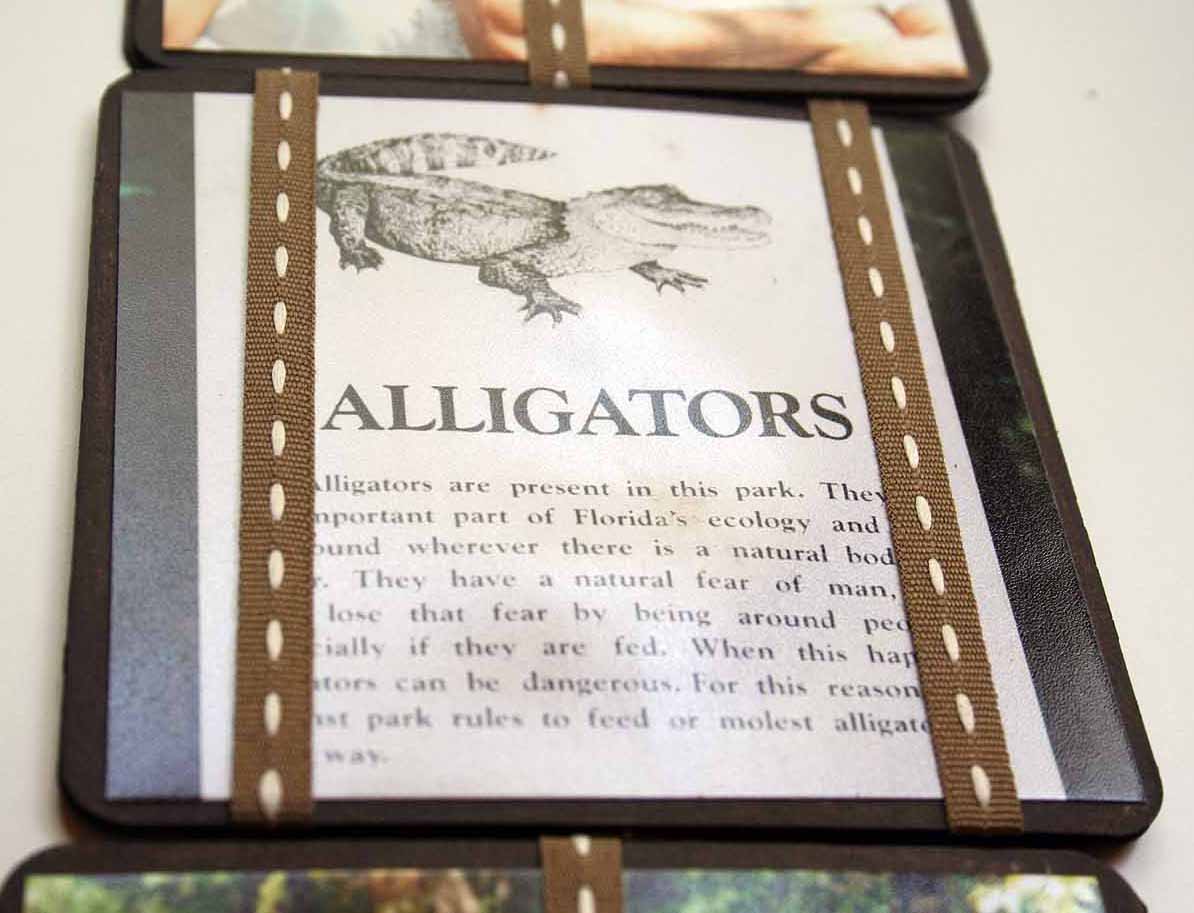
Step nine:
Decorate your inside pages by sliding your patterned paper or photo underneath your ribbon. Don’t tape anything over the ribbon or your Jacob’s ladder won’t flip!
Variations:Try different sizes with different amount of pages! I think these can be very addicting. I can’t wait to make another! I am thinking soft colors as a baby gift? Birthday party album? I can’t wait to see what you all come up with!
Hints:
- Make sure your ribbon doesn’t twist up or it won’t work.
- Play with it several times. Every time you make it flip, it will work better. Help it out a bit in the beginning if one or more of the coasters won’t turn.
Beate
25 Responses to “Jacob’s Ladder Tutorial”
Sorry, the comment form is closed at this time.


Thank you for another fabulous tutorial, Beate!!! I will have to give this a try when I get back from vacation! 😉
That’s really cool Beate. I’ll have to give a shot!
WOW! Awesome tutorial! I HAVE to try this! You are awesome!
This is incredible! Always the clever one! : )
I was SOOOO going to do this tutorial today, but I thought you might…LOL I did start mine Jacobs ladder though, it is so cool!
wow! This sounds FUN!!! I will have to give it a try once I finish all these projects with due dates. Then, I can play a little bit *wink* **HUGS** Alex
PS I finished mine!!!
Wow wonderful tutorial Beate! I can’t wait to make one of these. Hopefully sometime in the near future. 🙂
If you’re a visual learner, you can see the same directions on http://www.crafttvweekly.com
WOW! This looks way to cool…guess I gotta hit the local biergarten again to swipe some more coasters!!! 😉 Can’t wait to try this out!
Huggs,
Jana
Your on the showcase again today 5-8-07 girlie WHO HOOO!! way to go .. I just love that set you used especially that saying .. gotta be one of my favorites.. Way to go girlie ..
xoxox
Dawn
Have I mentioned lately how much I love you!!!! You are awesome. Thank you for posting this great tutorial. I am taking tomorrow morning off from work and this is on my agenda.
HUGS!!!!!
Thanks so much for the tutorial! I can’t wait to try this for Mother’s Day! I guess I’d better get busy!
Beate!
How cool is this! You rock girl! I need to make some gifts for Mother’s Day and maybe if I try real hard I can at least get one made for my MIL and get it in the mail in by tomorrow! And then I will have til Friday to make one for my Mother since I will see her on Saturday!
ok……….I just put one together, minus the deco paper and photos. WARNING!!!!!! Make sure your ribbons don’t get twisted!
UGH! I have the darn thing taped with so much sticky tape I can’t fix it! Oh well! I learned a lesson! And it’s only on one part of it!
Well, I guess I didn’t read the post very well. When I went back to see the other posts I’ve missed I saw the (more). Lo and behold here it is, LOL. TFS.
You rock! Can’t wait to try this.. a great excuse to go shopping! Thank you!!!!
I had tried to make one of these but just couldn’t figure
out how to make it more than just 2 pages… thank you so much.
Rita
This is so awesome!!! Very neato!! Can’t wait to try it myself.
[…] Boy Jacob’s Ladder Here is the Jacob’s Ladder that matches the Bundle of Joy card […]
Well I followed your directions and it came out awesome. I can’t stop playing with it. I took your idea and did it in pastel colors (baby). I think I might decorate it with the “Bundle of Joy” (SU) set. Thanks again!
[…] Invisible Jacob’s Ladder Technique Class (English) – (englisch) Jacob’s Ladder Christmas Card & Gift Card Holder (English) – (englisch) Mini-Scrapbook – Jacob’s Ladder (English) – (englisch) Jacob’s Ladder Tutorial (English) – (englisch) […]
This project is FANTASTIC! Love it!
an baly
I made a wooden Jacob’s Ladder several years ago, but I never thought of doing it for a card.
Thanks so much for this very helpful tutorial! My daughter needed a creative way to present a project on an explorer for her seventh grade social studies class. She made note cards with pictures and information, and we used clear thread in place of the ribbon. It was a bit tricky figuring out which card went where and in which direction, so we made a trial Jacob’s ladder with numbered note cards and we were able to figure it out. I’m so glad we found your blog!