
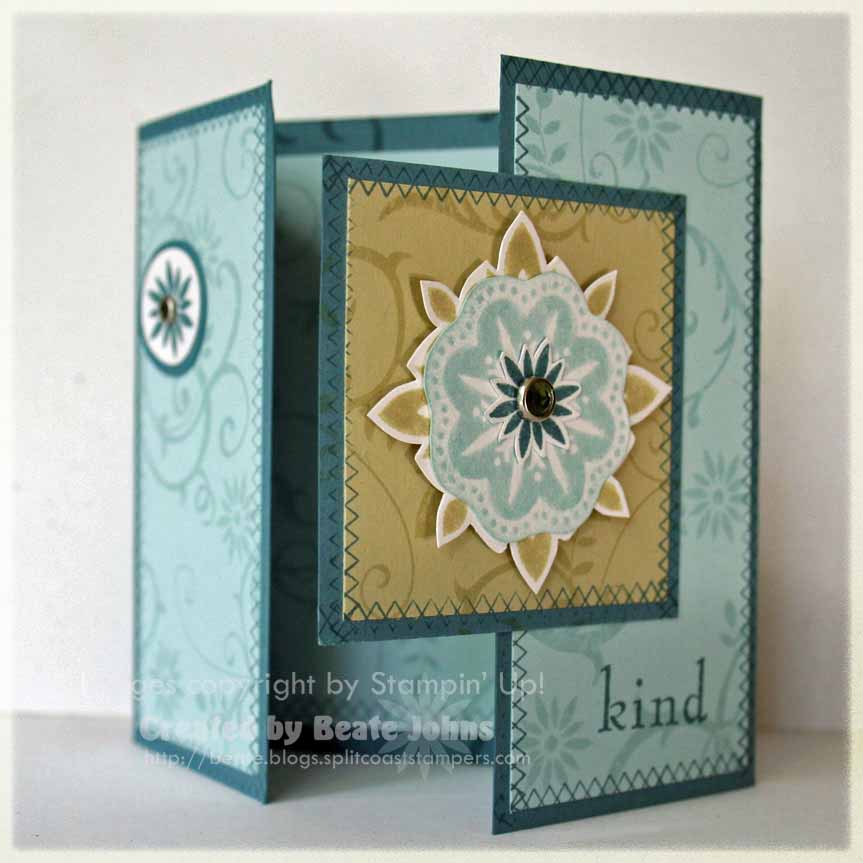
If you would like to see some step by step pictures on how to make this card, click on more.
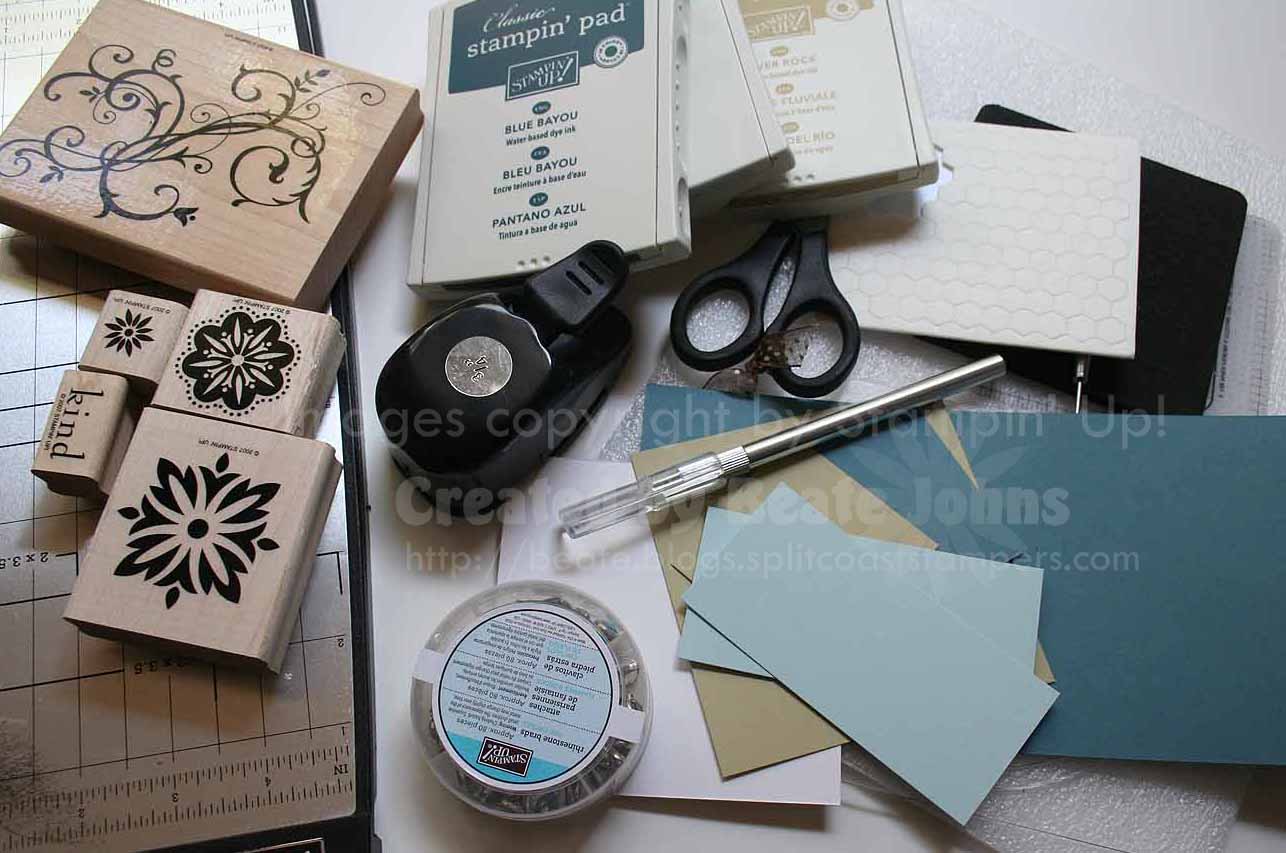
Supplies:
- 4 ¼” x 8 ½” piece of cardstock for card base (Blue Bayou)
- Two 2 1/8” x 4” pieces of coordinating cardstock (Soft Sky)
- Cardstock for center image (my sizes 2 ¼” River Rock and 2 ½” Blue Baqou squares)
- Stamps (Baroque Motifs)
- Ink (Blue Bayou, Soft Sky and River Rock)
- Adhesive
- Paper cutter with scoring tool
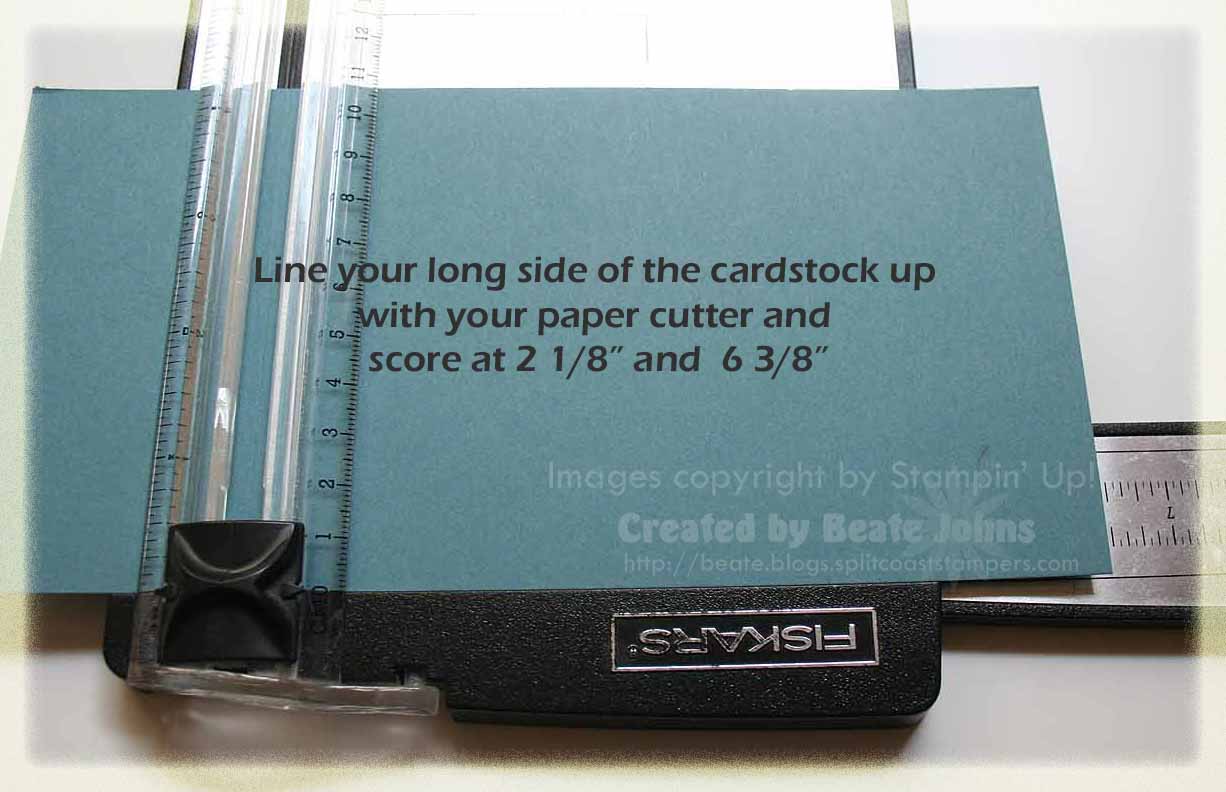
Step one:
Score your 4 ¼” x 8 ½” piece of cardstock at 2 1/8” and 6 3/8”.
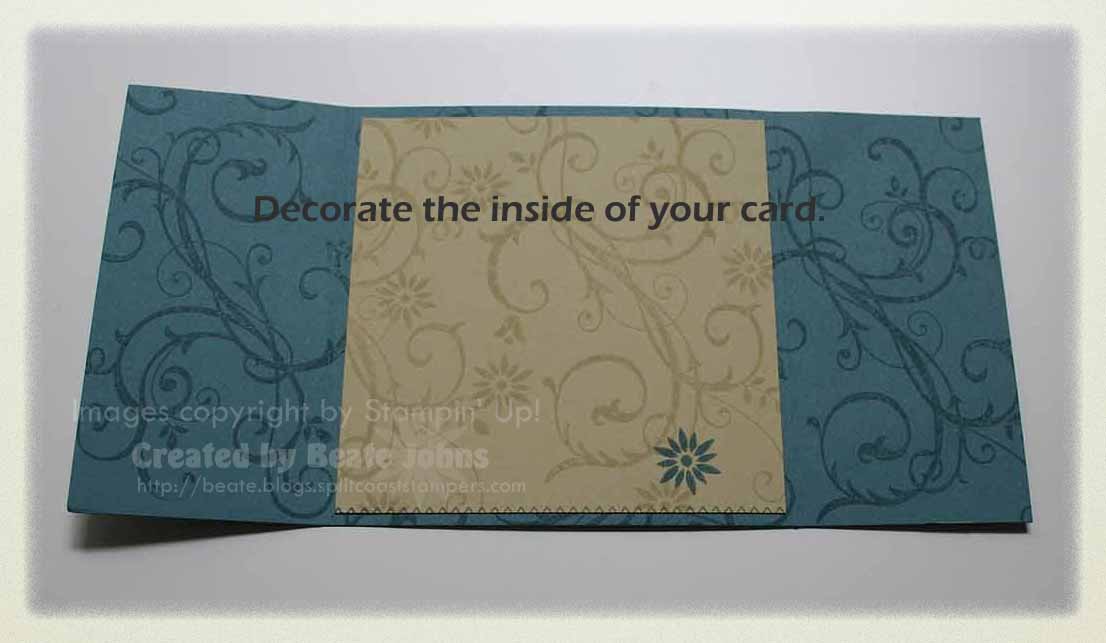
Step two:
Decorate the inside of your cardstock.
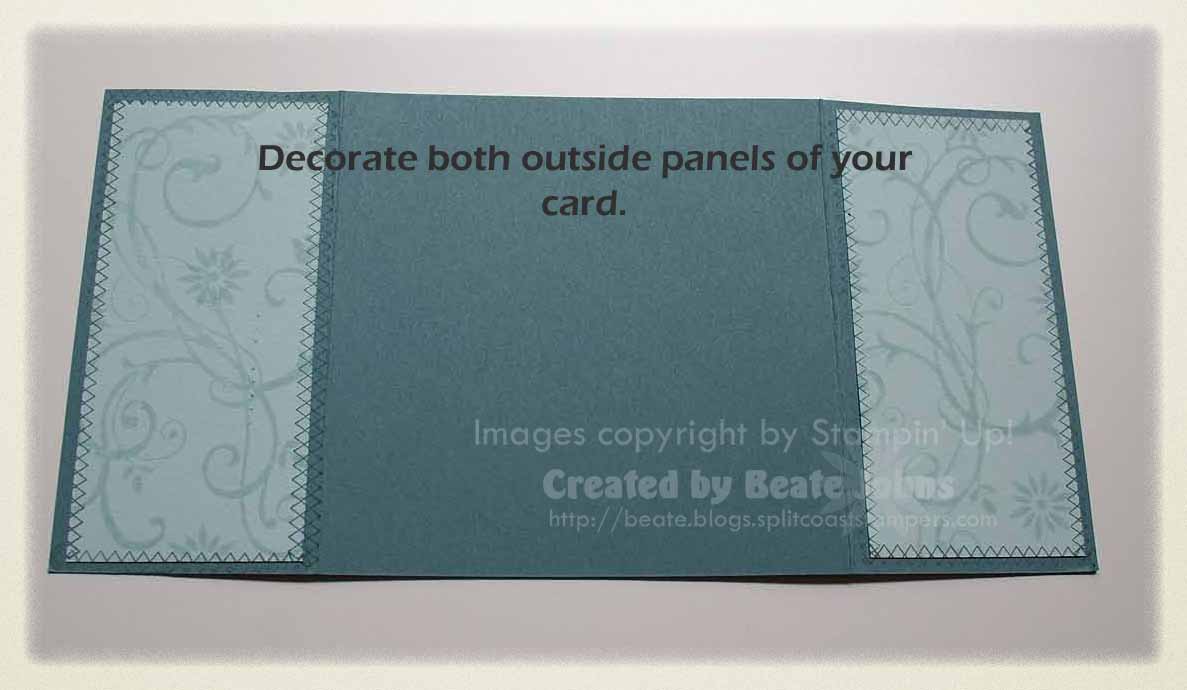
Step three:
Decorate both of your 2 1/8” x 4” strips of coordinating cardstock and adhere to the outer panels of the card front.
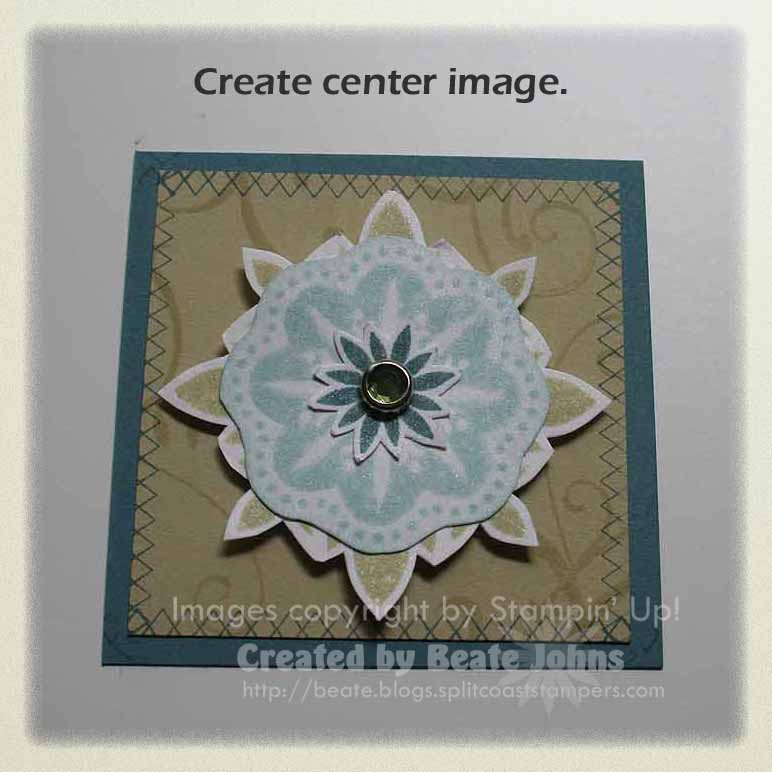
Step four: Create Center image.
Step five:
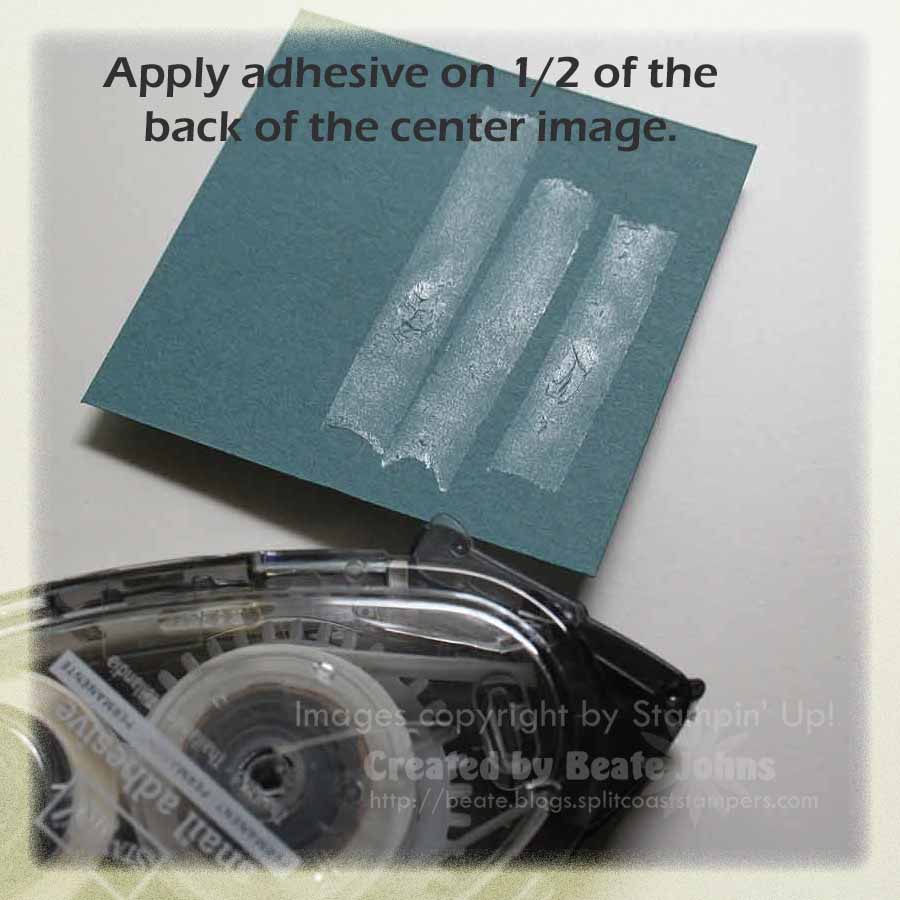
Add tape on one half back of the center image.
 Step six: Adhere your main image over the center of your card.
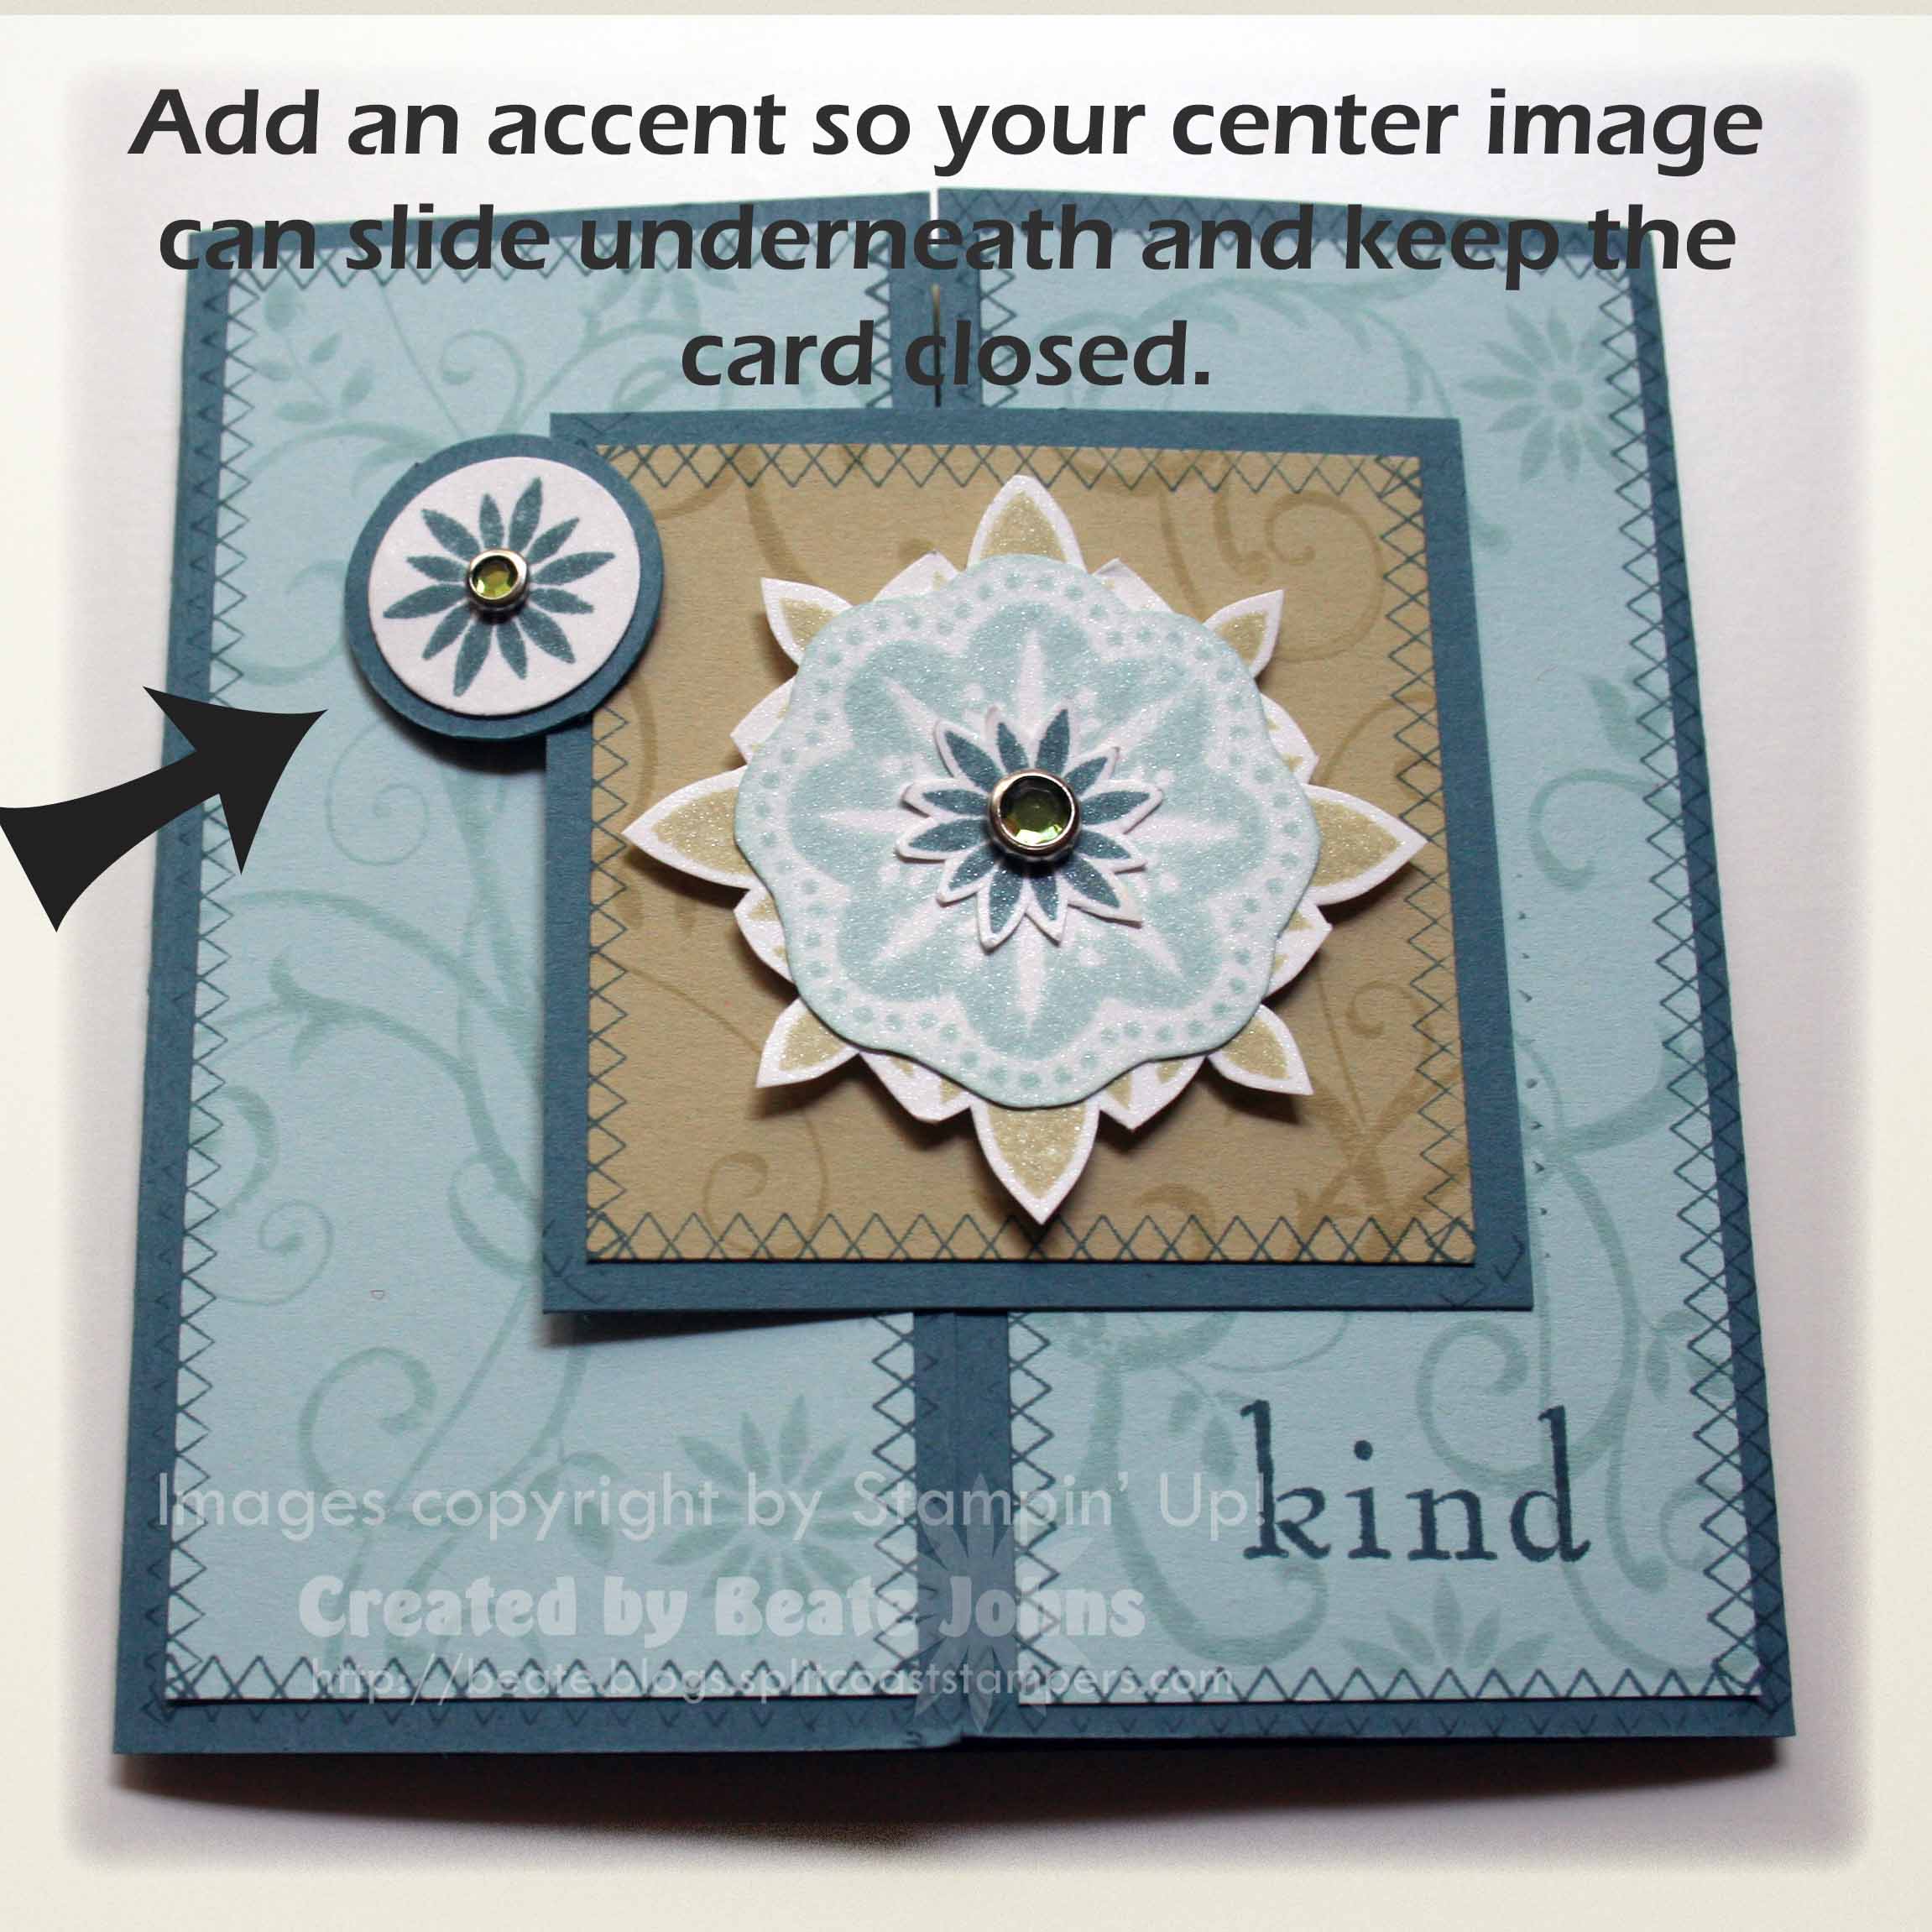
Add a little accent, overlapping your main image a bit on the side that is not adhered. Slide main image under to keep the card closed.
Variations:
You can make these Gatefolds any size you like. To figure out the size of the outer panels, use this formula:
Width of cardstock divided by 2 = width of card back
Width of card back divided by 2 = width of front panel
Always score the long side of your cardstock on width of panel, then flip cardstock over and repeat on opposite side.
Beate
41 Responses to “Gate Fold Card Tutorial”
Sorry, the comment form is closed at this time.


Yeah…your site is back up! I missed you and your wonderful projects! This is gorgeous! Love the colors and thanks for an awesome tutorial!
Thanks for such a clear, concise tutorial – they help me so much!
Put that All in a Row away!!! LOL! Girl, do you ever sleep? Love your Baroque card!
You know I have to have order all in a row now! Not to mention every stamp set and paper that you used!
have a great time!
This is gorgeous!!! I love the colors you chose and the layout is so fun!! TFS
Absolutely stunning, Beate! Love, love, love it!!!
Just beautiful. You ROCK!!!!
HUGS
Wow, Beate… This card is simply stunning!!!
So glad you are up and running again! Thanks for the tutorial on the card! I did one already but didn’t put that optional step to keep the card closed. Think I’ll have to go back and add something to mine now.
Oh my, this is probably one of the best cards I have ever seen. It is truly beautiful.
this is a beautiful card! thanks for the tutorial!
What an absolutely gorgeous card!
So beautiful. As always your work is just amazing. Glad your back online. TFS
I thought I was going to go nuts. I couldn’t get on your site and thought I had messed up my computer somehow! I’m glad you are back. Love the card! (But, of course!)
/p
Absolutely breathtaking Beate! Love your colors and layout especially! Wonderful tutorial as always!
Linda
Wonderful as always! What kind of camera do you use? You do such a great job and I love the shots you take!
OMG! I wasgoing through withdrawal! Don’t ever leave again….gasp! Love this type of card…will have to try it!
Beautiful card, I love it! I can’t wait to get me new SU! stuff.
OH how absolutely breath-taking and gorgeous!
~Angie
Great job on the tutorial! Love the card 🙂
I love it. Missed you yesterday.
I love the card but love the tutorial with it. I was curious what the “inside” of these type cards looked like.
It’s very pretty,
Sandy
Ok Its Time I really need to step up and try this Gate card challenge sometime today maybe .. Love your stuff girlie BUT you already know that HUH?
Happy Blogging girlie Sure did miss you when your blog was down .. It was totally the pits that I couldn’t get my Beate Fix Hee! Hee! Sure happy your back and everything is working again
xoxoxo
Dawn Griffith
Gorgeous card, and wonderful tutorial! I sure am gonna miss you while you’re gone! 🙂
Love it! The best card using the new stuff I’ve seen so far! Just one question… What is the outside (bottom layer) dimension for the center piece???? Thanks so much for going the extra mile (ten miles???) and doing the tutorial. I can’t tell you how helpful that is. Thanks again!
gorgeous, gorgeous, gorgeous… now you’re making me want that set, too…. must…. resist…. 🙂
Elegant Card & thanks for the awesome tutorial Beate!
Elegant, elegant, elegant!!! I love the colors, new stamps, and stamp pad colors, I even noticed the SU rhinestone brads!! Thanks for this wonderful tutorial, it’s much clearer to me now, and TFS.
Love this card, and love all you’ve been doing with the new sets and All in a Row! Thanks for all the inspiration!
Oh, this is absolutely beautiful! Love the colors, the images and the tutorial. You ROCK!
This card is absolutely gorgeous! I LOVE the colors and that main image! You’re making me want that set that I thought that I could live without!
PS Any chance you’re going to Stampfest in Orlando? It’s be cool to “meet” you if you were…just a thought!
Couldn’t figure out what why I couldn’t get the pics…Thank you so much for sending this out! Love it. Can’t wait for my order to come in…..
Love this card and new stamps!
I LOVE the color combination. This is such a fun card. I can’t wait to get started making some of my own. TFS
LOVELY CARD! – and thank you for another excellent tutorial! I am a great fan of all your works. I visit your blog almost every day. Love it!! 😀
I haven’t got a SCS account yet, but if you want you can see my version of the gate card in this swedish forum for scrapping and crafting: http://forum.pyssel.net/viewtopic.php?t=11382&postdays=0&postorder=asc&start=0
WOW!!!!! I love every single thing about this card! It is just BEAUTIFUL!!!!
Such a great tutorial! I made a Father’s Day card using it, but I gave it away before I took a photo. Here’s some invitations I made using your tutorial. They’re slightly modified from your design: http://wellsaidcards.blogspot.com/2007/06/gatefold-invitations.html
Thanks!
WOW! I think my heart stopped for a second. This is GORGEOUS! Truly gorgeous!
Another exquisite card! I cannot get enough of your designs! You are such a talented and inspiring artist! Katie 🙂
[…] was having some fun with the idea of Gatefold Cards I saw through Beate’s Blog, Fresh & Fun. While DH was watching play off hockey … & getting more of a work out shouting at the […]
THanks for a great step-by-step on how to make these!
I really appreciate it!