
Yesterday’s Featured Stamper on SCS was Carolyn, aka. Cammie! I love her work. When you have a minute, check out her gorgeous gallery.
Carolyn has several gate fold cards in her gallery that she closed with a card band. I decided to case that design.
I am sure you aren’t shocked when I tell you that I made a square gatefold, instead of the rectangle ones Carolyn made. LOL
And you are probably aren’t surprised about the cardbase color either. Yep….Chocolate chip.
I took my 5 1/4″ piece of Chocolate Chip cardstock and scored it at 2 5/8″ and 7 7/8″. I sponged all the edges with chocolate chip.
For the layers on my two flaps I took two 2 3/8″ x 5″ pieces of Sage Shadow and stamped the outer part with the Paisley from Wanted in Chocolate Chip. Then I sponged around the edges, distressed the sides with the cutter kit and taped them down.
Next were two 2 1/8″ x 4 3/4″ pieces of Outlaw designer paper. I sponged the edges of the striped paper just a tad with chocolate chip and then the rest of the paper a bit with Creamy Caramel. I distressed the edges again, taped the paper down and added faux stitching with the All in a Row Argyle stamp.
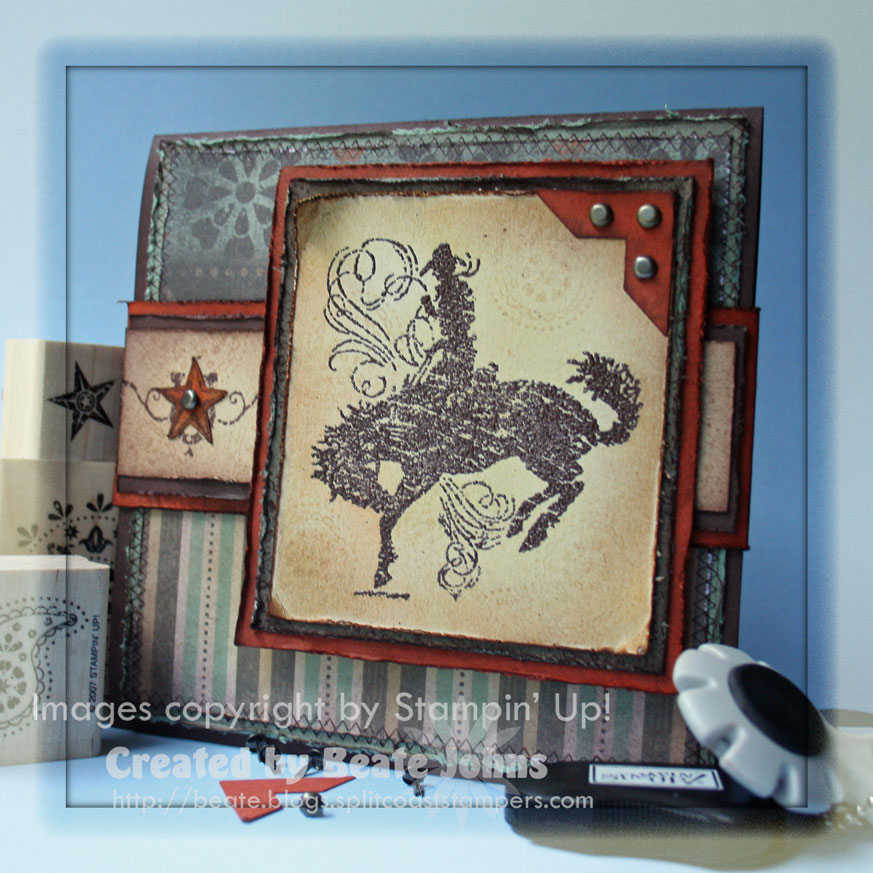
For the main image I stamped the Cowboy from Bronc Buster in Chocolate Chip craft ink on a 3″ x 3 1/4″ piece of Natural Ivory cardstock and then embossed him with the retired chocolate embossing powder (Earth Element Embossing powder stack). I inked up the Paisley from Wanted in Creamy caramel, stamped it off once and then stamped it over the image. I repeated it all over the main panel. Next the edges of the cardstock were distressed with the cutter kit, sponged first with creamy caramel, then with Really Rust and last with Chocolate Chip. I added a bit of Creamy Caramel sponging to the entire piece to age it.
The photo corner was punched out of Really Rust cardstock with the Photo corner punch. I stamped the medaillon from Wanted over it, sponged it first with Really Rust, then with Chocolate chip and adhered it to the top right corner.
The next two layers are made with Sage Shadow and Really Rust cardstock. Each layer is a 1/4″ bigger then the last. The Sage shadow cardstock was stamped and sponged like the panels for the gate folds. The Really Rust cardstock was sponged with Really Rust and Chocolate chip. Both layers were distressed.
I taped all three layers together, added three Pewter brads from the vintage brads to the corner and flipped over the top right corner of the ivory layer.
I was asked how I keep my brads in such a staight line. I use my Paper piercing template from stamping up for all brad placements. It’s easy and it will keep them straight and in the right distance between each other. Remember, I am German. I like ORDER! LOL
For the card band I scored a 1 1/2″ x 11″ piece of Really Rust cardstock strip at 5 3/8″ and 10 3/4″.
I taped it shut on the 1/4″ scored end, distressed the edges and sponged it first with Really Rust, then with Chocolate Chip.
The next layer was a 1 1/4″ x 5 1/4″ piece of sponged and distressed chocolate chip strip.
The last layer was a 1″ x 5 1/4″ strip of Natural Ivory cardstock. It was stamped with Creamy Caramel and the Paisley stamp, then sponged with Creamy Caramel and the edges with Chocolate Chip. I stamped the star/swirl image in chocolate chip far to the left. I stamped another one of those image on a scrap piece of Ivory cardstock cut out the star and then sponged it with Really Rust and Chocolate Chip. That was layered on top of my image on the band.
All three layers were taped together and a Pewter brad was added in the center of the star.
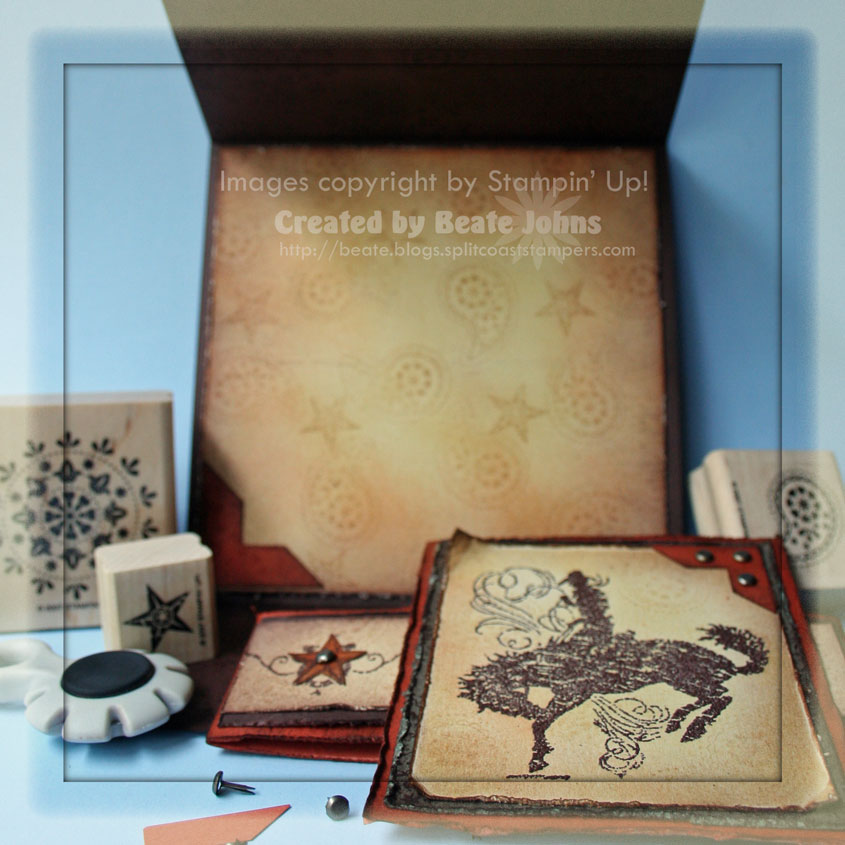
On the inside I stamped the Medaillon and Paisley from Wanted in chocolate chip on the flaps. For the center I cut a 5″ square of Natural Ivory cardstock, sponged and stamped it to match the rest of the card. I also added the bigger Really Rust photo corner. It was sponged and stamped just like his little brother on the main image.
After all that sponging, which took quite a while, my finger tips were DARK. I really enjoyed making this card and like how it turned out. Sorry this entry was like…FOREVER long!
Hugs and smiles
Beate
24 Responses to “Featured Stamper: Cammie”
Sorry, the comment form is closed at this time.


As always, your card is gorgeous! Love the distressed edges…very vintage looking!
Love it Beate – I too am partial to the square card, leaves us much more room to put things *wink*
*STAMPIN HUGS* Alex
That is really great. I was not sure what you meant by a card band, glad you had a pic. You Rock!!!
HUGS
This is gorgeous, Beate! I love how you finished the inside of the card too! Very nice!
Beate, you are on some serious stamping mojo girl! This is incredibly gorgeous! I sure hope you are submitting your gorgeous cards to some contests!
Just gorgeous! Love how you use this cowboy!
I love the vintage look of this card. Fantastic as always! 🙂
I’m, also, “not surprised” by how beautiful you card is- teeheehee! I love the whole thing but my favorite element is layered strip that goes across the card with the little star and flourish! I will definitely be CASEing that idea!
I don’t have this set yet, but the more I see you use it, the more I want it. What a great guy card! As always, awesome!
The more I see this cowboy stamp set, the more I think I might have to have it:) I love the colors and the masculine look to this card, and I also appreciate your detailed posts so we can all reproduce the cards on our own. You have so many great tips to pass on that it makes cardmaking more fun for all of us. Thanks for sharing:)
Wow! Love this card! I need that stamp set, it’s on my Wish List for my husband 😉 I’ll remember your card for inspiration!
Awesoem card Beate! Love the western cowboy look! Deb
Awesome card Beate! Love the western cowboy look! Deb
Gorgeous, gorgeous card!!! I love the colors and perfect distressing!!! Everything about this is just so awesome!!
What a wonderful card! Love how everything came together. 🙂
WOW! What an awesome card! I love everything about it.
That is too dang cute! And as a Texan I can appreciate the western-ness of it. I love that it’s a belly band, I need to remember to try that too. I’ve also learned we have something very cool in common- I am a chocolate chip addict & I have trouble with purples…so basically we’re soul mates. 🙂 Just kidding, thanks for sharing all of your super work!
Mmmmm . . . chocolate, distressing & cowboy — can it get any better? NO! Love this, B!
GASP!! Beate, I love this!! WOW!!!!!! STUNNING!
Another beautiful card Beate! I love all the elements of this card!
Awesome job on the card. Love the shabby chic look.
SUPER SUPERB!!! Because of the shadow you created on the main image and the swirl it looks lika a lot of movement, which I love. Exceptional work. TFS.
Beate – I love this card. You did such a fantastic job. I copied it and am putting it up on my blog this evening. Even though I thought I was the distressing queen, I learned more about sponging by following your lead. Thanks for the detailed instructions and inspiration! (check out your card on http://www.cateredcrop.typepad.com
[…] Beate's work, well, honey, let me tell you . . . She is a wealth of talent and know how. Click here for Beate's card; she gives very detailed instructions on how she did the beautiful shading […]