
I took some pictures last time I used my Crop-A-Dile to show off how easy it really is.
Click on more if you don’t know how to use it. It’s such an awesome tool. Even my boys were impressed!
Setting an eyelet with the Crop-a-dile (COD):

Step one:
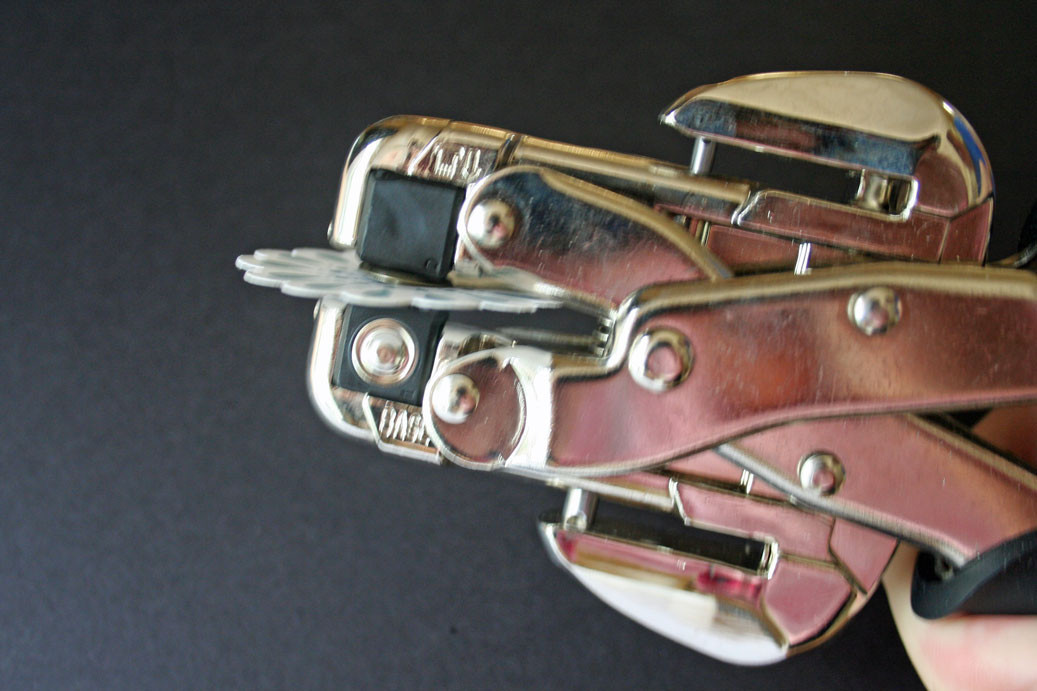
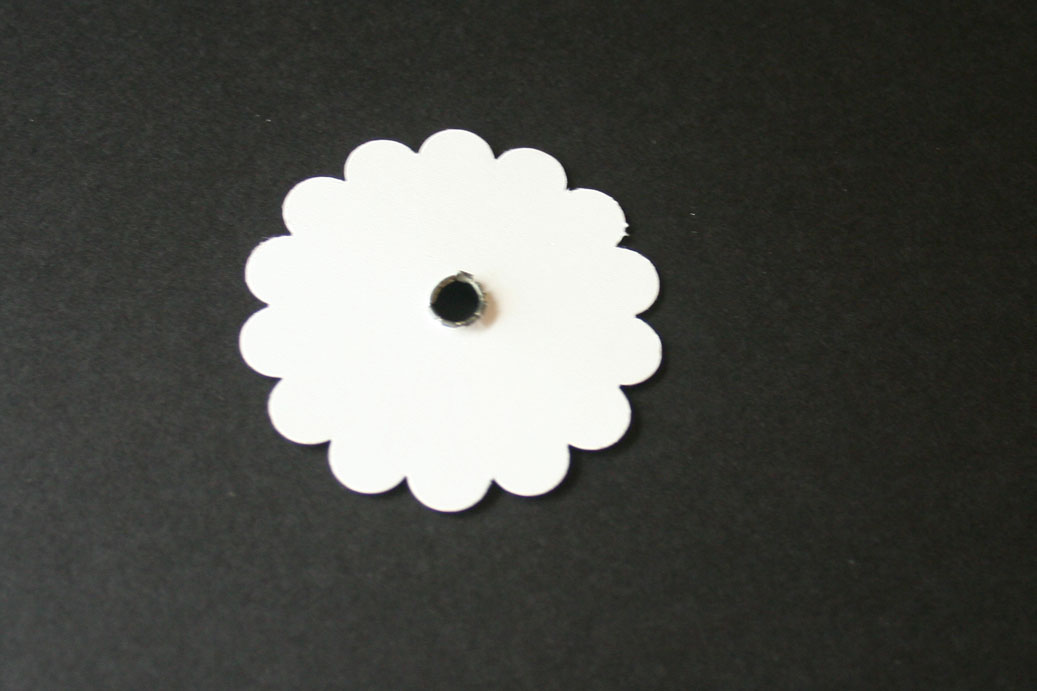
Place your cardstock in between one of the two outer hole punches. The smaller one is for 1/8″ holes, the bigger one for 3/16″. Press the punch down a little so you can see where it will punch, center your cardstock directly under it and press the handle together.
In the picture I show the 3/16″ hole punch.

Step two:
Add your eyelet.
Step three:
To set your eyelet you will need the front part of this tool.
For small eyelets , set the top to C and the base to 3.
For bigger eyelets, set your top part to A, the base to 2.
Place your paper with the eyelet in between top and bottom, so that the top of the eyelet is facing the little nob (top of COD) and the bottom of the eyelet is center with the outward curved base.
Step four:
Press your handles together to set the eyelet.
Dry Embossing with the Crop-a-dile

Step one:
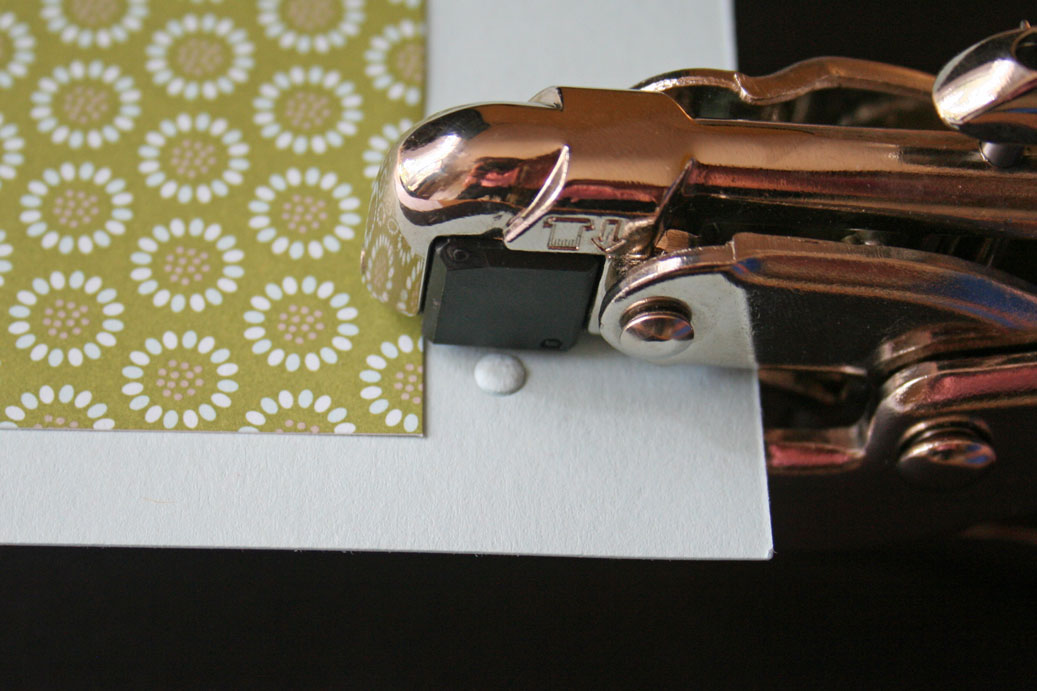
For dry embossing, set your top to A, your bottom to 2.
To keep a straight line when adding more then one circle, I line up the top of the black square with the layer I want to put the circles next to, and the right side of the black square with the beginning of my layer.
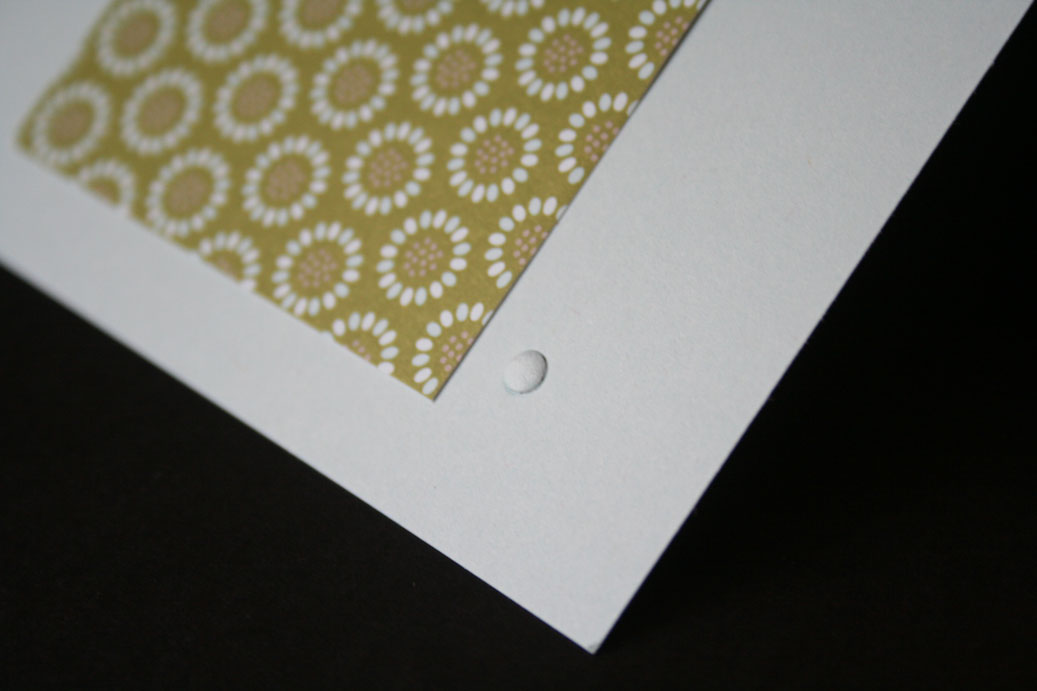
Step two:
Press handle together. Your first dry embossed circle is done.
Step three:
Line up the right of your black square right next to your first dry embossed circle, the top of the square with the end of the layer and press down to make your second circle.
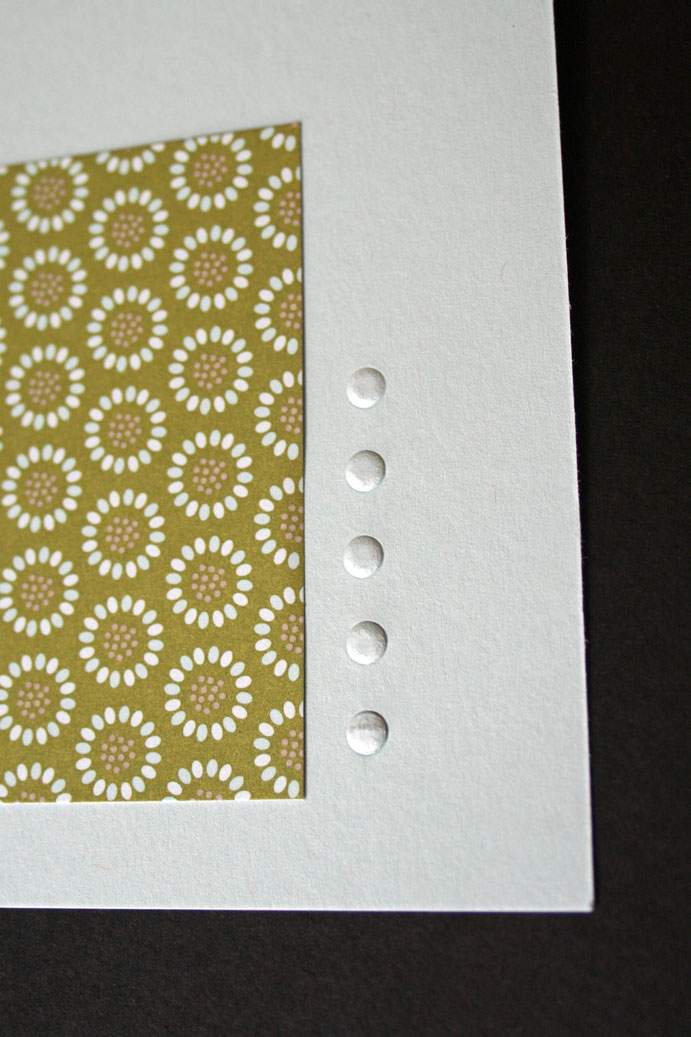
Step four:
Continue to add circles if wanted.
Beate
52 Responses to “Crop-a-dile, easy as 1 – 2 – 3”
Sorry, the comment form is closed at this time.


I LOVE my crop a dile! It brought eyelets back to my cards after 3 years, I HATED the loud banging.
But I think the dry embossing is seriously impressive. Who would have guessed it could do that?
Thanks for sharing! I think everyone should have one, they make it so easy.
Hmmmm I wasn’t going to get a crop-o-dile but now you have me thinking…
Hey, I’m glad I am reading your blog today. I bought a crop-a-dile when Joann’s was having a sale and I still haven’t sat down to play with it to see all it can do. I really appreciate your step by step instructions. You have made it so much easier for me! When your not sure how to do something (like I was) you tend to be a bit nervous about attempting it. I didn’t want to waste any cardstock or eyelets. Thank you sooooo much!
Hey Beate! That is so funny that you did this today because I just got my Michael’s sale paper for Sunday and decided that I was going to buy a COD with the 50% off coupon! Now you have solidified my decision! Thanks – you never cease to enable me! 🙂
I just LOVE my crop-a-dile, and thanks for the ideas… I hadn’t even thought of dry embossing with it… okay… I guess I have a “reason” to play today… thanks for twisting my arm! 🙂
Very cool. I just practiced it an it works great. Thanks for the tip.
GET OUT!! The dry embossing is pure genious, Beate — thanks SO much for sharing that cool tip!!
Great information, Beate!! I discovered the dry embossing by accident…I was supposed to be punching a hole in my paper and I kept putting the paper in the wrong place, LOL. TFS.
I knew that you could do the dry embossing, but haven’t ever tried it. Now that I’ve seen it, I think I should try it!!! Beate you’re awesome!!
Great tutorial, Beate! Thank you!!
Love the Crop o dile! Thanks for sharing the settings for dry embossing – I was “doing it wrong!”
Thank you so much for sharing this info with us. I for the life of me couldn’t figure out how to dry emboss with it!
My StampinUp demo is certain I need one of these! She says when she first held one she knew it was for me! I’ve held off but it’s getting harder and harder!
Another amazing tutorial Beate! Thanks so much!
I bought a COD a few weeks ago and love it already. I also hated teh banging, especially since I like to play early in the morning sometimes while the family is still in bed and would have to wait til they got up before I could do my eyelets! This is a great tool..I’m so glad I got mine!
The dry embossing is just too cool!! Thanks for sharing the settings, I’ll be sure to try this out soon.
Thanks for the dry embossing idea…I have the crop a dile, but didn’t know it had other uses.
Beate this is sooo funny – I had just turned on my computer to see if I could find “where in the world did I see that thing about dry embossing with a crop-a-dile?” when I saw your blog post on my Google Reader!! 🙂 Thanks for saving me 4 hours surfing around trying to find it!! It was just perfect! 🙂
Thanks Beate for the helpful information! This is on my wish list for next month, Jennifer 🙂
Thank you Beate! Now to go try it.
thank you so much for the tutorial. i couldn’t figure out what setting to set my crop-a-dile on for the dry embossing. thanks so much!
Thanks, I don’t have one—yet! One other thing to add to a new stampers list!
Love my Crop-a-Dile! Just a note of caution when dry embossing….if you press TOO hard, you can punch a hole through your paper. When that happens, I just do it on a separate piece of paper and glue it to the back. Can’t do without it….especially for Chipboard!
I love my CAD. I have had it about 1.5 years and never new I could emboss with it until recently.
I have wondered about this tool!! After your little bit of info, I may just have to order one! Thanks.
Elaine
Thank you so much for this tutorial!
I saw the discussion about using the COD to dry emboss…
but it sure helps to have pictures 🙂
[…] cut your groovy guava with a 1/8″ border. using your crop-a-dile, dry emboss circles along the bottom edge. you can see a fantastic tutorial on how to emboss on beate’s blog. […]
Hi beate,
I wasnt going to get one of these…….UNTIL NOW…..that is !!!
I just adore those little cute dry embossed dots
TFS
Hugs
Janette x
Beate I love the concept and cannot wait to give it a try. Thank you so much for the wonderful tutorial.
Beate you ROCK. Thanks for this. My stamping friends are going to LOVE this.
Wow… thanks so much… I just got mine and had no idea it could do so much.
Love the tutorials. Just ordered my Crop-a-dile yesterday while at a stamp camp. Great that it will do eyelets.
I’m loving the idea of this thing. Considering purchasing one. Will it set any brand of eyelets?
Thank you so much for leaving the link to this on my blog – I shall give it another go now! 🙂 Hugs Becky
I just bought a crop-a-dile half of at Michaels and love it! I too had quit using eyelet due to the banging, etc. What a great tool! 😉
[…] on how to make this book. It is a great site with lots of tips, techniques and tutorials. Another tutorial that I used for making the little Lego pieces is dry embossing with a Crop-A-Dile that I found on […]
I just got my Crop-a-dile from Costco (really inexpensive) and what do we have today on SCS but a thread on how to use it. Perfect timing and one of our lovely ladies directed us to you. I’ve always loved your tutorials and so glad I can use another one. Thanks for all your wonderful work. Will miss you this summer but have a GREAT one with your hero husband and wonderful children! :))))
My daughter gave me for my birthday a crop-a-dile. I just love it.
Jogry/bali
Thank to you, Now i know How to use my new Crop-A-Dile.
Im so Happy.
Thank you.
You are such a genius! I’ve had my Crop-a-Dile for two years now and never thought about dry embossing with it. I love the look of Swiss Dots but can’t find the embossing folder locally, so I’m going to give it a try!!
i bought the crop a dial II thinking i could set snaps with this
product, is this possible,
[…] had to fight with my Crop-a-Dile cause I can’t remember when I used it last. I even did some dry embossing with the COD… not straight (look to the right of the stitches) but I did […]
That’s a crazy looking hole punch!
I purchased one as I am a SU Demonstrator and have tried to use it but your directions will help me along the way to better use. Thank you for sharing.
I have had my crop a dile for 2 years and am finally excited to own it and use it. Thanks so much for your tutorial. Love em all! 😀
Another use for this wonderful tool is an actual HOLE PUNCH! I was making a small calendar and realized the 3 hole punch I had wouldn’t work. I broke out the C-a-D and it went through all 12 pages of cardstock like BUTTAH!!! I was able to set the ‘distance’ where the holes would be (1/4″ from top) with the little measuring guide thumb screw.
I actually found mine at Walmart on CLEARANCE way back in early 2010. It was in a kit that had various colors of basic round eyelets in it. I just keep my C-a-D in there.
Dear Beate, thank you, thank you! Your tutorial was very clear.
Ter 😉
Hey Beate, thanks so much for sharing another excellent tutorial. You have the knack of making everything look so simple, I have to wonder why I didn’t just “get it” in the first place… hahaha
How cool is this- Thank You for sharing – I love the visuals! You are brilliant!
[…] Crop-a-dile, easy as 1 – 2 – 3 » fresh & funAug 31, 2007 … I took some pictures last time I used my Crop-A-Dile to show off how easy it really is. Click on … I really appreciate your step by step instructions. […]
Do you happen to have a tutorial for using the large orange one as it is not getting much use?
I’d love one too. I bought mine long ago and I KNOW it is underused.