
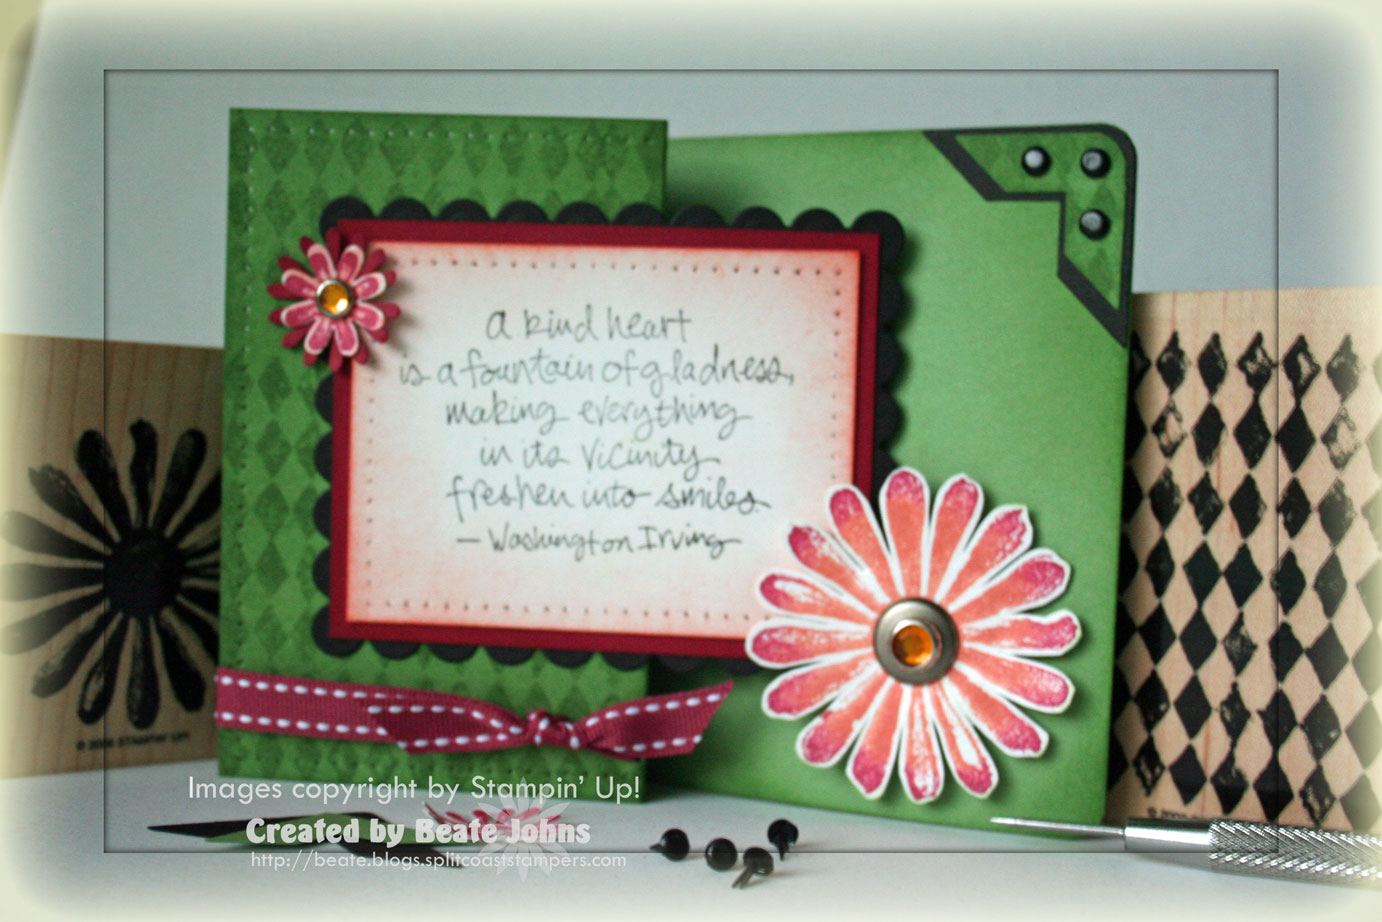
Here is my sample for this weekend’s sketch challenge.
I started with a 4 1/4″ x 11″ piece of Wild Wasabi cardstock.
I scored it at 2 3/4″ and 5 1/2″ , sponged all the edges and with Wild Wabi and stamped the Argyle from Looks Like Spring.
The left edges were punched with the corner rounder.
I added a double photo corner on the top right with three black brads.
For the center piece I started with a black scallop rectangle made with my Nestabilities, layered it first with Purely Pomegranate, then with Shimmery White. I sponged the edges of the Shimmery White with Groovy Guava, paper pierced the edges and stamped a saying from Friendship Flowers in it’s center.
I inked the big flower from Looks Like Spring first in Groovy Guava and then rolled the edges in Purely Pomegranate. It was stamped on Shimmery White cardstock and cut out. I added a Pewter Jumbo Eyelet in its center and topped it off with a Fire Circle Rhinestone brad. I taped the flower half over the sentiment layer with double stacked dimensionals (to make it higher).
I punched a hole next to the 2 3/4″ score and tied Purely Pomegranate double stitched ribbon through it. Last I punched some flowers with the Spring Flower punch, layered them over each other and added another Fire Circle Rhinestone brads.
If you need a few more pictures on how to make this card, click on more.

Step one:
Take your 4 1/4″ x 11″ piece of cardstock and score at 5 1/2″.
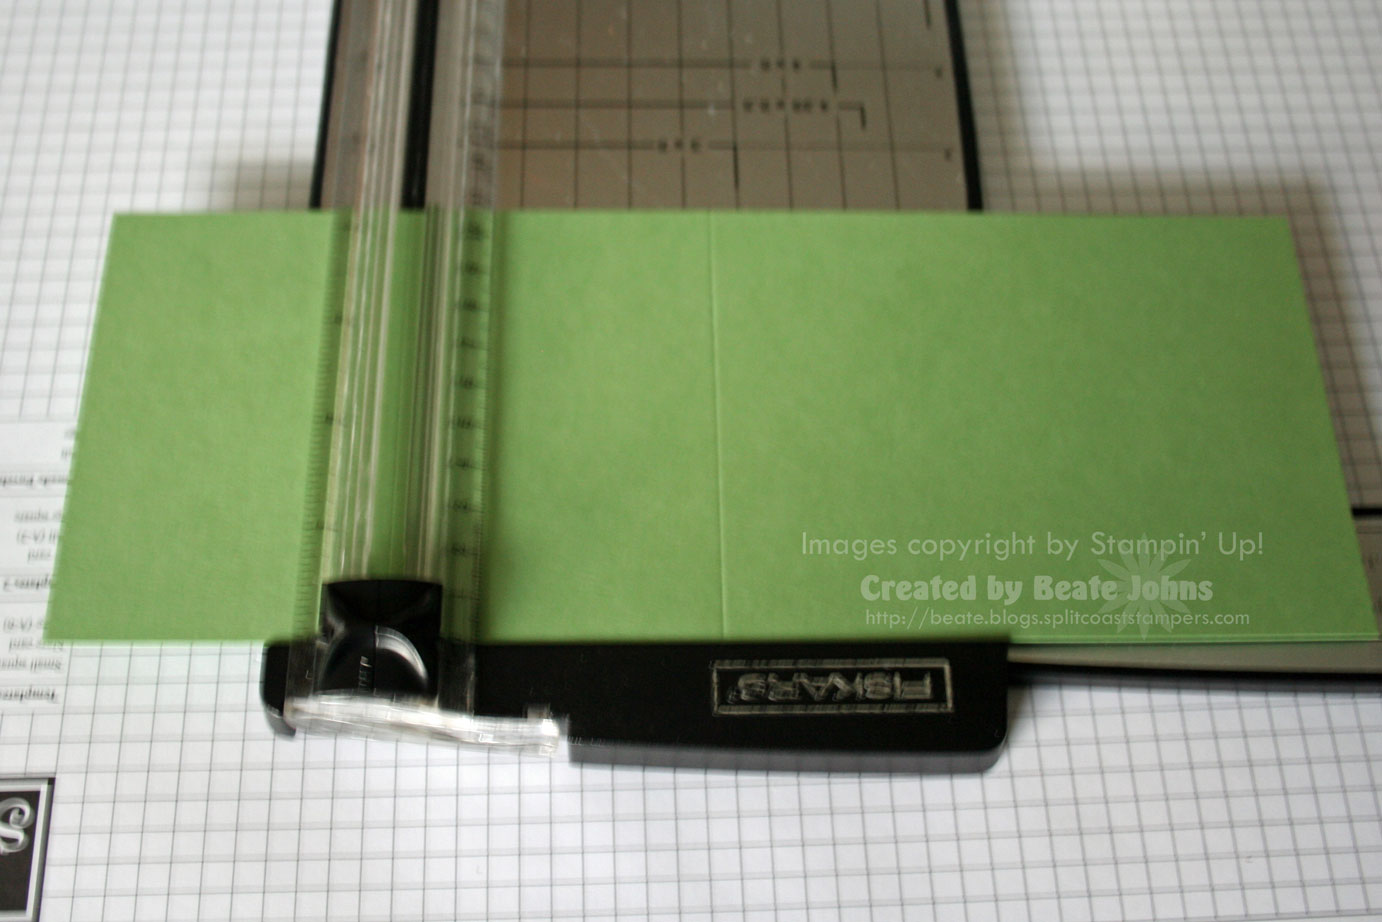
Step two:
Line cardstock up at 8 1/4″ and score again.
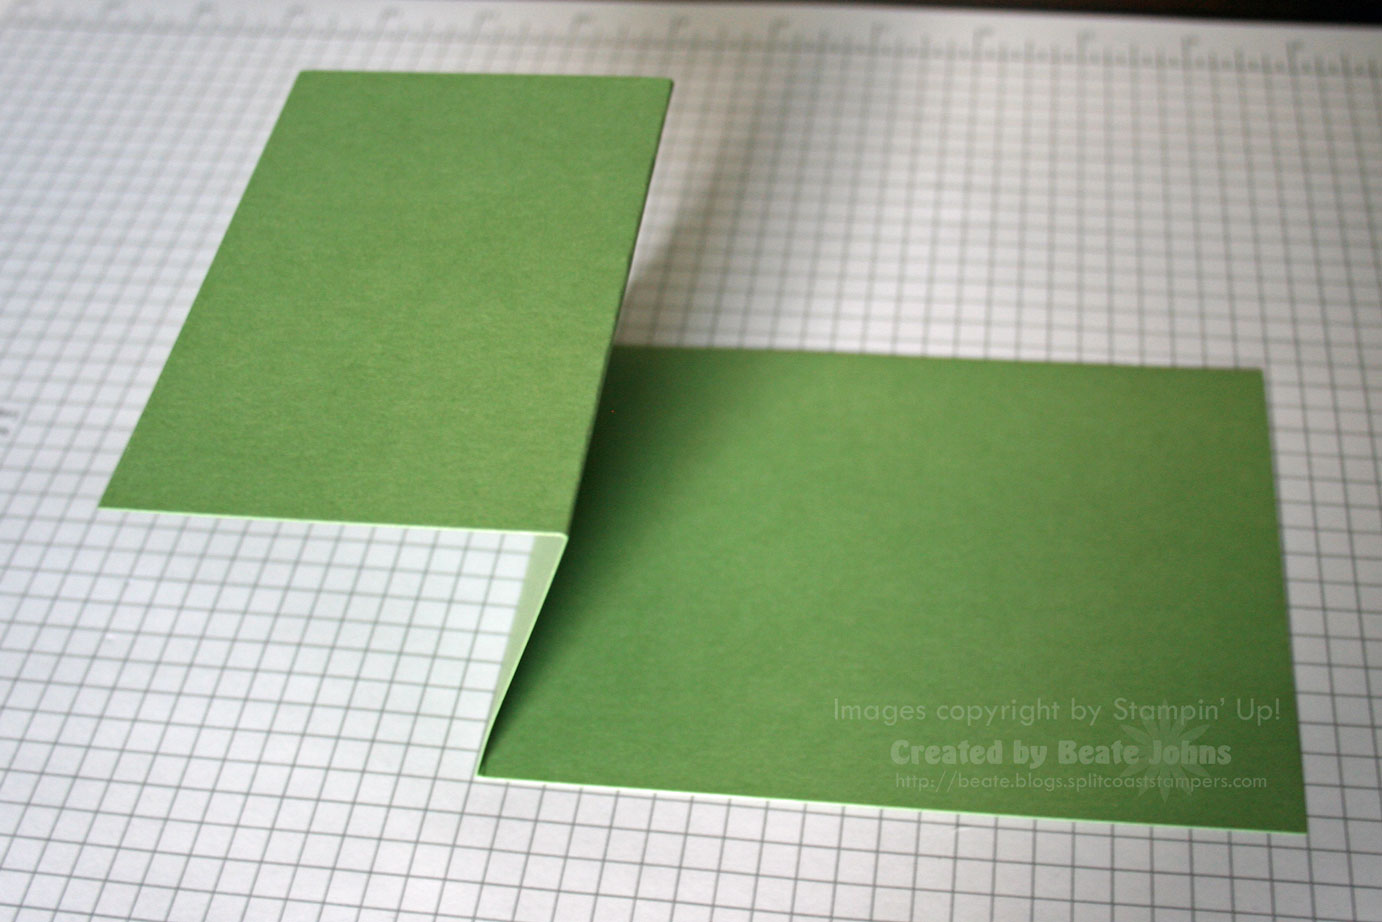
Step three:
Fold the left panel first in, then out. It will look like a Z.

Step four:
Decorate the card base.
I used the flower to keep it closed. You can also use the slit punch. Or just leave it without a closing mechanism.
Variations:
You can make any size card into a z-fold card.
All you do is take the width of the card (here 11″) and divide it by 4.
Score at 1/4 and 1/2 of the width to make your Z.
Beate
47 Responses to “Z-fold tutorial and Weekend sketch sample”
Sorry, the comment form is closed at this time.


Love it Beate! Thanks so much for sharing your tutorial…I have been eyeing this design for a long time now, just haven’t sat down to make one…now I can thanks to you!!!
This one was fun! 🙂 Love the colors, and the extra bling! 🙂
GORGEOUS, Beate! Love the colors you used!
Love the colors and the rounded corners..
So pretty…
Thank you for your Z-fold tutorial! I have been trying to come up with a design with three panels to use the Holy Triptych set on for our Christmas cards, I think I will give the Z-fold a try!
You clever girl — great card for this layout, I’ll certainly have to try it! Great colors, too, and I SO need to get that stamp set out again, I love it!
Your card is just amazing Beate. Love the colors, stamp choices, and all the details. I may have to research those “nestabilities” that I see in work lately:)
Also, great tutorial. Thanks for all you do.
Love this card — fabulous use of Looks Like Spring!!! But YUP, this is what I just called a Joy Fold — now off to see if I can figure out what a Joy Fold is — talk about confusing the masses — well, they probably all know the diff, but me!!! LOL!!!
I love the Z-Fold card and the colors you used. TFS and and the tutorial.
Beate,
This card is beautiful, love the flowers, the colors and of course the Z fold tutorial is perfect, I can’t wait to try it!
Thank You
BEAUTIFUL! I can’t wait to try it!
This is gorgeous, Beate!! I love that big flower closure and pretty bling!
Thanks for the tute also! I have been wanting to try one of these…how did you know? Lol!
Can’t wait to try this sketch. Thanks.
OMG Beate! This card is gorgeous. I must c.a.s.e. this at some point!
This is so beautiful. A real WOW card. I love the card stlye- I will have to give it a try this wkend. Thanks again for the inspiration. Barb
ooh, i like…great job!
Beate, I LOVE this sketch! Thanks so much for posting these for us…every week! You are the SKETCH QUEEN!!!! And your sample card is gorgeous! You have such an eye for combing fun colors!
I was just thinking about that Looks Like Spring flower today and how I haven’t seen it in a while and poof! you are using it, and so beautifully. Love your tutorials.
LOVE your card!! It’s awesome!
Love this design and your card!! Hope to try it this weekend!
I love this card, and your big flower to hold it closed. The colors are fantastic!
Beautiful card and those colors are great! Can’t wait to try this one! 😉
Wow I love the colours. I had time to do this Challenge this week Beate, Thanks for the chance. http://www.stampingmoments.blogspot.com Jenny x
I can’t wait to try out this neat looking card! Thanks! 🙂 Julie
My first blog challenge, how fun?! Thanks for the great tutorial and sample. You can find my sample at http://www.stampingjo.com.
My first blog challenge, how fun!! Thanks for the great tutorial and sample. You can find my sample at http://www.stampingjo.com.
What a great card… Love these colors. 🙂
Here is my card for your challendge. Susan
I’m really loving this card! Thanks so much for sharing it! I am also taggin you as you are one of my favorite sites! Thanks so much for always inspiring me! Jennifer
Beate … I’m up late and checked the Stampin’ Up! Demonstrator website. I couldn’t believe my eyes when I went into Stamper’s Showcase … THERE YOU ARE AGAIN!!! What is that … THREE times in one week????!!!! WOW!!! Congratulations! I think that’s a record!
lovely card. love this sketch. can’t wait to do it today.
Here is mine. What a great sketch and so fun and easy to make thanks to your wonderful tutorial.
http://www.splitcoaststampers.com/gallery/photo/706297?cat=500
Entry #40
What a fun card to make, I started this on Friday but didn’t get a chance to finish it up until today
http://stampingforsanity.blogspot.com/2007/10/weekend-sketch.html
Entry #44
beate…i love this fold! thanks so much for the challenge! here’s mine:
http://lordhavemercy-mercykerin.blogspot.com/2007/10/beates-weekend-sketch-color-challenge.html
Fabulous card, love the colours
I love this card, I will try this, thanks for sharing.
Your card looks great. I’ve never tried this before so I’m excited to get started! TFS!
Misty
What a FUN challenge! I am off to go check out the other cards.
Here’s mine: http://memorypreserves.blogspot.com/2007/10/weekend-sketch-challenge.html
Entry #71
Aloha Girl!!! Here’s my card. I’m entry #47!!! Yay!!! I hope it’s a lucky number!!!
Thanks for the challenge.
http://expressivelyme.blogspot.com/2007/10/manic-mondaybeates-challenge.html
hugs n’ aloha,
Jen
Entry #75
Wow!! I love your projects! You are a very talented one, that is for sure. Do you mind if I put a link to your blog on my blog? Thanks for sharing with everyone!
Jami
This was such a fun sketch, my card is on my blog
http://www.flofollies,blogspot.com
Entry #83
Love the colors, Great quote, neat fold, tfs!
Another first…a z-fold! Thanks Beate!
http://justaninkling.blogspot.com/2007/10/happy-halloween.html
Well, I finally did one! Here is my Christmas Z-fold card:
http://comestampwithme.blogspot.com/2007/11/new-month.html
Thanks for the great tutorial. I had never made a z fold card before. Here is my first attempt: http://theabcsofstamping.blogspot.com/2007/11/christmas-cards.html
Thanks again!
Thanks for your tutorial. I had NO idea how to make one of these! I really appreciate your step-outs!
These are fun to make!