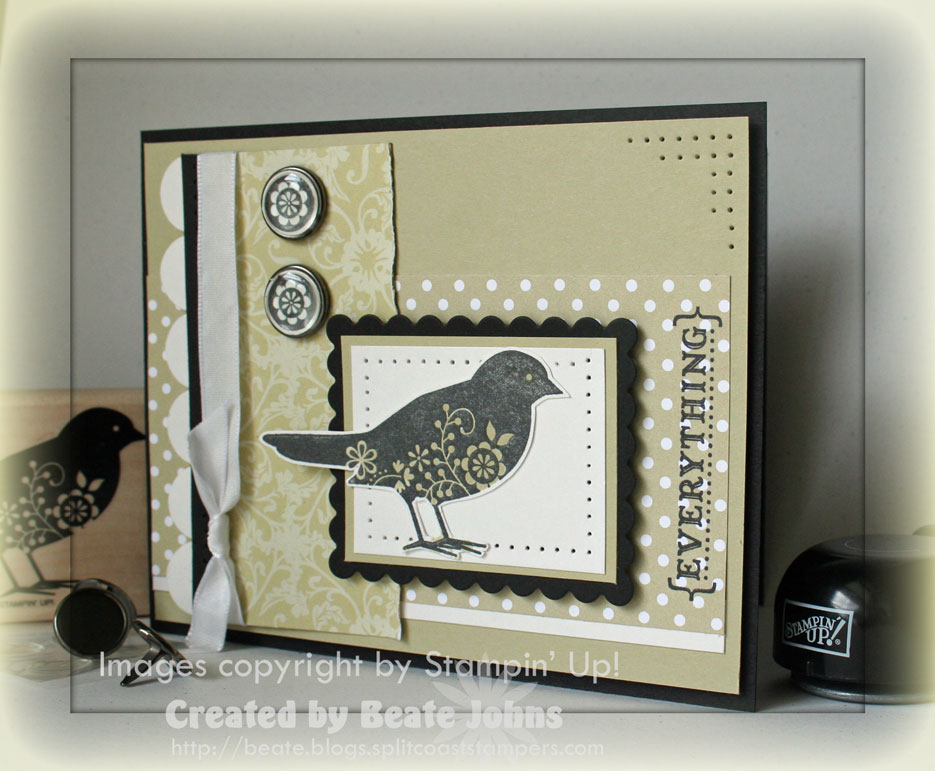
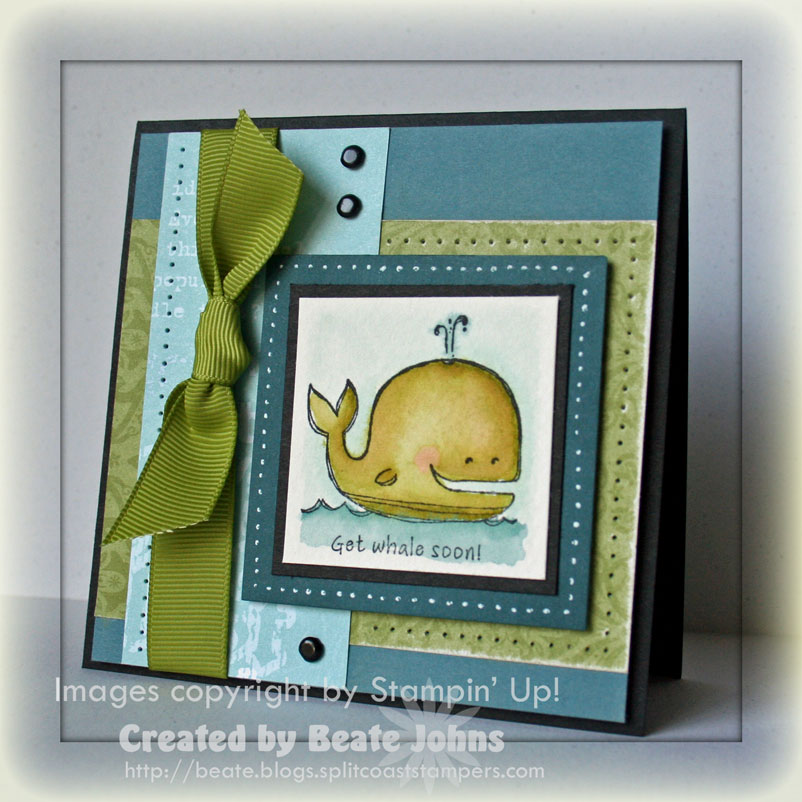
I really like this layout. I am sure I will use it again and again. Here is a card I made yesterday. I had fun playing with the set Pun Fun ! It’s so cute! Corinne Somerville made so many cute samples with it that I had to order it. I made another card with it that I will share later on.

pun-fun-olive-whale-wsc37.jpg

I never liked my watercoloring much.

BUT….using watercolor paper makes all the difference. I am having a blast trying to improve my coloring…and finding out that I like the end result.

The card base is a 4 1/4″ x 8 1/2″ piece of Basic Black cardstock layered with a 4″ square of Blue Bayou.

Both of the designer paper pieces are from the Spring Break Designer Paper pack. I love that paper!!! The horizontal strip measures 3″ x 4″ and was paper pierced and sanded on the right hand side. The vertical strip measures 1 3/4″ x 4″ and was paper pierced on the left. Black brads were added above and below the main image and 5/8″ wide Olive grosgrain ribbon was tied around it.

I stamped the Whale from Pun Fun in Black StazOn on a 1 7/8″ square of watercolor paper. It was colored in with Aqua Painter and classic inks (River Rock, Old Olive, Soft Sky, Blue Bayou and a touch of Cameo Coral for his blushing cheeks). It was layered on a 2″ square of Basic Black cardstock. The next layer is a 2 1/2″ square of sponged Blue Bayou. I added the dotted border with a white gel pen. The image was adhered to the card with dimensionals.

I wasn’t sure if the Olive would work on the whale, but I really like it now. I hope it doesn’t look weird too you. I was making the card during Lost. Could be that I was too tired to see the wrongness of it.

Here is the sketch for this weekend:

wsc-_37.jpg

To participate in the challenge and be entered in the  raffle, make a card with this layout and upload it either to your blog, or to an online gallery.

 If you upload your card on SCS, put WSC37  (NO SPACE INBETWEEN WSC AND 37) in the keyword section. That way we can look at all of them at once!

Post a link to your card to this blog entry as a comment. Please add your entry# to it.

I will determine the winner  with Random.org on Monday at 11:30 a.m.

always-basic-rock-tlc157-c.jpg

I used this sketch on Tuesday for my Basic Bird card.
To see samples made with this sketch now, check out the blogs of


Cambria Turnbow

Charmaine Ikach

Jenn Balcer

Laurie Schmidlin 

Lori Craig

MaryJo Albright

Sharon Harnist

Have fun creating! I can’t wait to see what you come up with.

SCS submissions

sc165.jpg

Yesterday’s sketch challenge on Splitcoast was a wonderful layout.

I had to try out right away.

My preordered Die Cut Blooms were sitting here untouched. I thought they would be perfect for the shape that was called for in the sketch.

I started out by sponging the edges of  a  Pumpkin Pie Die cut bloom with Real Red ink. 

stitched-exotic-blooms-clos.jpg

Next I punched out a Five Petal flower out of Real Red cardstock, sponged it with red ink and adhered it to the Pumpkin Flower.

The center is a Antique Brass Build a Brads. The center is a 1/2″ Chocolate Chip cardstock with a white rub-on from the Eastern Elegance Rub-Ons pack in it’s center.

I added dots to the bigger flower with the white gel pen, and stitched lines with my Chocolate Chip Marker to the smaller flower.

Once I had the flower done, I build the card all around it.

The card base is a 5 1/4″ x 10 1/2″ piece of Chocolate Chip cardstock folded in half. Next is a 5″ square of Real Red cardstock that was stamped in real red with the Stitched background stamp.

The lower square is a 3″ square of Spring Break Designer paper layered on a 3 1/4″ square of Pumpkin Pie cardstock. A white Rub-On border was added on the bottom of the Old Olive layer.

stitched-exotics-bloom-punc.jpg

A 2 3/4″ x 3 1/2″ piece of Soft Sky Prints Designer Paper was layered on a 1/4″ bigger piece of Whisper White cardstock. The Paper was paper pierced around the edges. Next the flourish stamp from Stitched Exotics was stamped in Old Olive Classic ink. Once it was dry the Sentiment from Friendly Flowers was stamped in Chocolate Chip craft ink over it. Red Stitched Grosgrain ribbon was tied on the bottom of hte Soft Sky layer.

On the top left I added two more 1/2″ Chocolate Chip cardstock circles with white Rub-On flowers and vintage brads topping them.

Today’s tutorial on Splitcoast is for the Chalkboard Technique. It is usually done on black cardstock, but I like the softer look of Chocolate Chip as base better (who knew, right? LOL).

live-your-dream-chalkboard.jpg

I started out with a 2 1/2″ x 4″ piece of Chocolate Chip.

I stamped the flower image from Live Your Dreams in White craft ink and used sponge daubers to apply Stampin’ Pastels (Pumpkin Pie, Real Red and Old Olive) over it. I didn’t wait for the ink to dry. I dabbed the chalk over it right away.

After I liked the way it looked, I wiped the excess chalk away with a swiffer towel.

Next I stamped the background Weathered over the image in VersaMark ink. It’s hard to see in this photograph, but it adds more texture to the center image.

I didn’t seal the image. The chalk seems to stay put real well without using a sealant.

I sponged and paper pierced the edges of the Chocolate base and distressed them with the Cutter Kit. Next it was layered on a 1/4″ bigger piece of distressed and sponged Real Red cardstock and then again ona a 1/4″ bigger piece of Pumpkin Pie cardstock.

The card base is a 4 1/4″ x 11″ piece of Chococlate Chip cardstock, layered with a 3 1/2″ x 4″ piece of Tea Time Designer paper. The bottom corners of the paper were punched with the ticket corner punch.

Next I cut a 3/8″ x 4″ piece of Very Vanilla cardstock, stamped it with Real Red ink and the small flower cluster from Live your Dreams, sponged it first with Pumpkin Pie and then with Chocolate chip and taped it to the top edge of the designer paper.

I punched out three 1/4″ circles from Real Red cardstock and taped it to the right side of the paper and topped them off wit Antique Brass Brads.

I used the Chocolate Chip Marker to only ink up the word Dreams from the sentiment in Live Your Dreams and stamped it on Very Vanilla cardstock. It was punched out with the 1″ circle punch, sponged first with Pumpkin Pie, then Real Red and lastly with Chocolate Chip cardstock and layered on a 1 1/4″ Real Red circle and 1 3/8″ Pumpkin Pie circle.

Red Red striped grosgrain ribbon was tied around the main image. The white was too bright, so it was sponged over with Pumpkin Pie ink and sponge daubers.

Last I stamped the tiny butterfly, added red into it’s white spaces, sponged it and added it to the top left of the main image with part of a dimensional.

Random.org picked number 153. That is Amy, aka. thisissomuchfun.

wsc36winner-amy.jpg

Congratulations, Amy!

Contact me with your mailing address so I can get a card out to you!

Thanks to everyone who tried out the sketch!

The cards were amazing, like alway!

Hugs and smiles

Rick emailed me that he got two packages of fantastic cards. One was from Kim Howard, aka. Basementstamper and one from Pam Dadisman, aka mspfd.

Thank you so much to Kim and Pam! Rick really loved the cards and your sweet note to him. He will be putting the cards out for everyone to take!

If you are interested in sending cards to the Rick so he can pass them along to fellow soldiers, email me and I will send you his address. It won’t cost more then sending them to me, but you will have to fill out a custom form.

Any occasion cards would be great! Please include an envelope for each card you send.

Thanks again to everyone that has or is sending cards. They are VERY appreciated!

Hugs and smiles

Sorry I am so late. Fridays through Wednesdays I spend a lot of time looking and commenting on all of your gorgeous cards made with the sketch challenge.

I did get to stamp a little. I made this card for both the Technique Lover challenge yesterday and Color Challenge today.

The technique challenge was easy peasy. Use two different patterned paper on your card. The color challenge was easy and soothing for the eye: Basic Black, Whisper White and River rock.

I couldn’t put my sweet bird away yet, so I made another card with it.

always-basic-rock-tlc157-c.jpg

I started out stamping the bird from Always in Black Stazon on Shimmery White cardstock.

I colored the design inside the bird with River Rock classic ink and Blender pen, then cut the bird out.

It was layered on a paper pierced 1 5/8″ x 2 1/8″ piece of Shimmery White cardstock layered, first on a slightly bigger layer of River Rock cardstock, then on a scalloped piece of Basic Black cardstock. The Black cardstock was cut with Nestabilities die cut template.

The card base is a 4 1/4″ x 11″ piece of Basic Black cardstock folded in half. Next is a 4″ x 5 1/4″ piece of River Rock cardstock. I paper pierced the top right edge.

 The horizontal piece of Designer Paper measures 2 1/2″ x 5 1/8″ and is from the Apple Cider Designer paper. I layered a small white strip underneath. The sentiment is from the set Always and was stamped in Black Stazon on the right hand side of the paper.

The vertical strip measures 2″ x 3 3/4″ and is from the Brocade Background Designer paper. I added a small strip of basic black cardstock on the left edge of that strip and paper pierced it. Then I made a scallop border with the slit punch. Usually I use the corner rounder. I like the softer edge of it. But I was afraid it wouldn’t show up much, with the busy patterned paper in the back.

Next white Taffeta ribbon was tied next to the black strip of cardstock. I stamped the small flower from Always twice in Black Stazon on Shimmery White cardstock, punched them out with the 1/2″ circle punch and adhered them to two Pewter Build a Brads (Snail adhesive works fine for that.).

always-bird-small-thanks-ws.jpg

I love this little bird from the Always stamp set!

I used it here for a 3″ x 3″ thank you card.

The card base is a 3″ x 6″ piece of textured River Rock cardstock folded in half.

The horizontal strip measures 1 1/2″ x 3″, the bottom edge is distressed with the Cutter’s tool kit.

The paper is from the Western Sky Designer Paper pack. I tied a piece of Double Stitched River Rock ribbon around that layer.

The bird is inked with Ruby Red ink. Before stamping the image on Whisper White cardstock, I outlined it with the brush side of my Chocolate Chip Marker. I colored his eye brown, punched his head out with the 1 1/4″ circle punch and layered it first on a 1 3/8″ River Rock circle, followed by a Chocolate Chip scallop circle.

The image was adhered with dimensionals and two white brads were added on the left. The sentiment is from Fundamental Sayings and was stamped in Chocolate Chip.

I love this layout for little cards. It’s back from my 4th Weekend sketch challenge but it’s been around forever!

I made a bunch of these as Thank you cards for my latest orders.  

Question: Would you mind getting a 3″ x 3″ card as a RAK? Is that size too small for a RAK?

I really need Stampin’ Up! to start carrying chocolate chip and white brads. If you feel the same, please drop them a note by going to the website and clicking on contact us. I already send them an email. Right now I am getting my white brads from Starlitstudio .

rak-0218-charmaine-ikach.jpg

Charmaine is spoiling me rotten.

She sent me this darling Valentine’s card!

Make sure you check her blog Oodlebug Alley.

Her work is amazing!

Sorry! No scrapbooking again! I am such a slacker!

This will be a short post, because I have another super bad migraene. I just wanted to share a project of yesterday’s stamp camp.

embrace-life-joyfully.jpg

The card base is Groovy Guava, the designer paper from Ginger Blossom.

The set is Embrace Life.

The flower is stamped with Brown Stazon on Shimmery white cardstock and colored in with Aqua Painter and Classic inks (Groovy Guava and More Mustard). The flower center is an Antique Brass Jumbo Eyelet.

Click here for a step by step tutorial with measurements for this Joy fold card.

I have some good personal news. Rick will be coming home for two weeks during spring break. He has one week of, then goes to a week long class right here! We are so excited. He is already planning a short trip (that’s my man, he loves to take trips) to the Smoky Mountains. I will be roughing it with my family for a few days in a log cabin! Wohoo (not on the roughing it part)!!!

© 2012 fresh & fun Suffusion theme by Sayontan Sinha