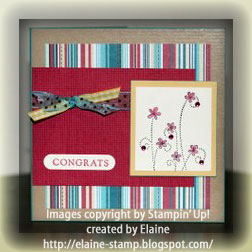
Random.org picked #56 this time.
That’s Elaine from Carpe Diem with this cute card.
Thank you all for participating in the challenge. Your cards were amazing!
Have a wonderful day. Hugs and smiles

Random.org picked #56 this time.
That’s Elaine from Carpe Diem with this cute card.
Thank you all for participating in the challenge. Your cards were amazing!
Have a wonderful day. Hugs and smiles
I needed several thank you cards next week for customers. I love making little 3″ x 3″ cards to put them in with their orders.
Can you believe I found little red love notes from when they first came out in my stamping stuff the other day? I couldn’t believe it. I knew I had to use those.
I really wanted to use my Summer Picnic Designer paper. I am such a sucker for Orange/Red color combos right now. I love the way it looks.
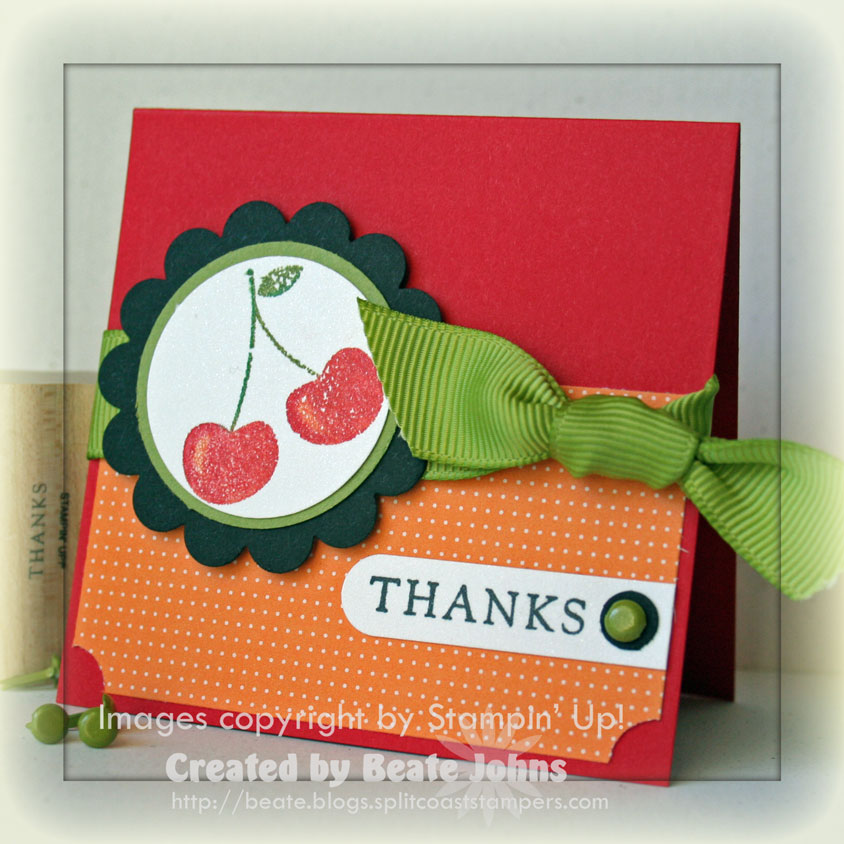
I cut a 1 1/2″ x 2 7/8″ piece of designer paper, ticket corner punched the bottom two corners and adhered it to the bottom of my Love Note.
5/8″ wide Olive grosgrain ribbon was tied around it.
I inked up the cherries from All Through The Year first with Pumpkin Pie and Old Olive markers. Next I took my Real Red marker and covered most of the cherries, leaving only a highlight in Pumpkin. I also added darker shading to the stem and leaf with Garden Green. I misted the image and stamped it on Shimmery White cardstock. The image was punched out with the 1 1/4″ circle punch and then layered first on a 1 3/8″ Old Olive, then on a black scallop circle.
The sentiment is from Fundamental Phrases and is stamped in Black StazOn (I threw my Basic Black ink pad in the trash! I never use it. I didn’t like the purple color it had) on Shimmery White, punched out with the Window word punch leaving a bit of room on the right hand side. I cut that end straight, added a 1/4″ black circle there and topped it off with an Olive brad.
On a personal note: Rick got in allright. He was asleep on his feet. He had been up almost 48 hours straight. He came home, handed out gifts, ate, showered and fell asleep. He is still sleeping. It’s soooo good to have him back home. Tomorrow we are leaving early for our 8 hour trip to Tennessee! I hope to get some good shots of the Smoky’s to share with you!
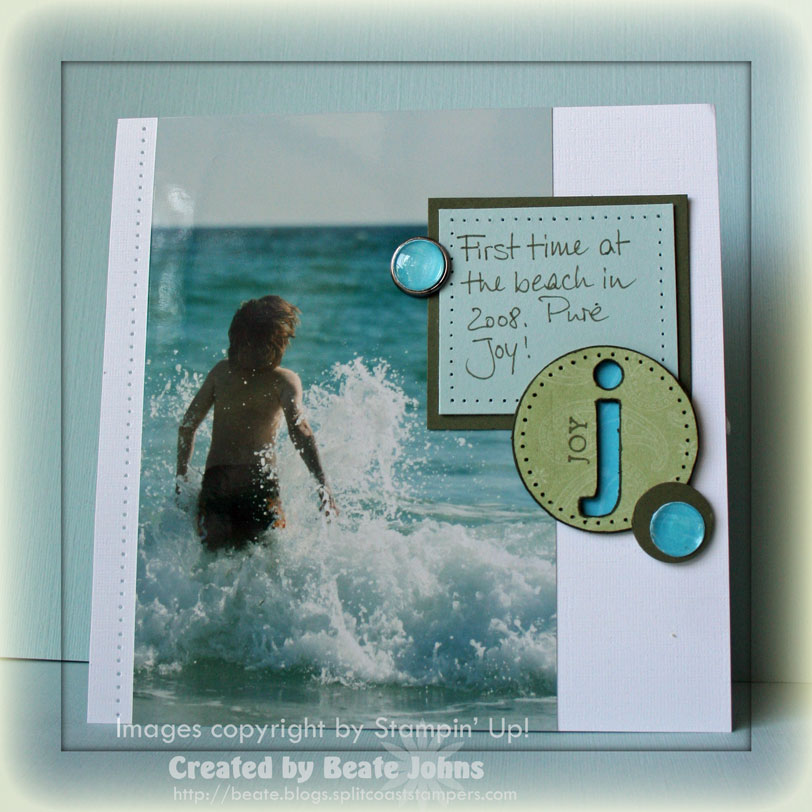
Here is a super simple 6″ x 6″ page that I made last night.
I held a stamp camp yesterday morning and working on other stuff during the day. I almost forgot my Scrapbook Sunday page.
It is very simple and has no stamping besides the word Joy from Fundamental phrases.
I love this picture and didn’t want to distract from it. I still can’t believe Rebecca and Lucas went into the water last month. Crazy kids!!!
The page base is a 6″ x 6″ piece of Textured white cardstock. I love the feel of it. The Chipboard piece is from the On Board Lots of Letters pack. I adhered Certainly Celery Prints designer paper on the top, cut around it, sanded it and cut the J out from the back with my hobby blade. I sanded the edges around the J with my Basic Grey Precision File set. It comes in handy for chipboard pieces like this. I paper pierced around the edges and used my Always Artichoke Marker around the edges of the chipboard.
Rick is coming home tonight! We are so excited! Cookies are in the oven, roast on the stove….life is good!
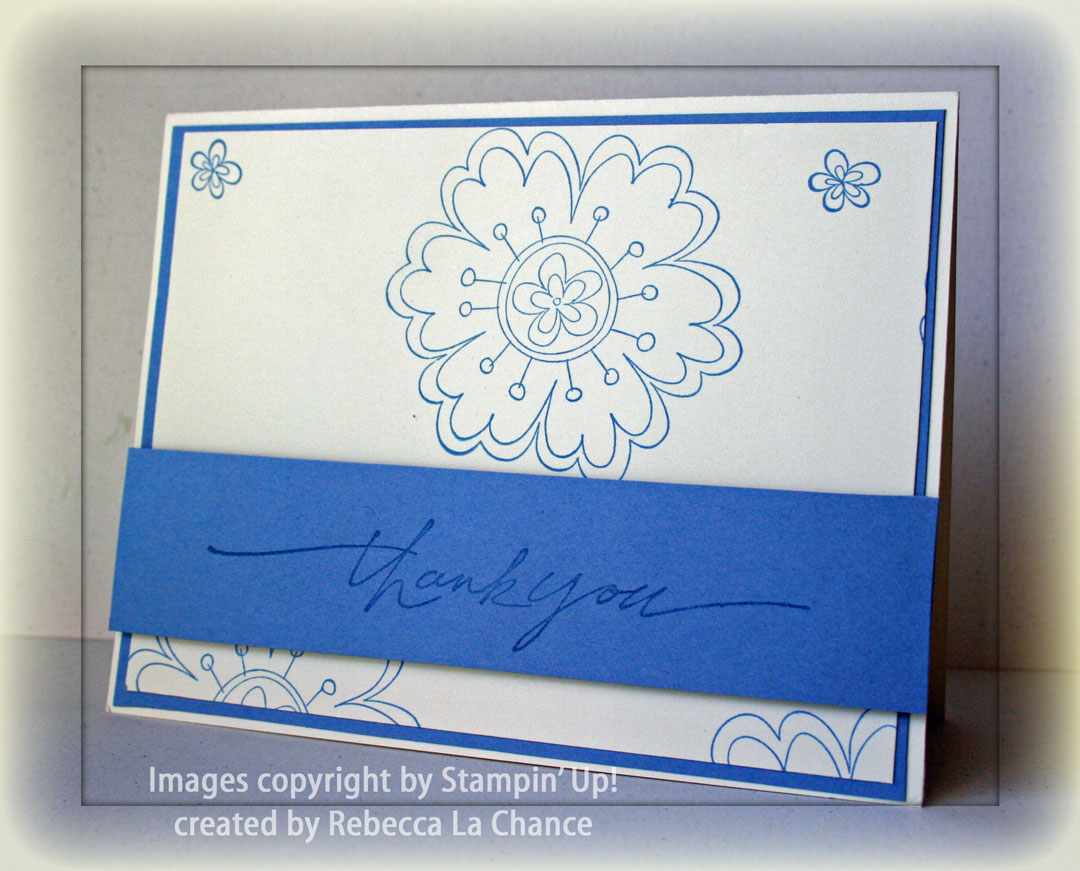
I really liked last week’s sketch challenge on Splitcoast.
It looked like a lot of fun. I knew I wanted to go funky and pulled out my Jersey Shore Designer paper. I hadn’t use Pun Fun for a while and I thought it would work well with the paper.
I made my card base a 7 1/2″ square of Bashful Blue and folded in half. (Okay…it didn’t start out that way…it cut it down a little bit to make the card look good.)
I started with my designer paper pieces. the orange and blue one measure 2 1/4″ x 2 1/2″ the green one is a 2 1/2″ square. I taped them on a 2 3/4″ x 7 1/4″ piece of Real Red cardstock. I paper pierced the edges of each paper and stamped the Argyle stamp from All in a Row in black, lining the “stitching” up with my paper pierced holes.

The red cardstock was layered on a 1/4″ bigger piece of Basic Black cardstock. Underneath the black layer I added a scalloped white border on the bottom. 5/8″ red grosgrain ribbon was tied around the layers before they were attached to the Bashful Blue card base.
The hippo from Pun Fun was stamped on Watercolor paper in Black Stazon and colored with Aqua Painter and Wild Wasabi, Pumpkin Pie, Bashful Blue Classic ink. Then the edges of the paper were sponged with Bashful Blue on top and Wild Wasabi on the bottom and the edges were paper pierced. Hippos “nails”, bow and ribbon were sparkled with Stardust Stickles. It was layered on a black scallop square that was cut with Nestabilities and attached it with dimensionals to the paper pieced strips. And yes, I am addicted to dimensionals. Everything looks better popped up!
Last I added a row of paper piercing between the top of the card and the black layer to finish the card off.
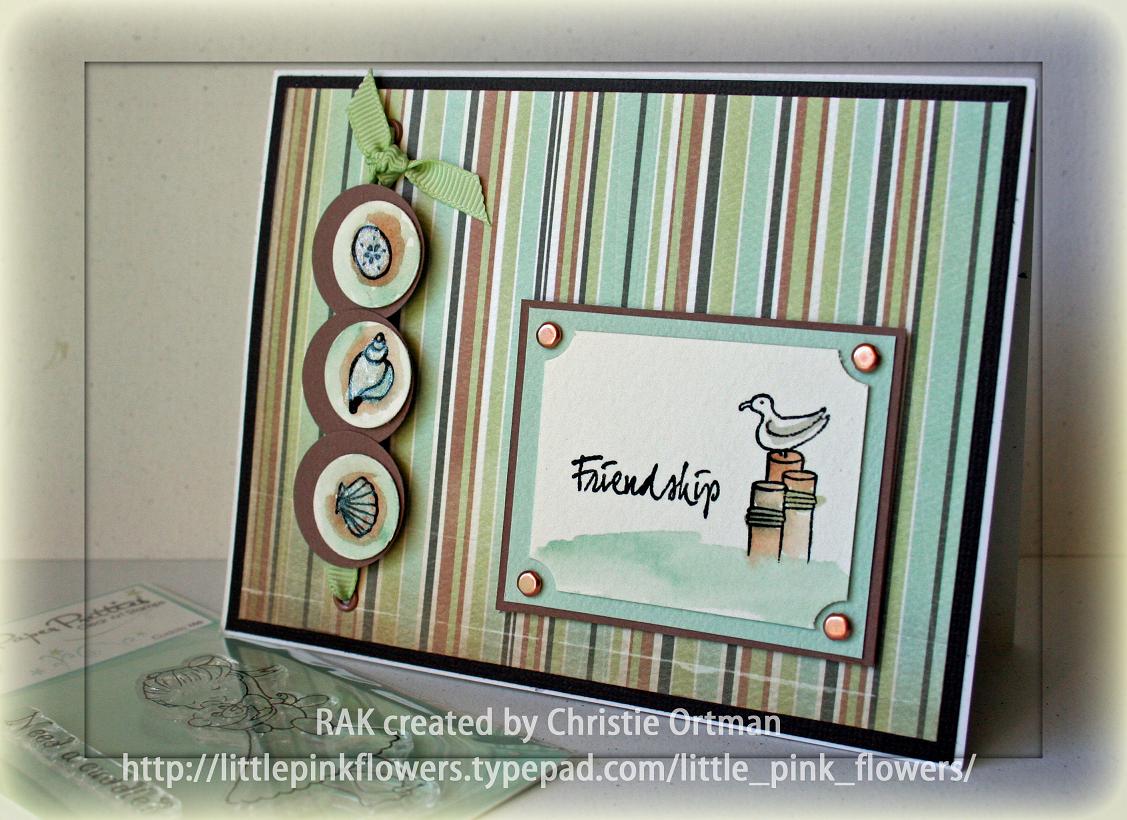
About three weeks ago I went to a Pyjama Party at Paper Pretties.
Charmaine had told me that there were challenges to participate in. I only got to play a little, but it was fun.
Little did I know that you could actually win something. I was very surprised to hear I got to pick a stamp set! I let Rebecca help and we picked Cuttle me. I love that little girl.
Christie Ortman sent me the stamp with this gorgeous card. Thank you Christie. I can’t wait to play with it.
I hadn’t as much time this week participate in the challenges and only yesterday got to try out the Color challenge. Unlike the week before, this one was a JOY to work with. No eyeblinding, gag evoking colors involved. The color combo for this week was Soft Sky, Whisper White and Basic Gray. I love it and I am sure I will use it often.
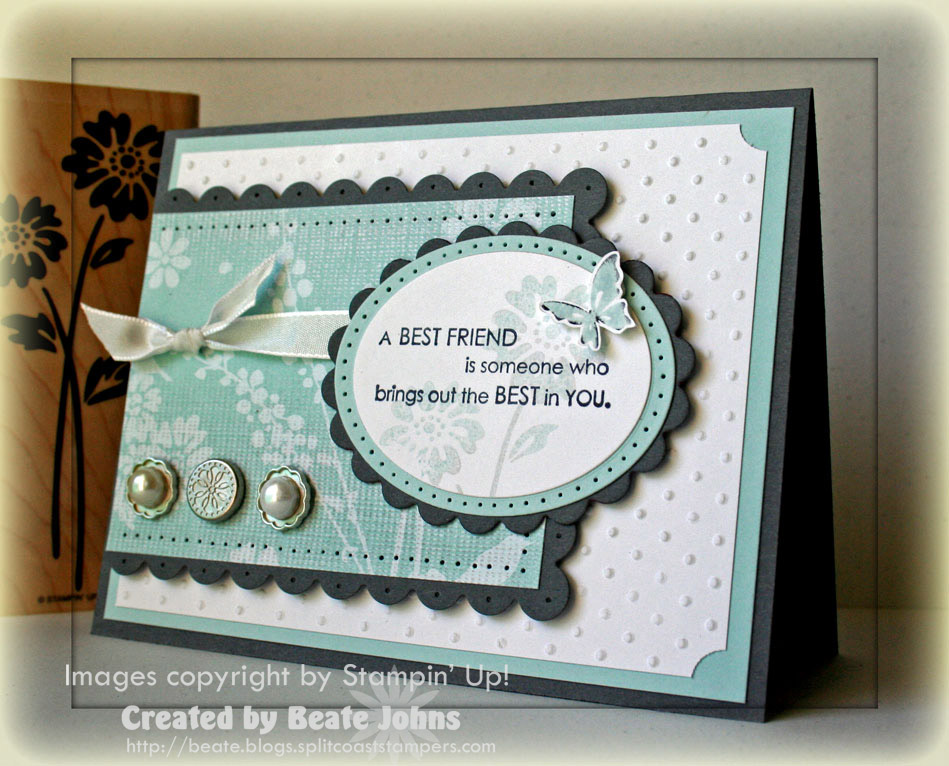
My card base is a 5 1/2″ x 8 1/2″ piece of Basic Gray cardstock folded in half.
Next is a 4″ x 5 1/4″ piece of Soft Sky cardstock followed by a 3 3/4″ x 5″ piece of Whisper White cardstock. I ran it through my cuttlebug with the Embossing folder Swiss Dots and ticket corner punched the left corners of that layer.
The patterned paper measures 2 3/4″ x 3 3/4″ and is from the Afternoon Tea Designer paper pack. It was layered on a slightly bigger piece of Basic Gray, that was cut with a rectangle scallop Nestabilities die. I paper pierced three of the edges and tied white Taffeta ribbon around the top half. On the bottom left I adhered two ribbon sliders from the Styled Silver Hodgepodge Hardware with mini glue dots with a brad from the same hardware pack in between. On top of those sliders I added half Pearls from the Pretties kit with Crystal effect.
For the main image I cut three ovals with the Oval Nestabilities. On the top layer I stamped a sentiment from the set Full of Life in Basic Gray. It looked super boring and I was tossing ideas around for a while. I paper pierced the soft sky layer, but that didn’t help much. I was thinking about paper piercing a row underneath the saying. That might have worked. But I inked up the flower from Live your Dreams in Soft Sky, stamped it off once and then stamped it over the white layer. Since I already had taped all three layers together, I used the leftover from the white cardstock that I ran through the cuttlebug to get the oval as my mask.
For the final touch I inked up the butterfly from Live your Dreams in Soft Sky, rocked the edges with Basic Gray and stamped it on Whisper White. I cut it out and attached it with dimensionals.
Today is the first day of spring break for my kids. So when this post goes live, I might still be in my bed! Ah….sleeping in. You got to love that! Only two more days and I get to see my husband! I am so excited! Even if he drags me to the Smokey Mountains next week. I am sure it’s cold there. Me and cold…don’t go together so well. Rick will be home for 12 days. I can’t wait!!!
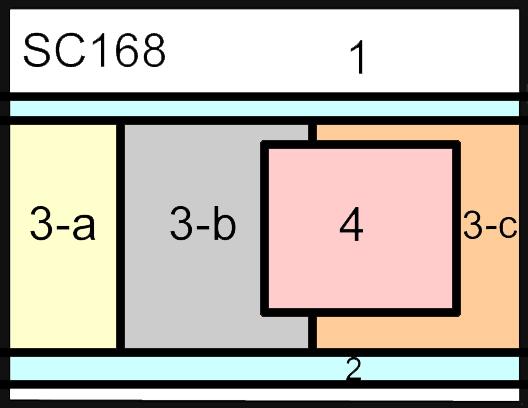
Here is the sketch for this weekend:
To participate in the challenge and be entered in the raffle, make a card with this layout and upload it either to your blog, or to an online gallery.
If you upload your card on SCS, put WSC41 (NO SPACE INBETWEEN WSC AND 41) in the keyword section. That way we can look at all of them at once!
Post a link to your card to this blog entry as a comment. Please add your entry# to it.
I will determine the winner with Random.org on Monday at 11:00 a.m. CST
To see samples made with this sketch now, check out the blogs of
Have fun creating! I can’t wait to see what you come up with.
Last week’s color challenge was a challenge indeed! The colors were Kraft, Sage Shadow and….wait for it… ORCHID!!!! Did you hear me scream. All morning I was mulling around saying NOOOOOOOOOOOOOO in my head. But …. challenge chaser that I am, I tried it. And it didn’t turn out as horrible as I thought it would. LOL
I thought these colors would maybe look allright on a dragonfly. So I pulled out the Level 2 Hostess set Infinite Goodness. I started by stamping the branch as well as the dragonfly in Black StazOn on watercolor paper. For the branch I wet it with my Aqua Painter completely before starting to add color. That made my colors run out of the lines a bit. I am trying to grow and getting more comfortable with my coloring and thought I would try this out. I like how it came out. The colors I used were Sage Shadow, Old Olive, Chocolate Chip for the branch and Soft sky. I colored the dragonfly first lightly with Sage Shadow and then kept on adding Orchid to make it very vibrant. Next I cut it out.
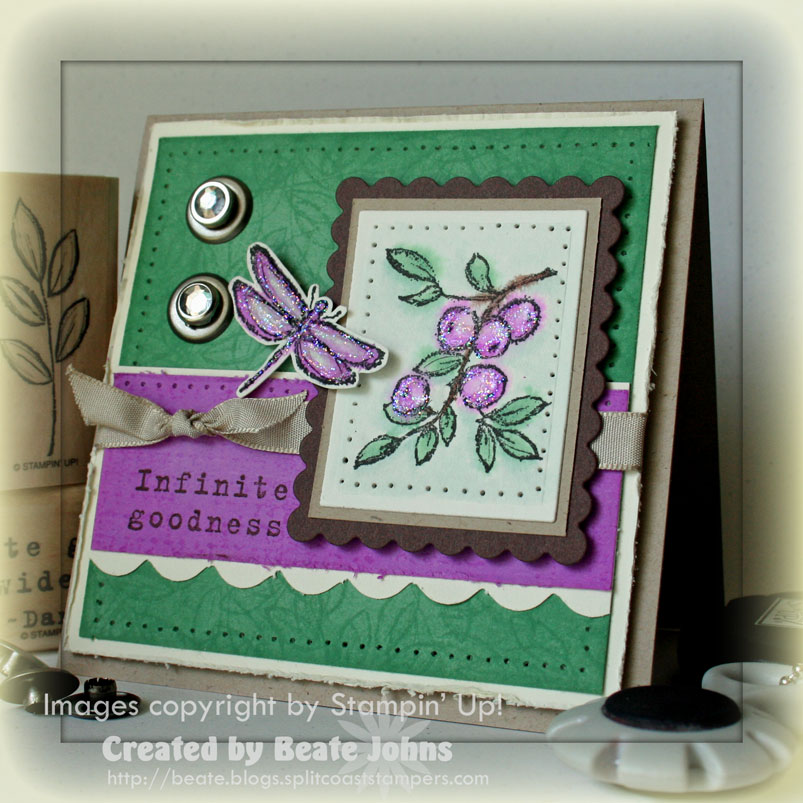
I cut the branch paper down to 1 5/8″ x 2 1/8″ , taped it to an 1/8″ bigger piece of Kraft cardstock and a Chocolate Chip scallop rectangle cut with the Nestabilities dies (I am telling you, you NEED those!). You know I had to paper pierce the border, right? I added my favorite Stickles called Stardust over my berries and set them aside.
The card base is a 4 1/4″ x 8 1/2″ piece of Kraft cardstock folded in half. The next layer is a 4″ square of distressed Vanilla cardstock. It’s followed by a 1/4″ smaller piece of Sage Shadow. I stamped the leaf from Infinite Goodness in Sage Shadow all over, sponged the edges heavily and paper pierced a border around it.
The horizontal Orchid layer measures 1 1/4″ x 3 3/4″. I sponged the entire piece and wheeled the Rough Texture wheel over it. Next I distressed the edges and layered it on a 1 1/2″ x 3 3/4″ piece of Vanilla cardstock. The corner rounder was used to add the scallops on the bottom part of that layer. The top edge of the Orchid layer was paper pierced and Kraft Taffeta ribbon was tied around it.
To finish the card off with two large Jumbo Pewter Eyelets that were topped of with Clear Rhinestone brads.
Limited Supply challenge was super easy two weeks ago. All we had to do is make a card that was smaller then 4 1/4″. I love small cards. I hadn’t used my Essence of Love set much, so I knew I wanted to use that. After seeing Silke Ledlow color her Pretty Petals background stamp, I knew I wanted to do the same with this stamp.
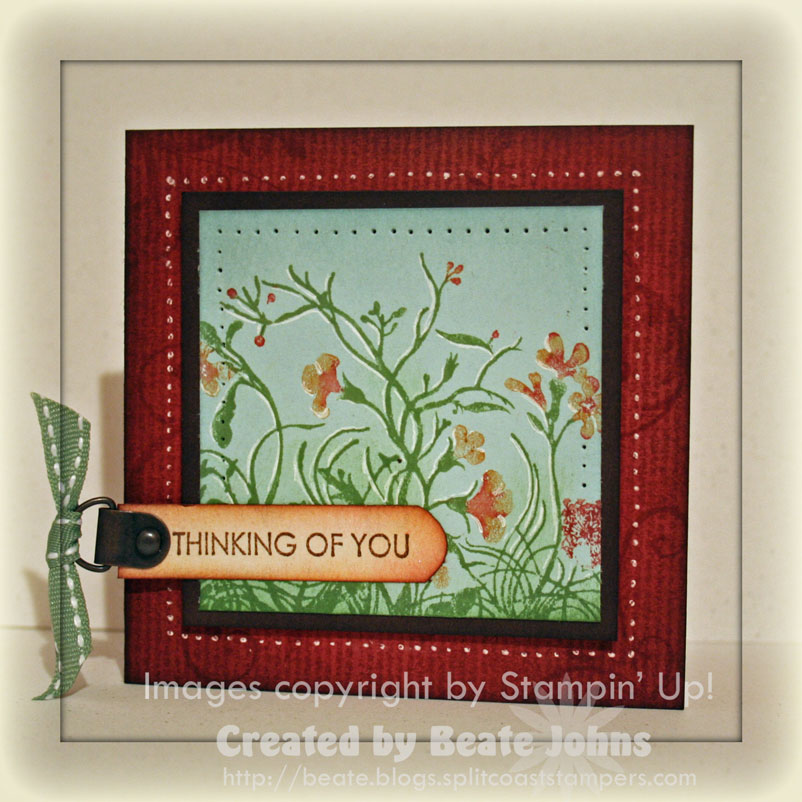
I started out by inking the flower with a Fantastix and Wasabi reinker as well as Pumpkin Pie and Ruby Red markers.
After I had it all inked up, I sprayed it carefully with my misting bottle and stamped it on a 2 3/4″ Soft Sky cardstock square. I had to cut it down 1/8″ because the end of the stamp was showing a bit on the bottom. That didn’t look too good.
Next I sponged the top edges with Soft Sky and the bottom with Wild Wasabi. Then I highlighted parts of the image with white gel pen. The image was layered on a 1/4″ bigger piece of sponged Chocolate Chip cardstock. Then I paper pierced the edges of the main image.
The card base is a 3 3/4″ x 7 1/2″ piece of Ruby Red cardstock. It was stamped first with Twill background, then with Baroque Motifs swirls. The card front edges were first sponged with Ruby Red, then with Chocolate Chip.
The main image square was attached to the card base with dimensionals. The sentiment was stamped on Shimmery White. I used my corner rounder to round the end of the strip. The strip was first sponged with Pumpkin Pie, then with Ruby Red and last really softly with Chocolate Chip.
Wild Wasabi Double Stitched ribbon was attached with a piece of Aged Copper Hodgepodge Hardware.
I used this card for the tutorial on SCS today. It’s a basic and easy technique. The more you mist, the more the ink will run.