
Here are step by step instructions for visual learner. Click on the images for a close up look.

Step 1:
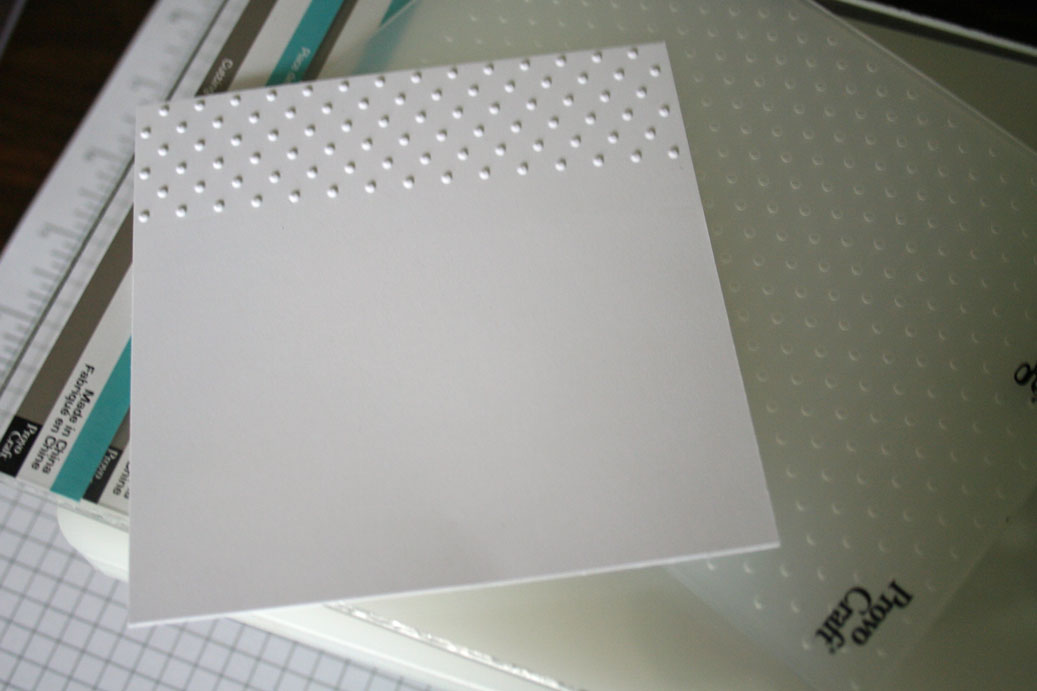
Open your Cuttlebug, place first your A Plate, then a B plate down. Place your cardstock piece (here 4″ square of Whisper White) partially in your cuttlebug folder and place it on top of your plates.

Step 2:
Place another B plate on top of your embossing folder. Run your sandwich through your Cuttlebug.
Step three:
Your cardstock will look like this.
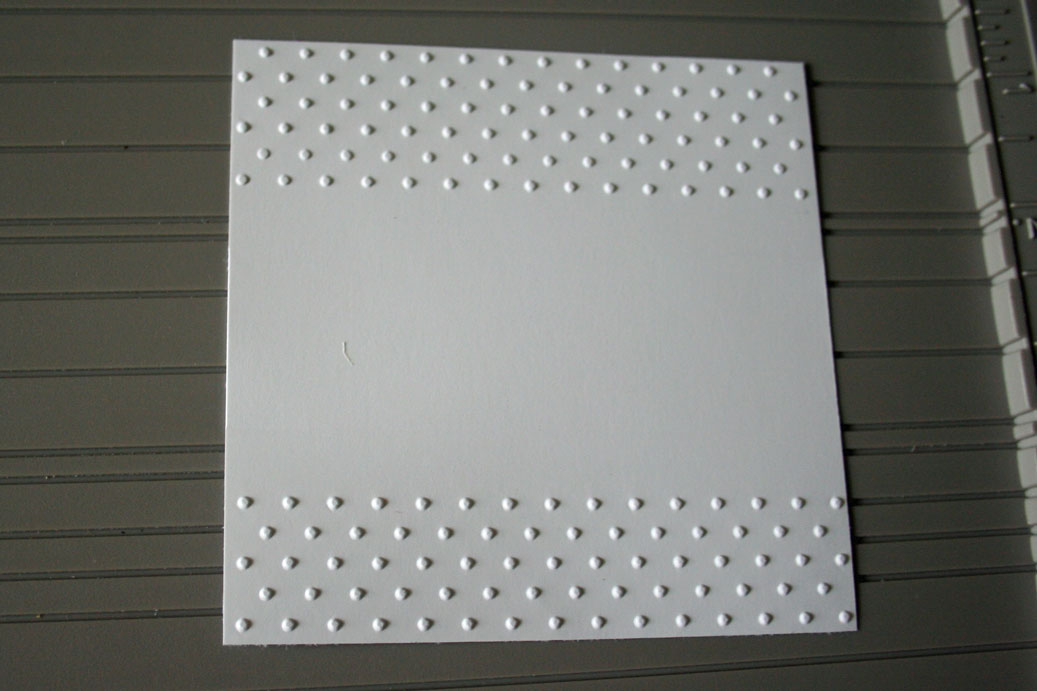
Step four:
If wanted, repeat the first two steps on the opposite side.
Step five:
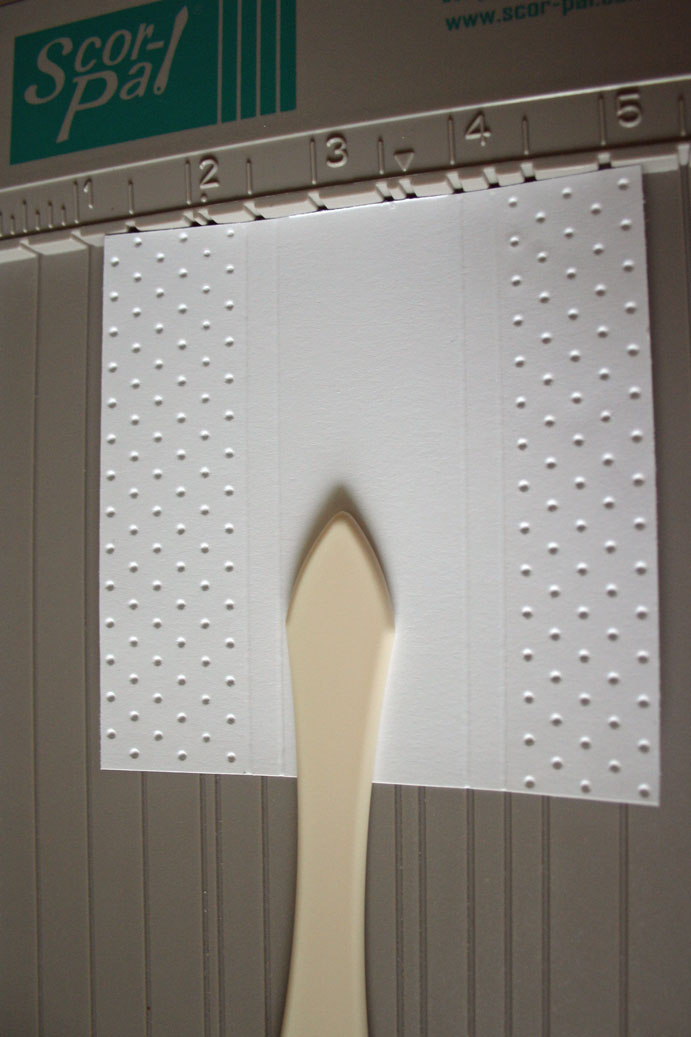
I added scored lines with my Scor-Pal. Make sure you have the side with the indented embossed image facing up (wrong side up). If I want to add two lines 1/4″ apart, I line the first line up with my 4″ mark, then I can use the 4 1/4″ mark for the next line.
Step six:
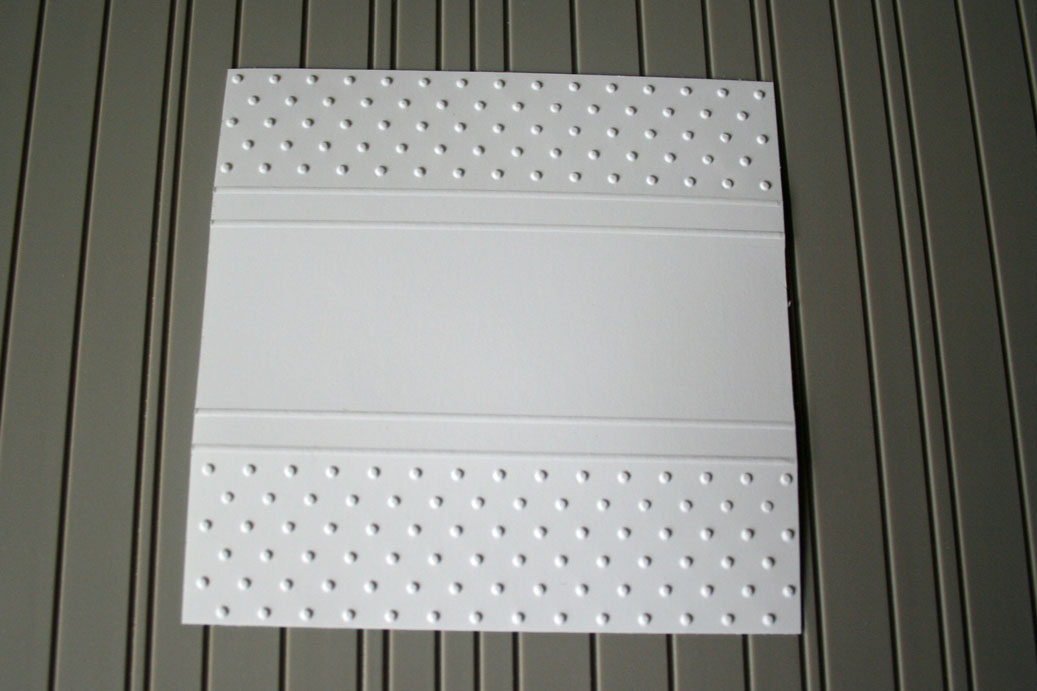
Your finished cardstock will look like this. Stamp, and adhere to your card. You can also stamp first, then emboss.
Additional info:
The cuttlebug folder used is called Swiss Dots. It’s sold out in most places right now. I lucked out when I got mine at Eclectic Paperie.
You can use other scoring tools to make your horizontal lines. I didn’t think I needed my Scor-Pal until I got it. I LOVE it and use it all the time. No more ripping the paper if you push down to hard (with my Fiskars cutter/scoring tool). No more moving the paper when making several scores. It makes scoring so easy, a caveman can do it (sorry….I watch too much TV).
I hope this helps anyone that couldn’t wrap their mind around this before. Hugs and smiles
Beate
24 Responses to “Partial Embossing with Cuttlebug folder”
Sorry, the comment form is closed at this time.


Thanks for this awesome tutorial! You are so giving. I hope you are having a fabulous day. TFS.
I must be lame, I am still a bit confused as to how you got the partial dots for a horizonal card, as just the plates fit through. Do you have a picture of you doing this with CB? I will read tutorial again, I must be making harder than it is! LOL! Thanks a bunch Beate! Hugs, Deb
Thanks for the information, love the swiss dots, unfortunately I am still on the hunt for mine.
OH how fabulous! Are you doing this from the Smokeys? LOL You are too funny. . .so easy a caveman can do it! BWAH!
I’m definitely going to try this! I also really want the Swiss Dot folder for my Cuttlebug!! Finally, becuase you’ve inspired so many of us with your creativity, I’ve passed on the Arte y Pico award to you:
http://theindividualist.typepad.com/theindividualist75/2008/04/arte-y-pico-awa.html
Thanks Beate!!
So cool. Thanks so much! I could not get my little pea brain to figure this out. Now having a major DUH moment. Your the best. -Molly B
You do come up with the best ideas. Just love all that you do. I will definetly give this a try. I have been looking for the swiss dot for a while.
Thankyouthankyou!! My mind was one of the ones not wrapping around that concept – NOW I get it, lol. Gorgeous pic of the mountains, too – hope you had a beautiful time (rain or shine). Blessings!
I love this effect! It’s so pretty!
This is great! Thanks, Beate!
thanks for taking the time to show this! i appreciate the effort and the time it took. i am a visual learner and this just made all the many times i was “told” this click in my brain when i saw it. great job and VERY MUCH appreciated!!
I just got a cuttlebug this weekend. Although I think it’s broken. The handle keeps falling off even with it screwed on and it doesn’t suction to the table. Does yours???
I’m so dissapointed!
Thank you for the directions. I’ll have to try that later this morning. Thank you also for the inspiration I gain from your site and the amount of time you spend teaching everyone. It is appreciated!
Exellent idea…thanks for sharing
Thanks for the tutorial. I need a Swiss Dots folder and a Score Pal-makes really pretty cards. I really like the one you made in another post. TFS
Bev J.
This is so incredibly clever!
Do you stop your CB plates after the dots but before the end of the folder? How do you not get a line in your card stock from the edge of the CB folder? (I am also one of those people who gets the edges of a small embossing folder imprinted along with the image … ;-( ) Thanks!
Thank you for making this tutorial. I can’t wait to order the Swiss Dots and then try this. You make it look so easy.
Thanks for share! 😀
Thanks a lot that is so smart I love it, going to get my bug out and give it a go, mwahh Meg
I was wodering if you had any solution to not leaving a line when you partially emboss. i must admit I am getting better and if it does occur I use my score pal to cover the line. Do have any ideas how to avoid this.
Thanks
Love what you do! A VERY smart lady!!! TFS
I liked so much!
Have you a tutorial out using chipboard taped to the front of the embossing folder to emboss only the shape of the chipboard? I have seen the Sissix procedure for this – but never with the Cuttlebug. Thx!