
I get a lot of questions about these and figured I answer them in a blog post.
First of, what are they and where do I get them?

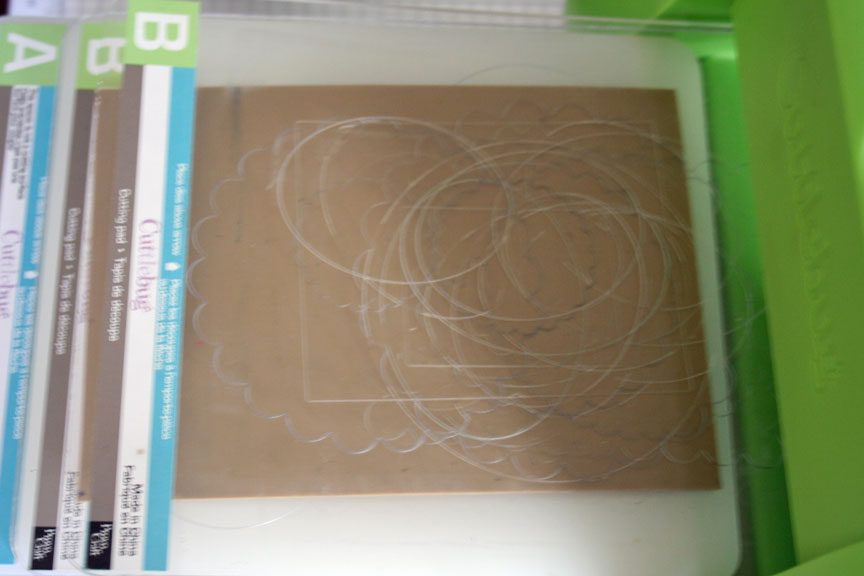
Nestabilities are die templates.
You can cut and emboss your cardstock with them. But it’s not only for cardstock. You can also use them on Fabric, Foam, Vellum, Chipboard and Magnet sheets.
They are made by Spellbinders and come with five staggered sizes in each package.
I bought mine at Ellen Hutson’s store. She developed the templates with Spellbinders.
How do I like them and how do I store my templates?
I love my Nestabilities. I had Marvy Punches for scalloped ovals, circles and squares before, but I sold them as soon as I got these templates. They are easy to use, give me perfect results every time and they don’t take much room to store.
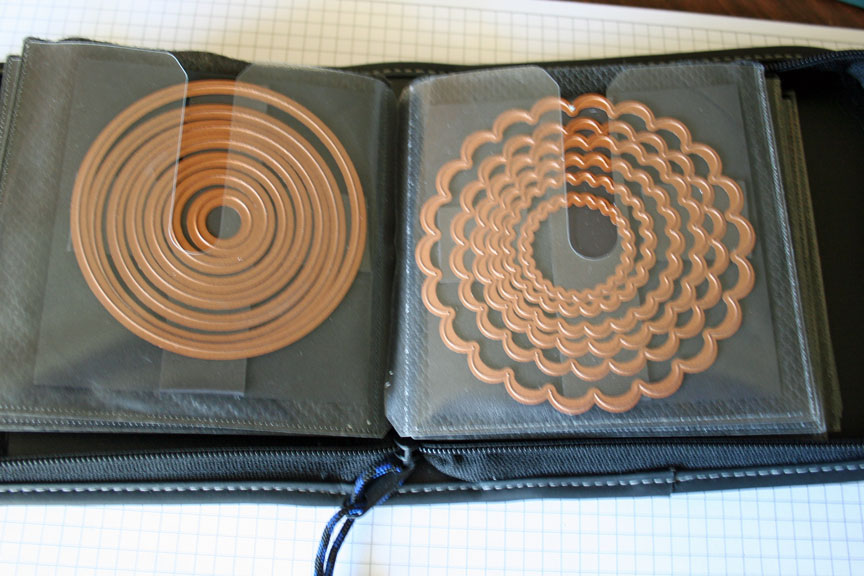
I store them in a CD traveling case.
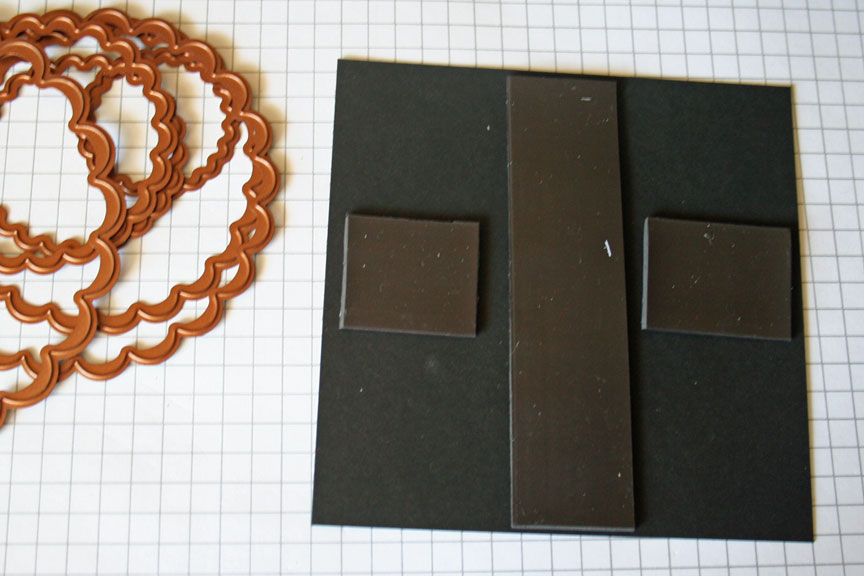
I cut myself 4″ squares out of black cardstock and taped magnetic strips (bought at Walmart on a roll) in an X.
It makes it really easy to take the templates off an stick them back on. I saw other “Nestie” user use magnetic sheets in CD cases or DVD cases, one for each set. I didn’t have magnetic sheets and went this way. Works like a charm.
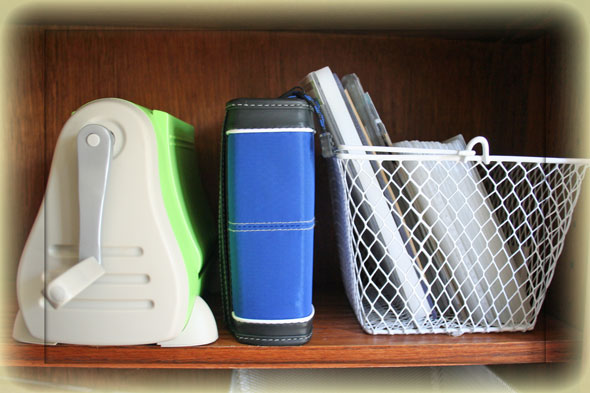
Here is how I store my cuttlebug, my cuttlebug embossing folder and my Nestabilities.
They are all on my bookshelf right next to my stamping table.
I picked up the little basket last week at the Target Dollar Spot.
Cutting Shapes with Nestabilities and Cuttlebug
I can only tell you how to cut with the templates and the Cuttlebug. I don’t have another die cut machine. I picked the Cuttlebug because it folds up and is easy to store. I am running out of storage space in my room. If you have a different die cut machine, check this post on Ellen’s blog.

Add first plate A, then Plate C on your cuttlebug. Place Nestabilities template on top of both plates. The site with the cutting line will face up. I staggered the plates so you could see the letters. Usually they are right on top of each other.
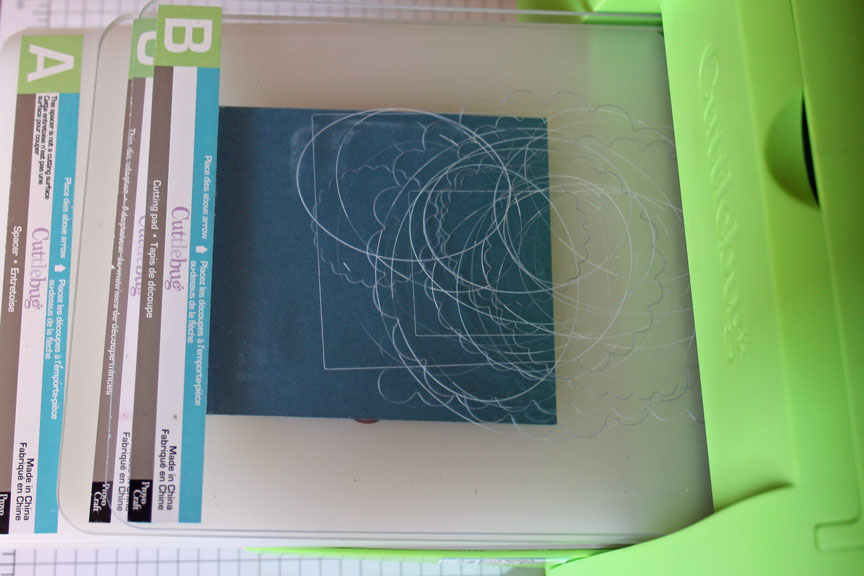
Add your cardstock over your template and place your B Plate on top of that.
Your template will cut into your plate a little bit. That’s completely normal.

Run your “Sandwich Stack” through your Cuttlebug by turning the handle of the machine. Take off access cardstock.
If you don’t want to emboss your cardstock with inner scallops, you can pop your cardstock out of the template. Otherwise keep paper in the die.
Embossing with Nestabilities

Stack a B Plate over your A Plate.
Now add 2 sheets of cardstock to raise the die a bit or (like me) use two thin coasters.
Place your cut cardstock along with the template on top of the cardstock or coaster.
Place a Tan Embossing Mat and another B Plate on top of your sandwich and run through your Cuttlebug.
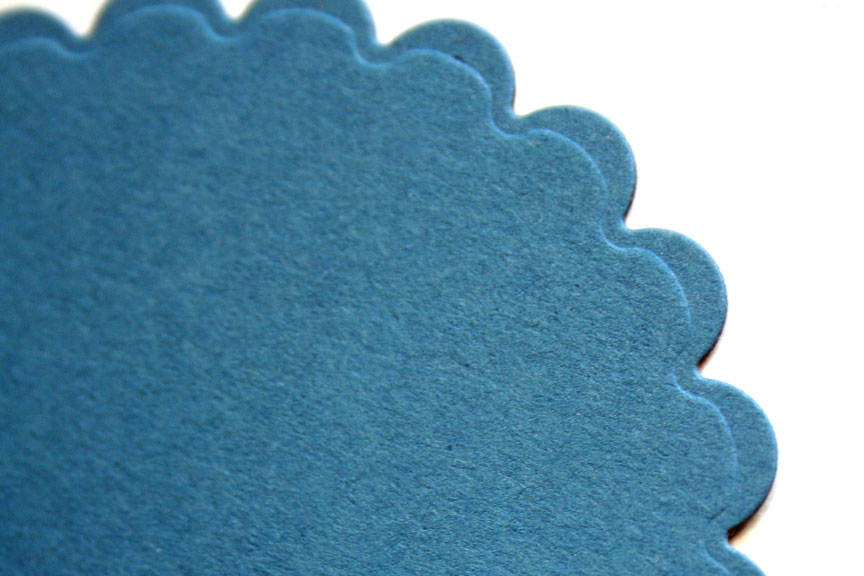
This step will give you a gorgeous embossed edge on your cut out.
Which ones should you buy first?
Well, I am not really the right person to ask this, since I bought the “I want it all” pack from Ellen last year. LOL
But if I had to buy one at a time, I would probably start with the squares or rectangles. If push comes to shuff, you can always add scallops to circles and ovals with your corner rounder. It’s a lot harder to get them right on squares and rectangles.
Beate
36 Responses to “Nestabilities”
Sorry, the comment form is closed at this time.


Thanks so much for that, Beate! I’ve been looking at Nestabilities since they came out since they’re just SO DANG COOL, but yours is the clearest explanation I’ve seen yet. I will say I already had a pretty clear idea of how they worked, but if I didn’t, you definitely would have crystallized it! :o) Thanks for all the great tutorials and info you provide, and all the wonderful inspiration…you’re amazing!!
Hugs,
Michelle
I have square nestabilities on my wishlist !!! Hopefully for my birthday 🙂 Thanks for a great tutorial…as usual 🙂
Thanks Beate. I echo everything Michelle just said. I think I’ll be saving my pennies and hope to get these soon. Melanie
Beate-
The CD holder idea is GREAT!! I’ve been trying to figure out a way to store my nestabilities. I’d seen the CD case idea on someones blog and had thought about doing that but I keep forgetting to pick up CD cases. I just so happen to have, what I think will be THE PERFECT, CD holder so now all I have to do is get the magnetic strip. I think this way will be a LOT more portable too—just easier than trying to keep hold of 16 different CD cases-
THANKS a TON for the AWESOME idea!
-S
Thanks Beate for sharing this with us. I purchased some on the weekend from a local Scrapbook store at Scrapfest. They flew Kim in from Spellbinders to attend the show to do a Make and Take with the Nestablities at their booth. After talking with Kim and seeing them in action, I couldn’t resisted these babies any longer. I didn’t have a machine so I wented with the Spellbinder machine. They had a great deal on it along with the dies.I purchase a few sets to get me started!! Mostly scallops and then the regualr set to go with it. I love it!! I would recommend it to anyone as it a great die-cutting tool!!
I love how you can cut and emboss without removing the shape.
Thanks for sharing!!!
Hugs,
Anne
Beate-
Not to take away from the Nestabilities…..I just LOVE your storage idea (earlier comment) but now I’ve been wondering……how do you store your cuttlebug embossing folders??? There’s another item that seems to be multiplying like rabbits that I know I’D LOVE a great storage idea for.
-S
Well hey that figures I brought circles first!! LOL I would love them all, next on my list are sqaures I think.
Have a great day Beate
Cazx
Thank you so much for writing about the nesties. I have held out for a long time and finally broke down this week and ordered all of them except the long rectangles. I’ve been so jealous of everyone’s fantastic creations using them – now I can do it too!
Thanks Beate! I can’t wait for my Nesties to arrive! I don’t like waiting but what can you do right?! LOL!
Hi Beate,
love the storage idea for the nestabilities! I just started “Collecting” mine, and I started with the CD tins but I like the CD storage idea much better. It looks like it would take up less space! Thank you for sharing!
Laura Jean
Awesome tutorial! I so love the nestibilities! Thanks for this, Beate! Have a great night! 🙂
Great tutorial on how to use the nesties. I think if I get any more questions, I’ll just give the link to your instructions. You rock! I’m also lovin’ the idea of the magnetic strips on a CD storage case. Awesome idea!!
Thanks for this great “visual” explaining the Nestabilities! YOu know I’ve been considering them for awhile now. Maybe this is how I”ll spend my “extra” money Uncle Sam is sending me soon! 😉
Thanks for the great info! They are all on my wish list too! I love how you stored them!!! Thanks again!
Thanks for the info Beate! I’ve been wondering about these for a while. I don’t think I’d want the embossed edges most of the time and I was scared to buy them and not like them. I think maybe I need to do some shopping soon. =)
I can see clearly now the rain is gone…(can you hear me singing?) I’m so happy you did this, Beate. I was beginning to think I was the only person in the world who didn’t understand these things. I’m going away for a scrapbook retreat weekend tommorow morning and now I’m crossing my fingers that there will be a cuttlebug and some nestabilities at the boutique!! Have a great weekend!
Thanks, Beate. This is the BEST tutorial I’ve read about the Nestabilities!!
Beate, thanks for that!
Scheinbar machst du nicht nur zauberhafte Karten…, nein, du bist auch noch ein Organisationstalent…:-) Have a nice weekend…
The storing idea of the magnets is great!!! will go and try to do something about my mess ;-)…..thanks for sharing this with us, the idea of embossing was new to me… since I just got a set, I will try it out asap
Wow-this is an AWESOME tutorial! The pictures are perfect for those (like me) who are more visually oriented. I totally need to get a set of those on my wish-list for DH (and the link to Ellen’s site, lol).
Thanks again!
I always wondered! Thanks for sharing this with us.
Tried your method and it worked like a charm. I did crank slowly for the cutting part of the template since I broke a B plate once aready, but it worked fine per your method. Thanks for the pics and step-by-step instructions. Love the Nestabilities–I’ve got several already. Your storage suggestion sounds great too. Thanks again.
wONDERFUL Q & A and tutorial!! TFS!!
Have you tried to use any of the other Spellbinders die cutters. They have a cool butterfly and was wondering if that would work in the CuttleBug. PAT
Beate – I love your idea how to store them – very clever!!! ~TFS~
Thanks for sharing. I am trying to save up now for some of these. I love your storage idea and bookmarked this for the future. TFS! -Samantha 🙂
The CD case is a brilliant idea for storage…working on mine right this very minute:) Have a wonderful night!
This is such a great storage idea!! Thank so much…I am going to do this with mine!! :0)
I’m not sure you’ll see this, but—did you buy the “petite” scallops or the classic? Is the only difference in them the size of the actual scallop or is the circle/rectangle/square itself actually smaller??? I’m thinking of getting them for my birthday, but I don’t know which ones I want to get & I don’t want to get something and then wish I had gotten something else!! Thanks for any help! Love the storage idea though—I have very limited storage space!! Thanks again for all your info~
GREAT information, Beate! I would LOVE to own some of these one day … they are high on my wish list after seeing this post!
WOW! I just bought my Cuttlebug at 1/2 price at Joann’s this weekend… which I LOVE the embossing folders. That same day I ran to the mall and there was a craft fair. This gal was selling scrapbook items and I was standing next to the booth as I was on my cell phone with my husband and notice the “NESTIES”!! (I told DH “I have to run!”) I’ve seen so many cute cards on blogs… so I bought a set! Thanks sooooooooo much for the tutorial on them. I couldn’t have lucked out on your info so quickly on how to use them!! I love the fact of the storage and mobility. Thank for the time you put into passing this info on to everyone… Michelle 🙂
Beate, thank you so much for showing how you store your Nestabilities! What a neat and compact idea – I am off to Target for a CD case!
Beate – Thank you for the wonderful tutorial! You are such an inspiration! I just recently purchased a CuttleBug and wanting to try it out immediately, I bought a few CuttleBug metal dies at Michaels. The larger image dies worked beautifully, but the smaller images didn’t cut the paper? I doubled checked my sandwich stack, still no luck. Tried to use the larger C plate, but it was not going to go through. Have you experienced this? I am hoping it is the die, and not my machine. Any advice would be greatly appreciated!
Thanks for all of the great info!! I looked at Ellen Hutson’s store, there are so many, which ones do you have, or use/like the most?
Beate’s,
Thanks for the great tutorial on the Cuttlebug. I just got mine last week at Michales, 50% off and I love it, now I have to get the storage binder. Also,I will be getting some of the Nestabilites, now that I know they will work in the Cuttlebug.
Thank’s for sharing all your tutorials and lovely cards, you are so talented.
I followed your steps in cutting a Nestablities heart. The B plate was on top. My problem was that the B plate was deeply cut into. It was brand new and now is deeply cut. Please advise. Where can I purchase another one?