
Julie Buhler wrote today’s great tutorial on SCS. I had to put my own spin on it an use one of the blank Accent & Element tins Stampin’ Up! demonstrators could order a little while go.
My first challenge was to cut the clear envelopes down to fit the tin. The inside of it only measures 5 1/4″ x 4 3/4″. I cut the envelopes down to 4 1/4″. Then cut the top layer down 1″, to create another flap like backing. I taped the envelopes together with snail adhesive.
Next I created the “page holder” by cutting Designer paper from the Ski Slope Designer paper to a 4 1/2″ x 6 1/4″ and scored it at 1″.
I folded over the flap and used the retired large corner rounder from Stampin’ Up! to round all four corners.
Before adding the jumbo eyelets, I cut a 1″ x 4 1/2″ piece of Whisper White cardstock, punched it with the Scallop Edge Punch and taped it behind my Designer Paper flap. I used Antique Brass Jumbo Eyelets to hold the flaps down and tied Kiwi Kiss Satin Ribbon.
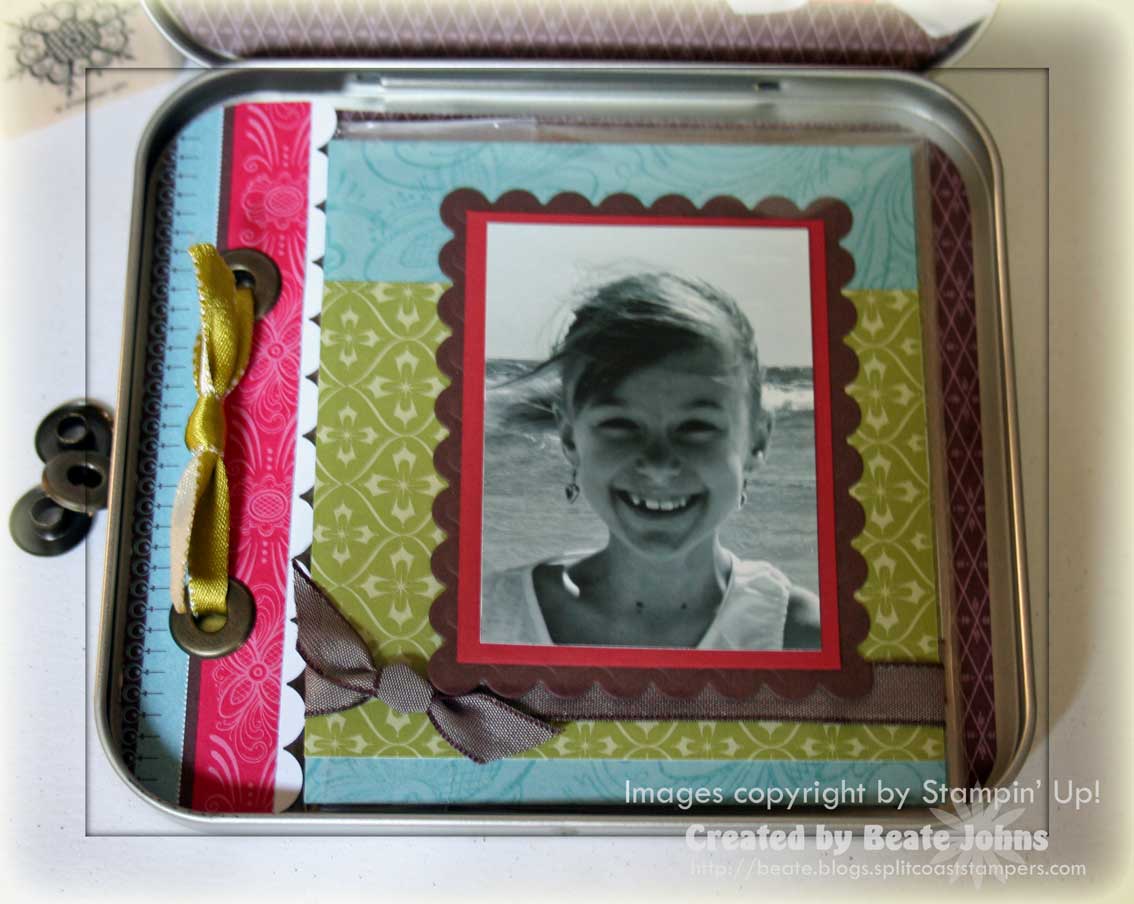
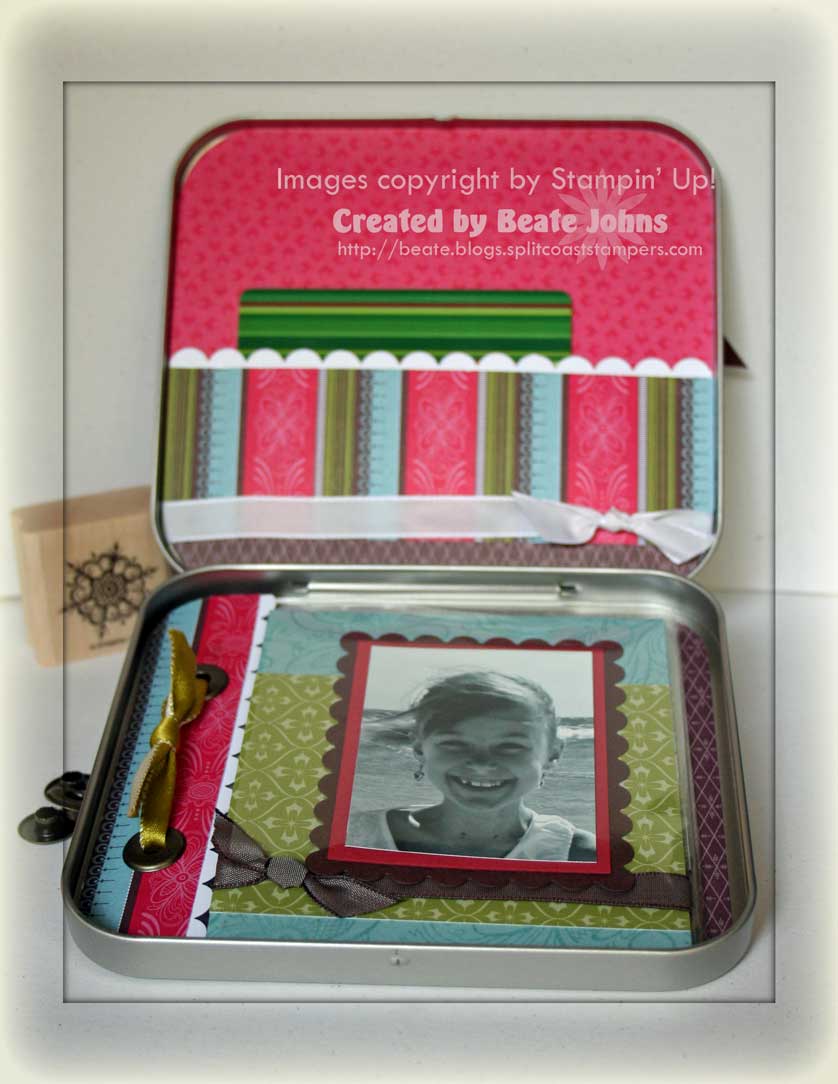
My pages measure 3 3/4″ x 4 1/4″ and are cut from Baja Breeze cardstock. I wheeled the Scandinavian wheel on both sides with Baja Breeze. The horizontal layer of Ski Slope Designer paper measures 3″ x 3 3/4″. Again, it is placed on both sides 1/4″ above the bottom of the page. Chocolate Chip Tafetta Ribbon was tied around the pages. The knot is facing the top of the page.
I cut scallop rectangles out of Chocolate Chip cardstock with Rectangle Nestabilities.
For the front of the page they were layered with 2 1/4″ x 2 7/8″ pieces of Riding Hood Red cardstock.
I will add new wallet size pictures there (as soon as I take them. First we all need serious hair cuts! Appointments are made. The pictures in here right now are old ones to make the pages look finished). These layers are attached vertically to the front.
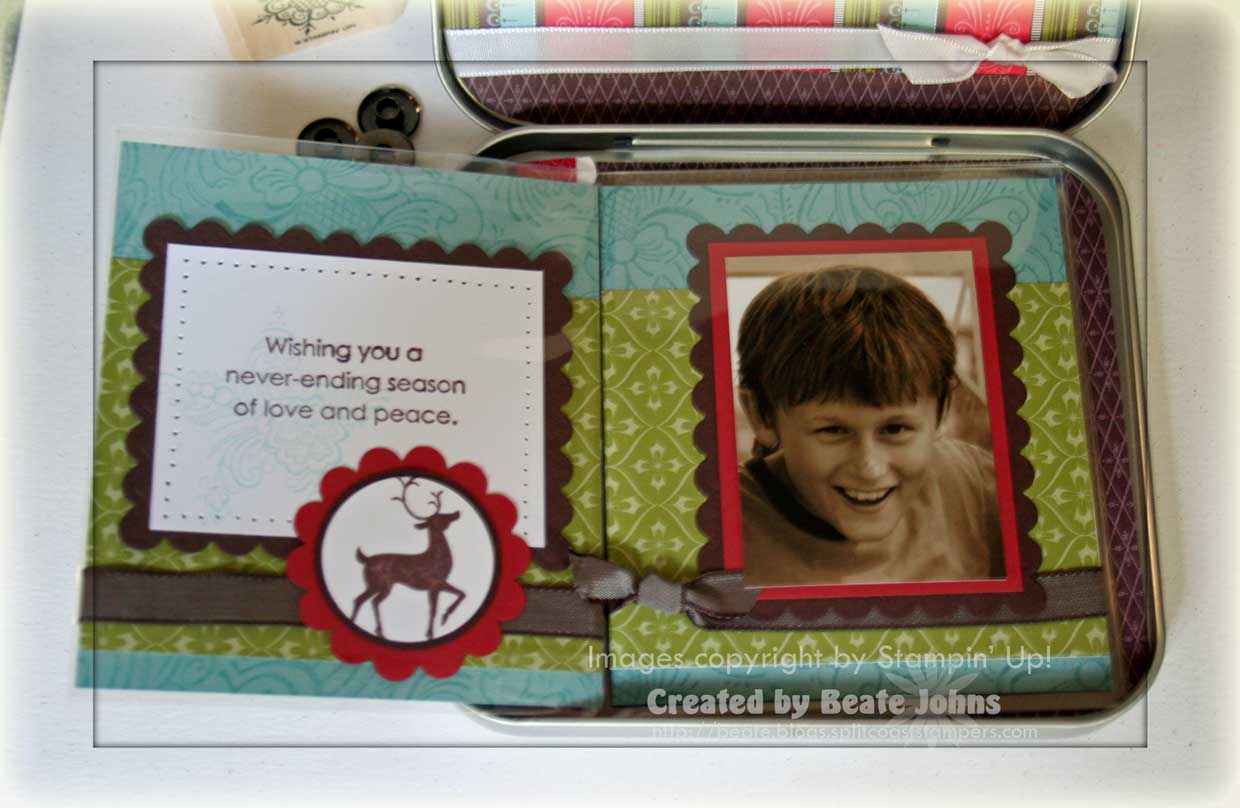
On the back of the page I attached the rectangles horizontally. They hold a 2 1/4″ x 2 7/8″ Whisper White layer that was stamped with one of the stamps from Scandinavian Season in Baja Breeze (stamped off once) and paper pierced.
I will add little embellishments on the bottom right over the ribbon. I have finished one page to make a sample. I will order the new felt snowflakes and might add some of those. The back page will hold little written messages from the kids to their grandparents.
HINT! If you are planning on making on of these tins, you might not want to add ribbon or thick embellishments on the pages. I started out making five pages, but the tin will only close with thee….good thing I have only three kids. LOL
To finish off the inside I cut a Ski Slope designer paper piece down to 4 7/8″ x 5 1/2″ and rounded the corners.
I taped a 1/2″ strip of chocolate Ski Slope designer paper on the bottom and rounded those corners.
Next I cut a 1 3/4″ x 4 7/8″ striped piece of the same designer paper pack, taped a strip of White Whisper cardstock punched with the Scallop Edge punch on top and added Sticky Strip to the bottom and the sides of the strip.
I taped the strip down, lining it up with the chocolate strip to create a pocket. It will hold a gift card to P.F. Changs. (Subway card is only in there to show off the pocket better.) The booklet with my kids pictures and a gift card to the restaurant will be my In-Laws Christmas present. What could be better then pictures of grandchildren and delicous food as a gift?
White Taffeta Ribbon was tied around the designer paper layers and the entire piece was adhered with Sticky Strip to the inside of the lid of the tin.

For the tin front I cut another 4 7/8″ x 5 1/2″ piece of Ski Slope Designer paper, rounded the corners and sanded the edges.
The striped designer paper measures 1 3/4″ x 4 7/8″ and is adhered to a 3/8″ wider piece of Chocolate Chip cardstock.
The bottom of the Chocolate strip was punched with the Scallop Edge Punch (yes, I know I use it a lot. I LOVE it!). 5/8″ wide Chocolate grosgrain ribbon was wrapped around all layers. Everything was taped down with Sticky Strip.
I stamped the label from Winter Post in Chocolate Chip three times; once on Whisper White, once on Kiwi Kiss and once on Ski Slope DP. I cut and layered them into one label, attached it with dimensionals to an wide Oval Punchout out of Whisper White cardstock and taped everything under the ribbon.
Sorry today’s post is so long. Have a wonderful day! I have to go grocery shopping (boooo). Hugs and smiles
Beate
36 Responses to “Tutorial on SCS – DVD tin scrapbook”
Sorry, the comment form is closed at this time.


This is gorgeous, Beate! I love your colours!!
WOW amazing… not that I exspected anything less from you. I am blow away it’s so pretty
What a fun project, love this one!
This is wonderful! So cute!
OMG! Beate, das ist so schön. Deine Papiere sind klasse…, die Bilder von den Kids sowieso…und die Idee, das ganze in eine Dose/ Tin zu packen einfach genial… Toll…:-) Liebe Grüße…
Gr8t!!! IDEA, love it…….gina
What a fun project – and what beautiful children!!! I love this.
This is so fantastic, Beate!! I love this whole idea, and will have to check out Julies’ tutorial!!
Really, really cute! I’m off to go look at Julie’s tutorial!
What a great project! Love it!
OH Beate, this is just beautiful! What a great keepsake!
Gorgeous tutorial! TFS
Ahhh WOW!!! You never cease to amaze me! This is totally fabulous! Thank you for all you do.
Wow! this is so fun! I’m going to check out that tutorial! I have several of these little tins laying around!! Love it!
Hi Beate,
I am a fairly new demonstrator. I’ve heard that you can buy the rectangular tins. Do you have any idea where?
Thanks for all the wonderful ideas you share with us.
Rosie
This is an absolutely gorgeous project! Love the pics–beautiful family!
I haven’t been by in a while – now I know why my budget has been in control. 🙂 I love all of your projects and really appreciate that you share tem.
This is why you’re the first blog I visit everyday! I have a bunch of tins like these. I think I’ll start my x-mas gifts right now! Thanks for all you do, Beate.
Beate, this is so precious… love, love it!
i have to try these, i have some DVD tins that are dying to be altered…LOL!
This is gorgeous. I love the colours.
OH I love the spin you put on it!! Looks fabulous! I only have these tins too…I’ll have to see what I can come up with!
Wow!! This is fabulous!
Your kids are SO cute! Such nice smiles. 😀
This tin is gorgeous! I simply must own that Ski Slope paper.
Gorgeous project Beate– I love the colors and design!
Oh girl!!! Stunning. Just love this!!!!
Oh my word!! Your sweeties are growing waaaaaay too quickly, Beate! Good thing you’re capturing them in fabboo projects like this one!
{{{hugs}}
Wow, Beate !!! This is beautiful !!! I love the layouts and pictures of the kids….what an incredible keepsake album !!!
Gorgeous, gorgeous mini-album, Beate! The colours look great against your black and white pictures. I like seeing how you used the new mini supplies!
It doesn’t take much embellishments to make a project too bulky, does it? I did a mini tabletop calendar for a colleague who was leaving the office and I barely embellished it and I still couldn’t fit all twelve pages in the CD holder! (I just held the extra pages in place with a ribbon when I gave the gift to her.)
TFS!
Cindy
WOW, I saw the tutorial and liked the idea immeadiatly… what you made out of it, makes me want to go rightaway and try it as well – but I need to find tins first…love your papers and all the scallopes you used…. great Christmas present indeed….
This is gorgeous, Beate! The grandparents will surely love it!
By the way, I think you can still buy these tins from Stampin’ Up! They are still listed as a catalog write-in — if I remember right, 3 for 9.95.
Beate this is awesome as always!!! ((hugs))
I’m such a bad scrapbooker …but I love this idea!!! Your project has turned out beautifully and I bet the grandparents will love it!!!!
This is so gorgeous Beate! TFS!
OMGosh! What a great project! You chose some really great colors to work with. And of course the pictures of those kids just made the project complete! hehe…
Thanks for the tutorual!
Beate, I just love your stuff! I’m not trying to find the time to whip one of these books together!
You were the Runner Up Mini-Book of the Week at Card of the Week.com. You can see the original post here: http://www.cardoftheweek.com/2008/09/scrapbook-sat-1.html.
I did use a picture from your post, with links back to the site and the original post. I hope that is OK. Please feel free to email me if you need me to change anything.
I also have an “I was featured” on badge for you if you want it 😀
This is beautiful and will make a wonderful Christmas gift. Thanks for sharing your wonderful talent with us!
Hugs~
Christyne