
I am sorry I didn’t get the card front done earlier yesterday. After I got my teeth cleaned all sparkly white and got a gold star from my dentist, I had some shopping to do. After that the usual housework/SCS work got hold of me. I finished the card front in the evening and decided to post it this morning.
When I began the card, I used this weeks Color Challenge on SCS Kiwi Kiss, Very Vanilla and Baja Breeze) as my starting point. For the flowers inside, I wanted some more POP and added Tangerine Tango and Riding Hood Red. I figured I could just use the challenge colors (+Chocolate, always plus chocolate).
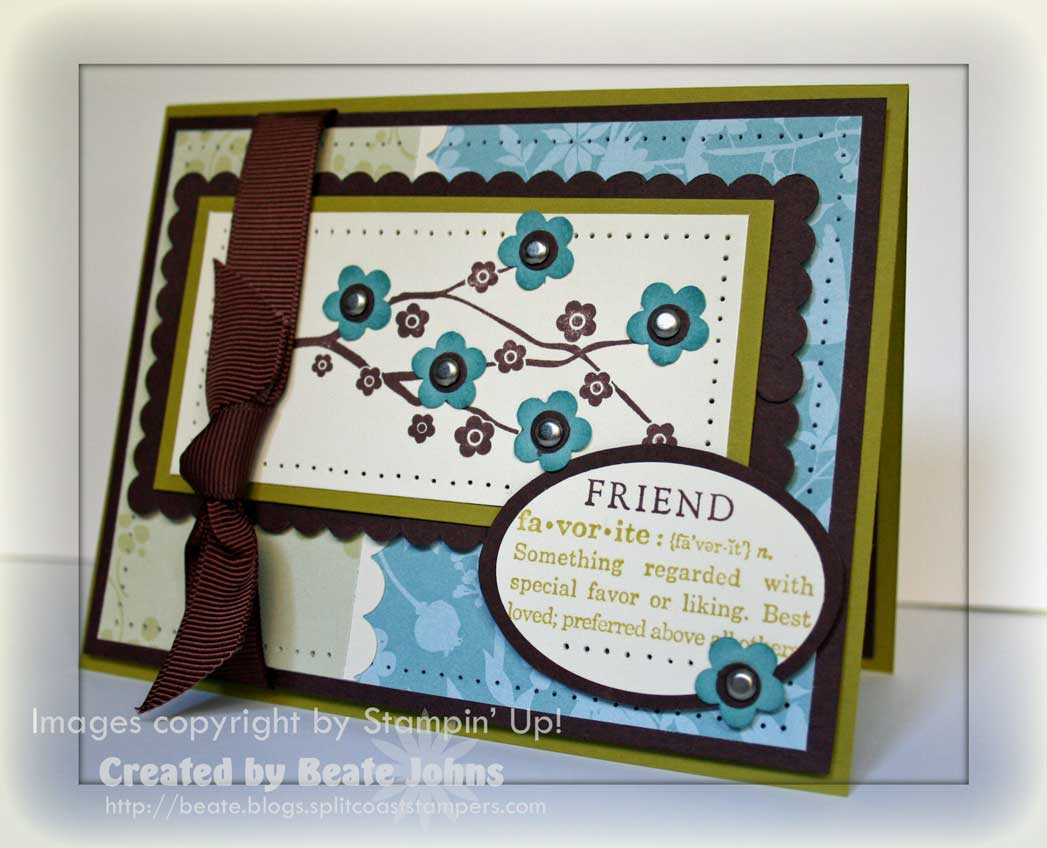
The card base is a 5 1/2″ x 8 1/2″ piece of Kiwi Cardstock folded in half.
Next is a 4″ x 5 1/2″ layer of Chocolate Chip, followed by two pieces of Urban Garden Designer paper. The smaller one measuring 2″ x 3 3/4″. Underneath that layer is a Scallop Edge punched piece of Very Vanilla cardstock. I paper pierced the edges of the chocolate/designer paper combo and set it aside.
For the main image I stamped the branch from Eastern Bloom in Chocolate Chip on a 1 7/8″ x 3 7/8″ piece of Very Vanilla cardstock. It was layered on a 1/4″ bigger piece of Kiwi Kiss cardstock and the edges were paper pierced.
Next I punched eight Chocolate Chip squares with my scallop square punch and created the scallop rectangle layer. I taped the stamped layers on top. The Baja breeze flowers were punched out with the Trio Flower punch, sponged at the edges with Baja Breeze and sponge daubers, layered with a 1/4″ circle punch and topped with silver brads (that go through all the way to the chocolate scallop layer).
The layers were adhered with dimensionals to the chocolate/designer paper layer. 5/8″ wide Chocolate grosgrain ribbon was tied around the left hand side of all layers. Then those were attached to the card base with dimensionals.
I stamped the favorite definition from Define your Life in Kiwi Kiss on Very Vanilla Cardstock. Over it, I stamped Friend from Fundamental Phrases. I had seen this combo in the current catalog and LOVED that idea. The sentiment combo was punched out with the wide oval punch, adhered to Chocolate Chip cardstock and hand cut around it to create the chocolate layer. Another Baja Flower was adhered to the bottom right and a row was paper pierced underneath the definition. The sentiment layers were attached with dimensionals.
Let me know if you need a detailed description of yesterday’s post. Otherwise I just leave it. Have a wonderful day!
Hugs and smiles
Beate
30 Responses to “and now….the rest of the story, I mean card”
Sorry, the comment form is closed at this time.


GORGEOUS card!! I love the Eastern Blooms set and your added punched flowers are just perfect. Great use of the colors and I love the layout!
Eine traumhaft schöne Karte.
LG
Anke
You have such an eye for design. You just never cease to amaze me. This is another amazing card.
TFS!
Cindy
Beate, deine Farbkombi ist so genial. Ich bin ein absoluter fan deiner Karten. und erwartungsgemäß ist auch die Hülle perfekt! 😉 Liebe Grüße aus dem warmen Deutschland!
I am just blow away by your attention to details. What a gorgeous “front” to your amazing “inside”.
Love the front! Very pretty as usual…
Love the way you used the square scallop punch here…would have never thought to layer it that way! Now that I see that the define your life stamps fit inside the large scallop – guess I “need” that too! I always learn a cool new tip or trick when I visit your blog Beate…thanks for the inspiration!!!
Bee-yoo-tee-ful. You rock out loud, Madame Beate! I really like the loose look of the ribbon. Makes it look artsy-fartsy. LOL!
What a great card!! I am so LOVING This set as well… I love you card… Some of my favorite colors on this one…. I’m so glad your blogging again.. Hope all your family is well.. Thanks again to your DH for working hard for us all…..
Your hit counter is out of control!!! I remember the itty bitty #’s when you just began… Thanks for all the inspiration!
Hugs
Brooke
Beautiful Beate!!! Going to need this stamp set now…lol…thanks for enabling!
These sure are wonderful colors together! I must give them a go! Lovely card, as always I adore it! Have a great day Beate! Deb
Oh so pretty!! Love the chocolate with the Kiwi Kiss and Baja Breeze colors!!
I LOVE this card! I love how you added the punched flowers to the stamped image!
This is so beautiful, Beate!! Great layout *wink*, and I love the gorgeous colors!! I also love how you’ve added the punched flowers and all of your piercing!! Wonderful!!
This is just beautiful! Love the addition of chocolate!!
Looking forward to trying one of these. I used to use spirals for a Victorian type of card years ago, so I was interested when I saw the tutorial. I liked the extra touches of red and tangerine on the inside – this is two cards for the price of one, almost – you wouldn’t know whether to leave it open or have the front showing!
This is wonderful, Beate! The chocolate really sets the colors off.
GORGEOUS, Beate! Love the colors you used!
What a beauty, Beate! I love the dimension the punched flowers and brads give to the card! Love all the wonderful details!
Beate this card is GORGEOUS, I love it! I NEED to get this stamp set!
Woooooooooooohooooooooooooooo!!
I truly love this style … it’s so ‘Beateful’ and gorgeous!
~Bev
Love the verse with the friend above it! Wonderful card!
Catherine
This is absolutely yummy – I love the colors and the scallops and the brads and well, everything, lol!! Another amazing card, my friend – you ROCK! *STAMPIN HUGS* Alex
This entire card is so beautiful, Beate !!! It’s a 10 out of 10 !!!!
Gorgeous!!!! The color are wonderful and I really like this new Set!!! The inside looks perfect – one of these days I’m gonna have to try the spiral pop up too!!!
Beautiful card. Nice job on hand-cutting the larger brown oval — you must have *very* steady hands…
Beautiful. You hand cut the oval around the wide oval? I’m ashamed to admit I am incapable of doing that. It’s perfect. Hugs . . . . M
BEAUTIFUL, Beate! I LOVe the color combo! Everything is perfect! 🙂 Hugs & 🙂
Really love the colors and the design. 🙂
very pretty, great colors and papers!