
Today’s tutorial on SCS is written by Carole Burrage and is called Faux Torn Mosaic. Create a different looking background by tearing patterned paper in pieces, sponging them and taping them over a piece of cardstock.
For my sample I used a new set from Taylored Expressions. I had ordered it on Saturday and BAM I already received it in the mail on Wednesay. Taylor is FAST! I thought the flower from Celebrate Life would be perfect for this technique. I needed something bold that wouldn’t be overpowered by the background.
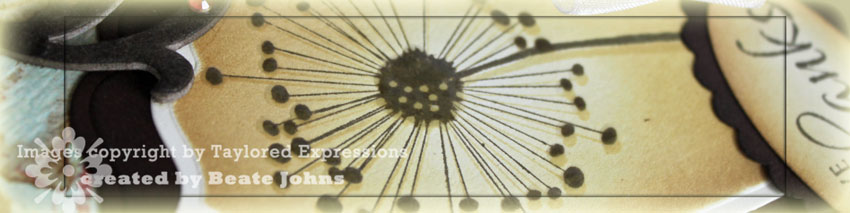
The flower was stamped in Stained Walnut on Very Vanilla Cardstock, then overstamped with Scattered Straw Distress ink. The image was cut out with Label 4 Nestabilities. I left the die on and sponged the image first with Scattered Straw, then a bit with Vintage Photo distress ink. It was layered on the next size up Label 4 die cut out of Chocolate Chip cardstock that had been sponged with Walnut Stain ink. The flower was finished off with a layer of Crystal Effect.

The card base is a 4 1/4″ x 11″ piece of Chocolate chip cardstock folded in half. The edges of the card front were sponged with Walnut Stain ink. For my background I tore up Penny Lane My Mind’s Eye paper. The torn edges were sponged with Vintage Photo ink. The torn layer was stitched to a 3 15/16″ x 5 3/16″ piece of Very Vanilla.
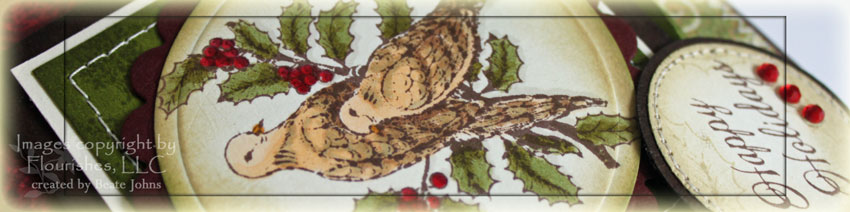
The sentiment is also from Celebrate Life. It was stamped in Walnut Stain on Very Vanilla cardstock, punched out with the large oval punch and sponged with Scattered Scraw and Vintage photo. It was layered on a sponged Chocolate Chip Scalloped Oval punch-out. Three small Lippy Red Kaiser Rhinestones were added underneath the sentiment.
I sponged a Maya Road Swirl with Walnut Stain ink, added more Lippy Red Rhinestones and placed it on the top right of the image. I punched a slit on the lower right of the image and tied May Arts Organdy white ribbon around the left hand side of the layers.
Here is a video for the visual learner:
[youtube]https://www.youtube.com/watch?v=tk7mnHIIfSk[/youtube]
Beate
12 Responses to “Tutorial on SCS – Faux Torn Mosaic”
Sorry, the comment form is closed at this time.


Beate, wieder mal ein super tolles Video. Hugs, Sabrina
Oooooooo,
Love it! That flower is perfect, and the sponging too!
This is beautiful Beate! Do I hear the vacuum in the background??? :):)
Another amazing creation. Thank you again and again for your sharing your beautiful work.
Beate, although I am not the best on commenting frequently, I just wanted to tell you that I love visiting your blog. You create such beautiful and professional looking cards. Your videos are fun to watch and always leave me inspired to try a new technique and get stamping! Thank you for all of the time you put into your blog and into your GORGEOUS cards! You have so much talent and I am so thankful that you take the time to share it! 🙂
I loved the technique (and the video). It looks so beautiful. I loved the videos (after watching this one, I watched 2 more 🙂 Thanks so much for sharing with us.
This is so beautiful, Beate!! I love your background, and the pretty images you’ve used!!
Stunning, Beate!! What a great technique…love all the distressing…right up my alley!! 🙂 (BTW, I never use gable green either! LOL!!)
Holy guacamole! This is FANTABULOUS Beate! The layout and color scheme is STUNNING and you know I love the stamps you used (grin!!).
I simply CANNOT wait to meet you at CHA!!!
Beate, I had to come back and post again to tell you how excited I am about a new “trick” you have taught me in this video.
I have always used sponges and daubers to
sponge ink onto the edges. I’ve always hated the little tidbits that kept falling off the sponges and daubers after sponging the cardstock or paper. But after watching your video and see you used the Tim Holtz blending tool and blending foam, I had to run and get mine out of my box that holds my alcohol ink supplies. I love using the tool and foam so much better than sponges. The foam comes in packages of ten so it’s great to have a foam for each ink color. The sponging looks so much better using these two items. It’s so wonderful learning all these new “tricks” by watching your tutorial videos. Thank you so much!
Oh my this is just gorgeous, love the colors, shading, tfs the video!
Beate, I used the Faux Torn Mosaic on a Thanksgiving card earlier this evening. Love the look! Mine looks like a tiled floor! thanks!