
My centerpiece base is part of a Manila file folder cut with Label 8 Nestabilities. The Vintage Blossom stamp was inked with Pearl Acrylic Paint Dabber and stamped on the bottom right of the label. After it dried (I helped along a bit with my heat gun) I stamped the Giving it all meaning background over it with Vintage Photo Distress ink. I also added swirls with one of the stamps from Growing with Unity.

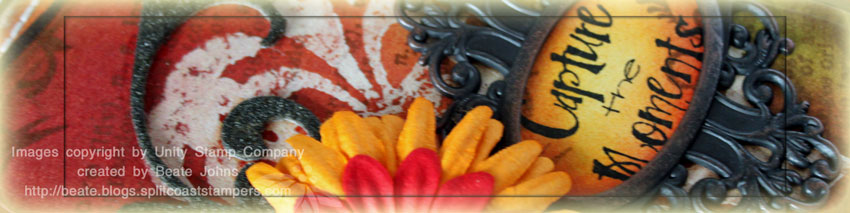
Next the label was sponged with Spiced Marmelade, Fired Brick, Peeled Paint and Vintage Photo Distress inks.It was layered on a slightly bigger piece of Chocolate Chip cardstock that had been sponged with Walnut Stain Distress ink. The sentiment is from Ippity’s Life’s little Moments. It was stamped in Black Stazon on another piece of Manila File folder. It was cut out as an oval to fit one of Tim’s Ornate Plates. Two small swirls were added with Vintage photo before the oval was sponged with Dried Marigold and Fired brick. The Ornate plate was attached to the label layers with matching brads.
A grungeboard swirl was first inked with Walnut Stain ink, then embossed with Walnut Stain Distress embossing powder. It was adhered to the card front, one of the ends hidden behind Daisy Doodle Flowers. The flowers were topped with a Making Memories Brad.
A 3 15/16″ x 5 3/16″ piece of Manila File folder was sponged with the same inks as the center piece, the edges were inked with Pearl Acrylic Paint Dabber. A border was stitched around the layer before it was adhered to the 4 1/4″ x 5 1/2″ Chocolate Chip card base.
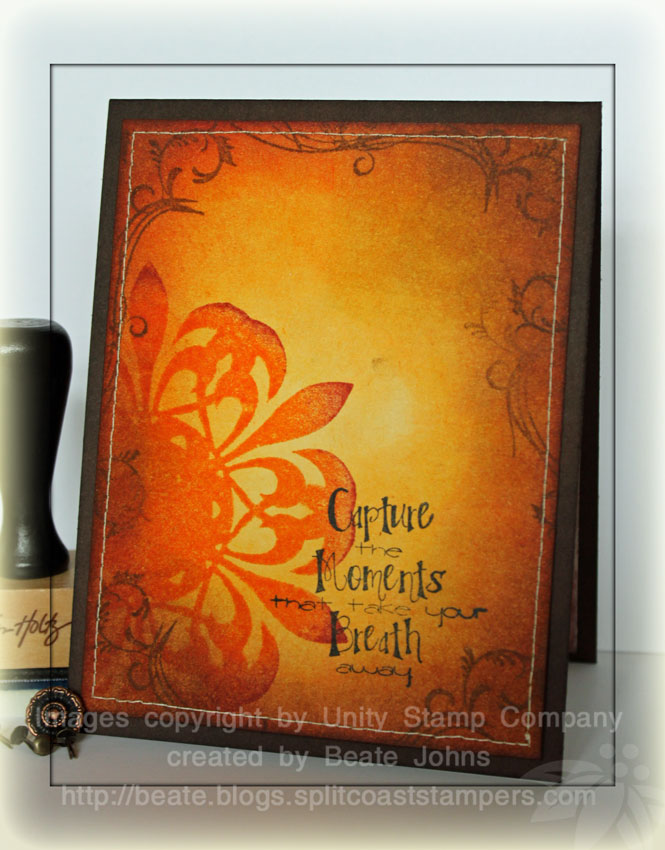
The inside layer of the card was also sponged like the outer layers and stamped with the Vintage Blossom and the swirl image used on the front. Here I had room to stamp the entire sentiment. I could only use the first two lines on the card front.
Here is a video for the Acrylic Resist technique for the visual learner:
[youtube]https://www.youtube.com/watch?v=lLM0m5OPL_Q[/youtube]
Check the Unity Blog to find a list of 50 blogs that participated in today’s Friends with Flair Friday.
Beate
36 Responses to “Video tutorial – Acrylic Resist”
Sorry, the comment form is closed at this time.


stunning. is all I can say.. breathtaking!
WOW.. totally awesome technique. I have been a little obcessed with your video tutorials this week and can’t wait to try more.I actually did 2 of them for my FWF this week. I am going to have to try this.. Fantastic Card Beate, love the colors you choose.
Thanks for the tutorial! Your card is gorgeous!
Stunning works of art Beate!! I am definitely going to try that technique!! Love it!! Thanks for the video tutorial!
Wow this is beautiful love your tutorials!!!
This is a beautiful technique, Beate! I will have to try it soon!
Oh my goodness Beate!!! Absolutely stunning! I definitely have to try this technique! Thanks for the inspiration!
Oh my…this is soooo rich, warm, and gorgeous, Beate!!
Beate, you are amazing! I love the colors and great tutorial. You always do an awesome job with them!
So beautiful and Classy! I just absolutely LOVE this card!
Another masterpiece. Love these warm colors and your layers always are an art in itself. Thank you for the tutorials!
Beate, you AMAZE me!!!!!!!!!!!!!!! Simple as that! I so love this technique and I didn’t even know Unity had that big gorgeous stamp!!! WOW….so love what you made it’s drop dead gorgeous!!!!!!!!!!!
wow really pretty
Love this! So cool how the sentiment looks like it’s glowing.
oh wow, I love it!
I just keep staring & staring, & have no words to give you, for this piece of art work; really, Beate, you have an art to wrok your eyes & hands into a masterpiece!
Gorgeous card Beate! Love the tutorial! Thanks!
Beautiful!
Amazing technique!
beautiful piece of art, beate! thanks for the video!
Gorgeous and gorgeous, and did I say gorgeous?!!! These deep rich colors are superb, and your tutorials are always fab! Thanks for the inspiration!
WOW! Fabulous card, I just LOVE the colours!
Fabulous card! Thanks for the video!!
Thanks for gracing our hop today – I se your tutorials all the time – thanks for helping inspire us!!
What a beautiful technique. The results are just stunning.
AWESOME!!!!!!!! I love watching your videos ….. and you give me such inspiration…..thank you……..
So cool, you can make this look so easy, I think you just have natural talent, Wonderful card!
you are my hero-love your work!!
This is fabulous Beatte! I have been trying to figure out what I wanted to do on a Vintage ATC! I don’t have any of the supplies you used, but I may have substitutes to try this. Thanks for the video and all that you do! Hugs Lori Reinholz
9Beate now that I have the issue of getting you blog back…knock my socks off! The richness of the colors is fabulous… the Distress Inks are great to work with! Thanks!
OMG Beate diese Karte ist der Hammer, die Farben sind ssssssssssooooooooo schön, ich bin total begeistert, ein TRAUMWERK *schwärm*
Liebe Grüße
von Anke
so wonderful!
Hi,
Thank you for this video !
love it!! super job on the tutorial.
This is absolutely GORGEOUS Beate! I have to try that acrylic resist. . .just beautiful!
Oh, my! The colours and shading on this are amazing! I love, love the result. 😀
Cindy