

Here is the tutorial for the grunge flower I posted yesterday.
Step 1:

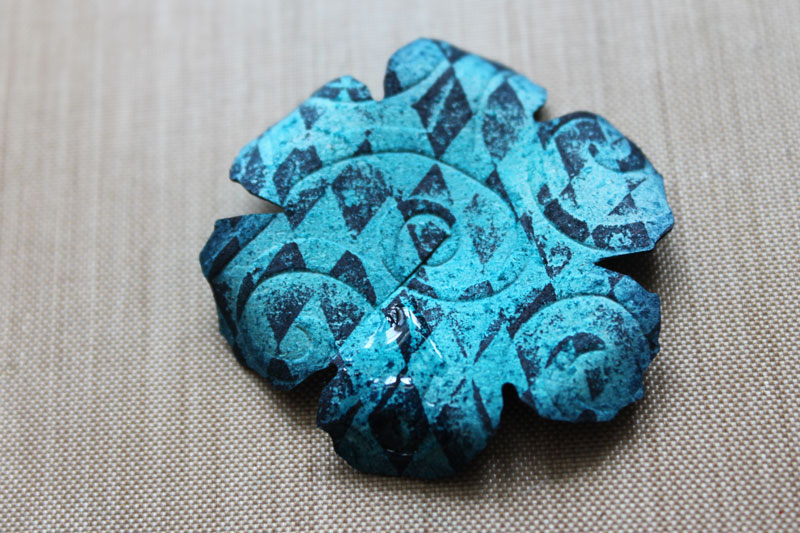
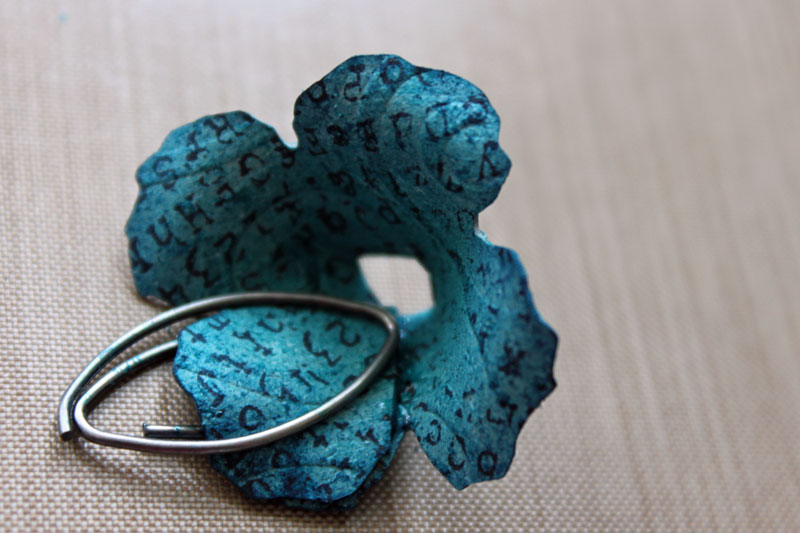
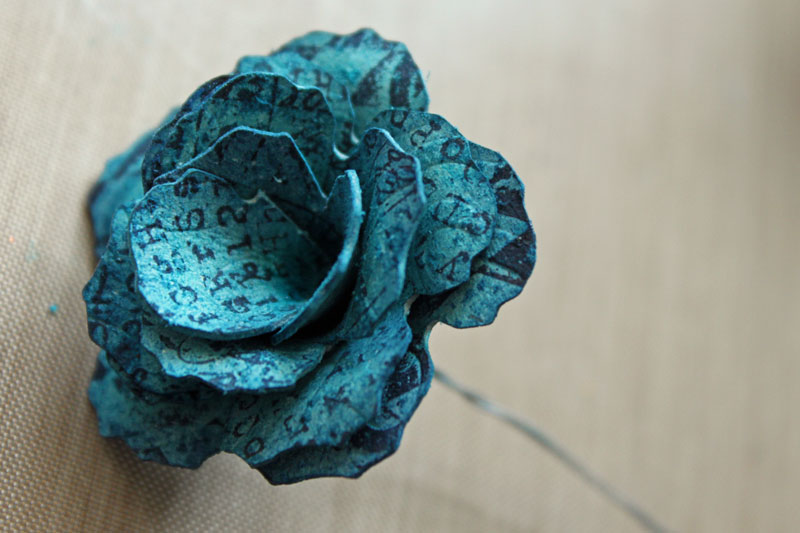
Cut three six petal flowers out of grunge paper that had been embossed with Cuttlebug’s Divine Swirls Embossing Folder. I used Tim ‘s Tattered Floral Alteration Die. The flowers were sponged first with Stream Adirondack , then with Chipped Sapphire Distress ink. Next they were stamped with Jet Black Archival Ink and stamps from the sets Going Somewhere and Mini Muse.
Cut the first flower between petals to the middle of the flower.
Cut one petal off the one flower and two petals of the other. Keep the extra pieces.
Step 2:
Roll each petal betwen your fingers to shape the petal.
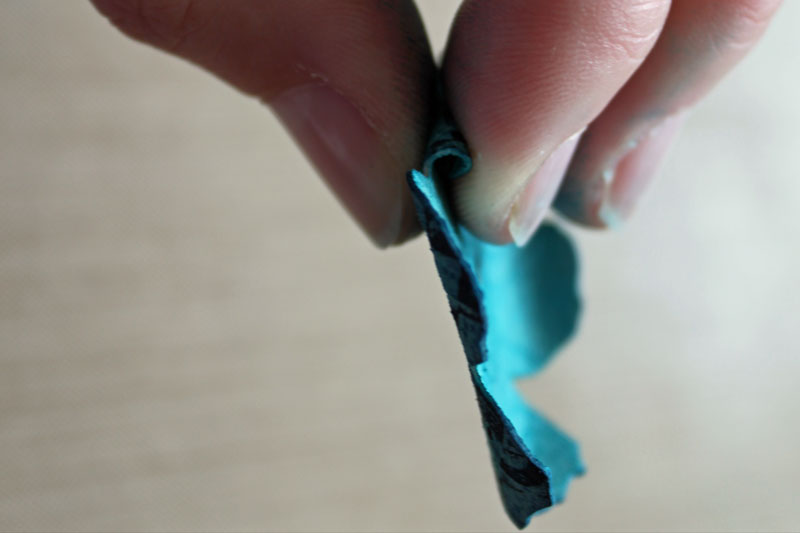
Step 3:
Add adhesive on the right petal next to the cut.
Step 4:
Fold the petal left of the cut over the right one and press down. To hold in place while drying, I use a paper clip.
Step 5:

Repeat step three and four with your five petaled flower.
As well as with your four petaled flower.
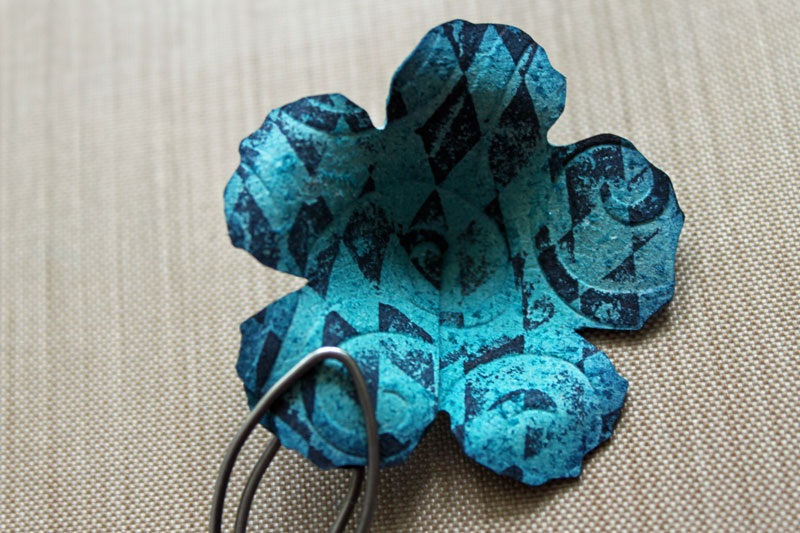
Step 6:

On your two petaled piece, roll the right panel down like all your other petals. Add adhesive to the back of your left panel.
Roll the left panel over the right creating a cone. Hold cone together while glue dries either with wire wrapped around it or a clothes pin.
Let all pieces dry. Five minutes should be enough.
Step 7:

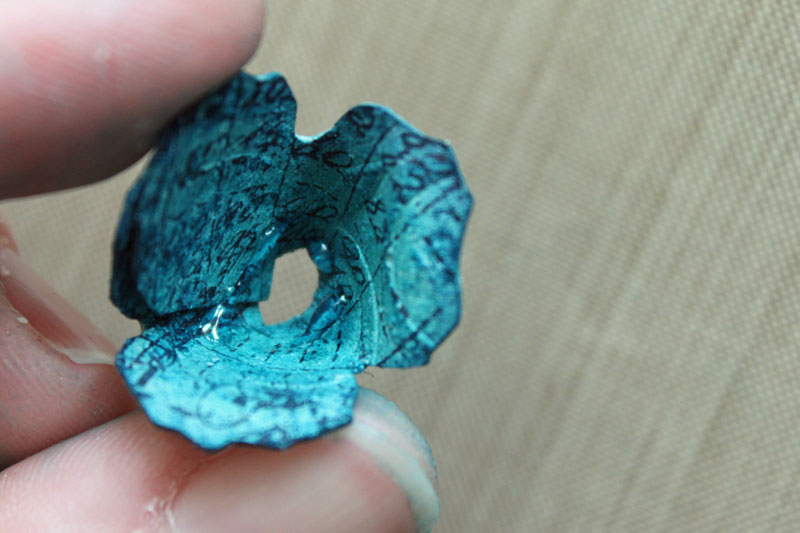
Cut a hole on the bottom of your four petaled cone.
Step 8:
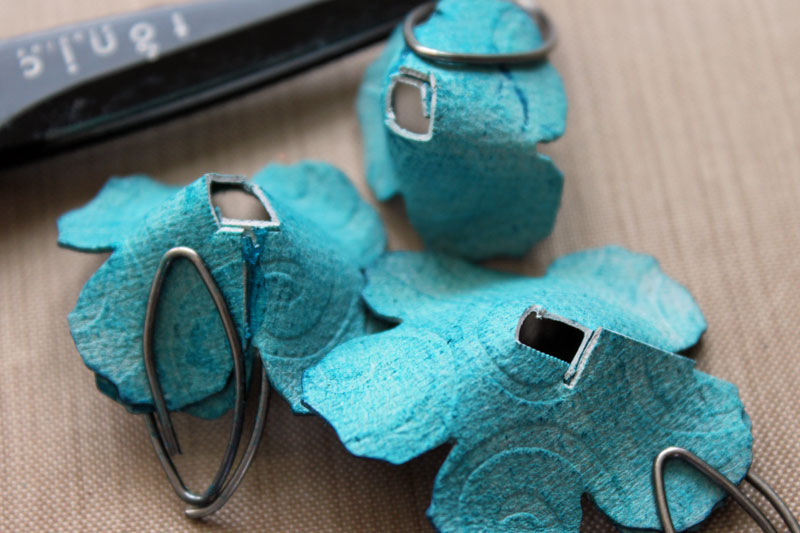
Repeat step 7 with the five and three petaled cone.
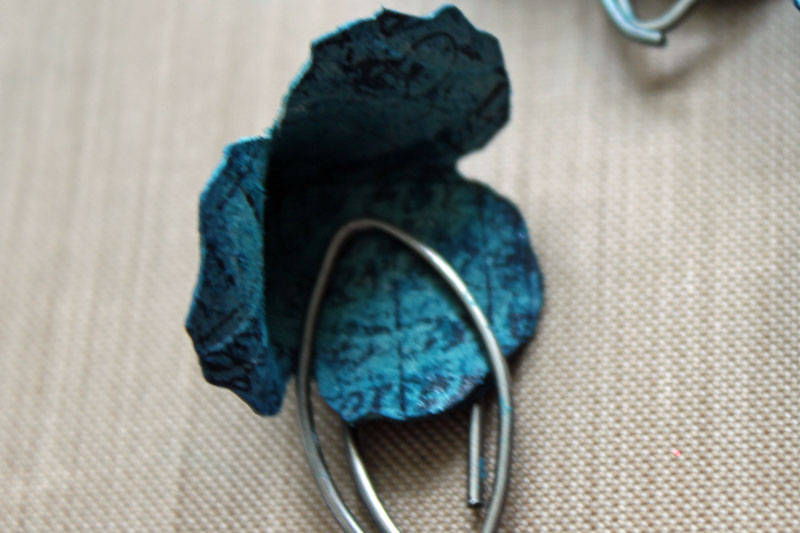
Step 9:
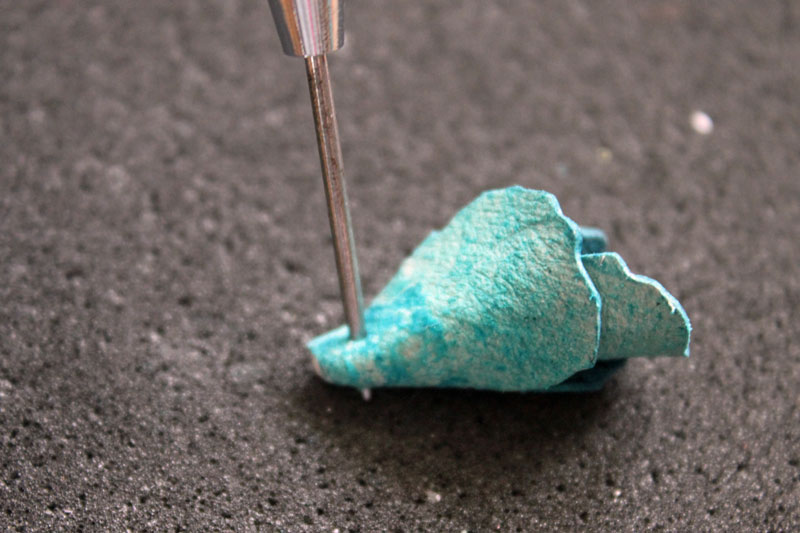
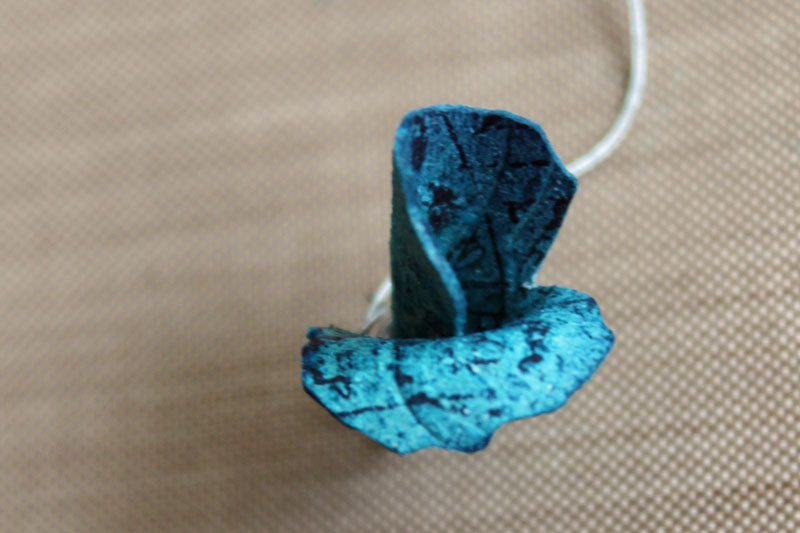
Poke a hole through your two petaled cone.
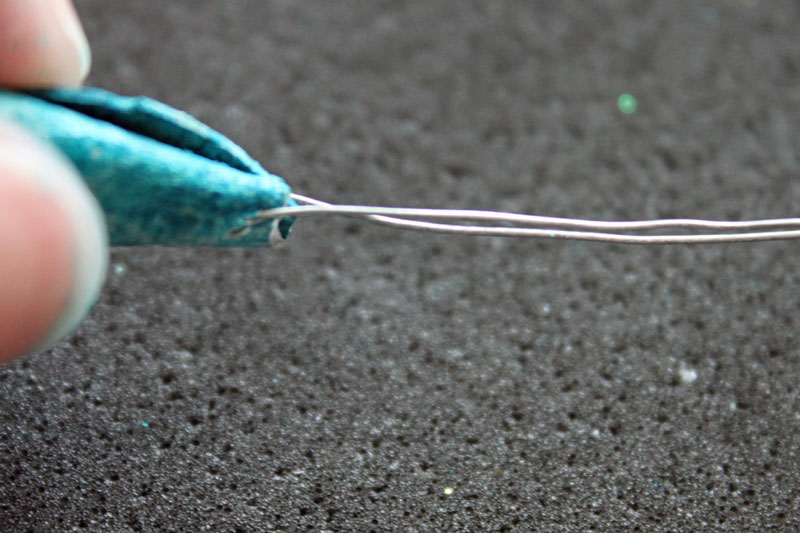
Thread a wire through the hole. Center the flower cone on the wire. Fold the wire ends together.
Step 10:
Roll the edges of your single flower petal inward, like a gate fold card. Cut the bottom off and slide into your two petaled cone.
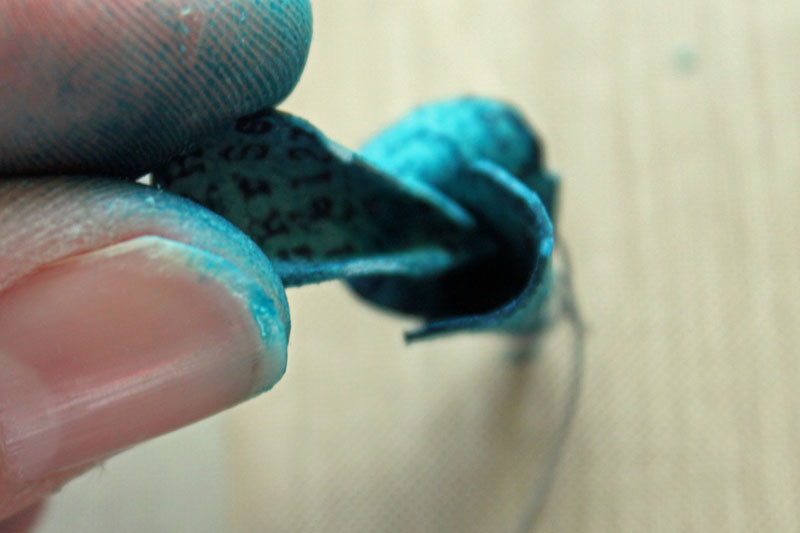
Step 11:
Add adhesive on the edges of the center of the three petaled cone.
Thread your two petaled piece into your three petaled cone.
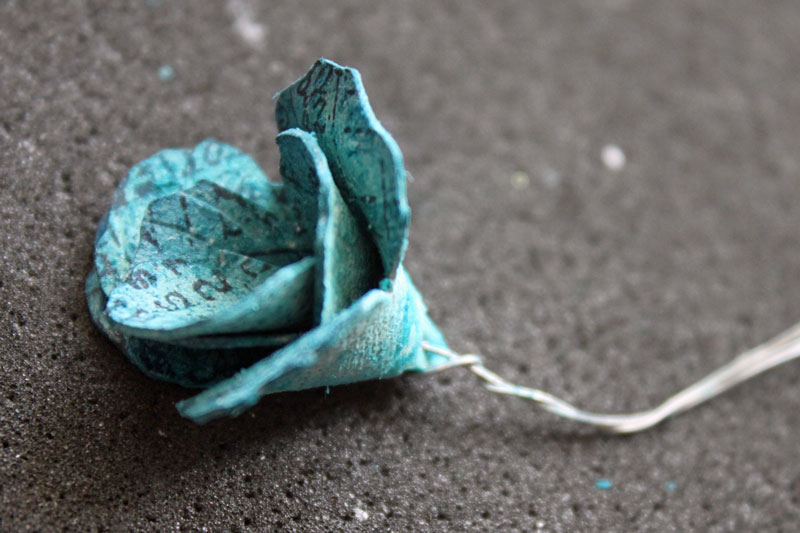
Step 11:
Repeat step 10 with your four and five petaled cone to finish your flower.
I shot the video for the grunge flower with the bigger die flowers of Tim’s die. I forgot to show to add glue to the inner cones before assembly. Sorry about that. Here is the video for the visual learner:
[youtube]https://www.youtube.com/watch?v=F9kW-wqKE1Y[/youtube]
Thanks so much for stopping by! Have a wonderful evening! Hugs and smiles
Beate
33 Responses to “Grunge Flower Tutorial”
Sorry, the comment form is closed at this time.


WOW!!! These are gorgeous! I love the colors on the flower you created for the video – can’t wait to see what you use that on!! Now I”m gonna have to go try me some grunge paper!
WOW! What a wonderful tutorial. Thanks for sharing.
Fantastic tutorial Beate!
So pretty… saw these on one of Tim’s ’12 tags of Christmas’ and have been itching to try it! Maybe I’ll wait until that flower die shows up… if I can 🙂
Thanks for the video! I am now so excited with this project. I would really love to make this one come Spring!
Beate – this is amazing. It’s almost like watching Tim himself. You got great inspiration.
xo
This is such a gorgeous flower! Can’t wait to give this a try. Thanks so much for your wonderful instructions and amazing video!
Beate! This is gorgeous! Fabulous tutorial!!! I NEED to try it! Maybe it’ll help me to be a little more like you!! You know I adore your style!!! TFS girl!
This is a fabulous tutorial! Love it!
This is so beautiful…..I will have to get this……Thank you so much for all you do for us……You are totally inspirational…….
I have seen this flower before and the tut just didn’t compare to yours! You are the greatest Beatte, TFS your wealth of knowledge
Hi Beate!
Thanks for sharing the details. My question is how do you deal with the odor of that grunge paper? Does the smell dissipate over time? I have mine double sealed in ziplock and just can’t get it out..HELP!
BEAUTIFUL!!!
WOWSA!! LOVE this tutorial Beate! I think I will try this!!!
That is GORGEOUS Beate! I am gonna have to try it! GREAT tutorial!
Great Video Beate!!! Imagine all the possibilities…My mind was racing when I saw this…Thank you also for showing such details as snipping the bottom of the flowers and the paper clip idea!!
Love them inky fingers! Awesome tutorial!
Great tutorial! I love the paper clip tip.
One thing that I use to roll my flower petal edges is a skewer. It works great! Nice edges w/o all the inky fingers:)
Wow, that’s very impressive! That blue-green flower is just gorgeous!
Thanks for the step-by-step tutorial 😀
Cindy
xox
Wow, I love that flower Beate! Fabulous colours and texture on it! Thanks for showing us how to make it in a video!
Beautiful flower Beate!
Great tutorial! If you have the Accent Essentials Cart for the Cricut, there is a flower that will work great on that cart, you can make any size you want. These are just beautiful!
Beate –
Thank you so much for the great tutorial. It really helps to see you doing it.
Elaine Allen
FABULOUS tutorial!!
I love the rose you made with Tim’s dies, (on my wish list before, but now I want them more). I have made GP roses using Wendy Vecchi’s stamps, but the flower die makes a gorgeous rose too. I think I’m addicted to making them, however they start, I love them all. They are so pretty.
Alexandra
Thanks for such a great tutorial. Love your work, can’t wait to try this flower. Still waiting on Tim’s new flower die.
so cool, thanks for sharing!
Love it!!! Thanks for sharing al the how to’s!!!
Oh my!!!! I am in LOVE!!!!! A BIG, HUGE thank you for making this video. I think I feel a flower coming on…I have my grunge paper ready to go…THANK you for all the inspiration!!!! Hugs…
Beate, I love the tutorial. Thanks for showing how to do the stem.. I must give this a try. By the way, I watch all of your video’s. I’m not on the computer much, and watching you with all the latest techniques is a GREAT help. Thanks for being so inspiring 😉
very nice tutorial. your instructions are very clear and it makes me want to create a bunch of flowers. I have access to lots of Tim’s products so I think I need to run out and scoop up a bunch. thanks
This is a wonderful tutorial.. I just got the dies and have been wanting to try these.. Thanks so much for taking the time to do this..
thanks for sharing–love your tutorial!