
Today’s tutorial on Splitcoast is written by Roni Johnson. It’s for the Distress Glue technique. For my sample I cut a square with Classic Square Nestabilities, added Tacky Glue, let it dry and then sponged it with Weathered Wood and Stormy Sky Distress ink. The square was layered on a black Fair Isle Pendant.

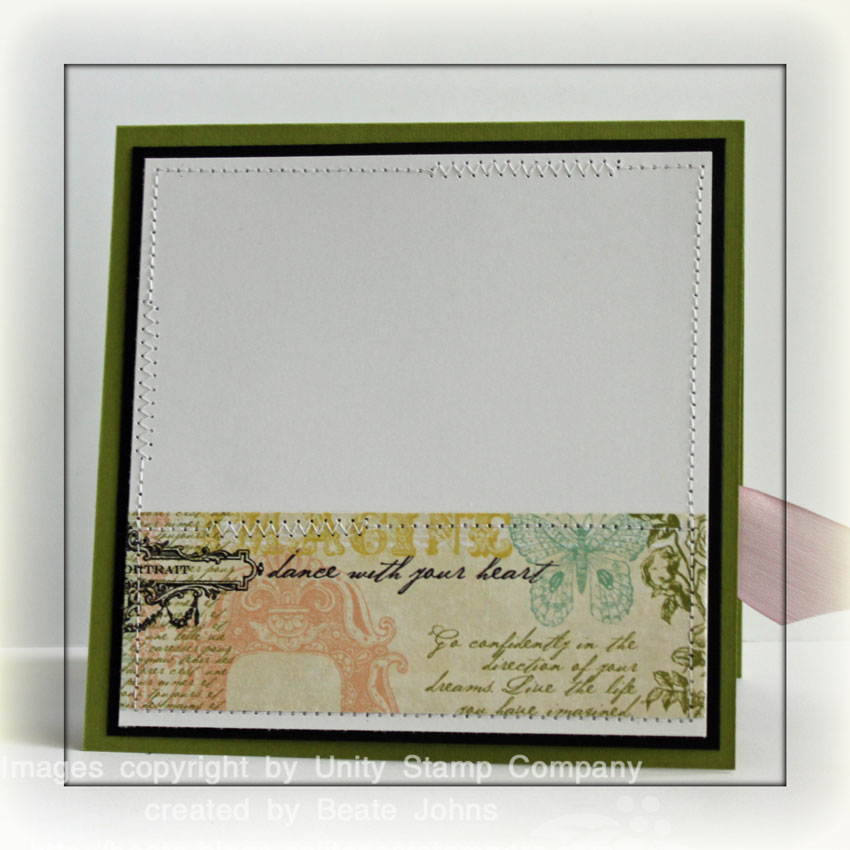
A 4 1/2″ square of Webster’s Pages paper was stiched to a 4 11/16″ square of black cardstock. A 4 1/2″ strip of Neenah Solar White cardstock was cut with the Lattice Borderabilities and adhered to the lower half of the square. A hole was punched in the lower right hand side of my main image before it was adhered to the card front with dimensionals. Pink Satin Ribbon was tied through that hole and around the layers and topped with a button. My card base is a 5″ x 10″ piece of Textured Old Olive cardstock folded in half. The layers were attached to the card base with dimensionals.
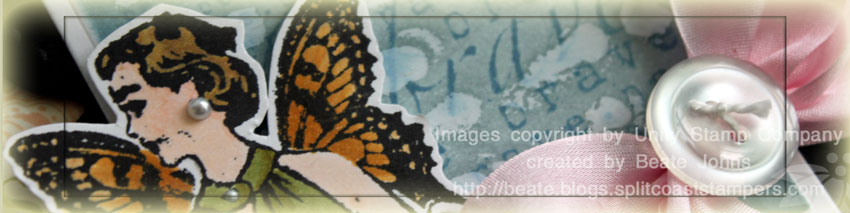
The butterfly lady (or as Jenn and I call her “Frida”) is from the Unity set Brave Girl. It was stamped in Black Soot Distress Ink on Neenah Solar White cardstock and colored with Copic Markers (![]()
![]()
![]()
![]()
![]()
![]()
![]()
![]()
![]() ). White Opal Liquid Pearls were added to her dress and a Kaisercraft Pearls Pearl as her earring. The butterfly wings were colored with the clear Spica Pen for a subtle shimmer. She was cut out and adhered to the square with dimensionals.
). White Opal Liquid Pearls were added to her dress and a Kaisercraft Pearls Pearl as her earring. The butterfly wings were colored with the clear Spica Pen for a subtle shimmer. She was cut out and adhered to the square with dimensionals.
The inside of the card is pretty simple. I used the left over strip (1 1/2″ wide) from the Webster’s Pages paper from the front, cut it down to 4 1/2″ and adhered it to a 4 1/2″ Solar White square. The square was stitched to a 4 11/16″ basic black cardstock piece before it was adhered to the inside of the card.
Here is a video for the visual learner:
[youtube]https://www.youtube.com/watch?v=yK_SHszRwo4[/youtube]
Thanks so much for stopping by! Have a wonderful day! Hugs and smiles
Beate
12 Responses to “Tutorial on SCS – Distressed Glue”
Sorry, the comment form is closed at this time.


BEAUTIFUL Beate.
Love what you did with that Unity/Melody stamp set! So pretty, Beate! It was great seeing and hugging you!!!
That card looks very pretty!
LOVE it 🙂
I love this technique!!! I can’t wait to try it! And I so love the video as I’m SUCH a visual learner! Oh and it was great chatting with you at CHA, really enjoyed meeting you!
Eine umwerfend schöne Karte liebe Beate, ich mag Deine Innenteile auch immer so gerne.
Liebe Grüße
von Anke
This turned out just lovely, Beate!! I so enjoy your videos…they really help those of us who are visual learners!
Gorgeous creation and love the technique Beate!
neat technique, I think I could do this one 🙂
Gorgeous card! Your design rocks. Thanks so much for sharing your wonderful video tutorial!
Gorgeous card, Beate! I LOVE that technique. . .it’s the first time I’ve seen it!
Great tutorial and beautiful card. As a visual learner I thank you for taking the time to teach.