
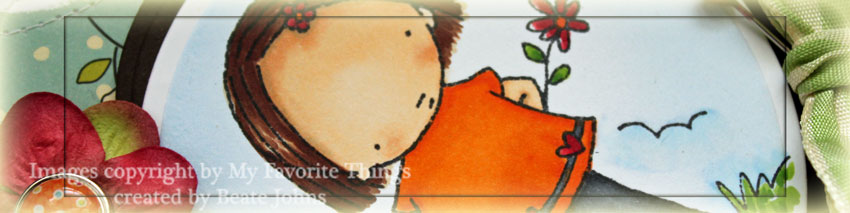
I love this Pure Innocence image. I love them all, but this one seems especially cute. Maybe it’s the clothes that remind me of Rebecca’s. Maybe it’s the way she stands with the flower behind her back. Anyway…I had to use her as soon as I she came in the mail and I knew I wanted to use her in one of the video tutorials.
The Flower Girl Image was stamped in Tuxedo Black Memento Ink on Neenah Solar White Cardstock and colored with Copic Markers (YG25, YG17, R35, R37, C03, C05, C07, E31, E25, E29, E51, E53, E55). It was cut out with Classic Circle Nestabilities and layered on a Chocolate Chip layer cut and embossed with Blossom Nestabilities.
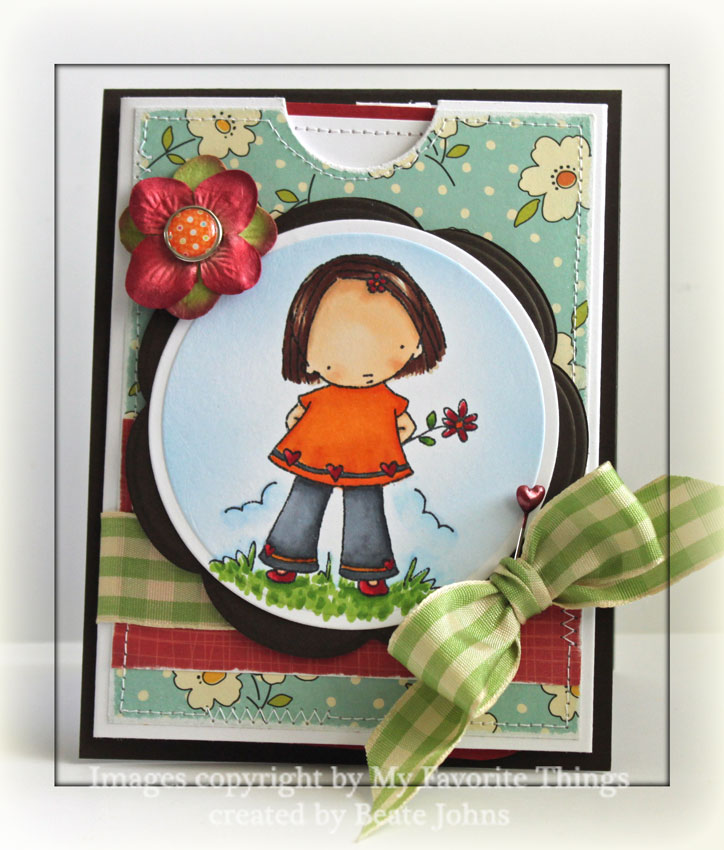
The card base is a 4 1/4″ x 11″ piece of Early Espresso Cardstock folded in half. The slider part was created out of Neenah Solar White cardstock. It was topped with a 3 3/4″ x 5″ piece of Report Card October Afternoon Paper. A 2″ x 3 3/4″ strip of Early Bird Cosmo Cricket was adhered to the lower half of the slider part and Gingham ribbon was tied around. A small heart pin was added to the bow.The image was adhered to the front with dimensionals. The card front was finished off with Prima Flowers.
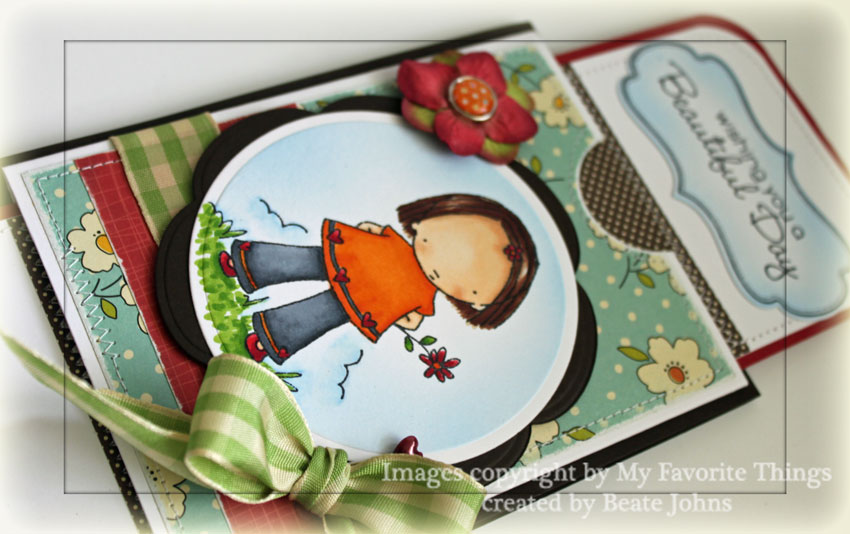
When you pull out the slider part, you will find a My Favorite Things Sentiment stamped on the matching Framed Greetings Die-namics die cut-out. The cut out was airbrushed with the same marker used to airbrush the main image.
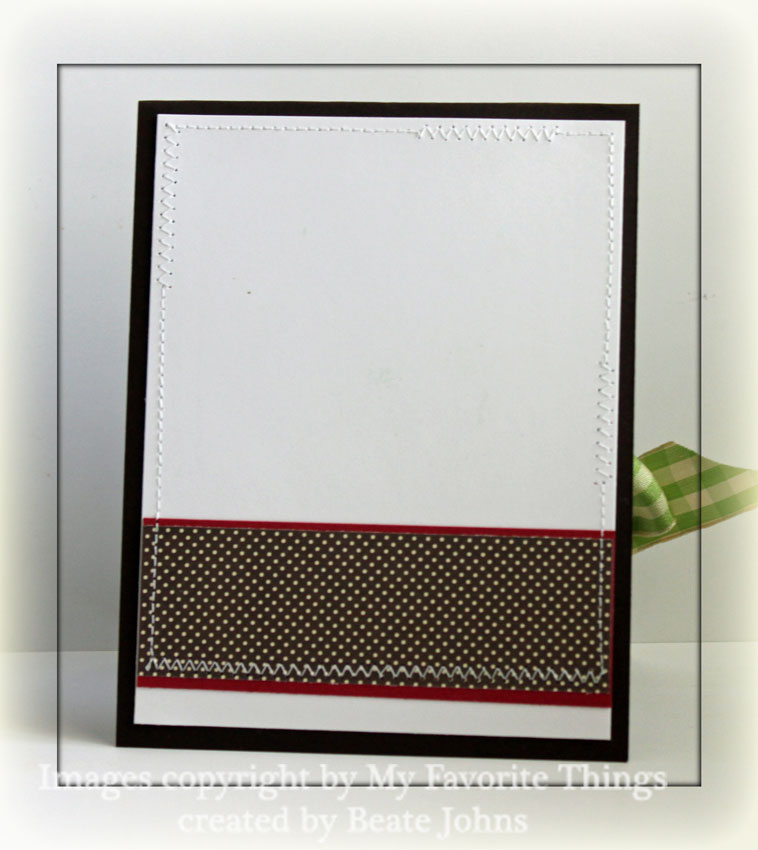
The inside was kept pretty simple. I just have a hard time leaving them completely blank.
Here is a video for the visual learner:
[youtube]https://www.youtube.com/watch?v=dgaIVVsaBc0[/youtube]
Thank you so much for stopping by. Have a wonderful day!
Hugs and smiles
Beate
16 Responses to “Video tutorial – Slider Card”
Sorry, the comment form is closed at this time.


this is SO cute and you’ve colored the stamp to perfection! Cant wait to try this out!
Your card is stunning as always! Thanks for the video.
Sigh…I LOVE this Beate!! GORGEOUS layout and your coloring is totally AMAZING!!!
Liebe Beate,
was für eine raffinierte Kartentechnik, vielen lieben Dank für diese supergeniale Anleitung.
Deine Karte ist wunderbar geworden, total goldig das kleine Blumenmädchen.
Einen schönen Tag
wünscht Dir
Anke
Beautiful card, it melts my heart
Oh, she is absolutely adorable, Beate! I love the slider card!
Beate this is darling!!! Love this cute PI image, the designer papers and of course your great Copic coloring!
Thanks again for your tips with using the Copics at CHA, it was so nice meeting you.
I want to thank you for sharing that video. It is so informative. I have been looking for this kind of post. I can follow your instruction in the video easily that is why I know that I can make it perfectly.
OMW Beate! I’m so inspired right now! This is AMAZING and I HAVE to try it out! Thanks for the video! YOU ROCK my friend! 🙂
This is adorable!!
Love, love, LOVE this card! It is absolutely precious. I am gonna try this later tonight. Can’t wait!!
I just love your creations. You always come up with an idea I’ve haven’t seen before. Love the grocery bag plastic!
Mary Ann
This is so totally cute!!
this is so adorable! love the slider idea and your coloring is amazing as always!!! love this!
too cool, might have to try a couple of these for my great nephews birthdays, tfs the video!
Get out! This is awesome! Thanks for the video, I’m not sure I would have understood it otherwise…lol! Can’t wait to try this one now! You rock!