
Wednesday’s tutorial on Splitcoast was written by Julie Warner. She showed us how to create Faux Brads. I made this sample for the video tutorial .
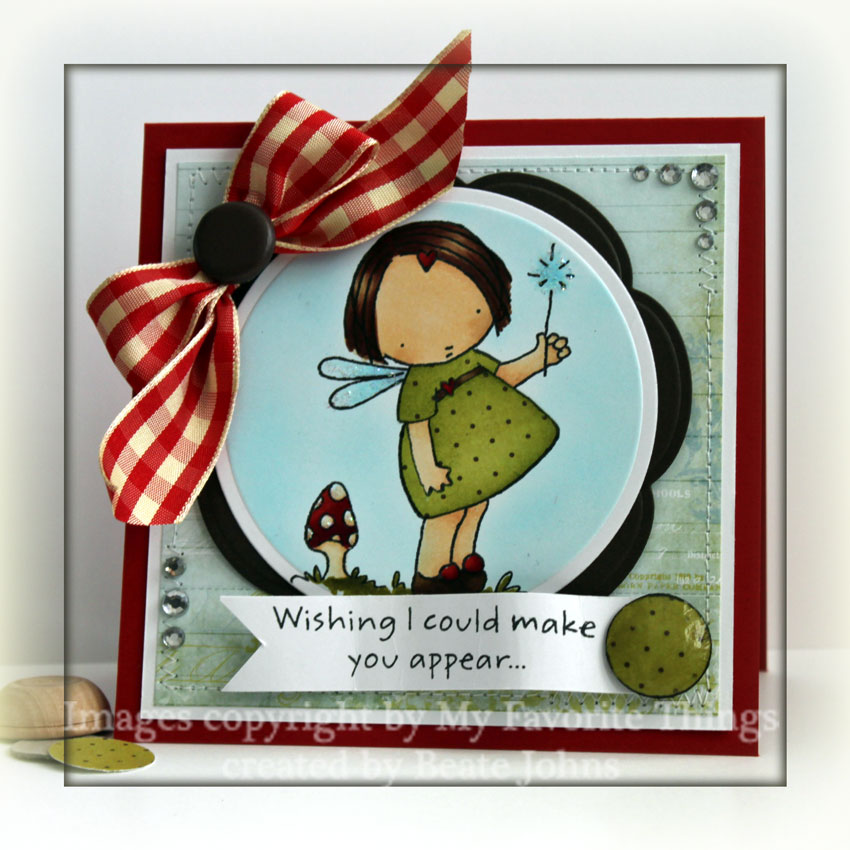
I started out with the darling Fairy Girl from My Favorite Things. It was stamped in Tuxedo Black Memento Ink on X-Press it Blending card. It was colored with Copic Markers (hair: E31, E25, E29 skin: E51, E53 mushroom: R24, R29, R39, E50, E51, E53 shoes: E55, E57, E59 Grass: YG95, YG97, Wings & Wand: B91, B000). It was cut with Classic Circle Nestabilities, airbrushed with Copic Marker B00 and layered on a piece of Canyon Brown Neenah cardstock cut and embossed with Blossom Nestabilities.
A 4″ square of All Fall Fancy Pants paper was stitched to a 1/4″ bigger piece of white cardstock. The card base is a 4 1/2″ x 9″ piece of Red cardstock from MFT folded in half. The two slightly smaller pieces were adhered to the card base and the main image was attached to the layers with dimensionals.
The sentiment is also from the Fairy Girl set. It was stamped in Tuxedo Black Memento ink on a strip of X-Press It Blending card. I was bend into a wavy banner and attached underneath the image with dimensionals.
The Faux Brad was created out of All Fall Paper and cardboard and measures 3/4″. The edges were inked with Walnut Stain Distress ink and the top was clear embossed. Silver Kaisercraft Rhinestones were added to the top right and bottom left of the card. May Arts Gingham ribbon topped with a Stampin’ Up! Brad was adhered to the upper left side of the image to finish off the card.
Here is a video for the visual learner:
[youtube]https://www.youtube.com/watch?v=aPaVjyIbCWQ[/youtube]
P.S.:
If you have never taken the Copic Certification class and want to check it out, you can get more info on Marianne’s blog. They are still accepting applications for the Chicago class next Thursday, the 21st. Jenn Balcer and I will be there and Lori Craig is the teacher. I can’t wait. It will be so much fun!
Thanks so much for stopping by! Have a wonderful Saturday! Hugs and smiles
Beate
17 Responses to “Video Tutorial – Faux Brads”
Sorry, the comment form is closed at this time.


How adorable, Beate! Love that image and how you showcased it using a fantastic design, gorgeous embellishments and colors. Your faux brad rocks! Definitely have to make a trip to Michaels to purchase wooden (buttons?)
Have a wonderful weekend!
Forgot to mention that I LOVED your video! Just watched your video again…. it’s a bowl not button (duh!)
Oh, this is so cute, Beate!
so stinken’ cute!
This is TOTALLY adorable Beate! LOVE the colors, your coloring and the layout!!!
Such a sweet card. And what a great idea to create a brad that way!
Adorable card, and great brad!!! Thanks for another video full of information! Wish I COULD get to Chicago for Copic class!!! Hugs…
wow great card and super neat idea. Thanks for sharing. Have a wonderful weekend.
xo
tina
Super cute card Beate…and love the tutorial!! Wish I could come see you in Chicago…but have a great time!
Cute card Beate! Love the sentiment! Wish I could make you appear with crafty supplies in tow to teach me a few tricks of the trade 🙂
This is completely cute!! Love the faux brads!!
this is darling, Beate! love the adorable image. off to watch the video! have a beautiful Sunday! =)
Clever!
Eine traumhaft schöne Karte liebe Beate, so wunderschön gestaltet, ein großartiges Werk.
Herzliche Grüße
von Anke
Holy CROW Beate this is a beauty! Love your coloring, and all those pops of red.
What a great tutorial, I love it!
Your beautiful card is being featured as part of Our Favorite Finds today!
I love this Beate.. I am going to have to give this a try for sure!!
Cute card and another great tutorial, Beate! I love your stylus tip for the Xyron to get rid of unwanted adhesive along the edges!