
Today’s tutorial on Splitcoaststampers is written by the sweet and talented Tosh Leyendekker. She shows us how to create loopy flowers out of felt strips.
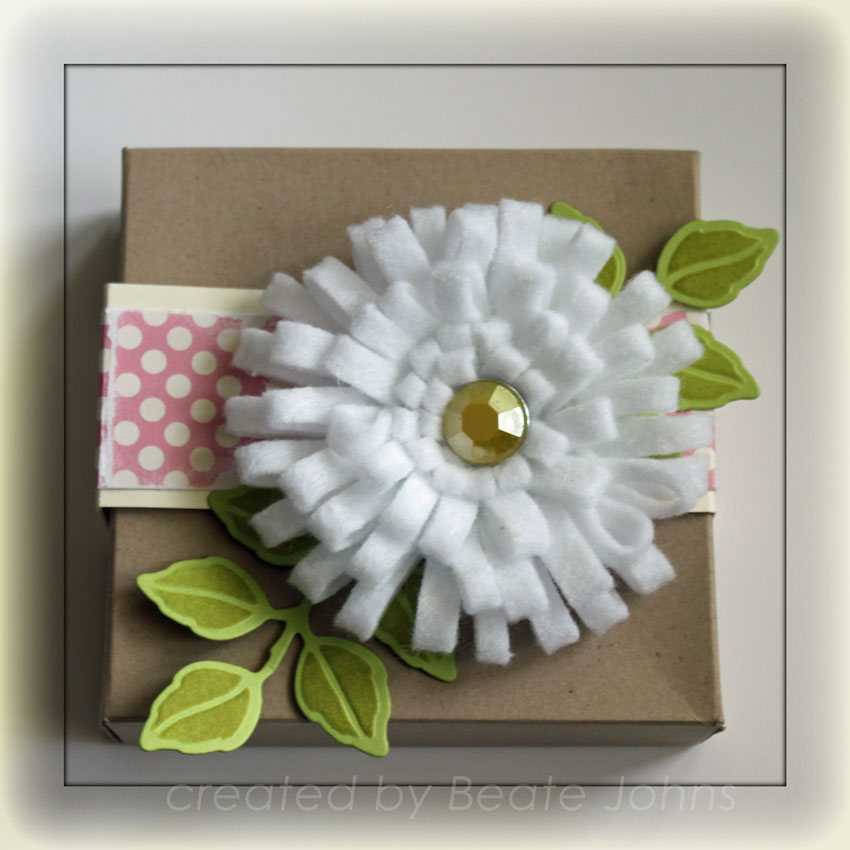
The finished flower is around 3″ big. I cut and embossed leaves out of MFT’s Sour Apple Cardstock with on of Spellbinders new Foliage dies. The leaves were sponged with Shabby Shutter Distress ink before I adhered them under my Loopy Flower. I placed a retired Pink Paislee brad in the center of the flower.
The flower was placed on a pizza box I had sitting on my shelf unfinished. Not sure why I never finished it. The pizza box base is was created out of Kraft cardstock, the patterned paper used is from October Afternoon’s Ducks in a Row line.
Here is a video for the visual learner:
[youtube]https://www.youtube.com/watch?v=EKdtXNYeKOA[/youtube]
Thanks so much for stopping by! I hope you have a wonderful week!
Hugs and smiles
Beate
26 Responses to “Tutorial on SCS – Loopy Flower”
Sorry, the comment form is closed at this time.


LOVE this Beate! That flower is AMAZING…off to check out her tutorial!!!
Love love this Beate…..so pretty!
Beautiful blossom, Beate. You always come up with the best ideas and inspiration. Thanks so much for sharing your wonderful video!
This is beautiful, I will have to check out the tutorial!
Hugs,
Peggy
Wahnsinnig schön Deine Box liebe Beate, die Blume schaut gigantisch aus.
Liebe Grüße
von Anke
I love these flowers! I have seen some like this in the store, but refuse to pay the price, now I don’t have to resist, I can make them myself in whatever color I want. I’m thinking it might be fun to try this with some fabric scraps too.
Thanks for the tutorial. Love it!
thanks for the video tutorial can’t wait to try it out
Beautiful … TFS
Such a pretty flower. I’ll be back later to check out your video. Have a wonderful day!
I love the flower. Very pretty!!
very pretty, thanks for doing the video
Fun Flower!
Hope you finding some peace during the packing! Best of “moving” wishes. Your fans in SW Ohio are going to miss your crafting wit and wisdom! Happy Trails.
I love the look and fullness of the flower – thanks for the video…
have a great weekend
tina
LOVE this flower! Thanks so much for the video tutorials, Beate. They make such a huge difference for me.
GORGEOUS! Love it.
that is a beautiful flower! off to check out how it’s made! =)
Thank you so much..Such a beautiful felt flower..Thanks for sharing..Bless you heaps..Love these little video insperations…frenchpossum west australia
THANK YOU SO MUCH! for doing this video! I have always wondered how to make this flower. Thanks!
Hi Beate! My heavens you have the patience of Job! I do love this flower, it is just stunning. Oh that “foliage,” which I have is beautiful as an addition…TFS!! Have a great weekend!!
When I first saw the flower I thought it looked hard, but I can see how easy it is. I just need to run off the Michael’s for felt.A good project for Saturday!
This is SO pretty, Beate!!
Love this…nice flower! 🙂
Great, Beate! Thanks for the vid…I really do need those ;o)
This is such a great idea and technique. I need to file this away for future use. Great video, but then you always do such a great job with your videos. You make everything look so easy, and everything you do turns out so beautifully. Thanks for the time you take to show us so many wonderful ideas! Best, Curt
Oh, how FUN!!
Wonderful projects!! Thanks for the tutorial!