
I should just call the remake of those super old tutorials blast from the past. I wrote the original tutorial back in 2004. It definitely needed a make over! For my Burned Batik sample I chose Taylored Expressions Friendship Blooms stamp set. With it’s big branch and flowers it was just perfect for it.
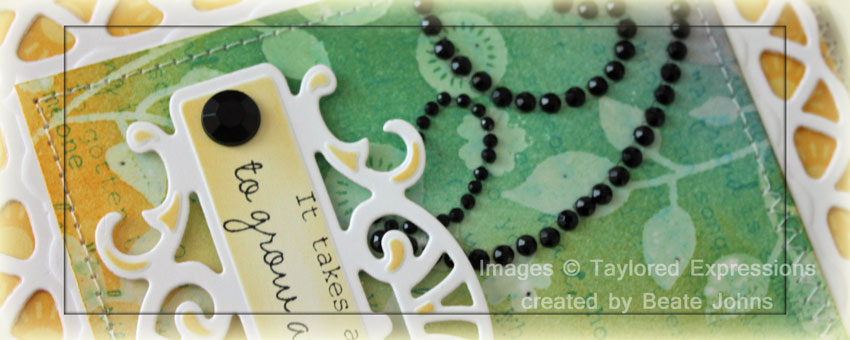
Images from that set were stamped in Embossing ink on a 2 7/8″ x 3 7/8″ piece of Neenah Solar White cardstock. They were embossed and heated until most of the embossing powder melted away. Then the layer was sponged with Wild Honey, Broken China and Peeled Paint. A bigger sentiment from the set was stamped all over the panel before it was buffed with a piece of cloth. The layer was stitched to a piece of white cardstock that had been cut and embossed with the largest of the Lattice Rectangle Nestabilities dies (sorry, I can’t help myself! I LOVE that die!).
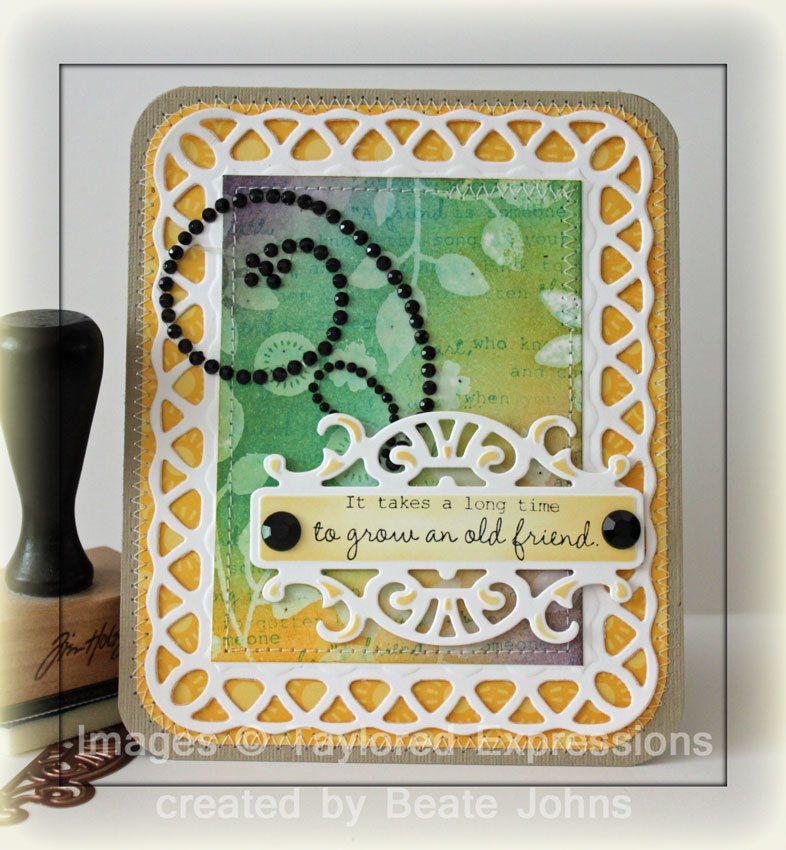
A sentiment panel was cut and embossed out of white cardstock with one of Spellbinders Fancy Tag Three dies. It was sponged with Wild Honey ink and a sentiment from the Friendship Blooms set was stamped in the center with Jet Black Archival ink.
Part of a black Rhinestone swirl was adhered to the upper right hand side before the sentiment panel was adhered with dimensionals. A big black rhinestones were attached on each side of the sentiment panel.
The corners of a 4 1/4″ x 5 1/4″ piece of Home Town Pink Paislee paper were rounded before the layer was stitched to the card base, a 4 1/2″ x 11″ piece of Textured Kraft cardstock folded in half. Each corner of the card base was rounded as well.
Here is a video for the visual learner:
[youtube]https://www.youtube.com/watch?v=3vGAxtRq6yM[/youtube]
Make sure to check out the new tutorial on Splitcoast today. Starla Nelson is showing us how to stamp on Metal.
Thanks so much for stopping by! Have a wonderful day!
Hugs and smiles
Beate
15 Responses to “Video tutorial on SCS – Burned Batik”
Sorry, the comment form is closed at this time.


thank you for sharing so much of your talent. i love it. makes my day.
Yes…a very fun technique! I love the colors you chose, including the beautiful purple! You have sold me on that lattice die…I just love it! TFS!!
This is absolutely gorgeous! TFS the tutorial!
Wonderful tutorial and beautiful card, Beate!! I love the colors, images, and beautiful dies you’ve used!! (I’ve ordered that Lattice die…lol). The bling is such a pretty accent as well!!
Oh wow, just gorgeous, Beate!
I get all excited when I visit your blog and you have another video tutorial for us…Thank You!
I love this technique, Beate. I need to invest in more distress inks, the ones I have are not as bright as these. Such a fabulous card! x
Liebe Beate,
was für eine traumhaft schöne Karte, einfach umwerfend. Die Technik ist genial, vielen lieben Dank für Deinen super Workshop.
Herzliche Grüße
von Anke
Gorgeous Beate!! Love your use of dies!! That technique is so creative and beautiful!! I will have to try it. I hope you are getting settled in your new home.
hugs,
Chris
Oh my word! That is gorgeous! LOVE it, Beate!
so pretty, love that background, the tag works great with the framing!
OOOOOOOOOOOH! This is AMAZING Beate! LOVE this background and the nesties are STUNNING!!!
such beautiful colors. gorgeous card, Beate! thanks for the video, too! =)
Gorgeous card, and you know how much I love your tutorials! Thanks!!!!
Beautiful card, very interesting technique. Will have to try this one. TFS!
ooh I need to get my hands on some Spellbinder dies! Maybe next time my aunt visits Pakistan, I will have to beg her for these. Your creation looks absolutely phenomenal!