
Today’s tutorial is written by the wonderful Cindy Lawrence. She shows us how to tailor an envelope or as she puts it “Hip to be a Square”.
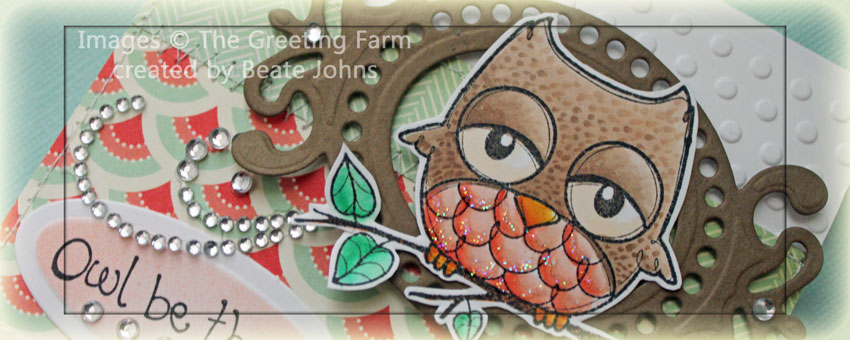
For my card that matches the tailored envelope I started by stamping the owl from The Greeting Farm’s Forest Friends in Tuxedo Black Memento Ink on Neenah Solar White cardstock. The image was colored with Copic Markers (R00, R01, R02, R05, E41, E42, E43, E44 G00, G02, G05, E50) and cut out. I chose the owl image so the card would work for Patty’s Hope you Can Cling To challenge.
A frame was cut and embossed with a Fancy Tag 3 and Classic Oval Nestabilities die out of Stampin’ Up!’s Soft Suede cardstock. The owl was adhered to the frame and a Baby Bling Rhinestone was adhered to each end.

The card base is a 4″ x 8″ piece of Solar White cardstock scored in half. The bottom corners were rounded.
A 3/4″ x 4″ piece of Cosmo Cricket Clementine paper was stitched slightly over a 2 1/2″ x 4″ piece of the same paper pack. A 1 1/2″ wide strip of white cardstock was embossed with Cuttlebug’s Polka Dots embossing folder and adhered under the layers. Everything was taped to the card base.
A sentiment from the set was stamped on a piece of white cardstock that had been cut and embossed with the smallest of the Petite Oval Nestabilities die and airbrushed with Copic Marker R02. It was adhered to the lower right edge of the horizontal layers. Baby bling was lined up under the sentiment and part of a Finesse swirl was adhered slightly over it. The frame with owl was adhered to the card base with dimensionals. Stardust Stickles over the pink feathers of the owl finishes off the card.
Thanks so much for looking! Have a wonderful day.
Hugs and smiles
Beate
13 Responses to “Tutorial on SCS – Tailored Envelope”
Sorry, the comment form is closed at this time.


Oh, Beate! I just love this card…what a sweet owl! TFS!
Hugs,
Brandi
This is adorable! I love the Stickles glitter on the owl and added bling. I also like how you added texture to the owl. 🙂
Hugs~
Hello!
I love everythng about this card – it is so happy and your coloring is beautiful! I love all that you create and check your blog every day to see what is new! Thank you for sharing your awesome talent!
Wishing you a wonderful week!
Hugs,
Barbara Diane
I love owls and this card is darling! That paper at the bottom could not be more perfect, I love the way it echoes the lapped feathers on thw owl’s belly! Also love the way you made a frame out of the fancy tag, so cool!
Too stinkin cute Beate! Love the image and how you added stickles…one of my favorite embellishments! TFS!!
Oh my gosh! That owl is so stinkin’ cute!!! I really need to try out that tutorial by Cindy. TFS!
Ha ha….this makes me happy! What a fun card – love the colors, and the DP is perfect!!! Great job with the fancy tag, too – love it!!!
So cute. I love the way the deigner paper mimics the owls chest. The tutorial on SCS was also great. I can’t wait to make some square cards.
God bless,
Peggy
very cute, like the owls eyes and how you framed him!
Your owl is so cute and I love the sentiment.
too darn cute! this made me smile BIG! love love it, Beate! fabulous coloring and design. YUM! =)
I love that sweet little owl. Great with the stickles and what a find, the matching paper! GREAT card!
How CUTE…..I just Adore that GF Owl….Reminds me to use it soon!!!! Love him….