
I created this card as a sample for the video tutorial for the Suspension card as well as another HYCCT challenge. Wanda is the hostess of that challenge and she challenged us to have a hanging element on your project. I thought it was the perfect occasion to create a suspension card.
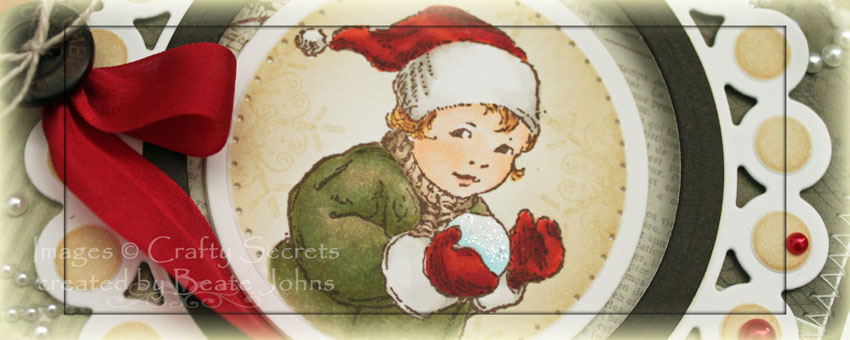
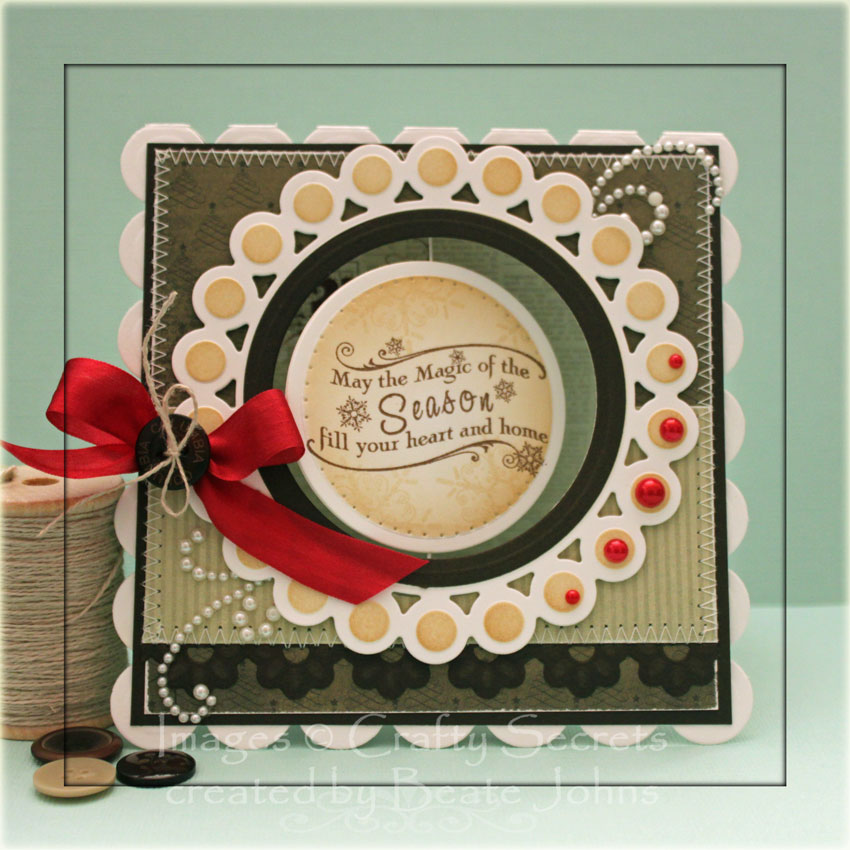
I cut and embossed two circles out of Neenah Solar White cardstock. On one I stamped an image from Crafty Secrets Winter Wishes in Rich Cocoa Memento Ink, on the other a sentiment from the same set. The image was colored with Copic Markers (Hat/Gloves: R05, R24, R29, R39 Coat: YG91, YG93, YG95 Skin: E0000, E00 Hair; Y23, E33) before it was masked and the circle was sponged with Antique Linen and Vintage Photo Distress ink. A snowflake image of that set was stamped over the circle with Antique Linen.
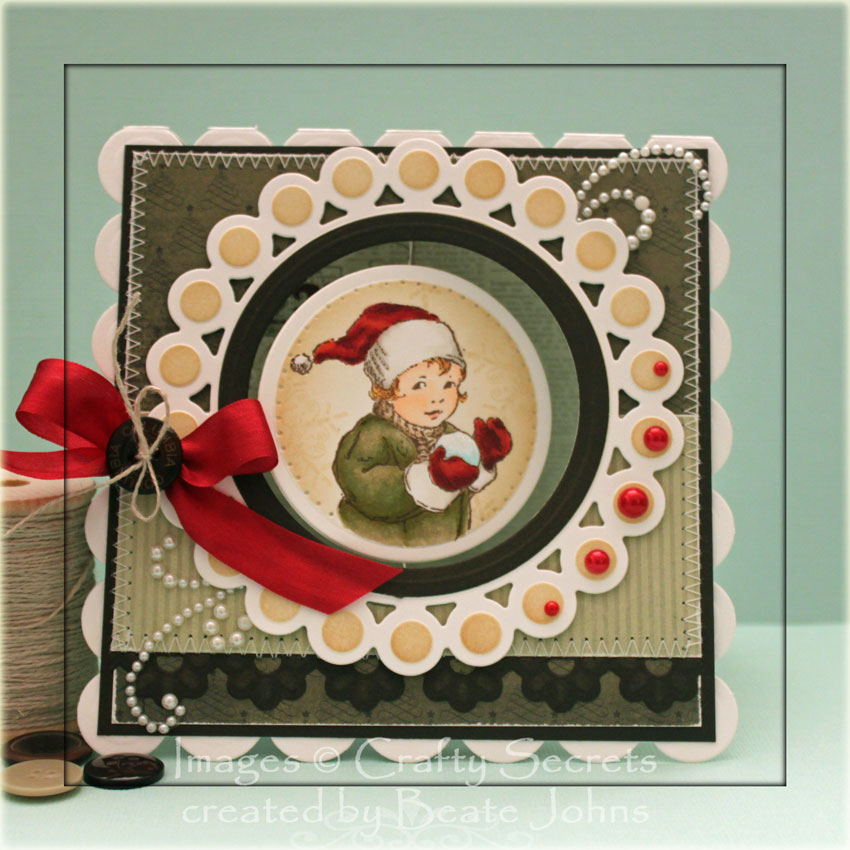
I created a frame for my window on the card front with a Beaded Circle Nestabilities die as well as a Classic Circle die out of Neenah Solar White cardstock. The frame was sponged lightly with Vintage Photo distress ink before a slim circle frame cut with Classic Circle dies out of Canyon Brown cardstock was added over the frame.
A strip of Canyon Brown cardstock was cut and embossed with a Floral Doily Accent die. It was adhered under a 1 7/8″ x 4 1/2″ piece of MME Lost & Found Christmas paper that was adhered to a 4 1/2″ square of the same paper pack. The layers were stitched to a 3/16″ bigger piece of Canyon Brown paper. A window was cut into the layers with a Classic Nestabilities die. It didn’t quite cut through the three layers and I used a Hobby Knife to finish the cut. A pearl swirl was cut in pieces. Part of it was adhered to the top right, part to the lower left of the window.
The card base was cut with one of the Grand Scallop Square Nestabilities dies out of white cardstock. Again a window was cut in the center with the same circle die used to cut the window in the other layers. The card front was adhered to the card base.
Here is a video for the visual learner:
[youtube]https://www.youtube.com/watch?v=i1geoRxwtEQ[/youtube]
Thanks so much for stopping by! Have a wonderful day.
Hugs and smiles
Beate
13 Responses to “Video tutorial on SCS – Suspension card”
Sorry, the comment form is closed at this time.


Hello!
This is such a beautiful card – I love everything about the layout and accessories! You are so creative and have a wonderful eye for balance in your designs! As I an a very visual person I love your videos and look forward to every one!
Wishing you a happy day!
Hugs,
Barbara Diane
What a neat idea. Your card is beautiful (as always!!)… thanks for the video showing how to do it. This looks like such a fun technique to do. thanks so much ~ Pam
Such a fun little card, Beate. Beautifully created with such a sweet image and embellishments. Thank you for another super tutorial, too:)
Fabulous and fun little card. Great details!
This is stunning Beate … love your colouring and a great tutorial … Many Thanks
What a fun interactive card. As always, love your image, coloring and layering.
God bless,
Peggy
I love your tutorials!!! This card is gorgeous! Fabulous image to use!
Wow! You’ve got this video thing down to a fine art!! As always I love the layers you create and your colouring is fabulous! I’d love to see the inside if that’s possible? I think so of that show through, is that true.
Having a fishing-fella in the house, I think he calls it fish line, but that might be a Canadian-ism?
Thanks for your awesome inspiration!
Beth Greco
Beate, Thanks for another wonderful tutorial! You really do have the video making down to a science – three minutes! Wowza! Your card is beautiful, love the image – it makes me think of my kids when they were younger. That snowball is ready to fly!!! Great post, as always!
another technique I have wanted to try, I guess I need to keep a list of them, your coloring of that darling image is beautiful, Lovely card all around!
beautiful coloring on the image. darling card, Beate!
Way cute – love that little image on the front, it is really adorable. Inspired to go and try this now. TFS
This is simply FABULOUS, Beate! That image is just TOO adorable! I love the colours and your use of pearls (my favourite embellishment) is always BEAUTIFUL!