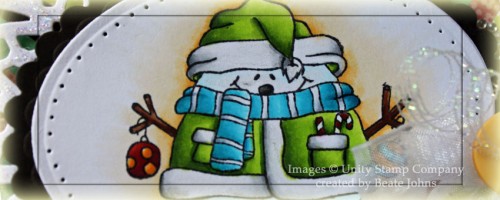
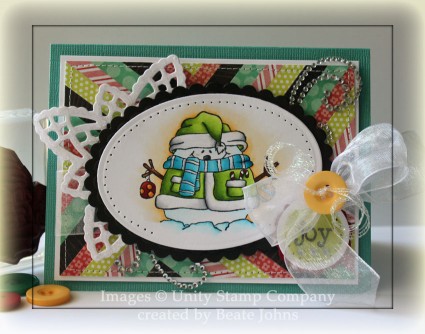
Today’s tutorial on Splitcoast is for the Herringbone technique. It’s a great way to get rid of your small patterned paper strips. For my sample I used an the Itty Bitty Unity image called Roly Poly Winter Joy. I had it colored since the CHA Supershow. It had been stamped with Tuxedo Black Memento Ink on Neenah Solar White cardstock and colored with Copic Markers (not sure about the colors, sorry). The image was cut and embossed with a Petite Oval Nestabilities die. It was adhered to a piece of Canyon Brown cardstock, cut and embossed with a Scalloped Petite Oval Nestabilities die. The edges of the image oval were paper pierced.
The Herringbone background was created with MME Lime & Twist Life of the Party patterned paper. It measured 3 1/2″ x 4 3/4″. It was stitched to a 3/16″ bigger piece of Neenah Solar White cardstock. White Organdy Ribbon was tied around the layers. A Basic Grey button was tied over the bow with Iridescent Curling Ribbon.
A piece of white cardstock was cut and embossed with a Lace Doily Accent die. It was adhered behind the image layers were before those were adhered to the Herringbone layers with dimensionals. The Lace Doily die cut was covered with Stardust Stickles. A sentiment from the Roly Holy set was stamped in Tuxedo Black on a piece of white cardstock cut and embossed with a Classic Circle Nestabilities die. The inner part was airbrushed before the circle was adhered to a piece of Cherry Cobbler Cardstock cut and embossed with a Scallop Circle die. The edges of the sentiment circle were paper pierced before it was adhered under the bow.
The card base is a 5 1/2″ x 8 1/2″ piece of Core’dinations cardstock folded in half. The layers were adhered to the card base and parts of a Finesse Rhinestone swirl finish off the card front.
Here is a video for the visual learner:
[youtube]https://www.youtube.com/watch?v=AMbHmMdUTC8[/youtube]
Thanks so much for stopping by! Have a wonderful weekend!
Hugs and smiles
13 Responses to “Tutorial on SCS – Herringbone Background”
Sorry, the comment form is closed at this time.


OOOOOH! This is AMAZING Beate! LOVE that stunning background, and this snowman is TOO cute…especially with your flawless coloring!
This is absolutely amazing! I saw the tutorial for the background on SCS, and wanted to stop by to comment on this fun, fresh and gorgeous creation. Beautiful work; you never disappoint!
No video! :<(
Barbara Diane
Eeeeeeeeeeek That image is so adorable and your coloring is perfect!!! I love the colorful paper and that doily! Just darling Beate!! 🙂
Love it! What a lot of backgrounds I could make with the tons of scraps I have. Thanks for showing us this wonderful technique!
Love love love this, Beate! That technique is SO cool!!! LOVE it! So glad I just ordered that snowman from Unity a couple of weeks ago!!!
This is really pretty and I love your coloring! Hugs, Karen
great idea for those scraps. thank you and i missed you this a.m. but glad you are up and running again.
this is so cute! thanks for the video tut … great idea for all those scraps i can’t throw away!! 🙂
Adorable card & beautiful coloring. Love the herringbone technique. Thank you again for sharing.
Blessings,
Peggy Allen
I love this technique and thanks for posting the video; I couldn’t get the link to this project to open in the SCS Weekly Inkling this week. I’m thinking it might be pretty, if the adhesive is repositionable, to remove a couple of the strips once the entire backgound is done and burnish in some of the microfine glitters to add some sparkle or glitter paper….gonna try this with some of my leftover Christmas cs scraps.
thanks, again, for another wonderful idea…..
Such a neat layout for your little guy, he is too cute!!
amazing background and coloring. fabulous card, Beate! love love it!