
Today’s tutorial on Splitcoaststampers was written by Joan Boardee. She shows us how to use both Copic Markers and Distress Inks to color an image.
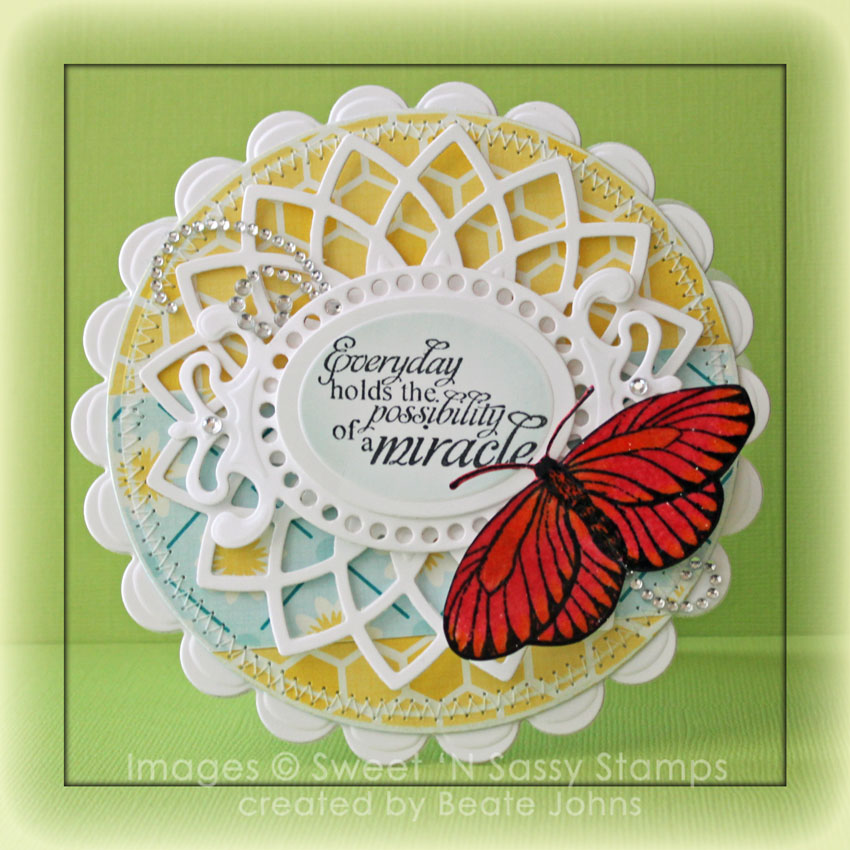
For my sample I used Sweet n’ Sassy Everyday Miracles. I stamped the butterfly in Black India Ink on Neenah Classic White cardstock. Part of the image was colored with Copic Markers Y15 and Y17. Next Worn Lipstick Distress Ink was applied directly with the ink pad. The image was misted with water. After the paper dried, the image was cut out and embossed with clear embossing powder.
Three pieces of Solar White cardstock were cut and embossed with a Lotus Pendant die, a Fancy Tag 3 die and a Classic Oval Nestabilities die. A sentiment from the Everyday Miracles was stamped in the center of the the Classic Oval die cut and the edges were sponged with Tumbled Glass Distress Ink. The oval was adhered over the Fancy Tag die cut and that was adhered to the Lotus die cut.
Pieces of Echo Park Country Drive Patterned Paper were cut and embossed with the smallest Grand Circle Nestabilities die. The edges were sanded and stitched before the layers were adhered to a scallop circle card base, cut and embossed with Grand Scalloped Circle Nestabilities die. A couple of Baby Bling Rhinestones and parts of a Finesse Rhinestone Swirl finished off the card.
Here is a video for the visual learner:
[youtube]https://www.youtube.com/watch?v=f_1dAy-D5dU[/youtube]
Thanks so much for stopping by! Have a wonderful day.
Hugs and smiles
|
|
|
|
|
|
|
|
|
|
|
|
|
|
|
|
|
|
|
Beate
17 Responses to “Tutorial on SCS – Distressed Alcohol Markers”
Sorry, the comment form is closed at this time.


This is beautiful. Again, love the video as I’ll be needing it. I’m waiting for my very first copics to arrive in the mail. I’m giving in!!!! The sentiment is very fitting for this card too. TFS!
Hello!
What a beautiful little card! I love the layout and the contrast of the butterfly! Thank you for another great video! Wishing you a happy day today!
Hugs,
Barbara Diane
looks like a fun and quick technique. i will try it. thanks for sharing
stamping sue
http://stampingsueinconnecticut.blogspot.com/
Very pretty Beate! Thank you for sharing! ;0)
Beate, this is stunning! Love the circle shape, die cuts and the red butterfly just pops right off the card!
This is gorgeous Beate! What a beautiful piece. Thank you for the video.
Elaine Allen
Such a lovely sentiment and a pretty creation!
This is beautiful, always love the videos. Love this design
WOW Beate!!! I already said you how much I love your videos?
I want to try this technique!! Thanks for sharing.
Have a great day.
xoxo Giò
This is a fun technique, Beate! I shall have to try this 😉 The butterfly looks gorgeous and your card is beautiful!! Love it!! {hugs}
This is a fun technique, Beate! I shall have to try this 😉 The butterfly looks gorgeous and your card is beautiful!! Love it!! {hugs}
This is a fun technique, Beate! I shall have to try this 😉 The butterfly looks gorgeous and your card is beautiful!! Love it!! {hugs}
Another STUNNER, Beate! The layers of die-cuts are just FABULOUS!
Hugs,
Naomi
Gorgeous, Beate! That butterfly is stunning!!! Thanks for the video too 🙂
Oh how lovely….I really like shaped cards, and the layers and dies you have used are just great together the way they let the dp peak through!! Hugs!!
Beautiful, love the layering of the dies, great sentiment and neat technique!
Super technique and such a very pretty card:-)