
Today’s tutorial was written by the wonderful Patti Gilliam. She is sharing on how to create a darling little box, with a flat back, that allows you display your artwork. I popped my Witch up on four dimensional adhesives, so the box part acts like a stage for her to stand on.
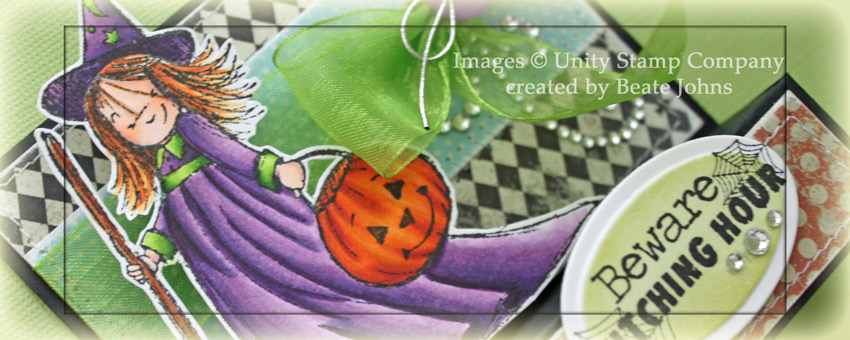
To begin with I stamped Phyllis Harris darling A Tiny Witch in Tuxedo Black Memento Ink on Neenah Solar White cardstock and colored her with Copic Markers (Skin: E000, E00, E01, BV10 Hair: Y23, E97, E99 Dress: V12, V15, V17, V09, YG01, YG03, YG17 Broom: E33, E39, YR21, YR23, YR27 Pumpkin: YR12, YR15, YR04, YR27). The witch was cut out and set aside.
 The box base was created out of black cardstock. Two pieces of Echo Park Mischievous Patterned Paper were cut to a 3 13/16″ length. The blue strip measures 1 3/8″, the black piece 2 7/8″. Both pieces were sanded before the blue strip was adhered over the bigger black piece and the edges were stitched. May Arts Ribbon was tied around the blue strip and the bow was topped with a button, tied on with a silver cord.
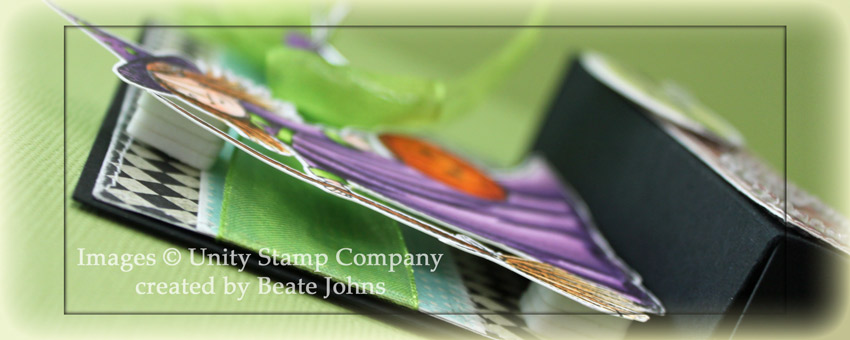
The layered paper was adhered to the back of the box with Scor-Tape and the Witch was adhered over the ribbon. I stacked 4 foam adhesive squares on top of each other so my witch would stand off a bit.
A 7/8″ x 3 13/16″ strip of Mischievous paper was sanded and stitched before it was adhered to the front. A sentiment from the set was stamped in black ink on white cardstock that had been cut and embossed with one of the insert dies from Fancy Framed Tag One set. The center was sponged with Pear Tart Memento Ink before the oval was adhered to the right hand side of the box part. Three rhinestones from a Sleek Strips Silver Rhinestones pack were adhered underneath the sentiment and part of a Finesse Rhinestone Swirl was added next to the sentiment and under the bow.
Here is video for the visual learner:
I hope you try it out!! This is a fun and super easy box. Thanks so much for stopping by!
Hugs and smiles
|
|
P.S.: I hope you are subscribed to Splitcoaststampers Weekly Inkling. Simon Says Stamp has a discount code in there for subscribers. 25% off!!!
Beate
14 Responses to “Tutorial on SCS – Flat Backed Treat Box”
Sorry, the comment form is closed at this time.


Hello!
I love this treat box – and you have decorated it so cute! I will be using this tutorial for treats this Halloween – love your video! Wishing you a happy day!
Hugs,
Barbara Diane
Beautiful box.
God Bless 🙂
Wow, this is gorgeous, Beate!! I love, love how you decorated it!! That little witch is absolutely adorable!! How creative to pop her up so it looks like a stage for her!! And I am definitely going to give this flat backed treat box a try!! Beautiful as always!! Have a great day 🙂
Hugs, Lisa
A Mermaid’s Crafts
That is brilliant, Beate!
This is super festive and fun. I need to try this, great job.
This looks awesome!
Gorgeous color combination Bate and just love the sentiment and the image. Hugs! Mojca
Oh this is FABULOUS!!! Love the box idea! Must check that out this weekend! Your little witch is coloured BEAUTIFULLY!!!
Beate, your box is just beautiful! I love the bling at the bottom of your beautifully colored image! That has to be the cutest witch ever! Thanks for the shout out, my friend! Have a good day 🙂
I always look forward to your fab video tutorials, Beate. Love this one and will definitely be making some for Halloween. Your box looks delightful! x
That is absolutely darling, Beate!! I love everything about it, and hope I get a chance to make one of those treat boxes myself! Thanks for the wonderful tutorial!!
Oh my goodness that is just adorable, I love the way you decorated the box and the great dimension you gave to her and as always, Awesome coloring!
love love this project, Beate! beautiful coloring on the little witch and thanks so much for the video!
This is so adorable, fabulous design and I love Philis Harris anything, she makes the most adorable little people!