
Today’s tutorial on Splitcoaststampers is written by Judy Maddigan and super fun. My little Santa cracked me up wobbling back and forth. I hope you try it out.
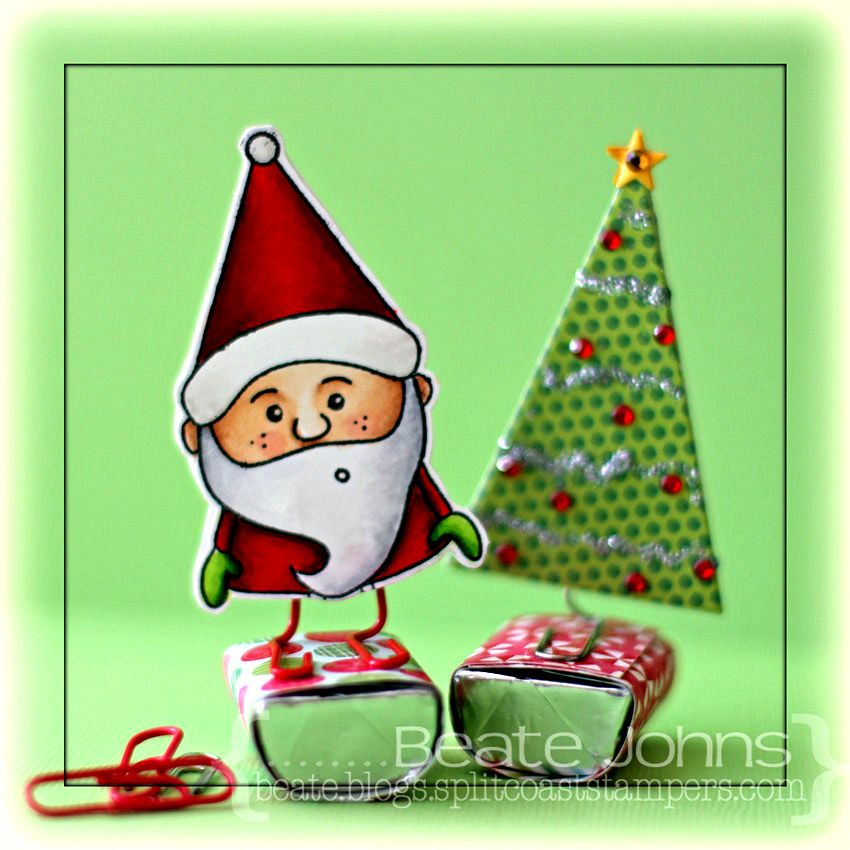 I made two samples. One really simple one with pieces cut out of Carta Bella Merry & Bright paper cut with Simon Says Stamp exclusive Christmas Trees dies. The tree was decorated with Silver Stickles and Red Baby Bling Rhinestones. A tiny star was cut out of Desert Marigold Fourz Bazzill paper with another die from the Holiday Trees set.
The santa (from Simon Says Stamp Gnome Sweet Gnome ) was a bit more tricky, since the stamp comes only with his face, not the back. I stamped it twice in Tuxedo Black Memento Ink on Neenah Solar White cardstockand cut them out. I flipped one over and traced the lines from the front to the back, leaving off his face and his thumbs.
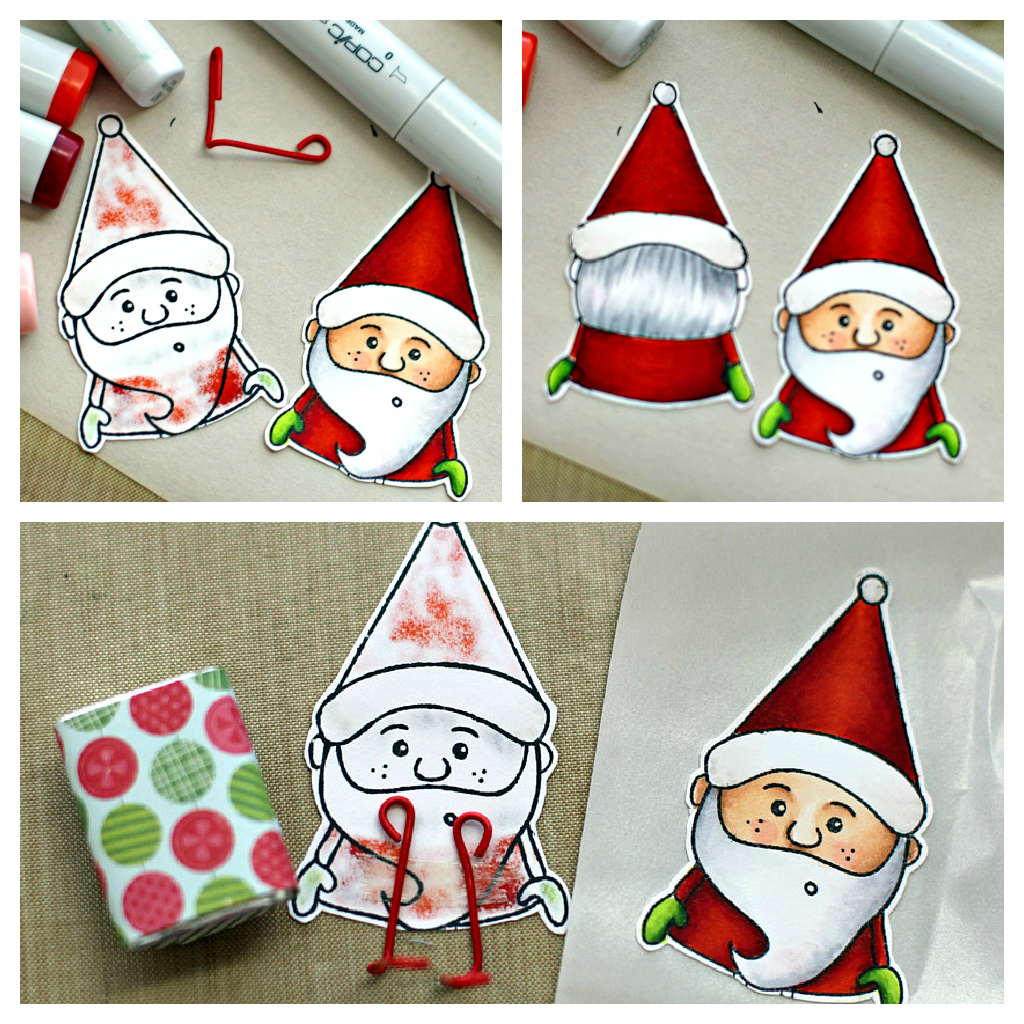 The images were then colored with Copic Markers (Red: YR09, R24, R29, R39 Mittens: YG01, YG03, YG17 Beard/Hair: N0, N1, N3 Hat trim: W00, W1 Skin: E50, E21, E34, R20). Red paperclips that had been unbend and reshaped were adhered to the inside of the back with Scor-Tape. The front was run through my Xyron and adhered over the back, hiding the paper clip ends. The Santa as well as the tree were adhered to a covered Hershey’s Nugget with Glossy Accents.
Here is a video what these little rockers do: They crack me up, especially that little Santa Gnome.
[youtube]https://www.youtube.com/watch?v=-dLGB22EbVY[/youtube]
And here is a video on how to create the rocker for the visual learner:
[youtube]https://www.youtube.com/watch?v=7CR8qa_D_c8[/youtube]
Thanks so much for stopping by! Have a wonderful day!
Hugs and smiles
|
|
Beate
43 Responses to “Tutorial on SCS – Hershey’s Nuggets Rocker”
Sorry, the comment form is closed at this time.


Oh this is totally cool!! Wonder if I have any of those nuggets in the cupboard. So fun! Your Santa is adorable….front and back! Love how you’ve decorated the tree too!
They are adorable!
God Bless 🙂
They are adorable!
God Bless 🙂
*eek*.. how sweet are they?!!!! ADORABLE!!! Just looooooove these super cute little guys!!!
And how clever to use paper clips for the legs and feet…oh my word.. fantastic!
Thanks Judy for the tutorial and Beate, your samples are just gorgeous!!! {{{LOVE}}}
{hugs} Sylvia
Hello!
Oh, the little ‘rockers’ are wonderful! What a great idea! I have some nuggets on my workdesk right now and am going to make one today! Thank you for the videos – they make me smile! What a happy little gift! Wishing you sunshine today – we have lots here in this part of WI. The other day we had a temperature of 62 degrees – in December – in Wisconsin! People were wearing shorts!
Hugs,
Barbara Diane
So sweet! They would look really cute scattered around the Christmas dinner table. Thank you for another lovely tutorial, Beate x
Oh Beate, I LOVE how you finished out the back of this little cutie!!! So adorable and really the video is so cute…who wouldn’t want to make one!!
hugs,
M
I love that you finished the back of Santa Gnome! I probably would have taken the easy route and just used red card stock! I love tat you once again went the extra mile!
Hehe, that is so cute it makes me giggle, Beate 🙂
You’re right – these little rockers crack me up, too, Beate! So cute!
I do have some nuggets at home and I will have to try this. Your Santa is so cute and with the tutorial and video I should be able to figure this one out. Thanks so much! Really fun!
I can’t believe you said you are not an artist! You most certainly are! The back of the Santa is amazing and your coloring is wonderful as always. So cute and my kids would love this! Adding nuggets to my shopping list. I’ll just have to eat up the ones I don’t use. Heehee…
That’s a good way to give away blog candy. So much nicer to give it away to a dedicated reader!
Such a fun project Beate. I love it. Hugs! Mojca
Well if that isn’t the cutest santa ever. Great job and flipping him for his backside was genius!
That is a hoot! Wouldn’t they make great place cards for Christmas dinner?
Beate, this is the cutest thing EVER! Thanks for sharing this! I may just have to try this out! I’m envisioning some cute Valentine themed ones too! 🙂
Oh my gosh, this is so stinkin’ adorable!! Watching the video of him wobbling, I could almost hear him ho ho ho-ing!! What fun!! And you did an awesome job drawing his back!! This is fabulous!! Have a great day 🙂
Lisa
A Mermaid’s Crafts
These are SO CUTE!! I think my 6 year old would LOVE making these for his class!! =) THANKS for sharing the video and have a FABULOUS WEEK!! =)
this is super cute Beate! What a clever tutorial she has too. Darling idea.
Very clever. Just wish I had time to make them. Maybe after Christmas when things settle down, I will get a chance to play.
🙂
I am so happy you shared this on your blog Beate. He is the cutest. Oh and genius to do the back of him the way he did. I would not have thought of that.
How fun and creative!
How cute!!! This looks really fun!!
I saw your video yesterday in the SCS newsletter….adorable project.
That little Santa is too cute. He makes me smile…
Those are so fun, I think you did an excellent job on his back side 🙂 TFS!
So fun. Great job on creating the back.
there you go again with such cleverness!
Oh Beate, you were right this is too Adorable! Tfs! Hugs Traci ;0)
OMGosh these are so adorable!!! Love them.
super duper fun! what a fabulous idea, Beate! love love this!
Oh Beate, this had me “rocking” side to side with giggles! A fabulous project and your coloring is phenomenal!
Cuuuute! Wow and you adapted the image for the santa’s back too! Fab idea 🙂
Wie wunderschön gemacht ist das denn? Herrlich! Schade nur, dass die in Deutschland erhältlichen (ähnlich geformten) M..n Cheri. nicht so schön schunkeln. Liebe Adventsgrüße
Hanni
Oh my goodness, SUPER, SUPER CUTE and clever!!!
Browsing through your blog … such a genius to “create” a back for your santa!!! I love it!!!
Oh No! Another thing to add to my list of projects I want to do for Christmas. These would be so cute in the stockings for my whole family! But there will be 28 of us, will have to be a very simple design for mine. I just love this idea!
Genius! If I were still working, all my coworkers would find one of these cuties rockin’ on their desks.
oh, super cute idea!!
This is the best video tutorial ever!!!!
Those little rockers are so cute. Have to make some for my grand kids. Beate your videos are always so precise and easy to understand. Thank you.
My 5 yo granddaughter and I made some after seeing your tutorial and blogged about it with a link to your post! Thanks!