
Today’s tutorial on Splitcoast is for the Embedded Image technique and written by Holly McMillen. Holly doesn’t have the equipment to shoot video tutorials, so I did that for her.
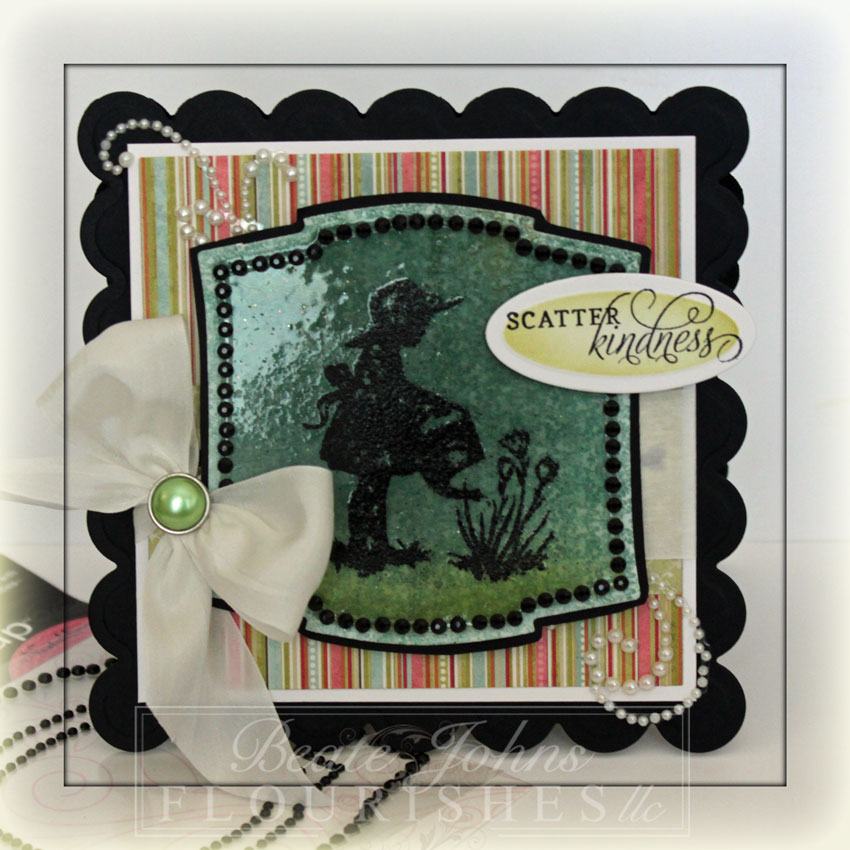
For my focal point I cut a piece of the new My Mind’s Eye 6×6 Vanity Fair Patterned paper (sneak peek….brought it home with me from CHA) with the second largest of the Label 2 Nestabilities die. The bottom was sponged with Peeled Paint, the top with Stormy Sky Distress inks before the paper was embossed several times with clear embossing powder.
The image is another sneek peak. It’s an image from Flourishes Sweet Days of Summer set, which will be released on August 12th. Wait until you see all the images. It’s gorgeous…and yes, I am a lucky duck to already own that set and the paper! After the clear embossing powder cooled on the label, I stamped the image in Embossing ink on the label and embossed it with Black Soot Distress Embossing powder.
The layer was adhered to a piece of black cardstock, which was cut with scissors into a slightly bigger layer. Black Nestabling for Label 2 were adhered around the image.
The card base was cut out of black cardstock with the second smallest of the Grand Scallop Square Nestabilities. A 1 3/4″ x 4″ strip of MME Vanity Fair paper was adhered to a 4″ square of the same paper pack. The layers were adhered to a 1/4″ bigger piece of Neenah Solar white cardstock and White May Arts Silk Ribbon was tied around it. The bow was topped with a Recollection brad and the layers were adhered to the card base.
A white pearl swirl from Want2Scrap was cut apart and parts were adhered to the top left and bottom right of the card base before the main image was adhered in the center with dimensionals. A sentiment from the new set was stamped with Jet Black Archival ink on a piece of Neenah white cardstock that had been cut and embossed with the smallest of the small Petite Oval Nestabilities dies. Before the panel was adhered, it was sponged lightly with Peeled Paint Distress ink.
Here is a video for the visual learner:
[youtube]https://www.youtube.com/watch?v=5lgov28AKIQ[/youtube]
Thanks so much for stopping by! Have a wonderful day!
Hugs and smiles
Beate
20 Responses to “Tutorial on SCS – Embedded Image”
Sorry, the comment form is closed at this time.


Great Video Beate!!! I have never seen or tried this technique so I am happy that you showed us how. Gorgeous card too! Have a safe and happy rest of the week and weekend girl!!
Hi Beate, your card is really pretty. Thank you for another easy to follow video tutorial. This technique looks great! I love finding new ways to create!! x
Beate this is beautiful love the shimmer and the image is so sweet. Have a great week.
This is beautiful. I may have to try this technique.
This is asn awesome technique I may have to try this! Beautiful card.
Like the technique I may have to try this. Beautiful card!
Beautiful card, Beate! Thanks for the great video tutorial!! I’m going to give this a try.
This is stunning Beate. I think this is a fabulous technique and the look it achives is stunning. 🙂
Hugs~
What a gorgeous card & cool technique, Beate. I just love the way the black image looks against the colours that you have under that shiny embossed layer. SO Lovely!
Sweet image, lovely card! Thanks for the tutorial video. Great technique I intend to try. 🙂
Beautiful card and great tutorial. I’ll have to give that a try one of these days.
Beautiful card, Beate. And what a cool technique. As always, thanks for the great tutorial!
What a great technique – I never would have thought you could do something like this. Love you’re card – it’s really stunning. I love the shadow effect over the colors. Thanks again for the video.
gorgeous card, Beate! wonderful technique and such a pretty effect. thanks for sharing! =)
Gorgeous! Isn’t this just the sweetest image. I like the rich colors of this. Very nice of you to do the video for Holly.
Very pretty. That looks like an awesome stamp set to be released by flourish. I love their silhouette stamps.
Ter 😉
really neat look and like how you didn’t go all the way to the edge with the embossing powder
way cool Beate. I didn’t unpack any embossing powders, but after seeing this I think I need to either find the box with them in it that’s in the garage or go and buy some. thanks for the great video. ~ Pam
again ,a beautiful job..and i will try it …im hooked on silhouette stamps too .. hope i can work as fast as you did lol ..anne
This is stunning!