
Today’s tutorial on Splitcoast is written by Michelle Kovack. She shows us how to give images a Faux Tile look. For my sample I used Flourishes Kids Play stamp set. I stamped the boy image in Tuxedo Black Memento Ink on Neenah Solar White cardstock and colored it with Copic Markers ( BG72, BG93, BG96, BG99, G24, G28, E31, E33, E35). The sky was airbrushed with Copic Marker B12.
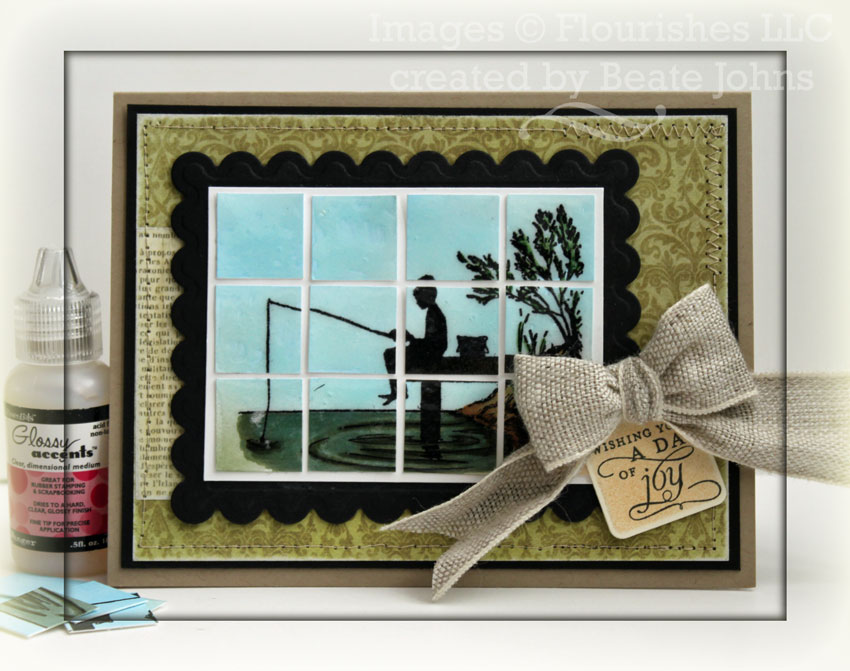
The image was cut into 3/4″ squares. Those squares were topped with Glossy Accents. After the tiles dried they were attached to a another piece of white cardstock. A black piece of cardstock was cut and embossed with Scallop Rectangle Nestabilities and the layers were adhered it with dimensionals.
The card base is a 5 1/2″ x 8 1/2″ piece of Kraft cardstock folded in half.
A 2 1/4″ x 4″ piece of 7 Gypsies Conservatory paper was adhered to a 3 3/4″ x 5″ piece paper from the same paper pack. The papers were stitched to a 3/16″ bigger piece of Basic Black cardstock.
The sentiment is from the same stamp set. It was stamped in Tuxedo Black Memento Ink on a tag cut out of Classic Cream cardstock cut and embossed with a retired Tag Spellbinders die. It was adhered to the right side of the image and topped with a bow out of Linen Ribbon.
Here is a video for the visual learner:
[youtube]https://www.youtube.com/watch?v=cmFXHPO_j0M[/youtube]
Have a wonderful day! Hugs and smiles
Beate
16 Responses to “Tutorials on SCS – Faux Tile”
Sorry, the comment form is closed at this time.


Hi Beate, I love your interpretation of this technique. Your videos are just great. Although I can do things by reading instructions, a video is just and added bonus. Thanks for sharing!
What a neat technique and card, Beate!
Fabulous card!!
Love how you’ve used this Flourishes image for faux tile Beate! It looks gorgeous! Great linen ribbon too!
WOW! Beate thanks for that video…I love watching your talent…and this one is no exception…Thank you for sharing. I hope you and yours are having a great new year 🙂
Hi Beate – I made one yesterday and pretty much copied yours. I love how it turned out so now I’ll venture out with other designs now that I’ve done one. I wasn’t sure if the Glossy Accents was equal to SU’s Crystal Effects which I already had, but I ordered some Glossy Accents just to compare. Very cool technique!! Thanks for sharing.
Great card and tutorial,thanks for making it look so easy!
Absolutely terrific! Love the colours.
I was just surfin around at the internet and so i came at your blog. you really make fabolous things!
xx Tessa
This is fabulous! I love the image and the technique!
Your videos make everything look so easy and I have tried many of your techniques just because I saw the video! Well done!
that is so neat, love it, the glossy accents really give it that tile look!
I love how you’ve used this darling image for this technique, Beate!! So precious, and so beautiful!! Thanks for another awesome tutorial!!
beautiful effect. gorgeous card, Beate! off to watch the video! have a fabulous weekend! =)
Awesome technique! Love this!!
Beate is BRILLIANT!