Search Results : wsc66

Random.org picked #17 as the winner of last weekend’s sketch challenge.

That is Jenna Millsap with this adorable card.

You can see more of Jenna’s work on her blog, A “Sap” for Stamps.

Thanks to everyone who participated in the challenge. I haven’t checked all the entries out yet. Sorry! I hope I will get to it in the next day or so.

I did however get more Christmas shopping done and even wrapped some presents yesterday! It’s cold here and I am getting into the Christmas spirit. The last two days I have been stamping Christmas cards. I haven’t created anything new (sorry), but I do have 50 Christmas cards ready!

Next week, while the kids are home, I think we will be baking my favorite Christmas cookies. Hm, hm, hmmmmm

Have a wonderful day! Hugs and smiles

I am done reading the Twilight series. I should say I finished reading the fourth book. I am seriously tempted to just read them again, slower this time. I am so going to the movie next week. I hope that if I wait until Tuesday, the theater won’t be too full anymore.

floressuaveswsc66artichokeb.jpg

So now that the reading is done, I could concentrate on making a sample for yesterday’s challenge.

My card base is a 4 1/4″ x 11″ piece of Basic Black cardstock folded in half.

 The first layer is a 4″ x 5 1/4″ piece of Juntos Designer paper. You can find it in the Celebrando Creatividad flyer.  The two left corners were punched with the ticket corner punch and the edges of the paper was distressed with a sanding block.

The next layers is a 3″ x 3 3/4″ piece of designer paper, again from the Juntos paper pack. Three edges were paper pierced and the edges were sanded. Three 1/4″ black circles were taped to the lower left side and were topped with silver brads.

The 2 1/2″ x 3 3/8″ piece of Shimmery White cardstock was firs stamped with the background script from Flores Suaves in More Mustard. The edges were sponged first with More Mustard, then with Really Rust. The tulip from the same set was stamped over the cardstock with Really Rust. It was layered on a 1/4″ bigger piece of Basic Black cardstock. The bottom edge was punched with the Scallop Edge Punch.

The edges of the Shimmery White cardstock were paper pierced and Polka Dotted May Arts ribbon was tied around the lower half of both layers. On the top right I added a double photo corner. The bigger corner is a sponged Really Rust cardstock corner, the smaller one was punched out of Basic Black cardstock. On top I layered three 1/4″ circles punched out from Juntos Designer Paper. They were topped off with black brads.

I stamped the Butterfly from Flores Suaves (if you are like me and you like stamps other then cutesy, this set is a MUST! You can find it just like the designer paper in our spanish flyer) in Black Stazon on Shimmery White cardstock. I colored it with Aqua Painter and classic inks (Always Artichoke and Chocolate chip). It was cut out and adhered with dimensionals. Last I spread Crystal Effect over the entire butterfly, sprinkled some Dazzling Diamond Glitter over it and added just a little more Crystal Effect over the butterfly body.

The sentiment is from Lovely Labels (you can’t find it in the current catalog, but you can still order it.). It is stamped in Really Rust on a Shimmery White cardstock. The sentiment was punched out with the 1 1/4″ circle punch and layered first on a 1 3/8″ Basic Black circle, then on a silver metal rimmed tag.

floressuaveswsc66inside.jpg

The inside of the card is a 4″ x 5 1/4″ piece of Shimmery White cardstock.  First I stamped the butterfly in Black Stazon to the lower right part.

Then I covered up the upper part with a ripped mask and the buttefly with a mask as well. The bottom part was then first stamped with the script from Flores Suaves in More Mustard. It was sponged first with More Mustard, then with Really Rust. The tulip was stamped all over with Really Rust. Last the butterfly was colored again with Aqua Painter with Classic inks (Always Artichoke and Chocolate Chip).

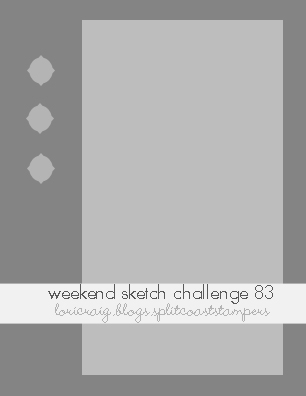
Boy oh boy…am I running behind. I did finish making samples and cutting for tomorrow’s SAS, but I didn’t have a chance to make a sample for today’s sketch challenge. Well, this morning, I knew it had to be fast. I have a doctor’s appointment and need to go grocery shopping(yuck) today after I bring Rebecca to school. Jenn will laugh when she reads this. Me and quick usually don’t go together.

I love the stamp set Winter Post and the designer paper Ski Slope. So I got those out and started playing. I knew I wanted to use the skating pair, they are so sweet, and that I wanted to keep the colors soft.

winterpostpinkskaterwsc66be.jpg

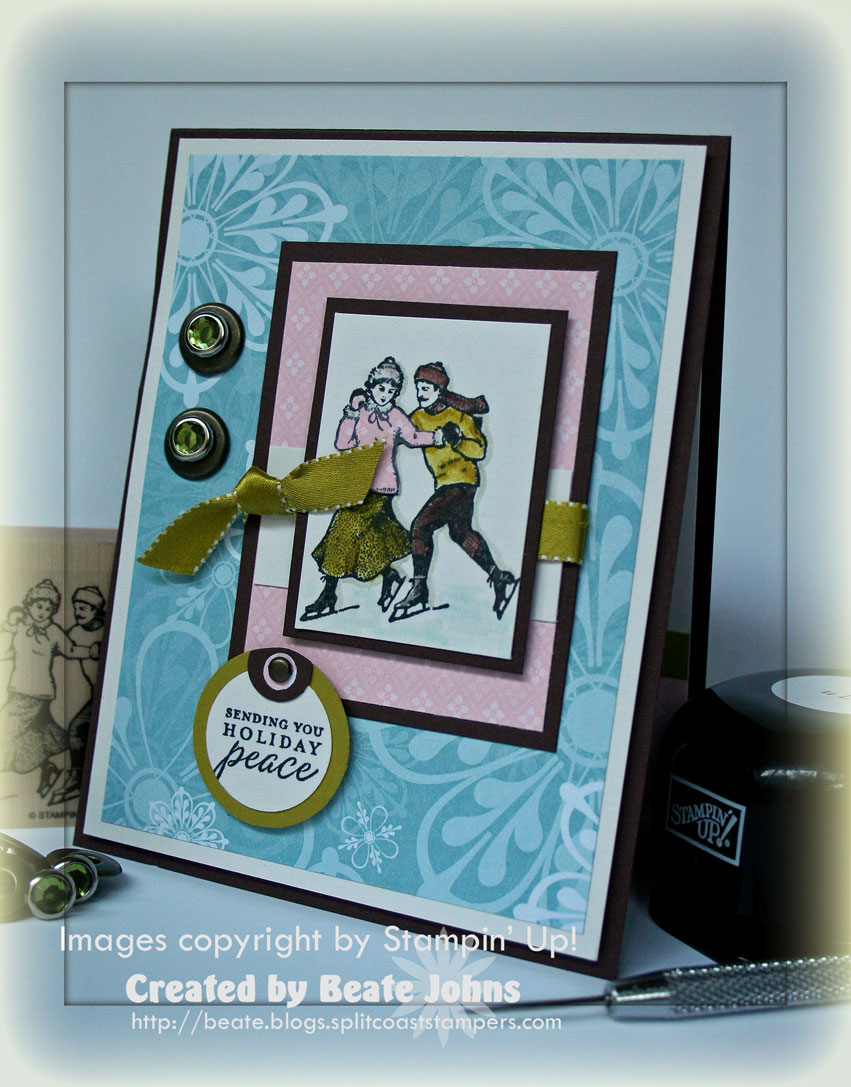
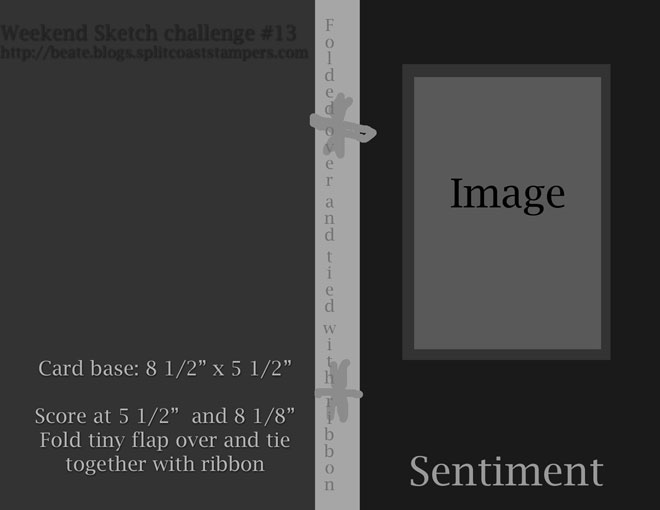
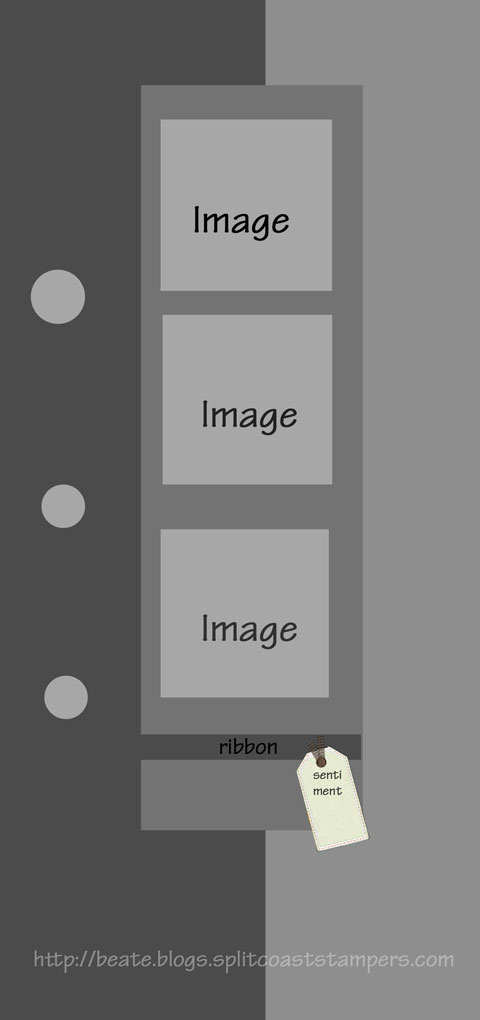
When in doubt, I always pick my trusted Chocolate Chip. Today was no different. I started with a 4 1/4″ x 11″ piece of Chocolate Chip cardstock folded in half.

Next is a 4″ x 5 1/4″ piece of Shimmery White (don’t fret. I cut the inner part out so I wouldn’t waste it, since it doesn’t show) followed by a 3 3/4″ x 5″ piece of Ski Slope Designer Paper.

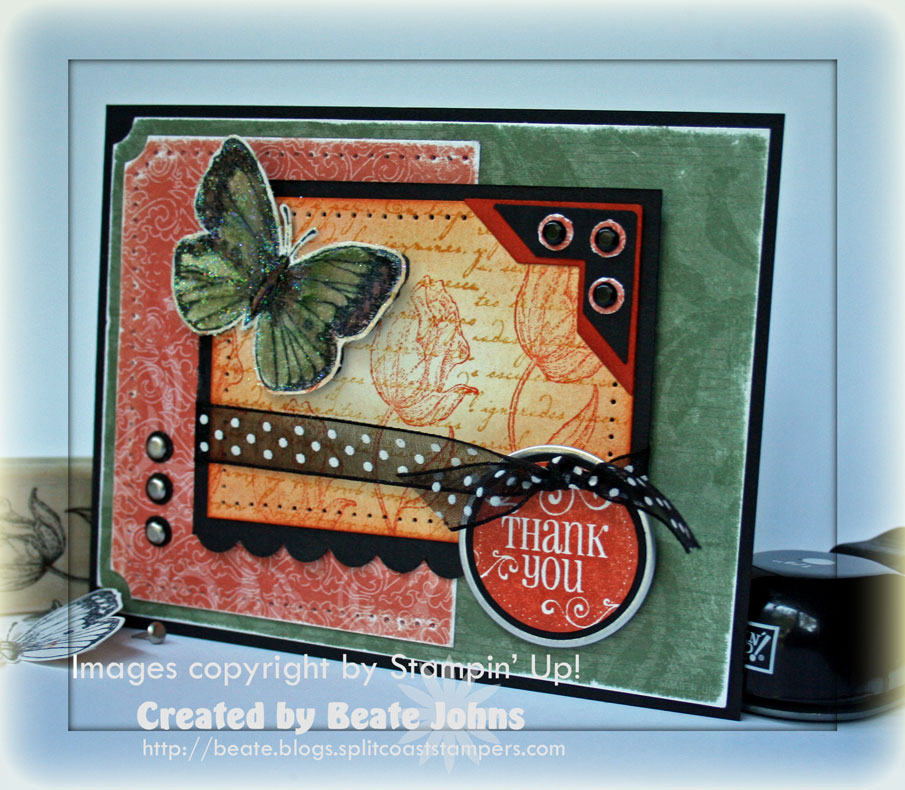
I stamped the skaters from Winter Post in Black Stazon on Shimmery White, cut the cardstock down to 1 5/8″ x 2 1/8″ and colored them in with Aqua Painter and Classic inks (Chocolate Chip, Kiwi Kiss, Going Gray (shadow) and Baja Breeze). I stamped the girl skater on Pink Pirouette Pattern Designer paper, cut out her sweater and taped it on top of the image.

The Chocolate Chip cardstock layer measures 2 1/2″ x 3 1/4″ and was layered with a 1/4″ smaller piece of Pink Pirouette Pattern Designer Paper, the same paper that I used for the sweater. A 1″ x 2″ strip of Shimmery White was taped to serve as the middle strip and Satin Kiwi Ribbonwas tried around it. The skater couple was layered on a 3/8″ bigger piece of Chocolate Chip cardstock and adhered over the bigger rectangle with dimensionals.

I adhered the skater layers to my Shimmery/Designer paper layers  and added Antique Brass Jumbo Eyelets with Ice Circle Rhinestones to the left hand side. The sentiment is from the stamp set To You and Yours. It was stamped in Black Stazon on Shimmery White, punched out with the 1″ circle punch and layered on a 1 1/4″ circle. On top I added a 1/2″ Chocolate Chip circle. I let it hang off a bit and cut the overhanging part off. The 1/4″ circle is punched out of the Pink Pirouette designer paper and a Antique Brass brad finishes the tag off. The tag, as well as the Shimmery/Designer paper layers were attached with dimensionals.

winterpostpinkskaterinside.jpg

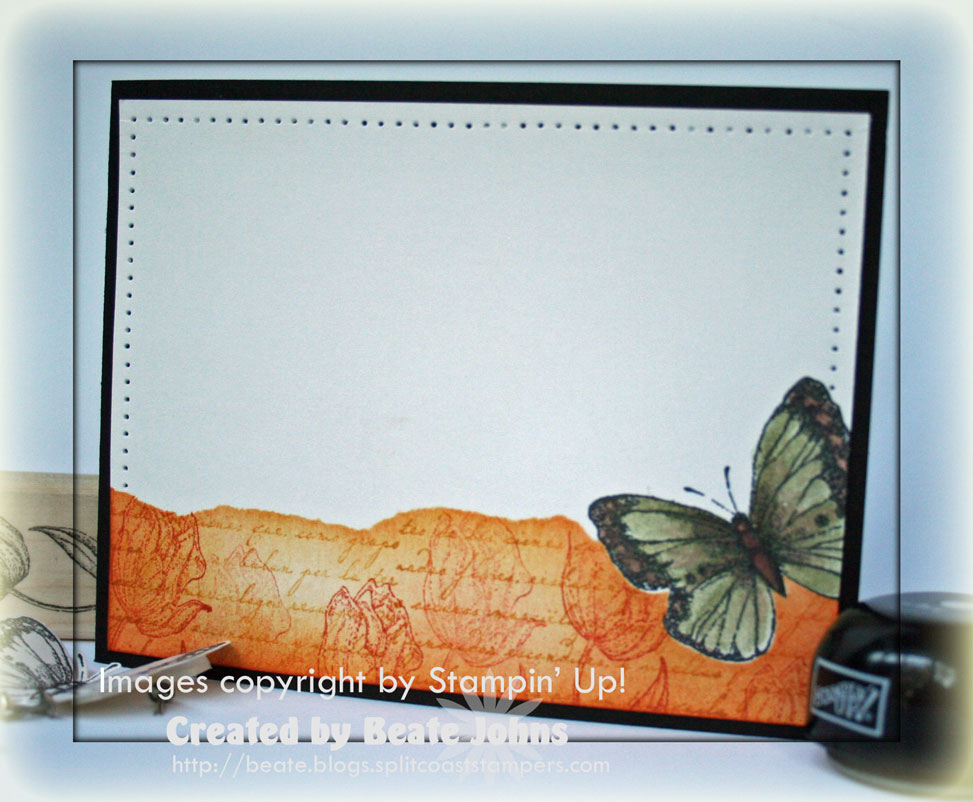
The inside of the card is really simple. I added a 4″ x 5 1/4″ piece of Shimmery White, topped with a 1 1/2″ x 4″ piece of Pink Pirouette Designer paperand a 3/8″ x 4″ piece of Kiwi Kiss cardstock.

Now that I see it posted, I think I will add the Postcard stamp from the Winter Post stamp set in the center of the designer paper in Chocolate Chip.

 I hope to post again this afternoon with some wonderful and exciting news about some friends of mine!!!!

wsc66.jpg

To participate in the challenge and be entered in the raffle, make a card with this layout and upload it either to your blog, or to an online gallery.

If you upload your card on SCS, put WSC66 (NO SPACE INBETWEEN WSC AND 66) in the keyword section. That way we can look at all of them at once!

Post a link to your card to this blog entry as a comment. Please add your entry# to it.

I will determine the winner with Random.org on Wednesday at 11:00 a.m. CST.

To see samples made with this sketch now, check out the blogs of

Cambria Turnbow

Charmaine Ikach

Jenn Balcer 

Lori Craig

MaryJo Albright

Sharon Harnist

Have fun creating! I can’t wait to see what you come up with.

SCS submissions

Previous WSC sketches

wsc78sharonharnist.jpgwsc1.jpgwsc3.jpgwsc4.jpgwsc5.jpgwsc7.jpgwsc8.jpgwsc10.jpgwsc11.jpgwsc12.jpgwsc13.jpgwsc14.jpgwsc15.jpgwsc16.jpgwsc17.jpgwsc18.jpgwsc19.jpgwsc20.jpgwsc22.jpgwsc23.jpgwsc24.jpgwsc25.jpgwsc26.jpgwsc27.jpgwsc28.jpgwsc29.jpgwsc30.jpgwsc31.jpgwsc32.jpgwsc33.jpgwsc34.jpgwsc-_35.jpgwsc-_36.jpgwsc-_37.jpgwsc-_38.jpgwsc-_39.jpgwsc-_40.jpgwsc-_41.jpgwsc-_42.jpgwsc-_43.jpgwsc-_44.jpgwsc-_45.jpgwsc-_46.jpgwsc47.jpgwsc48.jpgwsc49.jpgwsc50.jpgwsc51.jpgwsc52.jpgwsc53.jpgwsc54.jpgwsc55.jpgwsc56.jpgwsc57.jpgwsc58.jpgwsc59.jpgwsc60.jpgwsc61.jpgwsc62.jpgwsc63.jpgwsc64.jpgwsc65.jpgwsc66.jpgwsc67.jpgwsc71sharonharnist.jpgwsc72sketch1.jpgwsc73.jpgwsc74.jpgwsc75.jpgwsc76lauries.jpgwsc77-lcraig.jpgwsc78sharonharnist.jpgwsc79.jpgwsc80-cambria.jpgwsc81.jpgwsc82.jpgwsc83.jpgwsc84lauries.jpgwsc85-sharonharnist.jpgwsc86cami.jpgwsc87.jpgwsc88.jpgwsc89-lcraig1.jpgwsc90.jpgwsc91beate.jpgwsc92_sharonharnist.jpgwsc93.jpgwsc94.jpg

© 2012 fresh & fun Suffusion theme by Sayontan Sinha