mftspongedcloudwide.jpg

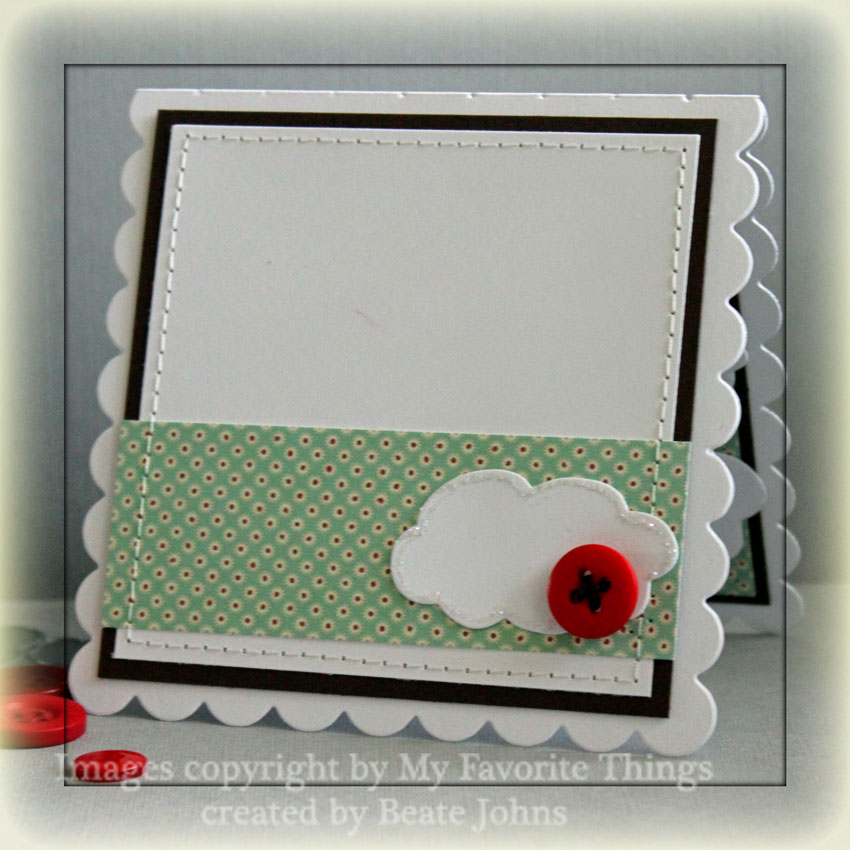
Here is another sample made with the cloud stencil from My Favorite Things. I cut stencils out of Mask Sheet, adhered them to a 3 1/2″ x 4 3/4″ piece of Neenah Solar White cardstock and sponged the entire piece of Tumbled Glass Distress Ink.

mftspongedcloudtree.jpg

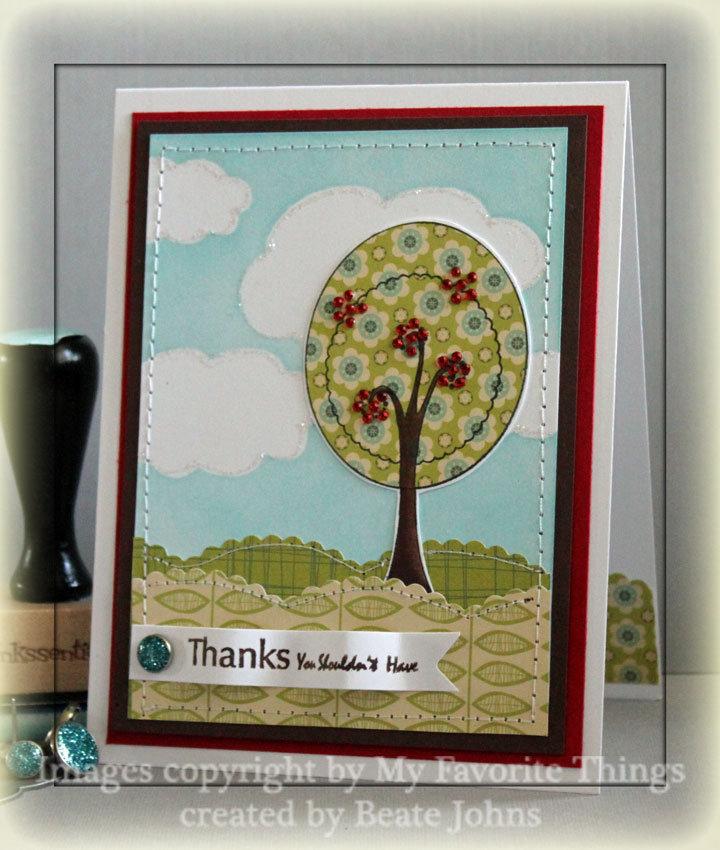
Two strips of October Afternoon Thrift Store patterned paper were cut with the Scalloped Scallop Border die and adhered on the bottom of the cloud layer. I stamped the tree from Grow Love Plant a Tree. with Black Memento ink once on Neenah Solar White cardstock, once on October Afternoon patterned paper. I cut them out, layered them on top of each other and colored the tree trunk with Copic Markers (E27, E29). Next I layered it on a 1/4″ bigger piece of Chocolate Chip cardstock and sewed around the edges. Then it was adhered first on red cardstock, then on a 4 1/4″ x 11″ white card base.

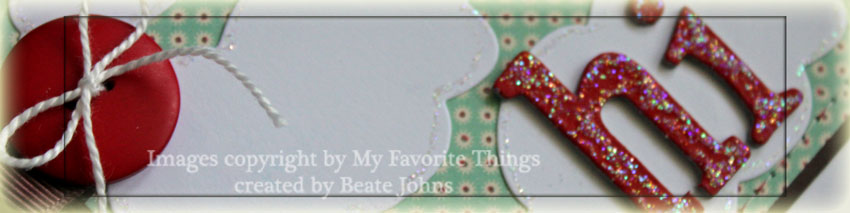
To dress up the card a bit, I outlined the clouds with Starlit Stickles. Tiny Twinkles were adhered to the tree with Mono liquid glue.

mftspongedcloudinside.jpg

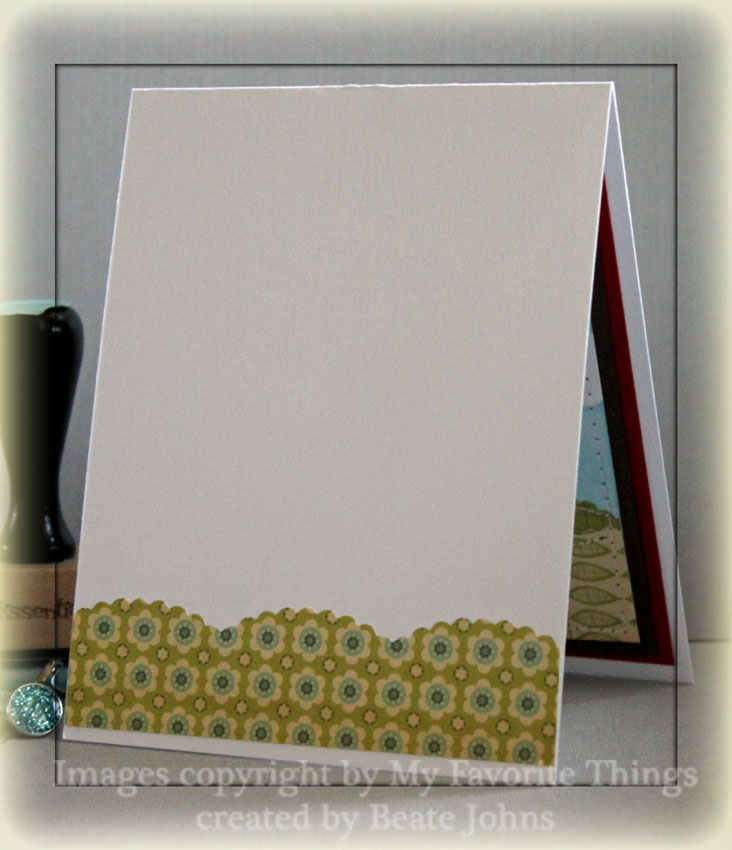
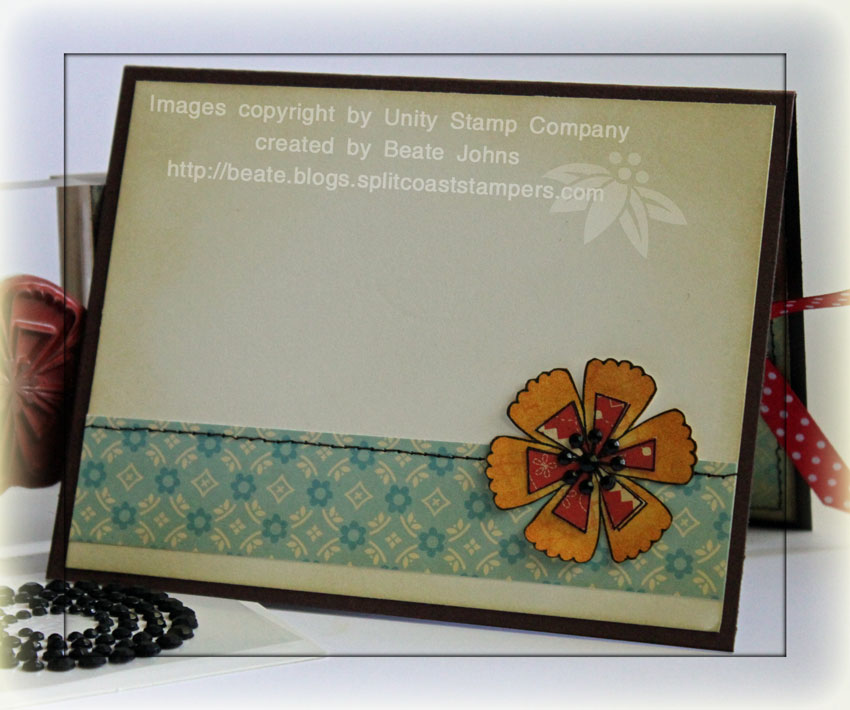
I kept the inside of the card very simple. I just added a strip of October Afternoon that had been cut with Scalloped Scallop Border die.

Here is a video for the visual learner:

[youtube]https://www.youtube.com/watch?v=GXh8MenPcU8[/youtube]

P.S.: Happy Mother’s Day!!! Have a wonderful day! Hugs and smiles

mftfairyjolinnewide.jpg

My Favorite Thing Stamps are so much fun to color with Copics.  For this card I stamped the image from Fairy Sweet Jolinne in Black Memento Ink. It was colored with Copics ( R32, R35, R39, E50, E51, E53, E97, E99, C1, C00, BG72, BG78, G40, G82) and small  dots were added to the wings for more texture with Rangers white gel pen.

mftfairyjolinnerustybj.jpg

I cut the image out and mounted it on a 3″ square. The corners were rounded with a corner rounder and it was stitched to a 1/4″ bigger piece of Basic Black cardstock. The sentiment is from the same set and was stamped on the top left of the square before adhering the fairy to it.

The card base is a 4 1/4″ x 11″ piece of textured Dusty Durango folded in half. A scallop border was cut out of Neenah White cardstock with the Scalloped Scallop Die-namics Border and adhered to a 4″ square Fly A Kite October Afternoon patterned paper. Both top and bottom of the patterned paper were stitched with a straight stich. To add a bit of flair I tied a ribbon around both layers and topped it with a button before adhering everything to the card base with dimensionals.

mftcloudstencilhiwide.jpg

Yesterday Splitcoast posted a Product Review on My Favorite Things new dies called Die-namics. So far they released three dies, two scallop borders and one super cool cloud die. I LOVE that die. It makes such great projects and the cloud sizes are prefect for cards.

mftcloudstencilhibeate.jpg

My card base is Neenah Solar White cardstock cut with Stampin’ Up!’s Scallop Square big shot die. A 3 11/16″ square of October Afternoon Thrift Store paper was stitched to a 3 7/8″ square of Chocolate Chip cardstock and the center of each circle filled with a red dot with Copics Red Spica pen.

Several clouds were adhered to the square. Stardust Stickles was used to outline the clouds. The letters are from the Grungeboard Alphabet Soup. It was colored with Adirondack’s Red Pepper Acrylic Dabber, adhered to the cloud with Glossy Accents and covered with Stardust Stickles.

To add a splash of red, I added a Basic Grey red button with a small piece of Chocolate Grosgrain ribbon on the top right.

mftcloudstencilhiinside.jpg

For the inside of the card I used the same measurements for the chocolate and white squares.  the patterned paper strip measures 1 1/4″ in with. A cloud with a red button was added to the right of the strip.

Here is a quick video about the Die-namics dies:

[youtube]https://www.youtube.com/watch?v=V8LCOqU1o8Q[/youtube]

sadimensionalflowerwide.jpg

If you read my blog, you have already seen my grunge flower tutorial, that I learned at Ranger U from Tim Holtz. Today’s tutorial on SCS is the same flower. I called it dimensional flowers since they also work with patterned paper and with a bit more effort (in rolling the edges) with cardstock.

sadimensionalflowersmallbj.jpg

For my flower I adhered dictionary pages to grunge paper before I cut the flowers with Tattered Floral Alteration Die. The die cuts were sponged with Wild Honey and Fired Brick Distress inks.

The sentiment is from the stamp set Good Thought. It was stamped in Jet Black Archival Ink on Neenah White cardstock. It was cut out with Nestabilities Label 2 dies. I left the die on and stamped the swirl from Mini Ornates in Shabby Shutter on the top left and bottom right. Then I sponged over the cardstock in the same color.

The layout for this card is from last week’s sketch challenge on SCS. My small squares measure 1 15/16″ and are from Tim Holtz Retro Grunge Paper Pack. They were adhered to a black scallop square cut with Stampin’ Up!’s scallop square die. Each edge was stamped in Jet Black Archival ink with the sewing stamp from Spring Sprung.

Here is a video for the visual learner:

[youtube]https://www.youtube.com/watch?v=hIe-bYvlw58[/youtube]

unitymaterialgirlpwwide.jpg

Today’s card is created with Unity’s new Get Scrappy With Material Girl stamp set. It matches the Cosmo Cricket Patterned paper with the same name.  Make sure you check the blog hop button on the bottom of the post to keep viewing more samples made with new Unity releases.

unitymaterialgirlpatchworkb.jpg

My card base is a 5 1/2″ x 8 1/2″ piece of Chocolate chip cardstock. The edges of the card front were sponged with Walnut Stain Distress ink. The patterned paper (like all patterned paper on this card) is from Cosmo Cricket’s Material Girl paper pad. It measures 4″ x 5 1/4″. The edges were sanded, then sponged first with Antique Linen , then with Walnut stain.

The patchwork background was cut with Stampin’ Up!’s Top Note die and the edges of the paper were zig zag stitched. Here is a video tutorial for the visual learner on how to create the background:

[youtube]https://www.youtube.com/watch?v=qwvXepmoPbQ[/youtube]

Three buttons (S.e.i. Paisley & Petals as well as $1 red buttons from Michaels) were added to the top right.

The tag was stamped in Sepia Archival Ink on Gina K Ivory cardstock,  cut out and sponged with Antique Linen Distress ink. The sentiment was stamped in Jet Black Archival Ink.  I cut a small square of patterned paper, sponged it with Peeled Paint Distress ink and adhered it to the tag top. A small eyelet was set over it and red polka dot ribbon threaded through.

The swirl stamp of the set was partially stamped on the lower left with Peeled Paint. A dimensional flower was secured over it. The flower was created out of three flower images that had been stamped on patterned paper. In the center of the flower are three wires covered in Ultrafine Strawberry FlowerSoft. Here is a video on how to create this flower. The video shows how to create the flowers with grunge paper. Patterned paper works as well.

[youtube]https://www.youtube.com/watch?v=F9kW-wqKE1Y[/youtube]

unitymaterialgirlpatchwoins.jpg

I kept the inside of the card pretty simple. A 1″ x 5 1/4″ strip of Material girl paper was adhered to a 4″ x 5 1/4″ layer of Ivory cardstock. The edges were sponged with Antique Linen Distress ink. The flower was stamped twice, once on the yellow, once on the red patterned paper and cut out, sponged and layered on top of each other. To top the flower off I added black Kaisercraft Rhinestones.

Have a wonderful day! Hugs and smiles

bloghopnextblog.png

Note:

I apologize for forgetting to set the Patchwork video to public. I changed the settings now (6:13 a.m.) and everyone should be able to view it. Sorry!

sanaturesmomentsbflywide.jpg

I actually shot two videos for the Glitter Puzzle Tutorial. One where you cut your puzzle with a hobby knife, and this one where I use Tim’s new Fanciful Flight Alteration Die.

The card base was cut out of Chocolate chip cardstock with Stampin’ Up!’s Big shot scallop square die. I cut another piece for my card front and sponged the edges with Walnut Stain distress ink.  I inked up the big flower image from a Nature’s Moment with Peeled Paint and Chipped Sapphire. It was stamped on  4″ square of Just Dreamy 2 My Mind’s Eye paper.

 sanaturesmomentsbutterflybe.jpg

The edges were sponged with Broken China Distress ink and stamped with the stitch stamp from Spring Sprung. (If you were following my blog 2 years ago…I was obsessed with using a stamp from All in a Row to fake stitching. This Tim stamp is sooo cool! I might get obsessed with using that.)

The sentiment is from Going Somewhere. It was stamped in Walnut ink and embossed with Clear Embossing Powder. Stardust Stickles was added over the flower ends.

I ran a sheet of cardstock through my Xyron to add double sided adhesive. Then I cut the butterfly twice, once with the adhesive side up, once with the cardstock side up.  If you cut the butterfly the same way twice, you will have two left glittery wings. 🙂

I attached the solid wing pieces to the card base with dimensionals, peeled off the adhesive backing and adhered the detailed wing part over it. Then I rubbed Red, Orange and Yellow Martha Stewart Glitter over the wing. After I tapped off the excess, I peeled the adhesive backing off the detailed stamp and added Brown Glitter.

Here is a video for the visual learner:

[youtube]https://www.youtube.com/watch?v=CLqwl2n-Q3s[/youtube]

I am enjoy playing with all my new Tim Holtz stamps, dies, inks and accessories so much. Have a wonderful Easter weekend! Hugs and smiles

Were you wondering what I did with the big old flower from the grunge flower video? I had to use it right away last night. I started out with a 3″ paper mache box you can find in any hobby store or even Walmart.

grungeroseboxrebaside.jpg

I am still stuck on anything made with Acrylic Dabber. They are just SO much fun! I stamped the swirl from Shabby French in Juniper Acrylic Paint on the sides of my box. After the paint was dry I sponged the sides with Walnut Stain Distress ink. Then I went over the swirls with a moist cloth and took off the distress ink from the Acrylic Paint. I added one Hitch Fastener in each corner of the box to create tiny feet. I really like how those look on the box!

sagrungeroseboxrebatop.jpg

I painted the entire lid with Juniper paint and let dry. Then I sanded the edges and sponged those with Walnut Stain ink.  I painted a swirl from Harlequin Grungeboard Elements first with Lettuce, then with Bottle Acrylic Paint Dabber and let dry. I then sanded the swirl and sponged it as well with Walnut Stain Distress ink.

I stamped the corner stamp from Mini Muse in Juniper Acrylic Paint on a 2″ x 2″ Memory Glass. I sandwiched a photo of Rebecca between the glass and a piece of cardboard and placed it inside a Antique Copper Memory Frame. The frame was adhered with dimensionals and the hoop of the frame is held in place by the wire of the rose. That was threaded through the lid and adhered on the inside of the lid.

sagrungeroserebainside.jpg

To cover the Hinge fastener on the bottom of the box and the wire of the rose on the inside of the lid, I cut Kraft cardstock to size and treated it like the sides of the box before adhering the cardstock in place.

Have a wonderful evening! Hugs and smiles

wvlistenheartgrungeflowerwi.jpg

Here is the tutorial for the grunge flower I posted yesterday.

Step 1: 

grungerosestep1.jpg

Cut three six petal flowers out of grunge paper that had been embossed with Cuttlebug’s Divine Swirls Embossing Folder. I used Tim ‘s Tattered Floral Alteration Die. The flowers were sponged first with Stream Adirondack , then with Chipped Sapphire Distress ink. Next they were stamped with Jet Black Archival Ink and stamps from the sets Going Somewhere and Mini Muse.

Cut the first flower between petals to the middle of the flower.

Cut one petal off the one flower and two petals of the other. Keep the extra pieces.

 Step 2:

grungerosestep2.jpg

Roll each petal betwen your fingers to shape the petal.

Step 3:

grungerosestep3.jpg

Add adhesive on the right petal next to the cut.

Step 4:

grungerosestep4b.jpg

Fold the petal left of the cut over the right one and press down. To hold in place while drying, I use a paper clip.

Step 5:

grungerosestep5a.jpg

Repeat step three and four with your five petaled flower.

grungerosestep5b.jpg

As well as with your four petaled flower.

Step 6:

grungerosestep6a.jpg

On your two petaled piece, roll the right panel down like all your other petals. Add adhesive to the back of your left panel.

grungerosestep6b.jpg

Roll the left panel over the right creating a cone. Hold cone together while glue dries either with wire wrapped around it or a clothes pin.

Let all pieces dry. Five minutes should be enough.

Step 7:

grungerosestep7a.jpg

Cut a hole on the bottom of your four petaled cone.

grungerosestep8a.jpg

Step 8:

grungerosestep8b.jpg

Repeat step 7 with the five and three petaled cone.

Step 9:

grungerosestep10a.jpg

Poke a hole through your two petaled cone.

grungerosestep10b.jpg

Thread a wire through the hole. Center the flower cone on the wire. Fold the wire ends together.

Step 10:

grungerosestep9.jpg

Roll the edges of your single flower petal inward, like a gate fold card. Cut the bottom off and slide into your two petaled cone.

Step 11:

grungerosestep11a.jpg

Add adhesive on the edges of the center of the three petaled cone.

grungerosestep11b.jpg

Thread your two petaled piece into your three petaled cone.

Step 11:

grungerosestep12.jpg

Repeat step 10 with your four and five petaled cone to finish your flower.

I shot the video for the grunge flower with the bigger die flowers of Tim’s die. I forgot to show to add glue to the inner cones before assembly. Sorry about that. Here is the video for the visual learner:

[youtube]https://www.youtube.com/watch?v=F9kW-wqKE1Y[/youtube]

Thanks so much for stopping by! Have a wonderful evening! Hugs and smiles

craftysvintagechristmastopn.jpg

Today is the last day of the Holiday Blitz week on Splitcoaststampers.  Angie Tieman came up with a Pizza box covered with Top Note die cuts last year and she agreed to write a tutorial for us. Make sure to check out her Top Note Box tutorial. It’s easy, fast and GORGEOUS!

craftysvintagectopnotebj.jpg

I used Kraft colored cardstock for my box and stamped images from the Vintage Christmas set from Crafty Secrets on the box with Frayed Burlap Distress ink. I sponged the edges of all pieces with Frayed Burlap as well.

The main image was stamped in Tuxedo Black Memento Ink on Neenah Solar White cardstock and colored it in with Copic Markers (W00, W1, W3, Y28, E44, R29, R59, Yr14, YR21, E30, BG96, E51, R12).  The image was cut out with Oval Nestabilities, layered on a slightly bigger black oval and a scallop red oval. Green May Arts Silk ribbon was tied around the box and the image was attached over it with dimensionals.

To finish the box off I added some Dimensional pearls on the Holly on the Santa hat and another Snowflake Medallion on the top left. The snowflakes were cut out with Create a flake 1 dies from Spellbinders, sponged with Shabby Shutters ink and Shard Vintage Glitter was added with Crystal Effect.  The medallion was topped off with a button from my Mom’s stash and Linen thread.

Here is a video for the visual learners:

[youtube]https://www.youtube.com/watch?v=taGqWS1IMDM[/youtube]

becauseofyouwcmd09ewide.jpg

For WCMD Verve challenged us to pick colors from a flag and create a card with that. Of course I had to pick Germany (Black, Red and Gold/Yellow). I knew I had a video for the Watercolor Wash Tutorial coming up, so I thought I try using it for my sample.

I cut out Watercolor paper with Spellbinder Label Four Nestabilities and stamped the flower silhouette from Verve’s Because of you in Black Craft ink. I embossed it twice with Clear Embossing powder. I guess I should have used the Embossing buddy, because you can see the stray powder. Although I think it gives it a nice look. I went over the image with  7Gypsies ColorWash Scarlet and Ochre to create the background. The watercolor paper was layered on a bigger black label.

becauseofyouwcmd09e.jpg

The card base is a 5″ x 10″ piece of Scarlet Core’dination cardstock folded in half. The Whisper White cardstock layer was cut with Stampin’ Up!’s Clear Scallop Square Die.  The 3 5/8″ Fancy Pants All Fall Patterned Paper was stitched to a 1/4″ bigger piece of Basic Black cardstock. Gorgeous Burgundy Silk May Arts Ribbon was died around the lower part of those layers before the main image was adhered.

The sentiment is also from Because of you. It was stamped in Tuxedo Black Memento ink and cut out with Spellbinder Tag Nestabilities. I left the tag on and airbrushed the center with Copic Markers. A Prima Flower with a 5/16″ black brad in it’s center finishes off the card front.

Here is a video for the visual learner:

[youtube]https://www.youtube.com/watch?v=kdw6x49_oOg[/youtube]

© 2012 fresh & fun Suffusion theme by Sayontan Sinha