Today’s featured new CAS-ual Fridays Stamps set is called Snowflake Greetings. As the name says it has quite an assortment of snowflakes as well as greetings. My card was created out of  5 1/2″ x 7″  piece of Neenah Solar White cardstock. It was folded in half and  a 3/4″ border was masked off with Eclipse Tape.

The center of the card was sponged with Evergreen Bough and Broken China Distress inks. Snowflakes were stamped with those same colors as well as Tumbled Glass Distress ink.

A border was drawn with a Copic Multiliner and a sentiment was stamped in the lower right corner of the sponged area with Jet Black Archival Ink.  Three rhinestones from Sleek Strip Silver Rhinestones were adhered to the left of the sentiment.

White cardstock was cut with the Faceted Snowflake die. A green button was tied on with silver cord before the snowflake was adhered to the upper right hand corner of the sponged area.

Make sure you check the CAS-ual Fridays Stamp blog to see more samples created with the new set.  Thanks so much for stopping by! Have a wonderful day!

Hugs and smiles

Today’s Holiday Blitz tutorial is written by Susan Culotti. She shows us how to create a flip top box (like it’s used for cigarettes or crayons). I shot the video and created this box as a sample.

My box base is a piece of Kraft cardstock. The patterned paper used to decorate the box is from Carta Bella’s Winter Fun patterned paper. Holiday Apothecary Labels stamps and dies were used to dress up the box.  Rhinestones from Sleek Strips Silver Rhinestones finish off the box.

Here is a video for the visual learner:
[youtube]https://www.youtube.com/watch?v=5M9mODY5weM[/youtube]

Thanks so much for stopping by! Have a wonderful day!
Hugs and smiles

I created this card for a Way to Use it Challenge (no fall colors) and a CASE study challenge.  I just LOVED the card we had to case and it made me create not just one but several cards. For this one I paired 3/4″ x 3 1/4″ wide strips of different colored blue Bazzill cardstock were adhered to a slightly bigger white base. I used the new Simon Says Stamp Curvy Snowflake die to cut a negative image in the center.  The edges were stitched and the snowflake die cut was adhered over the negative cut.

The layers were adhered to the card base, a 3 3/4″ x 10″ piece of Limeade Bazzill cardstock, folded in half. The bottom corners were rounded.

A piece of Solar White cardstock was cut and with Holiday Folded Banner die. The sentiment and frame is from the same named Simon Says Stamps exclusive stamp set and was stamped on the banner with Jet Black Archival ink. The banner was adhered to the lower right edge of the snowflake panel. Rhinestones on the snowflake and next to the banner finish off the card.

Thanks so much for looking! Have a wonderful day!
Hugs and smiles

P.S.: Today’s Holiday Blitz tutorial on Splitcoaststampers was created by Theresa Momber. She shows you how to turn a circle die cut into a darling basket.


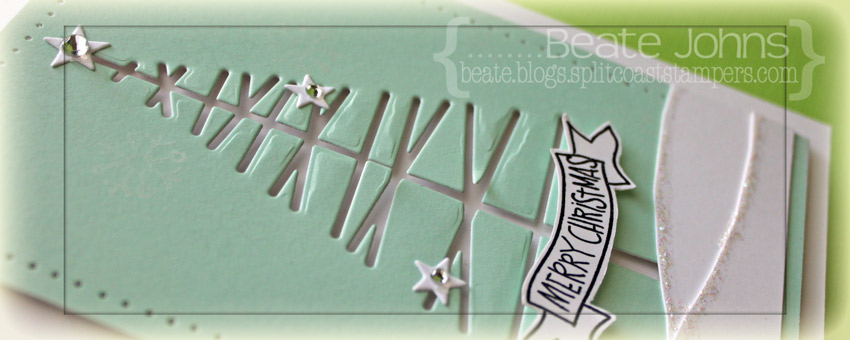
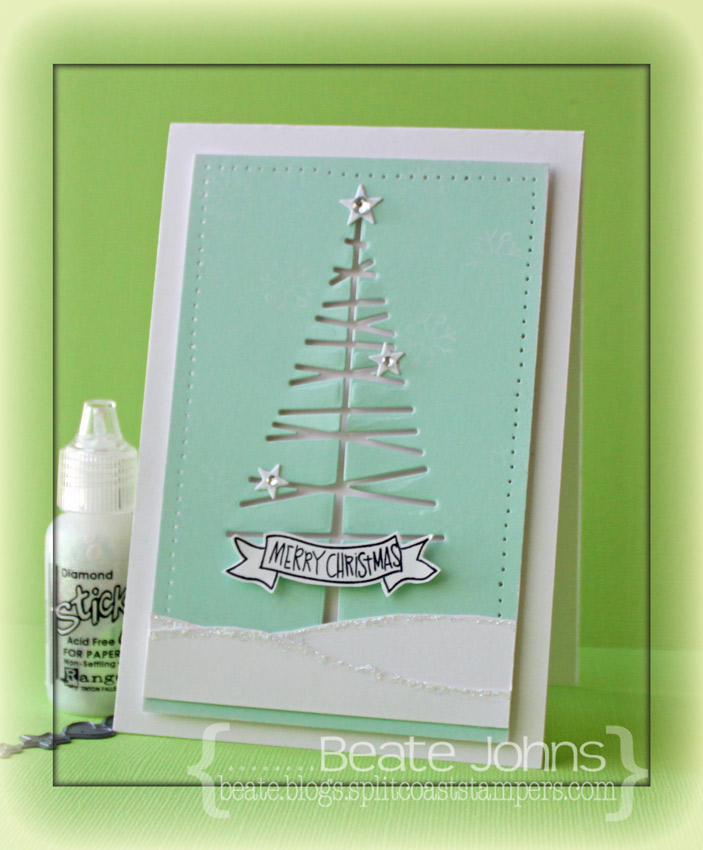
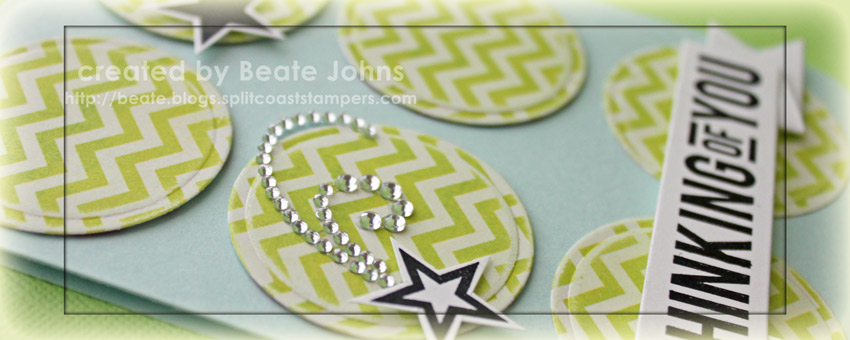
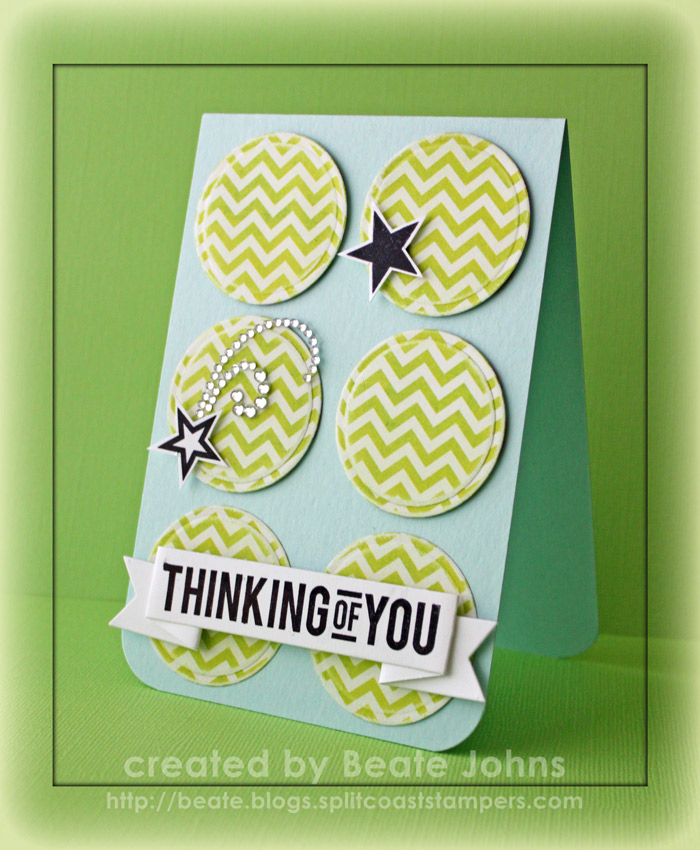
I received my Holiday Card Kit from Simon Says Stamp and had to play with it right away. I made two quick cards with it. I can’t wait to color the cute Gnome that comes in the stamp set. I am sure I will get to that soon.  For the first one I started by cutting the Mod tree in a 3 1/4″ x 5″ piece of Shallows paper (came in the kit). The edges were sanded and the side and top edge pierced.

Two 3 1/4″ strips of white cardstock were torn, adhered to the lower part of the layer and the edges were topped with Diamond Stickles.  The layers were adhered to the card base with foam adhesive squares, a 3 3/4″ x 11″ piece of white cardstock (from kit), folded in half. More white cardstock was cut with the Holiday Shapes die. Three stars were added to the tree and topped with a rhinestones.

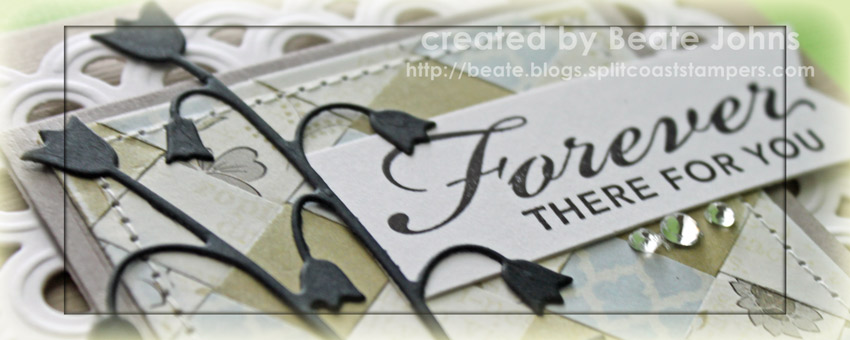
A sentiment from Gnome for the Holidays (included in the kit) was stamped in the banner outline from the same set, cut out and adhered under the tree to finish off the card.

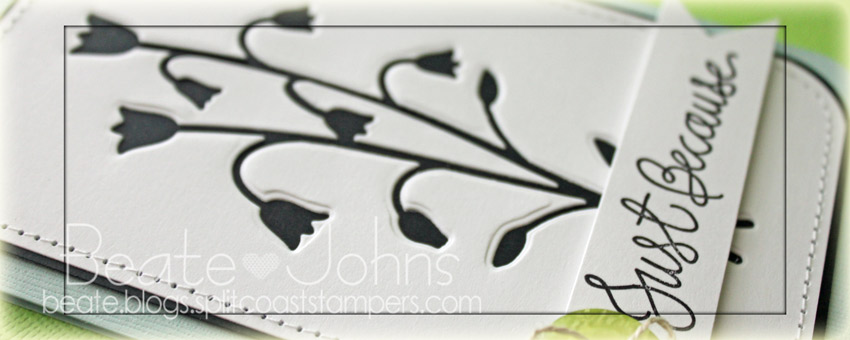
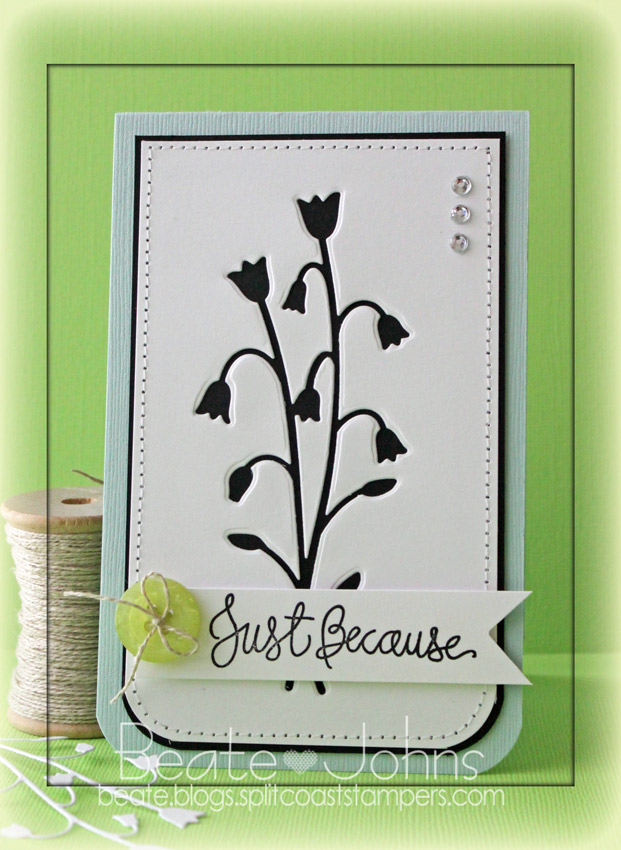
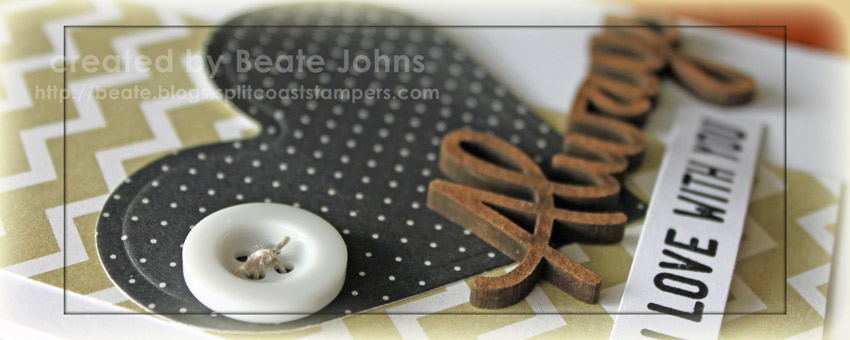
For my second card I stamped the label image from Gnome for the Holidays in Jet Black Archival ink on white cardstock, that had been cut with Simon Says Stamps exclusive Apothecary Label dies.  A little silver glitter brad (included in kit) was added on the top of the label.

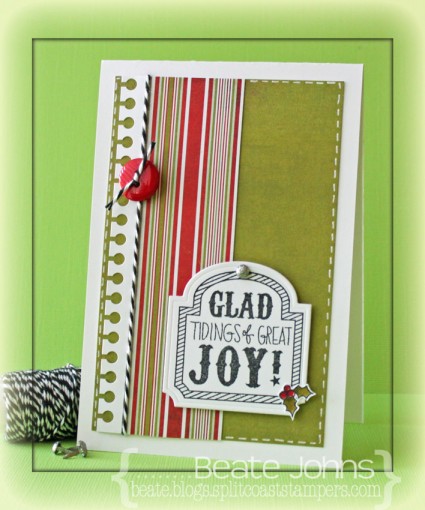
Part of a Doodlebug Francy Frills cardstock sticker (included in the kit) was adhered to a 1 3/8″ x 5″ piece of Aspen Frost Basic Grey (one sheet of each design included in the kit)  paper strip. Both were adhered to a 3 1/4″ x 5″ piece of the same paper kit. Black Doodlebug Twine (from the November kit) was tied around the layers and topped with a button  before the layers were adhered to the card base, a 3 3/4″ x 11″ piece of white cardstock, folded in half.

Faux stitching was added with a white gel pen. The tiny holly image from Gnome for the Holidays was stamped in Tuxedo Black Memento Ink on Neenah Solar White cardstock and colored with Copic Markers (R24, R29, R39, YG93, YG97). The imag was cut out and adhered to the lower right of the label to finish off the card.

There is only a limited amount of those card kits available. I am glad I got mine!

Thanks so much for stopping by! Have a wonderful day! It’s Friday!!!! Wohoo
Hugs and smiles

Last Friday the Free For All Challenge at Splitcoaststampers was to create a card with negative die cut shapes. I had a lot of fun with it and created four cards!!! That is pretty amazing for me. Usually I get two cards done per day, tops. But I had so much fun, I just couldn’t stop.

For this card I started with a 3″ x 5″ piece of Neenah Solar White cardstock. The bottom corners were rounded and the Meadow Rue die was cut out in the center of the cardstock. The layer was adhered to a 3/16″ bigger piece of black cardstock and the edges were stitched.

The layers were adhered to the card base, 3 1/2″ x 11″ piece of Seasalt Canvas Bazzill cardstock, folded in half. A sentiment from Simonsaysstamp’s Handwritten Sentiment stamp set was stamped on a  7/8″ wide strip white cardstock with in Jet Black Archival ink. The right edge was cut banner style and a green button was tied on to the upper left side of the strip with Linen Thread. The sentiment strip was adhered to the card with foam adhesive squares. Three rhinestones from a Sleek Strips Silver Rhinestones finish off the card.

Thanks so much for stopping by! Have a wonderful day!
Hugs and smiles

I created this card for last week’s Inspiration challenge.  For my sample I chose this darling stuffed giraffe.  The color scheme for this card came from last week’s  Ribbon Reel Challenge.  The sketch is from the current CASE study challenge.

I started by cutting a piece of Neenah Solar White cardstock with the giraffe die from MFT’s Spectacular Circus stamp and die set. The matching giraffe stamp was stamped over it in Wheat VersaMagic ink. A piece of Pink Paislee Portfolio patterned paper was cut and embossed with a Standard Circle Nestabilities die. The edges were sanded before the circle was stitched to a slightly bigger white cardstock circle.

A 3 1/2″ x 5 1/4″ piece of Kraft cardstock was embossed with the Simplicity M-Bossabilities folder. The bottom corners were rounded and a the edges were faux stitched with a Signo white gel pen. The layer was adhered to the card base, a 3 3/4″ x 11″ piece of white cardstock folded in half before the partial circle was adhered to the left hand side. The giraffe was adhered to the circle with foam adhesive squares.

One of the sentiment from Circus Spectacular was stamped in Gray Flannel Memento ink on a piece of white cardstock, cut with one of MFT’s Sentiment Strips die-namics die. One of the sides was cut straight and the sentiment was adhered underneath the circle with Scor-Tape on the edges and two foam adhesive squares on top of each other in the center.

Stars were cut out Solar White cardstock as well as the same paper that was used for the circle with SimonSaysStamp exclusive Holiday Shapes die. The stars were adhered to the card and topped with rhinestones. A rhinestone on each end of the sentiment strip finishes off the card.

Thanks so much for stopping by! Have a wonderful day!
Hugs and smiles

Today Splitcoast is posted a product review on Xyron‘s new 1″ Mini Sticker Maker and the new glue stick. I used both products on a card I created for last week’s Free For All Challenge.

I had recently discovered Freckled Fawn Washi tape and was eager to use it on a card. For this card, I covered a 3 1/2″ x 4 3/4″ piece of Neenah Solar White cardstock with three different tapes. The edges were stitched and one of SimonSaysStamp  Talk Bubbles die was used to cut a window on the lower right hand corner.

A sentiment from SimonSaystamps For the Record was stamped in Jet Black Archival ink on Solar White cardstock. It was adhered (with Xyron Glue stick) behind the window before the layers were adhered to a 3/16″ bigger piece of black cardstock. A border was drawn with aCopic Multiliner on the inside edge of the talk bubble.

Hearts were cut out of black cardstock with the Holiday Shapes die. Three were adhered to the upper left hand side and one little red baby bling rhinestone was added to the biggest heart. The layers were adhered to the card base, a 4 1/4″ x 11″ piece of Kraft cardstock folded in half with  foam adhesive squares. A border was doodled around the big layer to finish off the card.

If you haven’t checked out Freckled Fawn yet, get yourself something to drink, sit in a comfortable chair and go and check it out. It’s Washi Tape heaven!!! Their tapes are so pretty and I love how they staged their product photos. If you like their product, please go and like Freckled Fawn and Simonsaysstamp on facebook. Freckled Fawn was sweet enough to sponsor a little Washi Tape giveaway.

To enter be eligible for the drawing, just leave a comment under this post AND like Freckled Fawn on facebook. I will pick a winner with the help of random.org  this Saturday! You will love this tape. Good luck with the drawing!!!

P.S.: When you go to the Freckled Fawn Facebook page, please post that I sent you. This way I know you were there and liked them. Thank you!

Thanks so much for stopping by! Have a wonderful day!
Hugs and smiles

I am exciting to have a couple of cards to share with you on the Simon Says Stamp Blog. I have been purchasing and linking to the store for several years now. I LOVE their huge selection of product and their customer service. For a few month now they have monthly card making kits with Simon Says Stamps exclusive stamps and dies.

The first card was the card I made for Rick for our 19th wedding anniversary. I loved the colors in this kit and how it works for masculine cards.

The second card was created for last week’s Technique Lover Challenge on Splitcoaststampers. We were to use paper weaving on our projects. I love how the papers look together.

I hope you have time to check out the entire cards on the Simon Says Stamp Blog!  If you do, you may win a  prize pack worth over $25!!! Have a wonderful day!
Hugs and smiles

I had fun with Saturday’s Inspiration challenge. For this sample I chose the target sheet on the Empiral style website as my inspiration piece. I thought the layout would make a great card sketch. I thought the finished card would work great for the current Tuesday Trigger on Moxie Fab World, so I will be entering it there as well.

The card base is a 3 3/4″ x 11″ piece of Sno Cone cardstock, folded in half. The bottom corners were rounded. Six circles were cut with a Standard Circle Nestabilities die out of an old My Mind’s Eye Lime Twist Life of the Party patterned paper pack.  The edges of the paper were sanded. The four top circles were adhered to the card front with foam adhesive squares, the bottom two circles with regular adhesive.

A piece of Neenah Solar White cardstock was cut with Simon Says Stamps exclusive Memory Box Banner die. A stamp from the Saying it with Banners set was stamped in the center of the banner with Jet Black Archival ink. The banner was folded and adhered over the bottom two circles with foam adhesive squares.

Two star images from Shoot for the Stars were stamped in Jet Black Archival ink on Neenah Solar White cardstock, cut out and adhered to two of the circles. Part of a Finesse Rhinestone Swirl was adhered next to one of the stars to finish off the card.

Thanks so much for stopping by! Have a wonderful day!
Hugs and smiles

© 2012 fresh & fun Suffusion theme by Sayontan Sinha