It’s my turn to share a video post on the Spellbinders blog today. Next week it’s all about Edgeabilities on the Spellbinders blog. I thought it would be cool to create Chevron strips with the Ric Rac die from the Classic Edge One die kit.

The current CAS-ual Fridays challenge called us to make a masculine card. I think even with the rhinestones I added, this card fits the bill.

I hope you have time to check out the card and video. Thanks so much for stopping by! Have a wonderful weekend!
Hugs and smiles


I created a CAS Fall Thank you card for my blog post on the Spellbinders blog today. I hope you have time to check it out and tell me what you think.

Thanks so much for stopping by! Have a wonderful day!
Hugs and smiles

I have a quick video tutorial on the Spellbinders blog, showing how to create this little treat box. I hope you have time to check it out.  The sentiment is from a JustRite Stampers set that will be released in the middle of September. It’s called Grand Sentiments and it’s gorgeous!

Have a great weekend!
Hugs and smiles


Today is Silke and my first Flourishes Friday Focus post. It is time for a sketch challenge. I used an image from the Nasturtiums set and a sentiment from the Fuchsias in Bloom set.  Both sets are on the retirement list and won’t be available much longer.

I started by cutting and embossing a piece of white cardstock with the soon to be released Card Creator Matting B Basics (3rd smallest die). I stamped the big image from Nasturtiums in Tuxedo Black Memento Ink on the piece while the die was still over it. I stamped part of it again so I could cut one flower off and overlay it on the main image. The image was colored with Copic Markers (Y21, Y23, Y35, Y38, YR07, YR09, G40, G43, G46, BG000, BG01) and adhered to a piece of cardstock cut and embossed with the third largest Card Creator Postage Edges die.

A piece of My Mind’s Eye Howdy Doody Paper was cut and embossed with the third smallest of the Card Creator Matting A Basics die. The paper was sanded and the edges were stitched before it was adhered behind the image layers.

The layers were adhered to a piece of white cardstock, cut and embossed with the second largest Postage Edges Card Creator die. The layers were adhered to the card base,  a 4 1/4″ x 11″ piece of green cardstock, folded in half.

A 4 1/4″ long strip of white cardstock was cut and embossed a Classic Edges One die and a Classic Decorative Insert Five die. Ribbon was tied around the top  before the strip was adhered to the card base.  The ribbon was topped with a button. Parts of a Finesse Rhinestone Swirl and a few small rhinestones finish off the card.

If you are interested in winning the two “soon to be retired” Flourishes set I used for this card, just add your url to the Mr. Linky underneath. I will pick a winner on Monday with the help of random.org.

Check out what the other design team members have created with this sketch:

Thanks so much for stopping by! Have a wonderful weekend!
Hugs and smiles

Hello and welcome to Day 2 of our June Rubber & Die Release Showcase!

On Wednesday (20 June) Whimsy Stamps released this month’s new rubber designs, new Shapeology dies and new Shape EZ by TLC. From then until 26 June the Whimsy Stamps DT and Special Guests are showcasing these fabulous new goodies with a daily mini blog hop and I am part of today’s hop!

Each mini blog hop has a new release prize hidden somewhere along the way and you have 24hrs to enter each prize draw.

To be entered into today’s mini blog hop prize draw, be sure to leave a comment on ALL of the DT’s posts listed below by 12.00PM EST tomorrow. All winners will be announced on the Whimsy blog on 27 June.

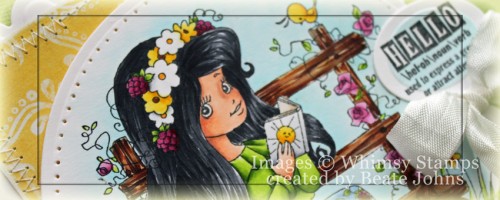
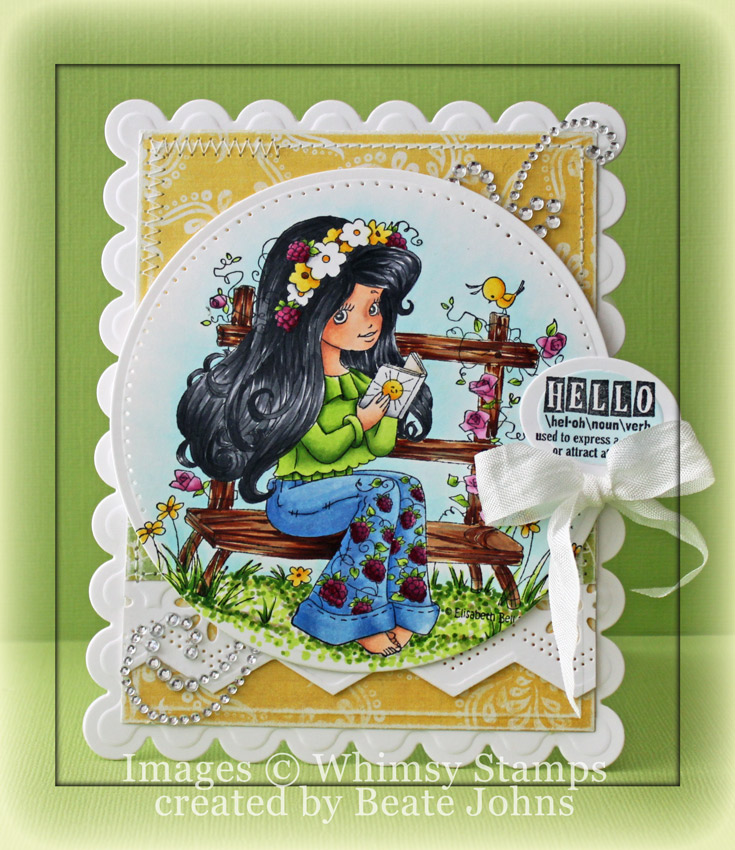
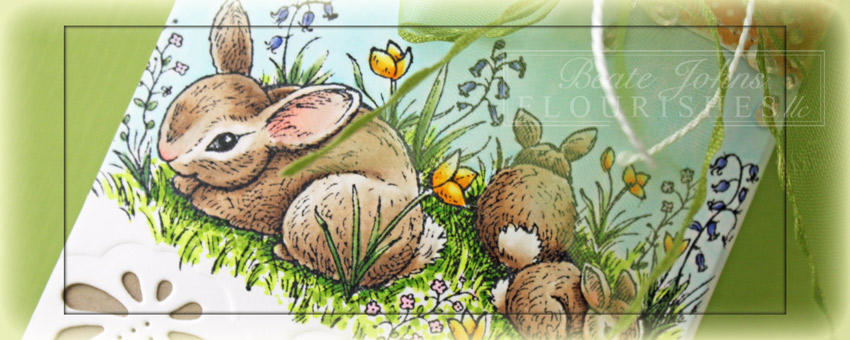
For my card I stamped Elisabeth Bell’s new Blossom Berry Sitting Pretty image in Tuxedo Black Memento Ink on Neenah Solar White cardstock, cut and embossed her with the smallest of the Grand Circle Nestabilities and colored with Copic Markers( Skin: E000, E00, E01, E11   Hair: C3, C5, C7, C9   Pants: B21, B23, B24, YG01, YG03, YG17, RV55, RV66, RV69   Shirt: YG01, YG03, YG17   Bench: E31, E34, E37, E29, W3    Flowers/Bird: Y13, Y15, Y17, RV52, RV55, RV66   Ground: YG01, YG03, YG17, E31, W3    Background: B0000, B000). The edges of the circle were paper pierced.

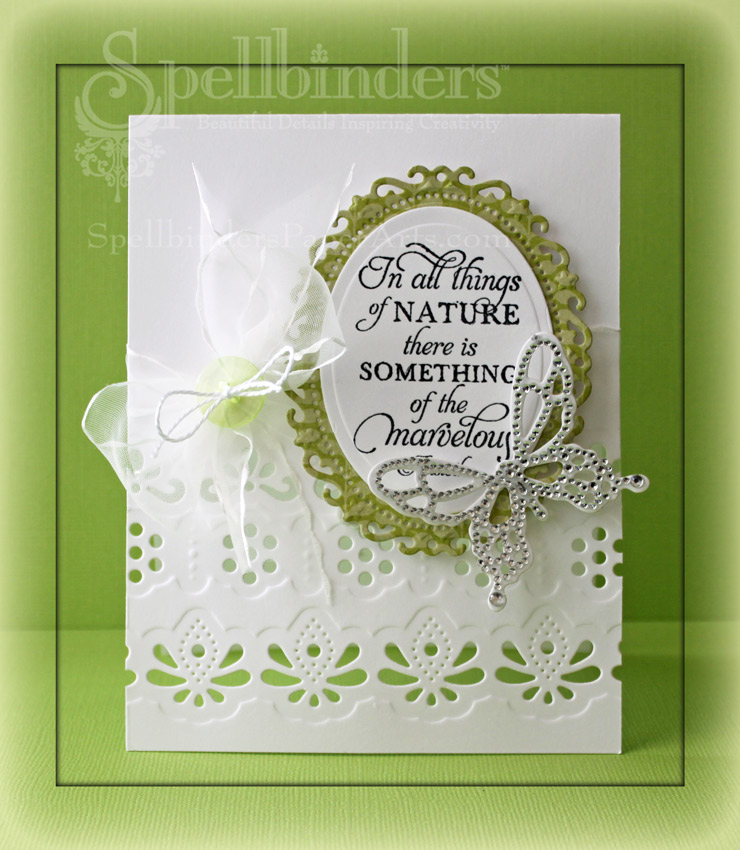
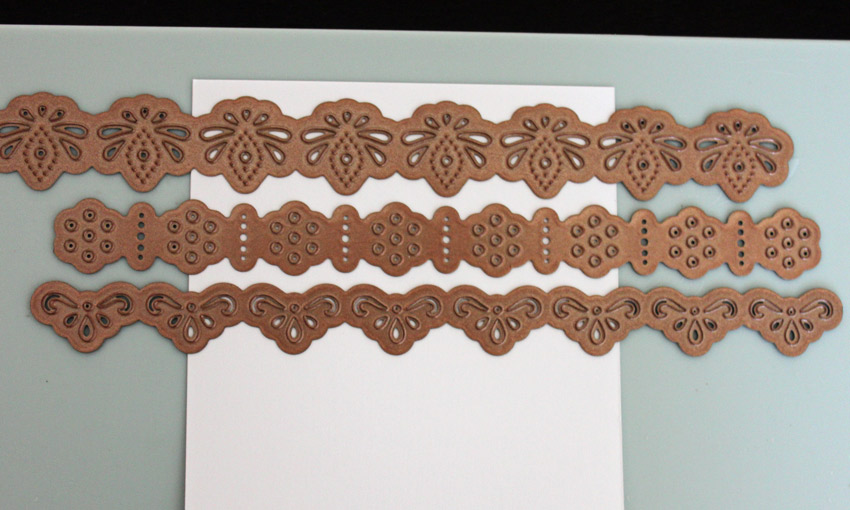
Two pieces of Echo Park Paradise Beach patterned paper were cut with a  Grand Rectangle Nestabilities die.  The edges were sanded and stitched before seam binding was tied around it.  The layers were adhered to a card base, cut and embossed with a Grand Scallop Rectangle die out of  Solar White cardstock.

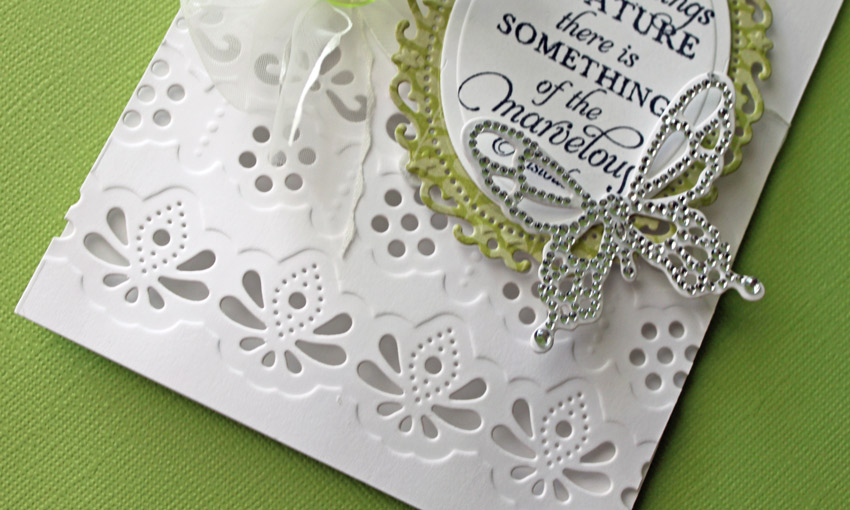
One of the new Definition Notables 4 sentiments was stamped in Tuxedo Black on Neenah White cardstock, cut and embossed with a Classic Oval Nestabilities die and colored with Copic Marker B0000.  The oval was adhered right over the seam binding bow. Parts of a Silver Finesse Rhinestone Swirl finish off the card.

To take a peek at today’s fabulous new release creations, please click on the links below…

Remember that the entire new release is available to buy right now from the Whimsy Stamps store along with all your Whimsy favourites.

Thanks for stopping by and don’t forget to pop back to the Whimsy blog tomorrow for more new release creations!
Hugs and smiles

Becky Fleck has new card sketches on her Pagemaps site today. I created this card with one of those gorgeous new sketches as well as one of her Spellbinders die packs.

For my sample I used Cosmo Cricket Baby Jane paper. I cut and embossed pieces with Pagemaps Whimsy dies and  sanded the edges to create the bird. Another piece of Baby Jane paper was cut and embossed with a Standard Circle Nestabilities die. Again the edges were sanded before the circle was adhered to a piece of Neenah Solar White cardstock, cut and embossed with a Tear Drop Circle Nestabilities die.

The bottom corner of a 4″ x 5 1/4″ piece of Baby Jane paper were rounded before the edges were sanded and stitched. The layer was adhered to the card base, a 5 1/2″ x 8 1/2″ piece of white cardstock, folded in half.  The left side of a Baby Jane paper strip was cut and embossed with a  Classic Square Nestabilities die to create a banner edge. The strip was adhered to the center of the card layers. A short strip of white cardstock was cut and embossed with a Classic Scallop Edgeabilities as well as a Classic Decorative Insert 5 die. The white paper strip was adhered over the left hand side of the strip and topped with a button.

A sentiment from Flourishes Tag Lines was stamped in Tuxedo Black Memento Ink on white cardstock that had been cut and embossed with a Nested Lacey Pennants die. The sentiment was adhered to the right hand side of the card. Parts of a  Finesse Rhinestone Swirl finish off the card.

Thanks so much for stopping by! Have a wonderful day.
Hugs and smiles

Yesterday a new Crafty Friends Challenge was posted. Heather is the hostess for this challenge and her challenge for us is to create anything BUT a card. I decided to create a tag with one of the new Pagemaps dies from the Tags & Flags die pack.

The card base was created by cutting and embossing a piece of Neenah Solar White cardstock with one of the tag die from the Pagemaps die pack. A piece of Bazill Basics Paper Vintage Marketplace patterned paper was cut with the same die. The edges were sanded and then it was cut down on the embossed edge. The paper was adhered to the tag base.

An insert from Classic Decorative Insert 6 and a cutting edge from Classic Edge One were used to cut and embossed a piece of Neenah Solar White cardstock. It was adhered under a 3/8″ wide strip of another pattern from the Vintage Marketplace paper. The strip was adhered to the tag and the edges were stitched. Seam binding was tied around the upper edge of the horizontal strip.

More Solar White cardstock was cut and embossed with the dress from die from Sewing Elements and the rectangle tag die from Home Sweet Home . Both pieces were sponged with Antique Linen Distress Ink. The dress form was adhered to the left hand side of the tag. The tag was stamped with a sentiment from The Craft’s Meow’s Sew Lovely stamp set in Rich Cocoa Memento Ink. The tag was tied on to the bow with embroidery thread and a button. Rhinestones from Silver Baby Bling Rhinestones and a Finesse Rhinestone Swirl finish off the card.

Thanks so much for stopping by! Have a wonderful Monday.
Hugs and smiles

I have a new video up on the Spellbinders blog today where I talk about Edgeabilities. I love how versatile those dies are. My sample is made with a brand new JustRite Stampers set called Botanical Medallions & Banners. As a layout a September 2011 CardMaps sketch. I hope you have time to check out the entire card and video.

Have a great weekend!
Hugs and smiles

I am excited to be participating in the Spellbinders™ Spring Blog Hop today. My assignment was to create a card with two or more of the gorgeous Classic Insert 4 dies. I love the look the inserts create along with the Classic Edge dies. But I had never used them without a cutting edge. I used all three insert dies without a cutting edge and I really like how it turned out.

Spellbinders Paper Arts Supply List:

Cross Promotional Partner:

I started by laying down the card base on my base plate. I arranged the Classic Decorative Inserts Four dies over the bottom of the back of the card base. (I placed the the back of the card underneath the dies, because the inserts are 8″ long. The way I arranged the dies I had to place them the long way on the base plate. Since the card base is 11″ long, it wouldn’t fit any other way).

I folded the card front over the dies and cut and embossed the card front.

A piece of My Mind’s Eye™ On The Bright Side Two was cut and embossed with the second largest Floral Oval die. A piece of white cardstock was cut and embossed with the second largest Classic Oval Small die. The white oval was stamped with a sentiment from Flourishes Life Lines and adhered over the patterned paper oval.

Ribbon was tied around the card front above the embossed part. A button was tied on over the bow with embroidery thread before the sentiment layers were adhered to the card front with SCRAPBOOK ADHESIVES BY 3L™ 3D Foam Squares.

A piece of white cardstock was cut with a die from the Wonderful Wings pack. Want2Scrap Wonderful Wings Bling was adhered over the cardstock butterfly before it was adhered to the lower edge of the oval panels.

The Spellbinders™ Spring Blog Hop will begin April 30th, and will end on May 5th, 2012. It consists of 16 individual and one grand prize drawings.  Enter the Spellbinders™ Spring Blog Hop by visiting the participating blogs each day.

From each Blog Hop post, click on the Blog Hop “Enter HERE” at the end of each blog to open the entry form. You may only enter once from each blog each day.

Spellbinders™ will randomly draw one winner from each participating blog to receive all of that day’s products. The Grand Prize Winner will be randomly drawn from the pool of entrants that sent entry forms from each and every participating blog during the 48 hours each blog was open. For the full list of official rules please click RULES.

**Enter the contest by clicking HERE**

Thanks so much for stopping by! I hope you have time to check out what the other blog hop participants have created for you.

Christine Emberson

Windy Robinson


Questions?  [email protected]

No entries will be accepted at this email address.


Maki is today’s Timeless Tuesday challenge hostess and asked us to create an Easter project or card. As soon as I read the challenge, I knew I wanted to use those adorable bunnies from Spring is Sprung.

I started by cutting the edges of a 6 1/4″ wide piece of white cardstock with a Classic Edge 2 die as well as a die from Classic Decorative Inserts die.  I scored the strip at 3″ and 6″ before stamping the bunny image in Tuxedo Black Memento Ink on one of the 3″ panels, above the embossed edge. The image was colored with Copic Markers (Bunnies: E40, E41, E42, E43, R00, R20   Flowers: Y13, Y15, Y17, RV10, B63, B66, G43, G46   Grass: YG01, YG03, YG17   Sky: B0000, B000).

A 6 1/2″ x 7″ piece of Kraft cardstock was scored at 3″ and 6″ on the 6 1/2″ side and adhered into a tube.The bunny strip was adhered around that tube. A 1 1/2″ x 6″ piece of MME Lost & Found 2 Rosy Patterned paper was stitched to a white cardstock strip. It was adhered above the bunny image strip. A rhinestone border bling was adhered to the bottom edge of the patterned paper layer and ribbon was tied around it. It was topped with a button, tied on with embroidery thread.

A hole was punched on top and ribbon threaded through it. Next a Hershey bar was pushed down into the tube and the ribbon on top was tied with a piece of embroidery thread. A sentiment from the same set was stamped on the lower right corner of the tube. Three small rhinestones on the embossed strip finish off the pull treat holder.

Check out my fellow Timeless Tuesday Challenge Members for more inspiration:

Cindy Haffner
Heather Jensen
Maki Jones
Mona Pendleton
Silke Ledlow
Tammy Hershberger
and March Guest Designer Meredith MacRitchie

Thanks so much for stopping by! Have a wonderful day!
Hugs and smiles


© 2012 fresh & fun Suffusion theme by Sayontan Sinha