I had a post on the Spellbinders blog yesterday featuring a Happy New Year’s card. I hope you had time to check it out and if not, go and hop on over there and tell me what you think. I am in love with Glimmer paper and stars recently.

Thanks so much for stopping by! Have a wonderful day!
Hugs and smiles

P.S.: Today’s new tutorial on Splitcoaststampers is written by Sabrina Friel for a Flip Down Stack card. I hope you have time to check that out as well.

It’s my turn to share on the Spellbinders blog today. The topic this week is sparkles. Now that was an easy one for me. Rhinestones, Brilliance ink and Glimmer Paper.

I hope you have time to check it out and tell me what you think. Have a wonderful day!
Hugs and smiles

I have another post on the Spellbinders blog today. I hope you have time to check out the entire card. It works great for the current Simon Says Stamp challenge, which is to create a Christmas project.

Thanks so much for stopping by!  I don’t know how much I will be posting over the weekend and next week! I wish you all a wonderful Christmas. Hopefully you get to spend it with loved ones!!!
Hugs and smiles

I am back with another cute Tiddly Inks image called Cocoa Wishes. It was printed out on Neenah Solar White cardstock. It was cut 3 1/2″ wide and the image was colored with Copic Markers (Skin: E50, E21, E33, R20   Hair: E13, E15, E19, E18   Jeans: B91, B93, B95, B97   Ear Muffs/shirt/bird: YR09, R24, R29, R39    Cup: E40, E41, E42, E43  ).

Two pieces of  3 1/2″ wide strips of Carta Bella’s Winter Fun patterned paper were adhered above the image and the edges were stitched. The layers were adhered to the card base a 3 1/2″ x 11″ piece of Kraft cardstock, folded in half. The bottom corners were rounded and a piece of red washi tape was adhered on the the paper strips on top.

A sentiment from Snowflake Letters Mini seals was stamped in Tuxedo Black Memento Ink on a piece of white cardstock, cut and embossed with a Standard Circle Nestabilities die. A red button was tied on with a silver cord before the sentiment circle was adhered with foam adhesive squares. A few snowflakes were cut and embossed out of silver glimmer paper with Snowflake Borderabilities dies and adhered to the card to finish it off.

Thanks so much for looking! Have a wonderful day!
Hugs and smiles

Today’s tutorial on Splitcoaststampers is written by the wonderful Susan Roberts. She shows us how to create a flower by cutting and melting ribbon pieces. It’s perfect for winter, when my hands seem to be cold all the time. 🙂

For my sample I used ribbon and tulle bought at Hobby Lobby. Both were cut with the two smallest Blossom Nestabilities® dies, heated and stuck together with a decorative brad.

A sentiment from Simon Says Stamp Apothecary Labels was stamped in Tuxedo Black Memento Ink on Neenah Solar White cardstock that had been cut and embossed with the second largest of the Classic Oval SM Nestabilities® dies.

Two pieces of Fancy Pants Country Boutique Paper were cut and embossed with the single leaf dies from the Bitty Blossoms Shapeabilities® die set. The leaves were sanded before they were adhered under the ribbon flower, who was in turn adhered to the lower half of the sentiment oval.

Another piece as well as more Neenah Solar White cardstock was cut and embossed with the second largest Decorative Label Eight Nestabilities® die. The patterned paper was sanded and cut on the embossed edge before it was stitched to the white die cut. The sentiment panel was adhered to the center of the fancy panel with foam adhesive squares.

The bottom corners of a 3 1/2″ x 5 1/4″ piece of Kraft cardstock were rounded and a faux stitched border was added with a black gel pen. The layer was then embossed with the So Trendy M-Bossabilities ® folder. It was adhered to the card base, a 3 3/4″ x 11″ piece of Solar White cardstock, folded in half with the bottom corners rounded. Rhinestones finish off the card.

Here is a video for the visual learner:

[youtube]https://www.youtube.com/watch?v=ajo7y88Rf3Q[/youtube]

Thanks so much for stopping by! Have a wonderful day!
Hugs and smiles

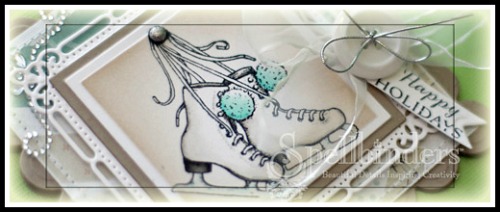
Becky and Melanie thought it would be great fun to team up for a little Holiday Hop today. We are showcasing Becky’s new set, “Warm Woolen Mittens” along with Becky’s new cut file “Grand Banners” and “Grand Banners – Winter Sentiments” and Melanie’s newest set, “Lots of Letters” as well as some of her other recent favorites.

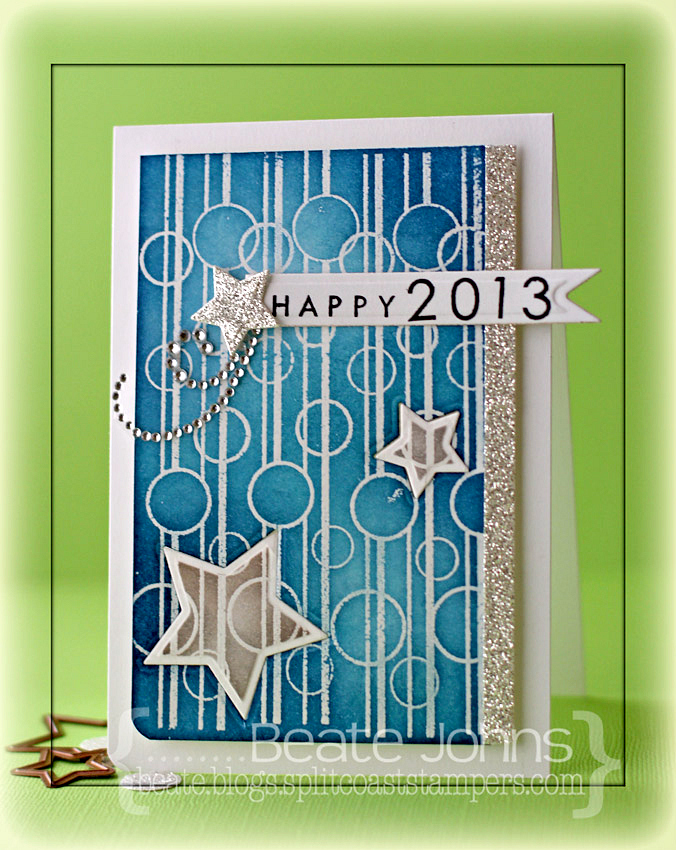
For my card I stamped one  of the patterns from Pretty Patterns in VersaMark ink on a 3″ x 5″ piece of Neenah Solar cardstock. It was embossed with clear embossing powder and stars were cut and embossed out of the lower half with the two smallest dies from the Star Nestabilities set. I had seen Jennifer McGuire create a card with this technique and had wanted to try that out ever since.

The bottom left corner was rounded before the background was sponged first with Teal Zeal, then with Nautical Blue Memento Ink. The stars were sponged with London Fog Memento Ink while the dies were still on the cardstock.

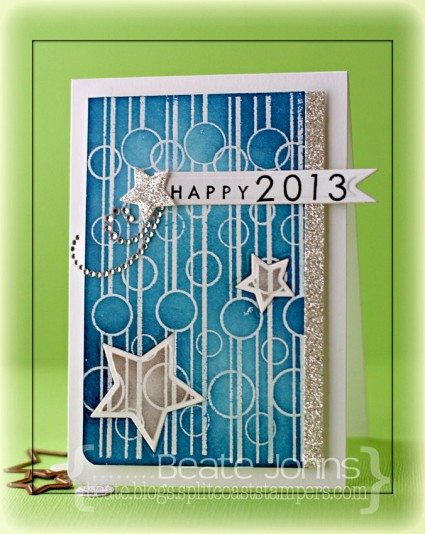
The card base is a piece of 3 3/4″ x 11″ piece of Neenah Solar White cardstock folded in half. Again the bottom left corner was rounded. The background and the stars were adhered to the card base with adhesive foam squares.  A 1/4″ x 5″  silver glimmer paper (Stampin’ Up!) strip  was adhered to the right hand side of the background. A small star was cut out the same paper.

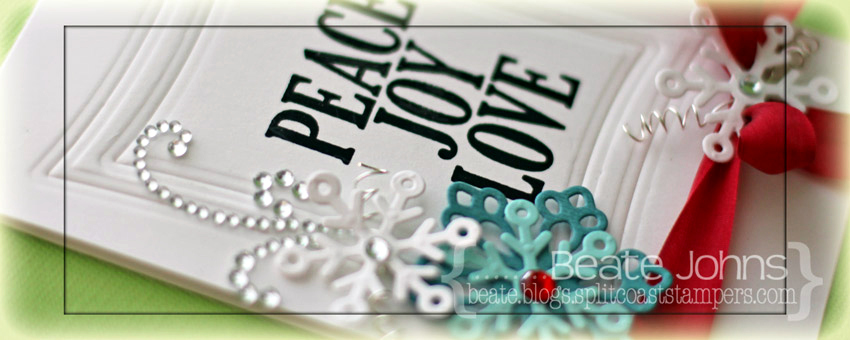
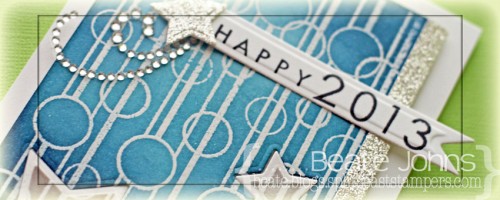
The word happy is from the stamp set Inspiration Mosaic. It was stamped in Tuxedo Black Memento Ink on a strip of white cardstock. 2013 was stamped behind it with numbers from the new Lots of Letters set. The sentiment was cut out with a Pennant die. The glitter star was adhered to the left of the sentiment and both were adhered to the upper half of the card. Part of a Finesse Rhinestone swirl finish off the card.

Make sure you visit everyone’s blog to leave a comment and be entered to win a clear “I do!” and “Beyond Baskets” stamp set! A winner will be announced Thursday.

Becky Oehlers (Illustrator of Warm Woolen Mittens)

JJ Bolton

Laurie Schmidlin

Latisha Yoast

Michelle Woerner

Richard Breaks

Vera Yates

Tosh Leyendekker


Thanks so much for looking! Have a wonderful day!
Hugs and smiles

I have another video post to share with you on the Spellbinders Paper Arts blog. The coming week is all about Nestabilities®. Nestabilities started my love for Spellbinders products. Once the original shapes came out I was hooked. In the video I talk a bit about some of my favorite techniques you can do with Spellbinders dies and show how to create this telescoping image.

I hope you have time to stop by, check it out and tell me what you think. I would love to hear from you!  Have a wonderful weekend!
Hugs and smiles

Patti, you asked for it. Here is a video for the visual learner on how to just emboss your Spellbinders die shape into your cardstock:

[youtube]https://www.youtube.com/watch?v=RRUoXVNuhF0[/youtube]

Have a wonderful Friday! Hugs and smiles


Yesterday I had some free time to play along some of my favorite challenges. I created this card for the current Way to Use it challenge on Splitcoaststampers (favorites), the current CASE Study and Simon Says Stamp challenge (snowflakes).

The current CASE study showcases a gorgeous card from Windy Robinson. Her card had some great dry embossing with Nestabilities dies. Her card had flowers in the center, but I thought snowflakes would be more appropriate for December. Plus I LOVE snowflakes. So I cut snowflakes out of Neenah Solar White cardstock, Frosted Teal and Patina Bazzill cardstock with dies from the 2012 Snowflake Pendant Shapeabilities® die set.

A 3 1/2″ x 11″ piece of Neenah Solar White cardstock was folded in half and the bottom corners were rounded.  Two of the Wonky Rectangles Nestabilities® were embossed in the center of the card. A sentiment from Merry Everything was stamped in the center of the embossed rectangles with Midnight Black VersaMagic Ink.

Red silk ribbon was tied around the lower part of the card base. Thin silver wire was wrapped around a stylus and added to the small white snowflakes. The bigger blue snowflake and a while one were adhered to the left hand side of the sentiment. A second white snowflake was adhered over the ribbon bow.  Rhinestones from Want2Scrap finish off the card.

Thanks so much for stopping by! Have a wonderful Friday!
Hugs and smiles

I have a new video to share with you on the Spellbinders Paper Arts blog today.  I love the reindeer image from Frosty Forms Spellbinders™ Shapeabilities® and used it along with a Label Twenty-Eight Spellbinders™ Nestabilities® die to create my tag.

I hope you have time to check out the entire tag and video, especially about the video. I bought a new tripod (since my plastic one was a little fragile for the new arm) and Tripod extender arm to create videos that are filmed directly above my hands. I love how much better it looks. Let me know what you think.

Thanks so much for looking! Have a wonderful weekend!
Hugs and smiles

© 2012 fresh & fun Suffusion theme by Sayontan Sinha