I don’t feel right posting a happy card today. So I post this instead.

[youtube]https://www.youtube.com/watch?v=AW8puRqE4Sc[/youtube]

I do remember where I was. Scott AFB, IL. The boys were in Mascoutah Elementary school, Reba was home with me. Rick called me to turn the TV on. I couldn’t believe that what I saw was real. It seemed unfathomable that this could happen and wasn’t a movie.

My thoughts and prayers go out for all the family members that lost someone that day and for the survivors of that horrible attack.

Hi everyone,

I just wanted to let you know that for the next few days I will be busy prepping for my card class on Saturday at Simply Scrapbooks. It might be the last class I will be holding in Ohio. I am not sure if I can get samples together for a June class in time.

I was sick over the weekend and am just now feeling better. So I didn’t stamp much and don’t have anything to share with you for the next few days. Sorry!

Have a wonderful week! Hugs and smiles

After shooting the video for Misting with Copic Markers I still had a partridge tag left over. I thought it work great on a boxI had created with the Ultimate Crafter’s Companion.

ginakhccopicspraybox.jpg

The box base was created out of a 7″ square of Chocolate chip cardstock. It was scored 1 1/2″ on each side. The top as created out of a 6″ square of The Merry Days of Christmas My Mind’s Eye paper. It was scored at 1″ on each side. Then the edges were punched with the Eyelet Border punch from  Stampin’ Up!.

The box was tied with Burgundy Satin Ribbon from May Arts. The tag was attached to the ribbon with elastic gold cord.

Here is a video for the visual learner:

[youtube]https://www.youtube.com/watch?v=yPeb8LpokVg[/youtube]

enjoyeverymomenwcmd09.jpg 

Are you stamping ? Are you knee deep in creating cards for the challenge posted on Splitcoast yet? You better drink something with lots of caffeine and head on over. SCS member companies are hosting challenge every hour. It started at 10:00 a.m. EST and it will end at 11 p.m. EST. As long as you upload your card by Sunday at midnight, you are eligible to win PRIZES!

Stamping and a chance of free stuff? I don’t think it can’t get any better. But wait…it does. Because…you can send the cards you have made to Operation Write Home  and donate them to this wonderful cause. Okay….so get your stamps out and get started! 🙂

This hour the SCS gang hosts a challenge. Our requirements are to make a card that

  • includes chocolate
  • follows the theme thankfulness
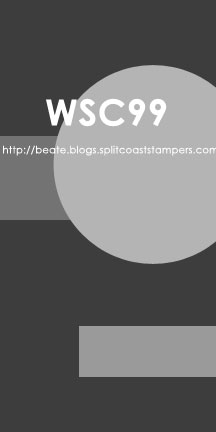
  • and uses the WSC100 sketch!

untitled-1.jpg

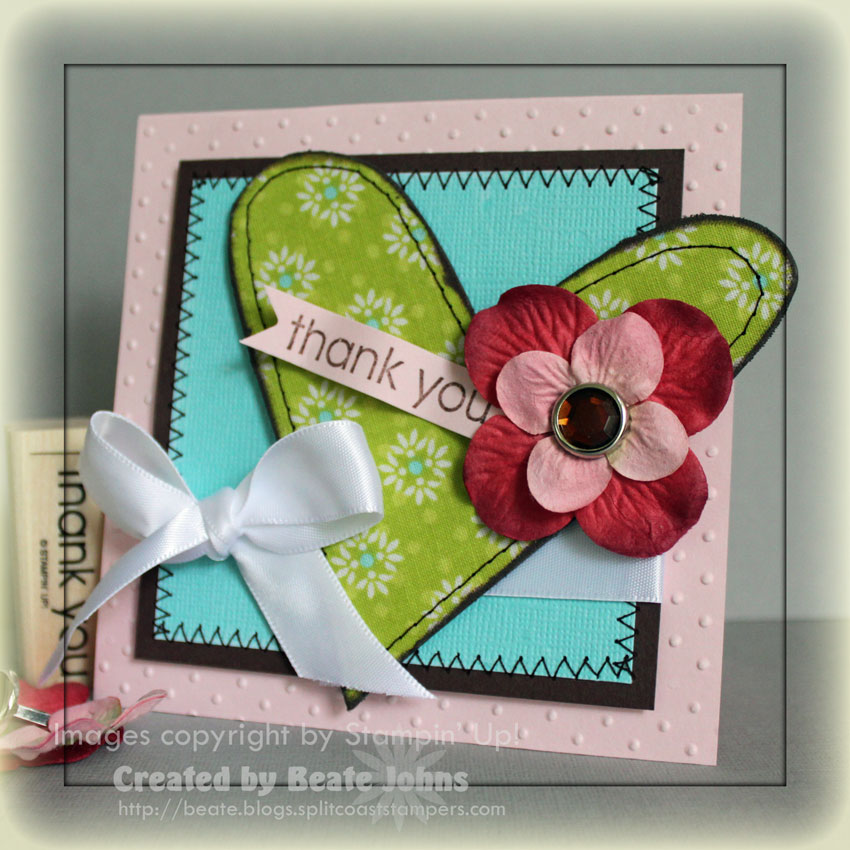
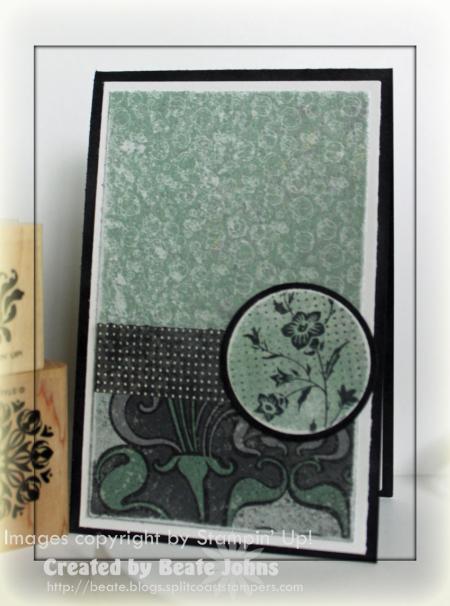
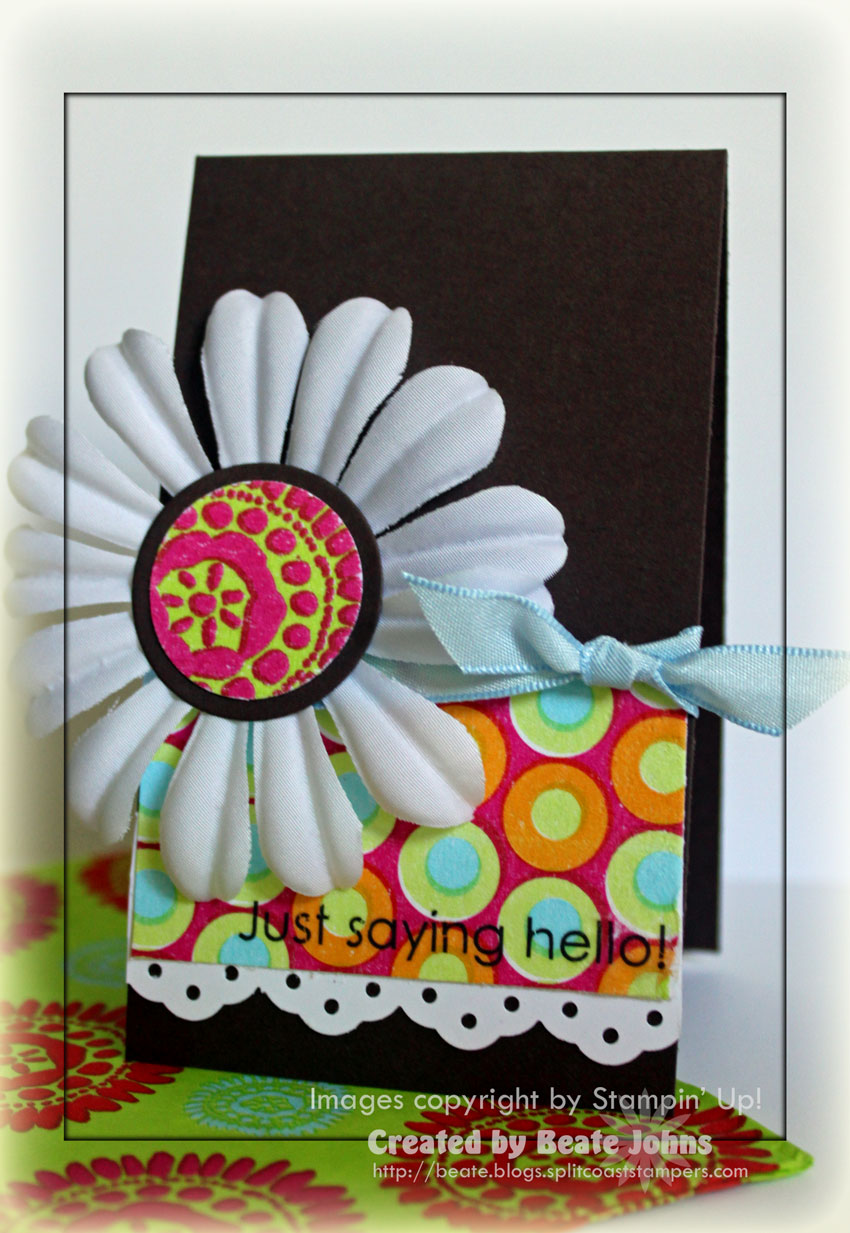
Here is my sample. And yes…that’s four days in a row that I posted a card with this sketch. I took my liberties and my circle turned into a BIG heart. But heck…if you read my blog you know I always just use sketches as starting points.

enjoyeverymomentwcmd09bj.jpg

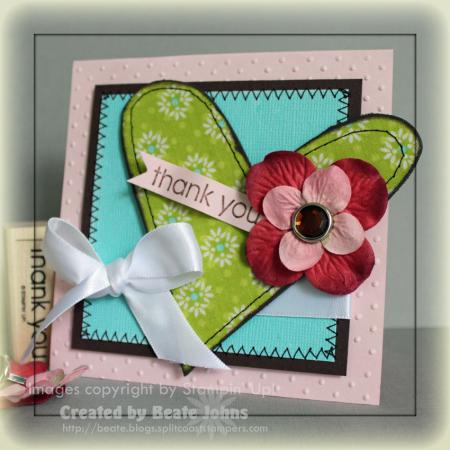
My card base is a 4 1/2″ x 9″ piece of Pink Pirouette cardstock, folded in half. The front was embossed with Cuttlebug’s Swiss Dot Embossing Folder.  The Chocolate Chip square measures 3 5/8″ . It was layered with a 1/4″ smaller piece of Aruba Core’dinations cardstock. The edges of that layer had been sanded and then zigzag stitched. Stampin’ Up!’s white Satin Ribbon was tied around the lower half of these two layers.

I adhered Fabric (bought as a fat quarter at JoAnn’s) over my chipboard heart, cut off the excess and inked the edges with Chocolate Chip Craft ink. Next I straight stitched around the edge (I was surprised my machine did that! Yeah for me and my Pfaff!).  The flowers are from Prima Quick Picks Flowers Hydrengea Strawberries pack. They were attached to the heart with a big rhinestone brad I got from sweet Charmaine a while back.

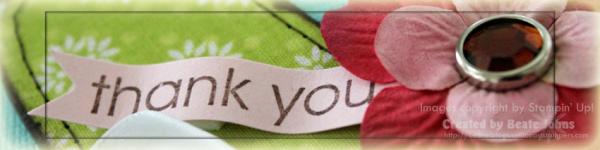
 The thank you from Stampin’ Up!’s Enjoy Every Moment was stamped on Pink Pirouette ink in Chocolate Chip. The cardstock was cut down to a strip and the left edge was punched with the photo corner punch. Next I rolled it up and down over a pen and adhered it with dimensionals.

Have fun participating in the challenge!

gratuitousgraffitiwcmdlong.jpg

Sorry I have been so quiet. I have been working like crazy on a big project that is now not going to be shown until next week. Bummer for now, but I can promise lots of posts at the end of next week!

Today’s tutorial on SCS is on how to create a background with your Acrylic Paints and a piece of Acetate. It’s really fun,  fast and easy.

gratuitousgraffitiwcmd09bj.jpg

The card base for today’s card is a 4 1/2″ x 9″ piece of Core’dinations Paper from the Roy G. Biv Super Assortment.

The centerpiece was created with today’s tutorial technique. It is super easy. Cut a piece of Acetate to the shape you need. Cut neutral cardstock the same shape. I used Label One Nestabilities. Next I stamped Gratuitous Graffiti with Black Stazon over my Acetate. Turn Acetate over and add Acrylic Paint. I used the Lettuce Adirondack Acrylic Paint Dabber. Place your neutral cardstock over the ink and let dry.

For the flower center I cut a 1 1/4″ Acetate and White Circle with Circle Nestabilities, stamped the TY from Gratutitous Graffiti over it with Black Stazon and added Rasberry Adirondack Acrylic Paint over it. The flower itself is  like the half pearls on the top left from Stampin’ Up!’s Pretties Kit. I sponged the edges with Lettuce paint. I attached the center to the flower with dimensionals, tied white Organza ribbon around the layers and adhered the flower over it.

Here is a video for the visual learner:

[youtube]https://www.youtube.com/watch?v=RxoWL5IC7s0[/youtube]

Sorry I am late. I stamped this card this morning….and I am not the fastest stamper. So here is my sample for WSC99. All supplies are from Stampin’ Up! (well…I used Circle Nestabilities. But that’s the only thing non SU).

charmingchicww99.jpg

The Basic Gray card base measures 2 3/4″ x 11″ and was folded in half. It was layered with a slightly smaller piece of Whisper White and then three designer paper strips all from the Nouveau Chic Designer Paper Pack. The edges of all pieces were sanded, the middle strip was paper pierced. Faux Stitching lines were added with a white gel pen.

I punched out a circle with the 1 3/4″ circle punch, sanded the edges and stamped the medallion stamp from Charming in second generation Basic Gray. Next I stamped the flower from the same set in Basic Gray. The circle was layered on a Whisper White and scallop sponged Basic Gray circles. Those two had been cut with Circle Nestabilities. I added more Faux Stitching and then heat embossed the entire center circle four times with Clear Embossing powder.

I threaded White Taffeta through a Basic Gray Corduroy Button and attached it with a dimensional. A swirl was cut out of Nouveau Chic Designer paper with the Sizzlits Die Swirls Scribbles, clear embossed and attached under the main circle. The sentiment is from Teeny, Tiny Wishes and was stamped in Black Stazon. The strip was cut out with the Window Word Punch.

charminchicwsc99inside.jpg

The inside of the card is decorated similar to the outside.

Have a wonderful weekend! Hugs and smiles

Here is this weekend’s sketch:

wsc99.jpg

To participate in the challenge, make a card with this layout and upload it either to your blog, or to an online gallery.
If you upload your card on SCS, put WSC99 (NO SPACE INBETWEEN WSC AND 99) in the keyword section. That way we can look at all of them at once! Add a link to your card  as a comment to this thread so I can go and check it out. ( I won’t be adding Mr. Linky anymore. I like it better when I get an email notification when someone adds a card so I can go and check it out and don’t forget).

 To see samples made with this sketch now, check out the blogs of

Cambria Turnbow

Charmaine Ikach

Jenn Balcer

Lori Craig

Sharon Harnist

Have fun creating! I can’t wait to see what you come up with.

SCS submissions

New guest tutorial writer Lynn Put came up with a darling Halloween Bucket made out of Pillow Box Dies. I thought that bucket would look wonderful as a Christmas basket too.

christmaspunchpillowboxbuck.jpg

I cut my pillow boxes out of Real Red Cardstock. The patterned paper is from the Merry Moments Designer paper pack. The handle slot was punched with the Horizontal Slot Punch and the handle itself was attached with Silver Jumbo Brads.

The sentiment is from the Level 2 Hostess set Christmas Punch. It was stamped in Chocolate chip ink on Very Vanilla. The damask image from Friends 24-7 was stamped over it in second generation Old Olive. I cut out the image right around the oval border, layered it on a Wide Oval Punch-out in Chocolate Chip and a Real Red Scallop Oval that had been cut with Oval Nestabilities. To finish it off I added a bow with Old Olive Grosgrain ribbon.

 Here is a video for the visual learner:

[youtube]https://www.youtube.com/watch?v=hpap24HCJSs[/youtube]

Here is the last Shimmery Resist sample I had made for the Cinncinati regional. Shannon suggested I show something other then Christmas projects, so I pulled out the skull image (LOVE THAT ONE) from the Stampin’ Up! set From the Crypt.

fromthecrypedfancyboxcloseup.jpg

Since I dont’ have the sample anymore, I won’t be able to give you the exact measurements. Sorry. I stamped the skull in Black Craft ink on Cast-a-Spell Designer Paper and embossed it with clear embossing powder. Next I rubbed Shimmery Paint all over. It was adhered to a slightly bigger piece of Whisper White. The edges were distressed and paper pierced.

fromthecrypedfancybox.jpg

The box was cut with the Big Shot die Fancy Favor Box out of Cast-a-Spell Designer Paper.  The Black Grosgrain Ribbon handle was attached through two Jumbo Eyelets. The bat from From the Crypt was stamped in Black Stazon on Whisper White cardstock, cut out and attached to the box with dimensionals.

The sentiment is from the set Teeny, Tiny Wishes. It was stamped in Black Craft ink, embossed with clear embossing powder and sponged over with Shimmery paint. Then the greeting was punched out with the Window Word punch and layered on a Basic Black Modern Label Punch-out.

Today’s tutorial was written and filmed by Lydia Fiedler. I created the paper with drink napkins I found at Target.

Week before last the Limited Supply Challenge was to create a card with the 2 1/2″ x 8 1/2″ strip of cardstock that you have leftover when you cut two 4 1/4″ x 8 1/2″ strips (for square cards) out of a sheet of cardstock. You can imagine how many I have of those. LOL

I combined both the technique for today as well as the challenge to create this little card.

feltedscraplinglsx236.jpg

There is actually no stamping done on this card. The napkin/background paper measures 1 1/2″ x 2 1/2″. I added a Whisper White cardstock strip underneath that had been punched with the Eyelet Border punch. Blue Taffeta Ribbon had been tied on the top of the background paper.

The sentiment is from the Rubon pack Chit Chat. The flower center was punched out of another napkin/background piece with the 1″ circle punch. The 1 1/4″ circle always seems too big to layer the 1″ circle on, so I cut a Chocolate Chip circle with my Circle Nestabilities. Both circles were adhered to a flower from the Pretties kit. That was taped to the card base with dimensionals.

Have a wonderful day! I hope you come back tomorrow and start blog hopping with me.

font-hop-icon.JPG

© 2012 fresh & fun Suffusion theme by Sayontan Sinha