love-and-happiness-jumping.jpg

Here is the matching page I made for last weeks scrapbook page.

I love this picture of Rebecca running into the water, her hair flying up in the air and her arms all stretched out.

I added a scallop border made with the slit punch to tie in the Carousel Note from the other page.

The rest of the ingredients is pretty much the same as last week.

Paper: Textured Wild Wasabi, Soft Sky, Chocolate Chip and Shimmery White Cardstock

Acc.: Slit Punch, Fusion Flowers, Antique Brass Build a Brad and regular brads, Love and Happiness Rubons, white gel pen

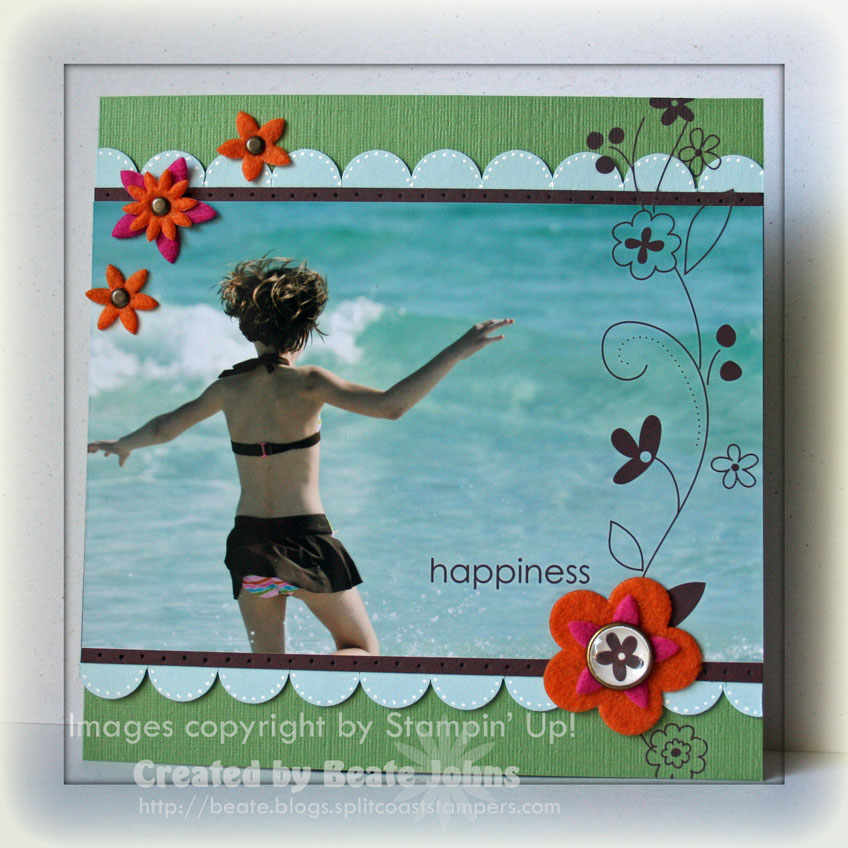
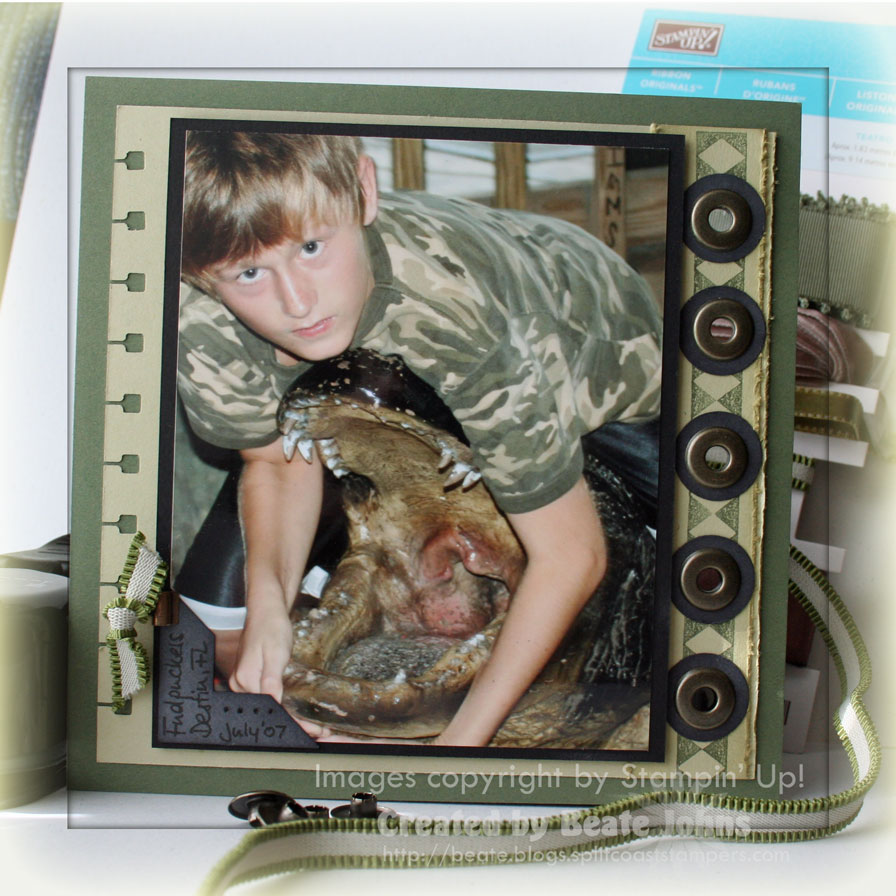
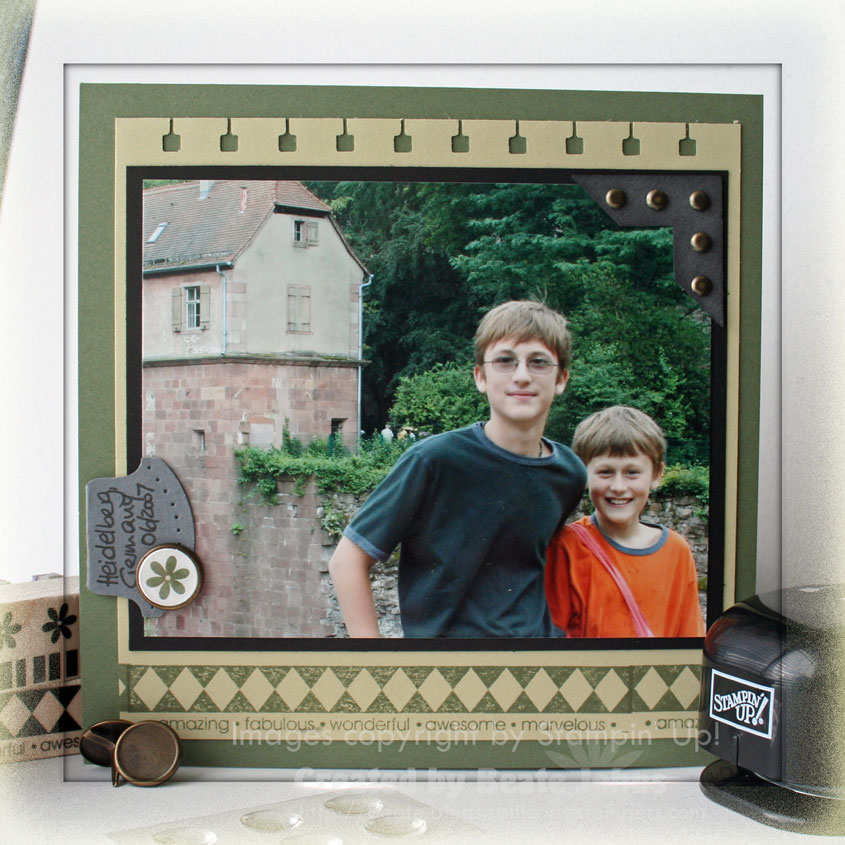
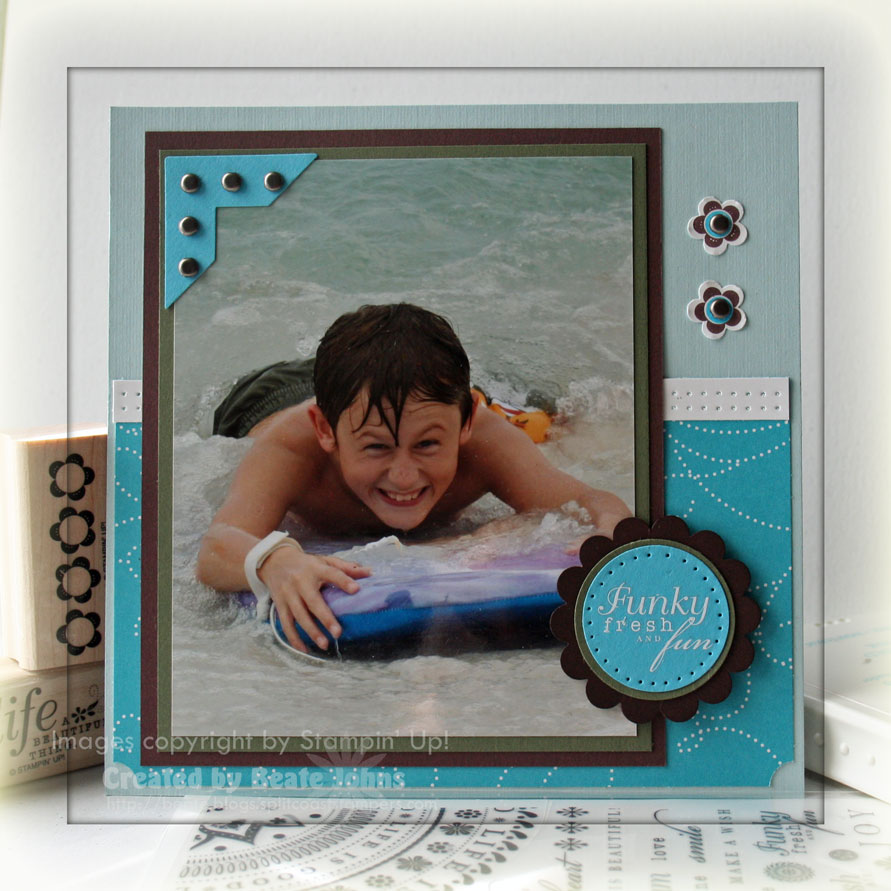
I finally have new pictures to scrap. Most of them are from our trip to the beach last weekend. I know those get old after a while, but what can I do? The beach is a big part of our life here.

love-and-happiness-rubons-b.jpg

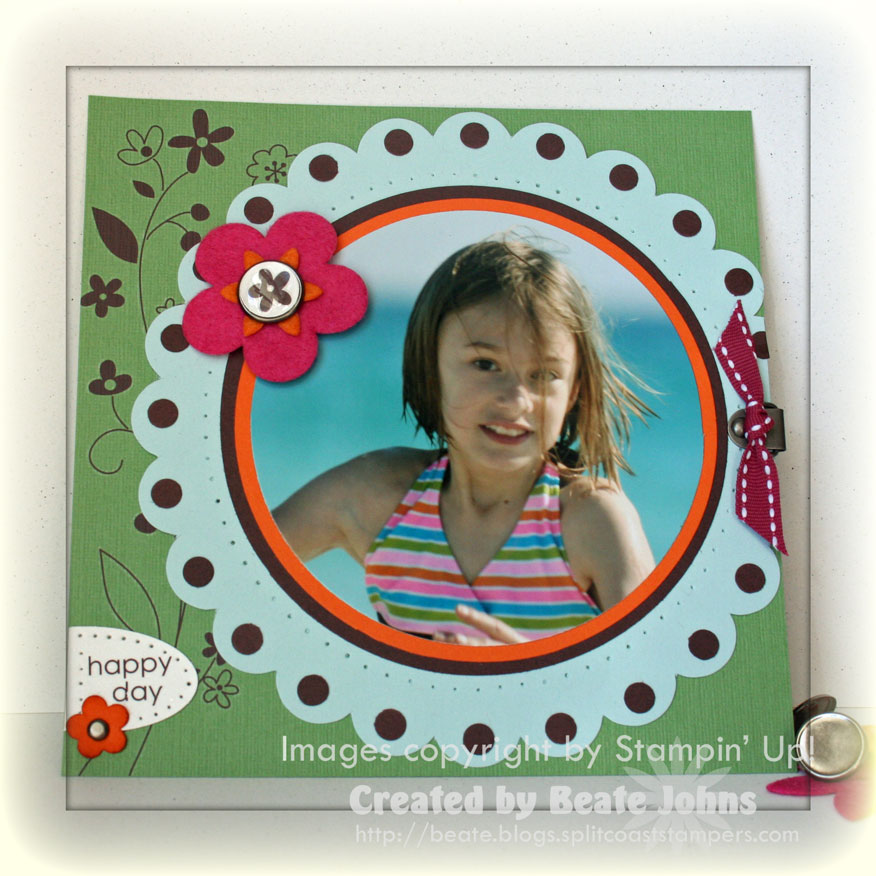
The scrapbook base is a 6″ square of textured Wild Wasabi.

I didn’t like the color when it first came out, but now I use it all the time. I will be sad when it retires this summer.

When I saw the Carousel Notes in the Occasional mini, I knew I wanted those for scrapbooking.

I added 1/2″ chocolate circle punchouts in each scallop and cut just a tad of the right hand side off.

For the center I cut my photo, Pumpkin Pie and Chocolate Chip cardstock with my Coluzzle and taped those layers down. Next I paper pierced all around it.

I added Love & Happiness Rubons on the left hand side of my Wasabi base. I love the way they look. Of course I had to try the Chocolate Rubons first! LOL The sentiment and the flower in my Pewter Build a Brad are both rubons as well. The flowers underneat the brad are from the Flower Fusion tin.

The sentiment was added to a Shimmery White large oval punchout that was paper pierced. The flower is punched out of Pumpkin Pie with the Three for you Flower punch. I sponged the edges with Pumpkin Pie and added a Pewter Brad in it’s center.

Where I had cut the scallops off my Soft Sky Carousel Note, it looked a little bare. So I added Double Stitched Pomegranate ribbon with some Pewter Hodgepodge Hardware.

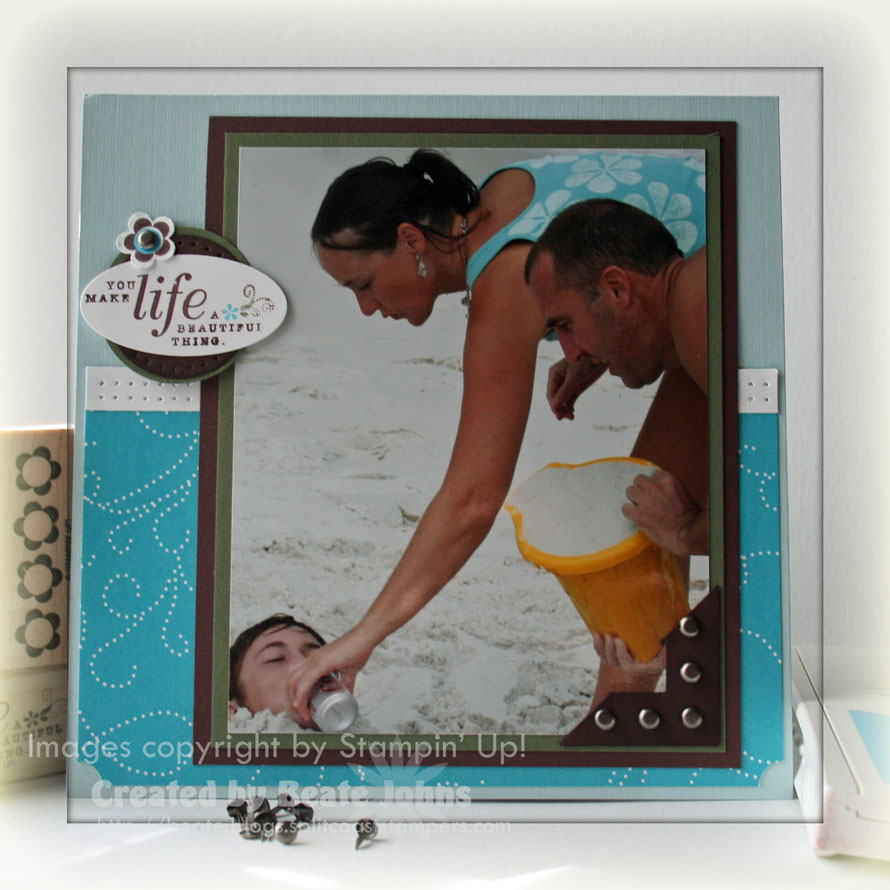
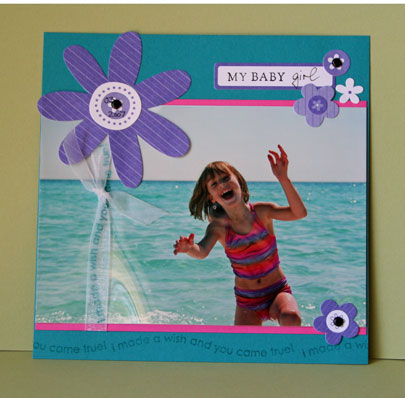
 While I was scrapping my baby girls picture my neighbor Cheryl scrapped a picture of her precious baby girl.

one-of-a-kind-julia-beach.jpg

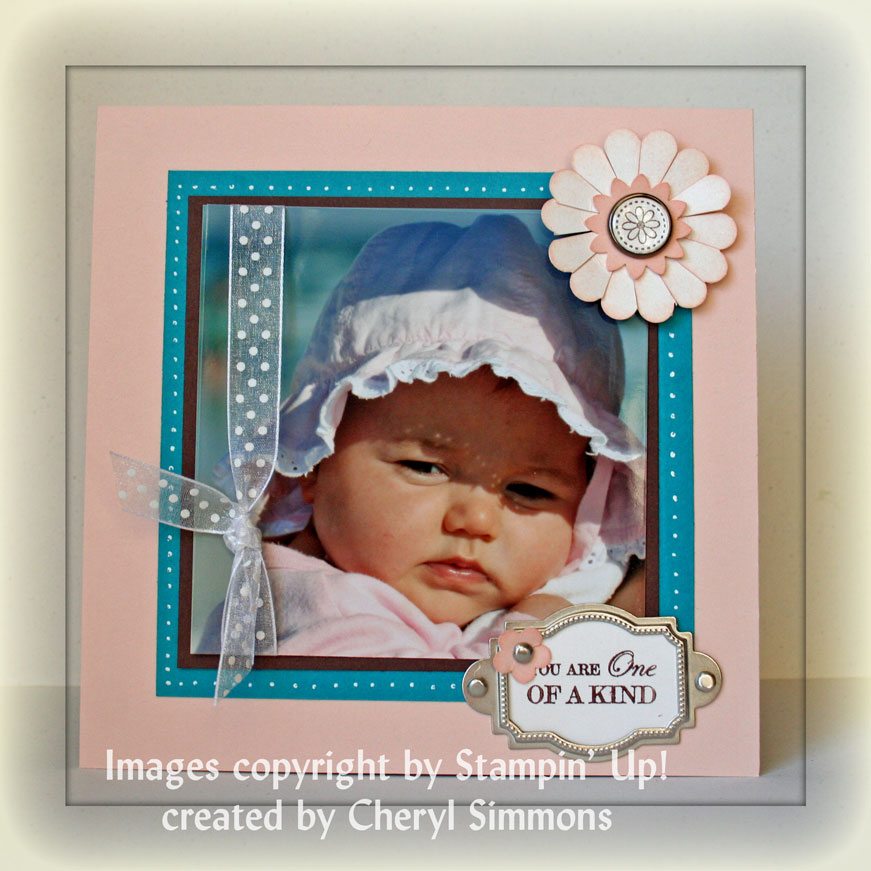
Isn’t her girl beautiful?

Cheryl and her family went with us to the beach last Sunday and I snapped this picture.

Cheryl chose Blush Blossom as the scrapbook base.

The picture was cut down to a 4″ square and layered first on a 4 1/4″ square of Chocolate Chip and a 4 3/4″ piece of Taken with Teal. She added a dotted border with a white gel pen.

Cheryl made her big flower out of a Shimmery White scallop punchout. She cut lines toward the middle of the scallop and sponged the edges with Blush blossom. Next she added a Blush Flower that was punched with the Boho Blossom Punch. Her flower center is a Pewter Build a Brad with center that was stamped with Small Flowers.

The sentiment from One of a Kind was inked up with Chocolate Chip Marker on Shimmery White and punched out with the Designer Label punch. That punch is perfect for the Styled Silver Hodgepodge Hardware piece.

The small flower was punched out with the Three for You punch and a styled silver brad was added in its center.

Crocodile Lucas doesn’t quite sound as good as Crocodile Dundee….But I think my little man looks good wrestling that stuffed alligator at Fudpuckers in Destin.

 scrapbook-crocodile-lucas-2.jpg

 The layout is basically the same as last week’s.

I tried to  make pages that will make good double pages after they are out of the calendar and in the album.

The difference between this and last weeks page is that I left off the tab, turned the layout to work with a vertical photo, journaled on the photo corner and added five large Antique Brass eyelets and sponged gray circles underneath.

scrapbook-austin-lucas-heid.jpg

I took this picture last summer during our visit in Germany.

We went to see the Heidelberger Schloss. You can see the house above the entrance gate in the background next to my boys.

The scrapbook page base is a 6″ x 6″ piece of Always Artichoke cardstock.

The photo is cut down to 4″ x 5″, then layered on a 4 1/4″ x 5 1/4″ piece of Basic Black cardstock.

I added a Basic Gray round tab on the left hand side for journaling with a Antique Brass Build a brad stamped with a flower from Happiness in Always Artichoke.

To tie in the Basic Gray and the hardware, I added a sponged Basic Gray large Photo Corner on the top right of the photo with five Antique Brads in it ( I know, I know….but it looks so good. I can’t help myself!)

The 5 1/2″ River Rock square was punched on top with the Spiral punch. On the bottom I used part of the Happiness background stamp. Quick and easy….had to be since I prograstinated and had only a few days to make 7 pages for Rick’s scrapbook calendar.

scrapbook-austin-buried-in.jpg

Austin loves to dig himself a big hole and to be buried in it with just his head sticking out.

A friend of ours took this picture last July.

Rick kept on adding more sand while I gave Austin some of my precious diet coke. LOL

Another page of Rick’s book to remind him of our great times at the beach.

Like last week this page has a 6″ x 6″ piece of textured Soft Sky cardstock as it’s base an a 3 1/2″ x 5 3/4″ piece of Bali Designer paper with a 3/8″ strip of paper pierced Whisper White layered over it.

The photo is cut down to 4″ x 5″ and first layered on a 1/4″ bigger piece of Always Artichoke, then a 1/4″ bigger piece of Chocolate Chip.

I added a large, sponged Chocolate Chip Photo Corner on the bottom right with five silver brads topping it off.

I used markers to ink up the sentiment from A Beautiful Thing, punched it out with the large oval punch, layered it first on a 1 1/4″ paper pierced Chocolate Chip circle and then a 1 3/8″ Always Artichoke circle.

The flower is also from A Beautiful Thing and inked up with Chocolate Chip and Tempting Turquoise. It’s punched out with the Three for you punch.

scrapbook-lucas-boogy-board.jpg

I love this shot of Lucas.

That grin of his always melts my heart.

For this and it’s matching page (I will show that next Sunday) I chose a 6″ x 6″ piece of textured Soft Sky cardstock as base.

Next is a 3 1/2″ x 5 3/4″ piece of Bali Breeze Designer paper on the bottom of the page with both bottom corners punched with the ticket corner punch. (I know, I know…I am so predictable! LOL)

I layered a  3/8″ x 5 3/4″ strip of Whisper White on top of the paper and paper pierced a double row on that.

The photo was cut down to 4″ x 5″ and layered first on a 4 1/4″ x 5 1/4″ piece of Always Artichoke, then on a 4 1/2″ x 5 1/2″ piece of Chocolate Chip cardstock.

I added a large Tempting Turquoise Photo Corner on the top right and topped it off with five silver brads.

The layered medaillon is made with a 1 1/4″ paper pierced circle of Tempting Turquoise, 1 3/8″ Always Artichoke circle and a sponged Chocolate Chip scallop circle.

I added a rub on greeting from the Eastern Elegance Rub on Pack on the Tempting Turquoise circle.

The two flowers were stamped with stamps from the A Beautiful Thing stamp set in Chocolate Chip and Tempting Turquoise with a silver brad in each center. I used the Three for you Punch to punch them out ( you can only punch one flower out at a time since the flowers in the quartruple row of that set don’t all sit the same way, if ykwim).

During the last week my neighbor came over with her little ones and was working on THREE Days to remember calendar for her family as Christmas gifts.

That got me going on Rick’s calendar again. Since I only have one week left, my next few Scrapbook Sunday pages will turn out rather simple.

scrapbook-austin-sweet-and.jpg

I don’t think Rick will mind though. He will be glad to have some pictures of us to look at while in Qatar. Plus he will love that I put everyone’s birthday on the calendar pages. I don’t know how it is in your family, but here, if I don’t think of birthdays, our relatives don’t get cards and gifts. LOL

I made this page to be later paired with a page I had made earlier.

The page base is a 6″ x 6″ piece of textured Blue Bayou cardstock. The photo was cut down to 4″ x 5″ and layered on a 1/4″ bigger piece of Basic Black cardstock.

The designer paper is from the retired Holiday Harmony Designer paper pack from the Winter mini catalog. I added a double photo corner on the top right. The bigger corner is in basic black, the smaller one punched out of Designer paper. I topped them off with five Antique Brass brads.

I added paper piercing and a brad border to complement the matching page and stamped the dotted border from All in a Row on the top left horizontally and vertically of the picture.

The A from the Wild West Alpha was stamped in Soft Sky ink on a 1 1/4″ Soft Sky cardstock circle. It was sponged and layered first on a black 1 3/8″ circle and then on a sponged Blue Bayou scalloped circle punchout.

I stamped Austin over the A in Black Stazon with my Simple Serif Alpha.

There isn’t any stamping on this page, but all the supplies are from Stampin’ Up!, except for the Heidi Swapp Ghost Hearts.

rebecca-in-tree-pink-6×6-ws.jpg

I cut the photo with the biggest Nestabilities circle die cut. Next I cut a scalloped circle out of Bravo Burgundy and mounted the photo on that.

The photo with matting was layered on a 4 1/4″ ticket corner punched square from Petals & Paisleys Designer Paper. That was adhered to a 4 3/4″ Whisper White square.

The scrapbook page is a 6″ x 6″ Rose Romance cardstock square.  The center panel was adhered to the page and small pink Circle Rhinestone brads (Ice Collection) were added in the white squares corners.

I punched a large oval out of Burgundy cardstock and added faux stitching with paper piercing tools and my white gel pen.

I journaled on a metal rimmed circle tag and layered it on a Burgundy scallop circle. On both the oval tab and the journal circle I added a Heidi Swapp Ghost heart and secured it with a large pink Circle Rhinestone brad.

Last I added Faux Stitching with Gel Pen and Paper Piercing tools all around the edges of the page.

Sorry this is so late and my post so short! I have to get back to work. But I couldn’t miss my scrapbook Sunday! It’s tradition and I look forward to making a page…no matter how simple it might turn out.

I will be really quiet all next week. I am working full time on something BIG for SCS that will start November 12th, plus I have to find the time and plan my next stamp camp on Saturday. I don’t know how much stamping I will get done during that time.

But I had to make another page for my Days to Remember calendar. Rick will be leaving right after Christmas, and this is only the 4th page for his calendar. I made this one to match the colors of another page for the calendar. That way they can be next to each other once they are torn out of the calendar and in an album.

simple-serif-rebecca-and-le.jpg

My page base is a 6″ x 6″ piece of textured Groovy Guava cardstock.

As I for earlier Sunday pages, I used the layout for this weekend’s sketch challenge to create the page.

The black layer is a 5″ square, the following Purely Pomegranate paper from the Cutie Pie Designer Paper pack a 4 3/4″ square.

The two right side corners were punched with the ticket corner punch and the edges were stamped with my All in a Row Argyle stamp.

For the scalloped layer I cut a piece of Whisper White cardstock with the biggest Square Nestabilities Die. I lined the cardstock up so one side would be straight.
I then layered a 3 1/4″ x 3 1/2″ piece of Darling Doodles Designer paper over that.

I cut my photo down to 3″ x 4 1/4″ and layered it first on a 1/4″ bigger Basic Black piece of cardstock, then on a 1/4″ bigger piece of Wild Wasabi.

I added a double photo corner to the top left hand side. The bigger piece is punched out of Basic Black cardstock, the smaller one out of Blue Bayou Prints Designer paper. Three Pewter brads finish the corner off.

Before taping all the layers and photo down to the page, I tied Blue Bayou Double Stitched Ribbon around the lower part of the layers. Then I taped everything down and added three Pewter Jumbo Eyelets on the left hand side. I fastened three Square Ice Rhinestone brads in the center of the eyelets. (I had seen that just this weekend on someone’s entry for this WSC and thought it looked awesome! Thanks for the inspiration!)

I stamped Spring 2007 on a Whisper White large oval punchout. I layered a black scallop circle with a Pomegranate Designer label punch, a 1 1/4″ Wild Wasabi Circle and topped it off with the stamped large oval. I added a Pewter brad on each tip of the oval and mounted the whole thing with dimensionals to the page.


Side note: 

I received several questions about Nestabilities. You can find great information here:

Ellen Hutson lists what die cut machines work and how to sandwich the dies with those machines

Sharon Harnists review

My personal opinion? I love them! I have a hard time not using them. I love scallops and these dies are a great way to make them, without having to store a mountain of punches. Just in case you are wondering which ones I bought, check here. It made a great early Christmas present to myself. Because doggone it….I am good enough, I am smart enough…and people like me (I LOVED that sketch on SNL).

build-a-flower-tin-6×6.jpg

This is the last of my Build A Flower tin pages for Convention.

I love that picture of Rebecca. It was taken on the first day we went to the beach this year. It was March and the water was COLD. Rebecca ran in anyway and screamed when she came back out. LOL

The page base is a 6″ x 6″ piece of Taken with Teal cardstock.

I adhered the 4″ x 6″ photo on a slightly wider piece of Pink Passion. Then I stamped the saying from Stem Sayings in Taken with Teal Craft ink on the photo and carefully embossed it with clear embossing powder. I tied some white narrow organdy ribbon over the saying.

The same saying was stamped on the bottom of the page, this time in Taken with Teal Classic ink. I added some flowers to the page and used one of the label sticker included in the tin to make my title. The words for that title are from the set Fundamental Phrases

© 2012 fresh & fun Suffusion theme by Sayontan Sinha