Today’s  Chalkboard tutorial on Splitcoaststampers was created by the wonderful Amy Rohl. I created the video for the technique and this is the sample I created for it.

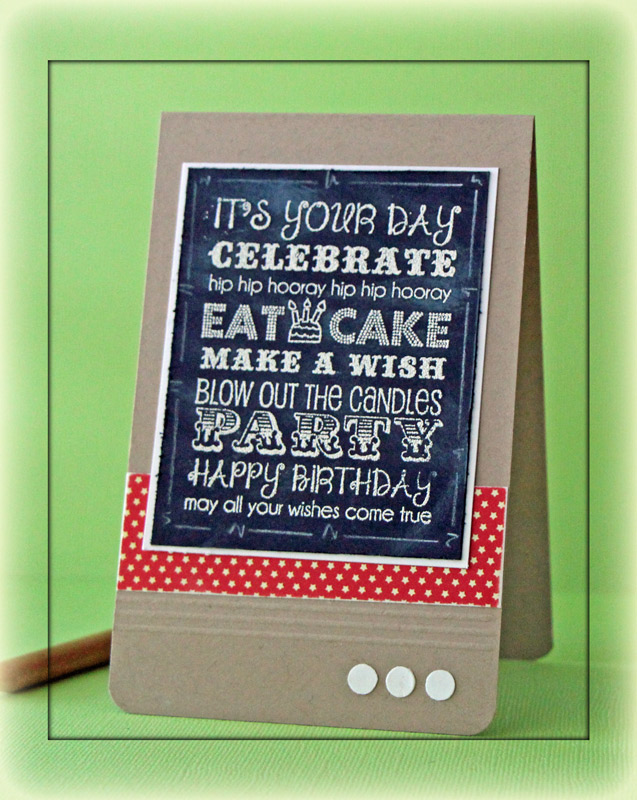
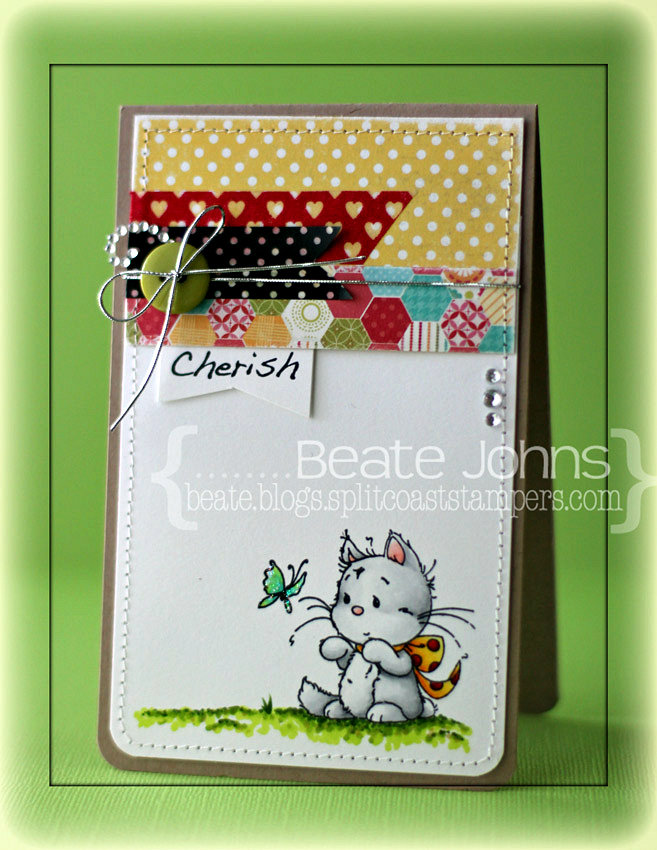
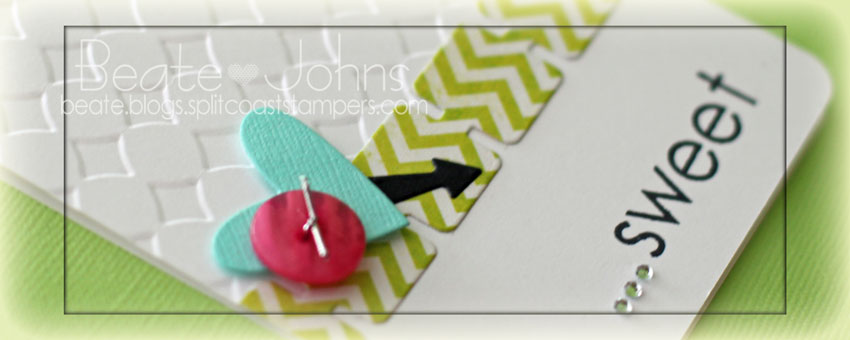
The card measures 3 1/2″ x 5 1/2″ and was created out of Kraft cardstock. The bottom corners were rounded and some score lines were added with my Scor-Pal.

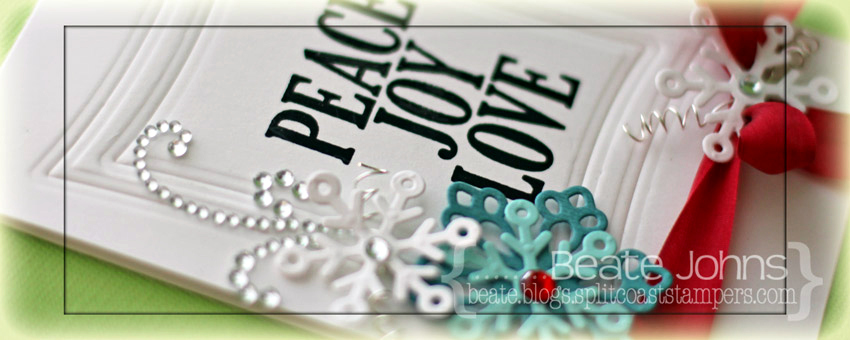
Taylored Expressions Graphic Birthday Greetings sentiment was stamped in Snow Cap Pigment ink on black cardstock. It was embossed with white embossing powder. The edges were distressed and the layer was adhered to white cardstock. A border was added with a white chalk pencil.

A piece of an old Pink Paislee paper pack was added above the score lines before the image was adhered to the card base. Three 1/4″ white circle punch outs on the bottom right corner finish off the card.

Here is a video for the visual learner:

[youtube]https://www.youtube.com/watch?v=zj1fVfmU5fs[/youtube]

I created this card also as a sample for my Hope You Can Cling to Challenge on Splitcoaststampers. It is the fourth year of our annual card drive to create cards for the MD Anderson Cancer center in Houston. Participate in challenges, send your cards to the hospital and you might win  great prizes from some of your favorite stamp companies. I hope you have time to join us.

Thanks so much for stopping by! Have a wonderful day.
Hugs and smiles

Welcome to the NinaB Designs* first team blog hop of 2013! We hope you have had a relaxing holiday break and ready to join us for another year of inspirations and prizes!

*NinaB Designs is a product designer for a few paper crafting companies including Spellbinders, Want2Scrap and Penny Black, and The Craft’s Meow.

For this month’s hop, Nina challenged the team to create a project with the LOVE theme, which can be interpreted in many ways: Valentine, Anniversary and Friendship.

I couldn’t help myself. For my card I used a new M-Bossabilities folder as well as  Scalloped Border dies from the new Spellbinders Winter CHA release. I know, I am a lucky one to have them already. A little birdie told me that Nina designed those border dies.
I started by scoring a 5 1/2″ x 8 1/2″ piece of Neenah Solar White cardstock at 3 1/2″ and 7″.  Next I used three dies from the A 2 Scalloped Border One Spellbinders™ Borderabilities® Card Creator dies to cut and emboss the 1 1/2″ edge of the tri-fold.  The other outer panel was embossed with the new Spellbinders™Infinity M-Bossabilities™ folder.
A sentiment from The Craft’s Meow Sent with Love was stamped in Tuxedo Black Memento Ink on a piece of Neenah Solar White cardstock that had been cut and embossed with the 3rd smallest of the Classic Oval SM Nestabilities® dies. It was adhered to black cardstock cut and embossed with one of the Fancy Tags Three dies. A piece of a Beautiful Bloom Bling Border was adhered under the sentiment and flowers were threaded through one of the tag holes and adhered on the back.
The sentiment panel was adhered slightly over the scallop border side to close the card. A piece of a Finesse Rhinestone swirl finish off the card. I picked the black and white (with a splash of pink) color scheme to make the card work for the current Simon Says Stamp Challenge.

The NinaB Designs team is giving away these TWO PRIZE PACKAGES:

Prize Package #1 includes Spellbinders Venetian Accents and Motifs:

Prize #2 includes 2 retired sets from Layers of Colors stamps:

Winners will be picked randomly from 2 of the designers’ blogs:


Everybody is welcome to comment and be eligible to win. The winners will be announced on  January 22 on Nina’s Blog, where you will also find all the relevant info regarding the giveaways. Finally, please consider liking the following Facebook pages that are represented on today’s hop, so you don’t miss the latest news and happenings:

Thank you for joining us today! Have a wonderful day!
Hugs and smiles 

Did you see the new images Tiddly Inks released? They are so cute. For my card I used the new Happy Mail images. They were arranged, printed out on Neenah Solar White cardstock and cut and embossed with the Out of the Box Technique as well as the second smallest of the new 5″ x 7″ Matting Basics A Spellbinders Paper Arts.

The image was colored with Copic Markers (Skin: E50, E21, E33, R20    Hair: YR24, E99, E39, E18   Dress/Bird/Flower: Y13, Y15, Y17, YR15   Mailbox: E31, E34, E29, W3, W5, BV20, BV23, BV25   Flower Center: E99, E09    Grass: YG01, YG03, YG17)  and the edges were sponged first with Summer Sky, then with Bahama Blue Memento Ink. The image was adhered to a piece of black cardstock that had been cut and embossed with the second smallest of the new 5″ x 7″ Detailed Scallops Spellbinders die.

A 2″ x 3 5/16″ piece of My Mind’s Eye Six by Six A Mother’s Love was adhered to a 3 5/16″ x 5 5/16″ piece from the same paper pack. The edges were sanded and stitched before the layers were adhered to the card base, a 3 1/2″ x 11″ piece of Solar White cardstock, folded in half.

The sentiment from Happy Mail was printed out and cut and embossed with a new die from the Charmed I’m Sure Spellbinders Shapeabilities® die. A button was tied to the left hand side of the tag with silver cord before it was adhered to the upper right hand corner of the image layer.

The card works wonderful the current Tiddly Inks Challenge (anything goes.

Thanks so much for stopping by! Have a wonderful day!
Hugs and smiles


I have another post on the Spellbinders blog today. I hope you have time to check out the entire card. It works great for the current Simon Says Stamp challenge, which is to create a Christmas project.

Thanks so much for stopping by!  I don’t know how much I will be posting over the weekend and next week! I wish you all a wonderful Christmas. Hopefully you get to spend it with loved ones!!!
Hugs and smiles

Welcome to the Whimsy Stamps December 2012 rubber stamp and die release!

Today, Whimsy Stamps is releasing 20 fantastic new Rubber Stamps & Stamp Sets, 5 wonderful new Whimsy Shapeology Dies, a fabulous new Shape EZ by TLC template and 2 beautiful Whimsy Designer Paper 6×6 packs. These new goodies are available to buy right now from the Whimsy Stamps store along with all your Whimsy favourites.

We are also welcoming two new DT members to the Whimsy family today! We hope you will join us in giving a warm Whimsy welcome to Melissa Andrew and Janette Garcia. We are very excited that these extremely talented gals have joined us here at Whimsy as members of our magazine staff! Welcome Melissa and Janette!

From today until 23 December, the Whimsy DT and Special Guests will be showcasing these new products with a daily mini blog hop. Each mini blog hop has a new release prize hidden somewhere along the way and you have 24hrs to enter each prize draw by leaving a comment on every blog listed for that day.

At the end of release week (Monday 24 December) a ‘Release Round-Up’ will be posted on the Whimsy blog with a complete list of winners from the daily mini blog hops.


For my card today I used an image from the darling new Playful Kittens stamp set. Again this card works wonderful for the current Simon Says Stamp challenge. Some of my favorites on this card include Washi Tape, Patterned paper, Wee images, Rhinestones and Copic Markers.

The image was stamped with Tuxedo Black Memento Ink on a 3 1/4″ x 5″ piece of Neenah Solar White cardstock. The bottom corner were rounded and the image was colored with Copic Markers (Kitten: C00, N0, N1, N2, R000, R20     Scarf: Y11, Y13, Y15, Y17, YR09, R24, R29, R39      Ground: YG01, YG03, YG17    Butterfly: YG01, BG10, BG11, BG13).

Two 3 1/4″ wide strips of Echo Park So Happy Together paper were sanded and adhered to the top of the image layer. The edges were stitched and two pieces of Washi Tape were adhered to the left hand side of the patterned paper strips. A green button was tied on with silver cord.

A sentiment from the Playful Kittens set was stamped on a scrap piece of paper. It was cut into banner shape and adhered under the paper strips. Stardust Glitter was added over the butterfly wings and rhinestones above the button and to the right hand side of the card.

To be entered into today’s mini blog hop prize draw, be sure to leave a comment on ALL of the DT posts listed below by 12.00pm EST tomorrow:

If you would like to join us as our Guest Designer for our February 2013 release please go to our Guest Designer Contest page to read all about how to enter. Entries close at 12.00pm (EST) on Monday 24 December 2012.

For a full reveal of this month’s fabulous release, please visit the Whimsy blogThanks so much for stopping by. Have a wonderful day!

Hugs and smiles

It’s time for a new Crafty Friends Challenge. Charmaine is the hostess and her challenge to us is to create a mostly white card, with just a splash of color. I will also enter the card into the current Simon Says Stamp Challenge, which is to use your favorites. Here I used paper piercing, rhinestones, dies, patterned paper and paper piercing.  The layout of the card is from the current CASE Study card by Windy Robinson.

I started by cutting snowflakes out of silver glimmer paper with one of the Snowflake Borderabilities dies.  A 1 3/4″ x 3″ strip of Carta Bella’s Winter Fun patterned paper was adhered to the bottom of a 3″ x 5″ piece of Neenah Solar White cardstock after the edges of the paper were sanded.  The bottom edges were rounded and the edges of the layers were paper pierced.  Seam Binding was tied around the top of the patterned paper and three bells were tied on with silver cord.

The layers were adhered to the card base, a 3 1/4″ x 10 1/2″ piece of Solar White cardstock folded in half with the bottom corners rounded. A sentiment from Simon Says Stamps Small Folded Banners Holiday was stamped in Platinum Stazon on white cardstock. It was cut into banner form. Want2Scrap Rhinestones finish off the card.

Check out my fellow Crafty Friends for more  inspiration:

    Thanks so much for looking! I hope you have time to join us in the challenge. It’s easy and fun! Have a wonderful week!
    Hugs and smiles


Usually on the 15th we have a NinaB. Designs blog hop. Because everyone is so busy this month we decided to skip it. I thought it would be fun to post  card showcasing Nina’s stamps anyway. The card also works great for the current Simon Says Stamp challenge, which is to showcase your favorites. Some of my favorites are using dies, rhinestones, Memento Inks and my trusted corner chomper.

I started my card with a 3″ x 4 1/4″ piece of Neenah Solar White cardstock. The lower part was cut with the Country Landscape Memory Box die. The upper part was cut with the Simon Says Stamp exclusive Falling Stars die.  The houses were sponged with Toffee Crunch, the trees with Bamboo Leaves Memento Ink. The sky was sponged with Nautical Blue Memento ink. The bottom corners were rounded before the layers were adhered to another piece of white cardstock exactly the same size.

Stardust Stickles was added on the bottom, on top of the trees and houses as well as in the star holes. Silver cord was wrapped around the lower edge and topped with a yellow button. A sentiment from Just Sayin’ was stamped in Tuxedo Black Memento Ink on white cardstock that had been cut and embossed with one of the Nested Lacey Pennant Nestabilities® dies.

Yellow Bazzill cardstock was cut and embossed with the smallest Star Nestabilities® die. The star was adhered to the right hand side of the sentiment and topped with a rhinestone. The sentiment strip was adhered to the image layer with foam adhesive squares. the layer was adhered to the card base, a 3 1/2″ x 10″ piece of Kraft cardstock, folded in half with more foam adhesive squares. More rhinestones (under the sentiment and above the button) and a double row of paper piercing above the layer finish off the card.

Thanks so much for looking! Have a wonderful weekend!
Hugs and smiles

Are you on Pinterest? Do you pin things and tell yourself you will create something like that at one point later on? A blogging friend of mine, Kendra Wietstock, is posting a Pinterest inspired project from the first of December until the 21st on her blog. I thought I join her today.

Ever since I saw a Christmas tree made out of string on Pinterest, I knew I wanted to try it. But when buying string for it, I changed my mind a bit and bought fuzzy white yarn instead. I had seen a Christmas tree decor at Target that I liked and thought I could re-create it with the string tree technique. Plus white and silver would work great with the current Moxie Fab World challenge.

Well…it worked kind of. I wrapped a styrofoam cone with wax paper. Then started glueing the string to the cone.

Once I wrapped the entire cone and the glue was dry, I took the styrofoam cone out and tried to separate the my string tree from the was paper. Note to self: This doesn’t work the with fuzzy yarn! LOL So I stuck the styrofoam cone back in and started on the decoration.

I cut and embossed hearts and stars out of shiny silver paper (bought at a scrapbook store back in Ohio) with the small dies from Sweet Folk Art. They were strung up on silver cord and adhered to the tree. The tree was topped with a star created out of the same paper cut with the bigger star die. Red and Silver rhinestones finish off the tree.

I am happy with how it turned out, even if it’s a bit different then the pinterest idea I started out with.  Thanks so much for stopping by! Have a wonderful Sunday!
Hugs and smiles


Yesterday I had some free time to play along some of my favorite challenges. I created this card for the current Way to Use it challenge on Splitcoaststampers (favorites), the current CASE Study and Simon Says Stamp challenge (snowflakes).

The current CASE study showcases a gorgeous card from Windy Robinson. Her card had some great dry embossing with Nestabilities dies. Her card had flowers in the center, but I thought snowflakes would be more appropriate for December. Plus I LOVE snowflakes. So I cut snowflakes out of Neenah Solar White cardstock, Frosted Teal and Patina Bazzill cardstock with dies from the 2012 Snowflake Pendant Shapeabilities® die set.

A 3 1/2″ x 11″ piece of Neenah Solar White cardstock was folded in half and the bottom corners were rounded.  Two of the Wonky Rectangles Nestabilities® were embossed in the center of the card. A sentiment from Merry Everything was stamped in the center of the embossed rectangles with Midnight Black VersaMagic Ink.

Red silk ribbon was tied around the lower part of the card base. Thin silver wire was wrapped around a stylus and added to the small white snowflakes. The bigger blue snowflake and a while one were adhered to the left hand side of the sentiment. A second white snowflake was adhered over the ribbon bow.  Rhinestones from Want2Scrap finish off the card.

Thanks so much for stopping by! Have a wonderful Friday!
Hugs and smiles

While creating yesterday’s card, I cut a strip of the MME Lime Twist Life is a Party Paper with the second die from MFT’s Retro Square Die-namics dies. It was too pretty to throw away, so I created another card with it. The card base is a 3 1/2″ x 11″ piece of  Neenah Solar White cardstock, folded in half. The upper 3/4 (and a bit of the back) was embossed with the Simplicity M-Bossabilities folder and that Life is a Party paper strip was adhered where the embossing ended.

A heart was cut out of Patina Fourz Bazzill cardstock with the smallest heart from Hearts a Plenty Die-namics die. It was topped with a pink button, tied on with silver cord and adhered with foam adhesive squares to the left hand side of the retro strip. A tiny arrow from MFT’s Flags & Tags Die-namics set was cut out of black cardstock and adhered to the right of the heart, pointing to the sentiment.

The sentiment was stamped with Melanie’s new Lots of Letters set in Tuxedo Black Memento Ink. The bottom corners of the card were rounded. Black and silver Rhinestones from Want2Scrap finish off the card. This card is another entry for the Keen on Neon Moxie Fab World Challenge.

Thanks so much for stopping by! Have a wonderful day.
Hugs and smiles

© 2012 fresh & fun Suffusion theme by Sayontan Sinha