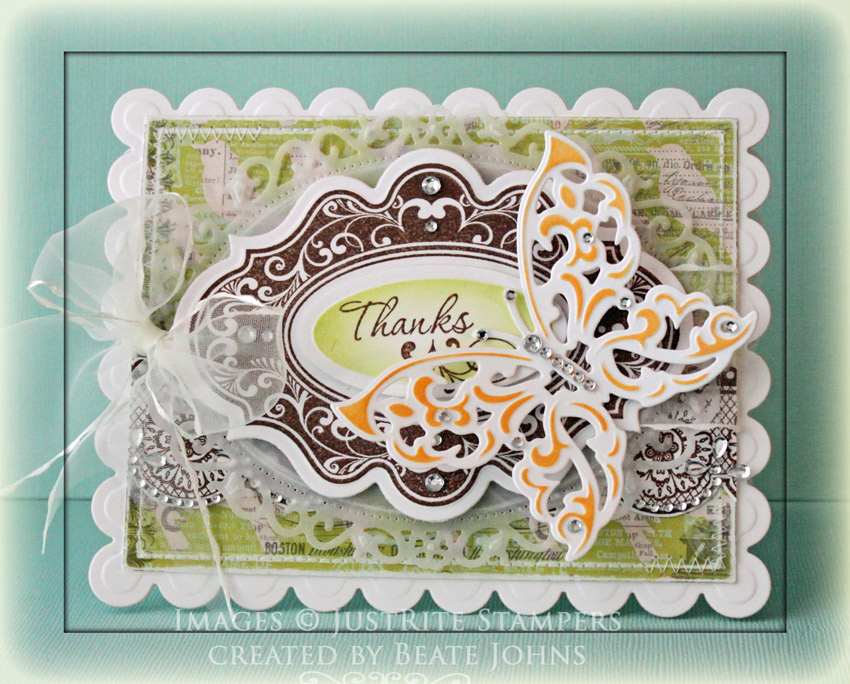
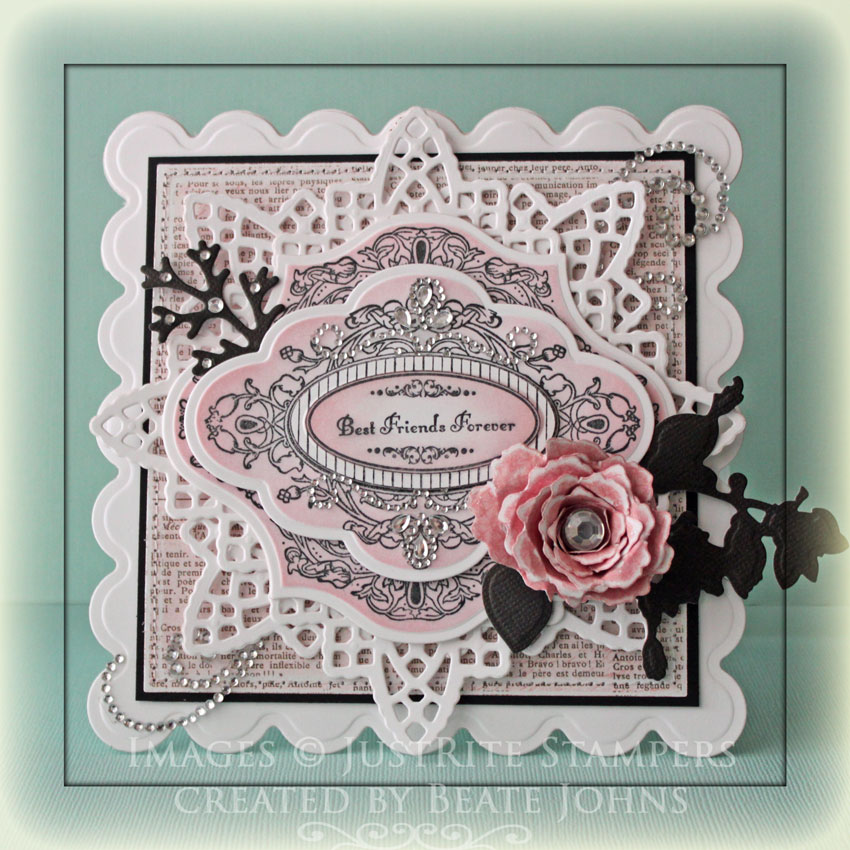
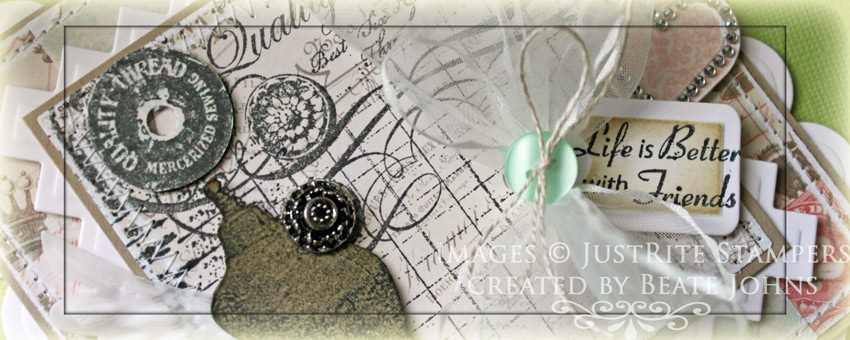
JustRite Stampers released gorgeous new background stamps. I had to try one out right away. It is called Grandma’s Attic.  I created the card for the current JustRite Stampers challenge.

I stamped it once in Tuxedo Black Memento Ink on a piece of Pink Paislee London Market Patterned paper, once partially on Kraft cardstock and again partially on another patterned paper piece from London Market paper pack. The biggest piece was cut and embossed with a Classic Square Nestabilities die. The edges were sanded before the layer was stitched to a slightly bigger piece of Kraft cardstock.

The dress form was cut out from the Kraft cardstock piece. The edges were sponged from the Frayed Burlap Distress Ink before it was adhered to the main image square. One of the spools was cut out from the other patterned paper piece and adhered to the main image.  A brad was added as well as a wooden spool button. A piece of vellum cardstock was cut and embossed with a wing die from Home Sweet Home. Th embossed parts were highlighted with a white pastel pencil before it was adhered underneath the dress form. A piece of Neenah Solar White cardstock was cut and embossed with the largest Square Swatches die and the layers were adhered above it.

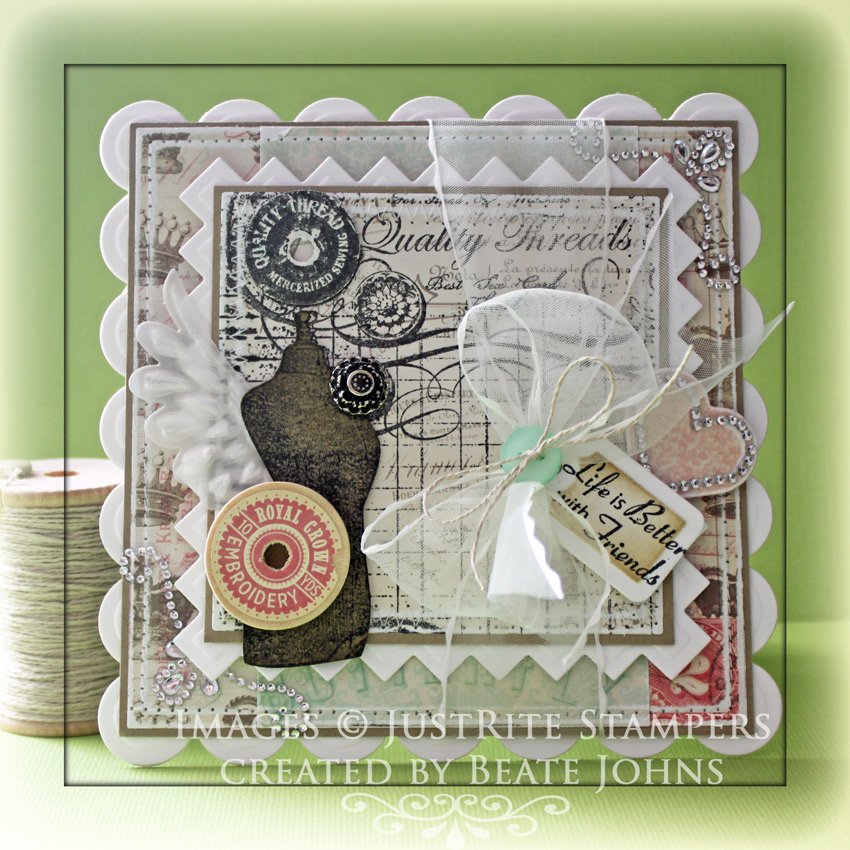
A 3″ wide strip of London Market Paper was adhered over a different patterned paper from the same pack. It was cut and embossed with a Grand Square Nestabilities die. The edges were sanded before the paper was stitched to a slightly bigger piece of Kraft paper. The image layer were adhered to the bigger squares with dimensional foam adhesive before May Arts Ribbon was tied around it vertically.  The layers were then adhered to the card base, Solar White cardstock cut and embossed with a Grand Scallop Square Nestabilities die.

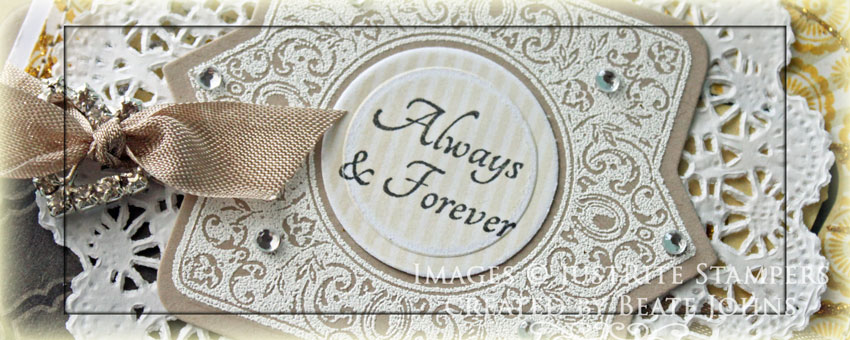
A sentiment from the new Vintage Rose Medallion stamp set was stamped in Tuxedo Black on Solar White cardstock that had been cut and embossed with a Home Sweet Home tag die. The center of the tag was sponged with Frayed Burlap ink before the tag was tied to the ribbon bow with Linen Thread and a button. Another piece of London Market paper was cut and embossed with the larger Heart die from Home sweet home. The edges were sanded and the heart was adhered slightly under the tag. Heart Silver Rhinestone Nestabling was addded over the heart and Fancy That! Border bling to the upper right and lower left hand side to finish off the card.

Thanks so much for stopping by! Have a wonderful weekend!
Hugs and smiles

Here is a sneak peek of the card I created for today’s post on the Spellbinders Blog.

The image is from JustRite Stampers With Sympathy set and it was colored with Copic Markers (R81, R83, R85, YG01, YG03, YG17, airbrushed BG01). And look close at the Floral Oval Nestabilities die cut. It’s not out of cardstock! I hope you go and check out the post on the Spellbinders Blog with step by step instructions for this project.

Thanks so much for stopping by! Have a wonderful day!
Hugs and smiles

The current JustRite Stampers challenge is to create a card using spring colors and butterflies. I just got new Spellbinders dies in and couldn’t wait to try out the smaller of the two butterfly dies from Wings of Hope. I cut and embossed a piece of Neenah Solar White cardstock and sponged the butterfly with the die still on with Cantaloupe Memento Ink.

A frame from JustRite Stampers Kindness was stamped in Rich Cocoa Memento Ink on  Solar White cardstock. It was cut and embossed with the largest Label 20 Nestabilities die. Another piece of white cardstock was cut and embossed with the smallest of the Large Petite Oval Nestabilities die and sponged with New Sprout Memento Ink. A sentiment from Kindness was stamped in Rich Cocoa ink on the oval before that was adhered to the stamped frame with dimensionals. The butterfly was adhered to the lower right of the frame.

An image from Classic Scallop Border I was stamped in Rich Cocoa ink on white cardstock and cut out. It was stitched to a piece of Pink Paislee London Market Patterned paper that had been cut and embossed with the second smallest  Grand Rectangle Nestabilities die and the edges had been sanded. Fancy Waves! Border bling was adhered to the bottom of the scallop before the sentiment and butterfly were adhered to the center of the paper.

A piece of vellum was cut and embossed with the largest of the Floral Oval Nestabilities dies and adhered under the sentiment layers with dimensionals.  May Arts ribbon was threaded between the Vellum and the label, the label was adhered to the patterned paper with dimensionals and the ribbon was tied into a bow. Everything was adhered to the card base, which was cut and embossed out of Solar White cardstock with a Grand Scallop Rectangle die. Rhinestones from the new Sleek Strips Silver Rhinestones on the butterfly and label finish off the card.

I hope you have time to participate in the challenge. You could win JustRite stamps! Have a wonderful weekend!
Hugs and smiles

P.S.: Yes, I am hooked on Grand Scalloped Rectangle cards right now and that Floral Oval hasn’t left my desk since I unpacked it. Hi…I am Beate and I am a Spellbindersaholic…..no, I don’t want a 7 step program. I am loving with it!

Today is my first Saturday post on the Spellbinders Blog. I shot a video on how to turn a Styrofoam egg into a darling Easter decoration. Please hop on over to say hi, check out the supply list and the video.

Have a wonderful weekend! Hugs and smiles

I created this card during last weekend’s Virtual Stamp night over at Splitcoaststampers for the Spring is for the Chicks challenge. I thought it was the perfect challenge to combine it with the current JustRite Stampers challenge (Black/White plus one additional color).

I started by stamping the both labels from Vintage Oval Label Cling set in Tuxedo Black Memento Ink on  Neenah Solar White cardstock. The smaller label was stamped twice. One of the smaller label was cut and embossed with Label 6 Nestabilities dies, the other with the smallest of the Petite Oval large Nestabilities die. The large label was cut and embossed with the largest Label 13 Nestabilities die.  The edges of the layers were sponged with Spun Sugar Distress ink while the dies were still on and then they were layered on top of each other with dimensionals. Fancy That Want2Scrap Border Bling was added to the top and bottom of the smaller label die cut.

Two pieces of Solar White cardstock were cut and embossed with a Lace Doily Motifs die. They were adhered on top of each other and the labels were adhered on top of that.

A piece of MME Lost & Found  Madison Avenue paper was cut and embossed with the Spiral Blossom one die. The edges were  sanded before the flower was rolled.  Frost Smooch Glitz was added to the edges and a large Rhinestone was placed in the flower center. It was adhered to a piece of black Core’dination cardstock that had been cut and embossed with one of  Donna Salazar’s Shadow Flowers dies. Another piece of black cardstock was cut and embossed with a Foliage die. The rolled flower layers were adhered to the lower right corner, the foliage die cut on the upper right.

Another piece of Madison Ave paper was cut and embossed with with a  Grand Square Nestabilities die. The edges were sanded and the layer was stitched to a slightly bigger black square. The layers were adhered to a piece of white cardstock, cut and embossed with a Grand Scallop Square Nestabilities die. The card base was cut and embossed with the same die. Parts of a Finesse Rhinestone Swirl on the upper right and lower left corner finish off the card.

Thanks so much for stopping by! Have a wonderful day!
Hugs and smiles

Today a new product review was posted on Splitcoaststampers. It is for Spellbinders new M-Bossabilities embossing folders. Needless to say I love them (what Spellbinders product do I not love?). To show off the folders, I created a quick and easy tutorial on how to create a Faux Letterpress look.

The background was created with the new Elegance M-Bossibilities folder. It was inked with Cantaloupe Memento Ink andNeenah Solar White cardstock was embossed with the folder. It was cut down to a 2 15/16″ square, which was then stitched to a piece of Solar White cardstock, cut and embossed with the largest of the Fleur De Lis Square Nestabilities dies. The card base was cut out of the same cardstock with the same die and the card front was adhered on top.

An image from JustRite Stampers Botanical Butterflies was stamped in Tuxedo Black Memento Ink on a piece of white cardstock, cut and embossed with a Parisian Accent die. The image was colored with Copic Markers (Butterfly: Y17, YR15, YR18    Leaves: G40, G43, G46) and sponged with Old Paper Distress ink. The image layer was adhered to the lower right of the card base with dimensionals.

A sentiment from Fleur De Lis Label 20 stamp set was stamped in black on white cardstock that had been cut and embossed with a Nested Lacey Pennants die. Parts of a Finesse Rhinestone Swirl finish off the card. I made this card into a birthday card I can enter it into JustRite Stampers current Birthday Bash Challenge.  You still have an entire week to enter the challenge for a chance to win JustRite stampers stamp sets.

Here is a video for the visual learner:

[youtube]https://www.youtube.com/watch?v=45XWgbAOKqw[/youtube]

Here is my last guest designer sneak peek for JustRite Stampers.  This one is a box like the one I created back in December. I used of the new JustRite Stampers set Just Keep CalmMy Mind’s Eye Lost &Found 2 Breeze paper and various Spellbinders dies.

I hope you go and check out the entire box over at the JustRite Stampers Blog.

Have a wonderful day!
Hugs and smiles

I am back with another card created for my guest design spot on JustRite Stampers.

For this card I used a new Rubber Cling set called Always & Forever. It works great with the new JustRite Stampers exclusive Spellbinders label dies. I hope you go to the JustRite Stampers blog to check out the rest of the card.

Thanks so much for stopping by! Have a wonderful day.
Hugs and smiles

I am excited to be the Guest Designer for JustRite Stampers this month. I love their stamps. They make it so easy to make elegant cards. I can give you a peek of  a card I created with the new With Sympathy set. You can read all the details about the card on the JustRite Stampers blog today.

I hope you go and check it out. I really like how the card came out.

Have a wonderful day! Thanks so much for stopping by! Hugs and smiles

Today I want to share with you a simple card I made with a new JustRite Stampers set called Cast all your Cares. I started by stamping the flower stamp in Tuxedo Black Memento Ink on Neenah Solar White cardstock. It was masked and the frame image was stamped over it. The image was cut out with the Out of the Box Nestabilities die and a Label 16 Nestabilities die. The image was colored with Copic Markers (Flowers: Y11, Y13, Y17, Y38, E25   Leaves: YG21, YG23, YG17   Frame: E97, E99, E37   inside: B0000, B000).

The card base is a 4 1/4″ x 11″ piece of Solar White cardstock folded in half. The bottom corners were rounded and the card front was embossed with the Provocraft Brocade Embossing Folder.  A 1 3/8″ x 4 1/4″ piece of MME Lost & Found 2 Breeze Patterned Paper was adhered to the lower half of the card front and Yellow Organdy Ribbon was tied over that strip. The image was adhered over the ribbon with dimensionals. Part of a Finesse Rhinestone swirl finish off the card.

Thanks so much for stopping by! Have a wonderful day!
Hugs and smiles

© 2012 fresh & fun Suffusion theme by Sayontan Sinha