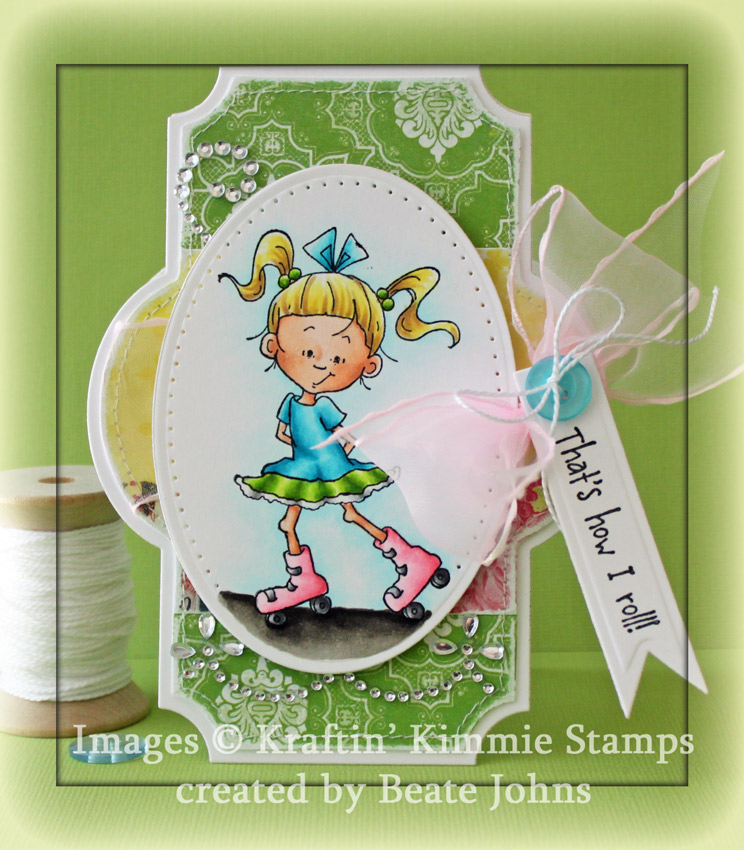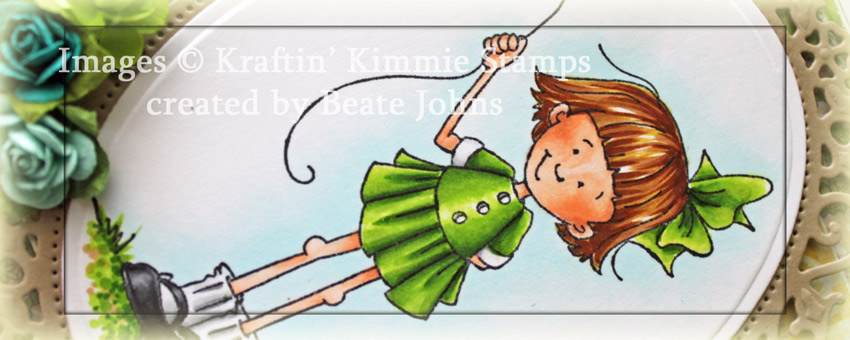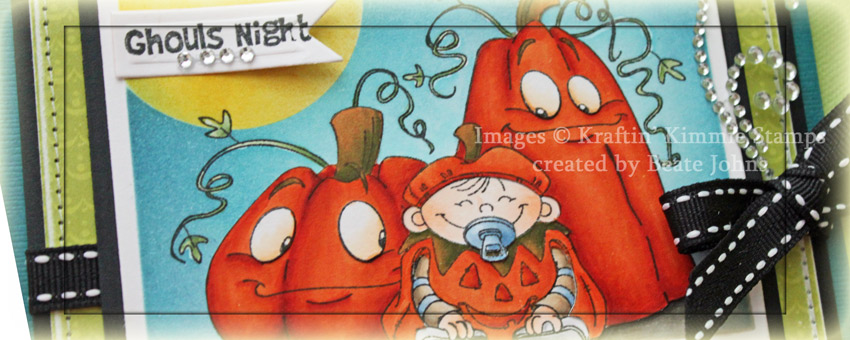
I can’t believe my guest designer stint with Kraftin’ Kimmie Stamps is already over. Time seems to fly now that school has started again. Today’s challenge is to create a scene. I made it easy on myself and used a stamp that already looks like a scene when you stamp it. It’s an image from Emilie Goulet’s new Too Cute to Spook 1 set.
The image was stamped in Tuxedo Black Memento Ink once on Neenah Solar White cardstock and once onEcho Park Hello Summer patterned paper. Both images were colored with Copic Markers (Pumpkins: YR00, YR12, YR15, YR18, R08 Leaves: G20, G21, G24, G28 Skin: E000, E00, E01 Shirt: E41, E42, E43, B91, B93, B95 Pumpkin Eyes: E50, E51, E53). The image on the patterned paper was cut out with scissors and adhered to the image on the white cardstock, which was cut and embossed with a Card Creator Matte B die.
The images were masked and a circle mask was adhered to the upper left corner. With the die still on the cardstock, the image was sponged with Broken China and Chipped Sapphire Distress Inks . Next the circle mask was taken off and that area was sponged with Mustard Seed Distress Ink. The layer was then adhered to black cardstock, cut and embossed with a Card Creator Matte A die.
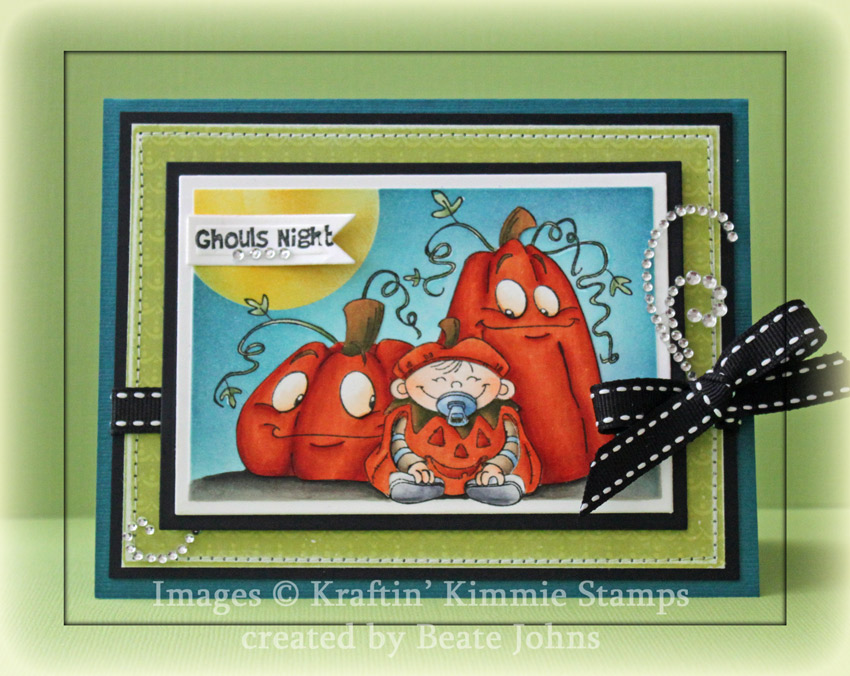
A piece of Hello Summer paper was cut and embossed with another Matte B die, sanded and stitched to a piece of black cardstock, cut and embossed with the next larger Matte A die. Ribbon was tied around the layers before the image layers were adhered with dimensional adhesive. The layers were adhered to the card base, 5 1/2″ x 8 1/2″ cardstock from the Emerald Coast Color Made Easy collection.
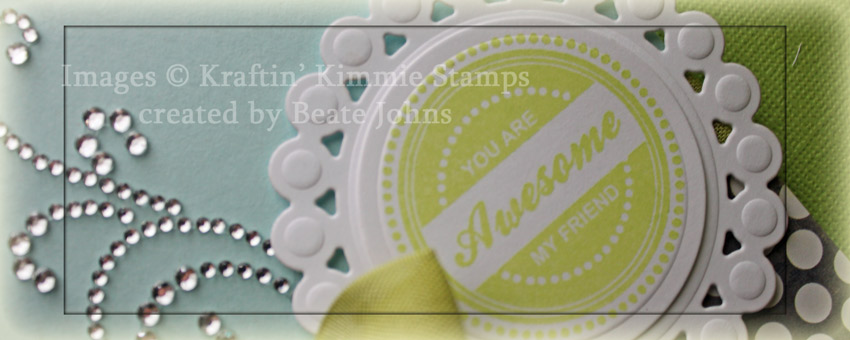
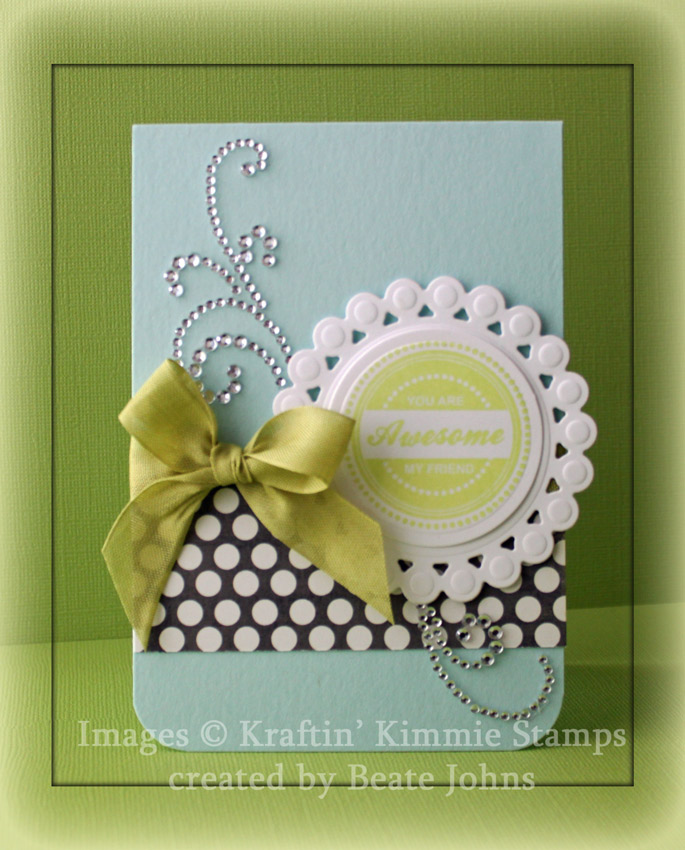
A sentiment from the set was stamped on a piece of Solar White cardstock, cut and embossed with the smallest of the Nested Lacey Pennants dies. Four rhinestones from a Sleek Strips Silver Rhinestones were adhered underneath the sentiment before the pennant was adhered to the upper left corner. Part of a Finesse Rhinestone Swirl above the bow finish off the card.
I hope you have time to check out the other designers samples and participate in the challenge. Have a wonderful weekend!
Hugs and smiles
|
|