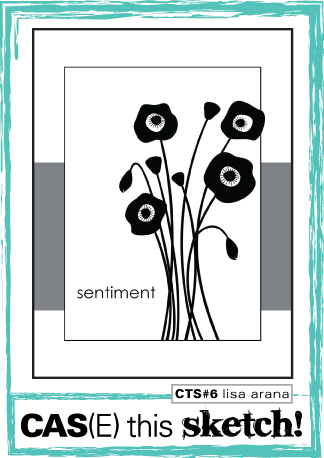
I am the hostess for the new Crafty Friends Challenge. Since I have been on a CAS card kick lately, I thought it would be fun if that was my challenge to do. Create a clean and simple card.

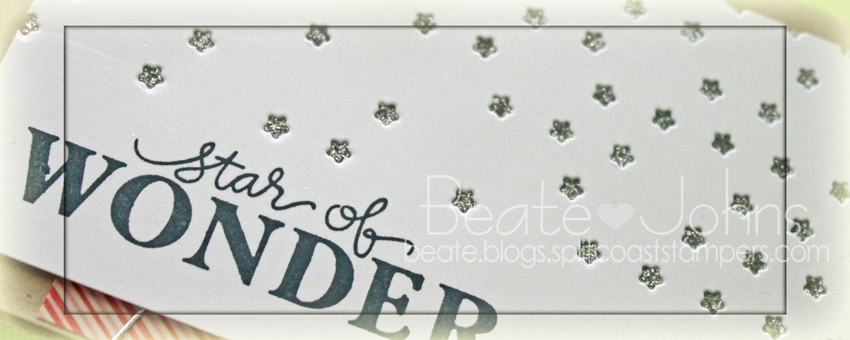
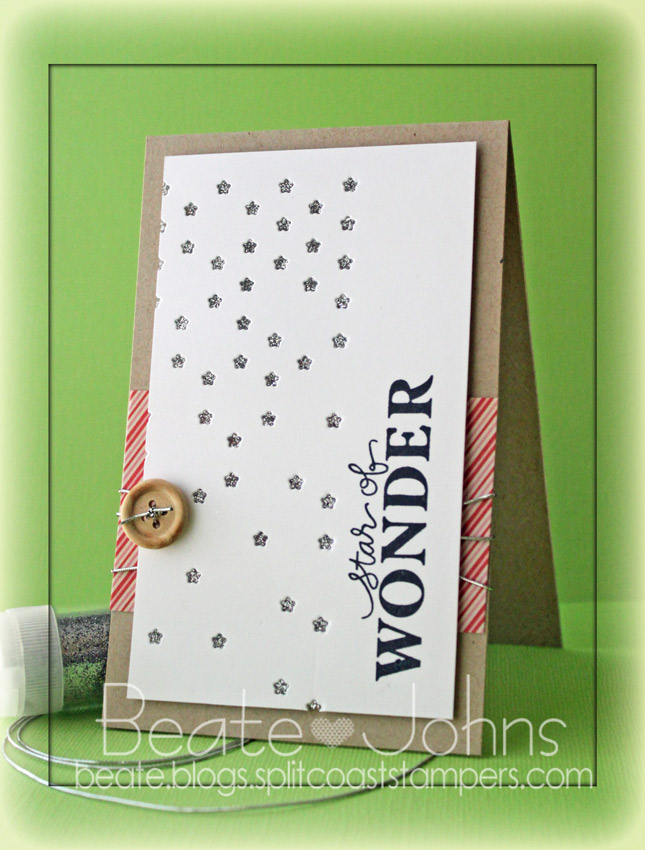
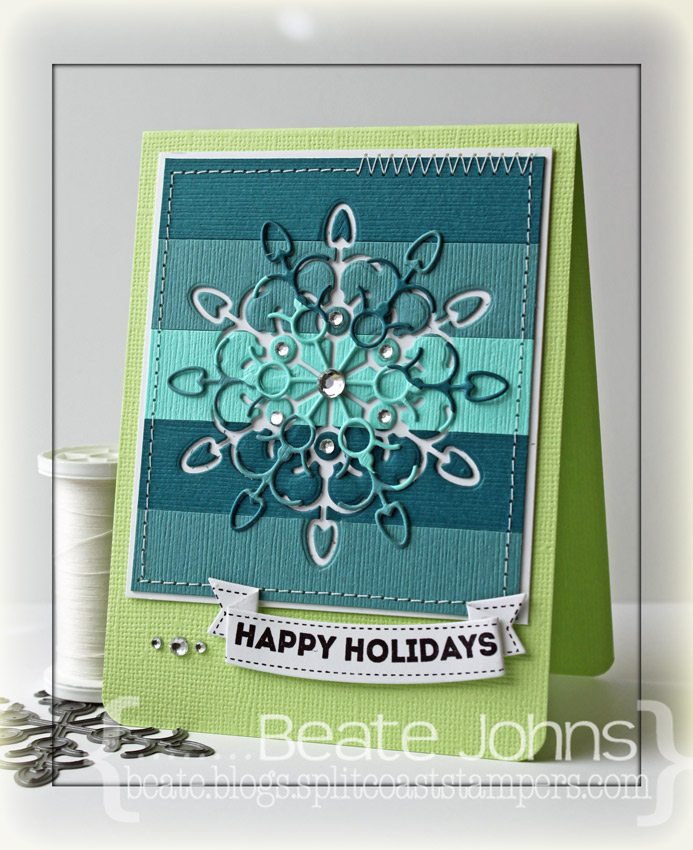
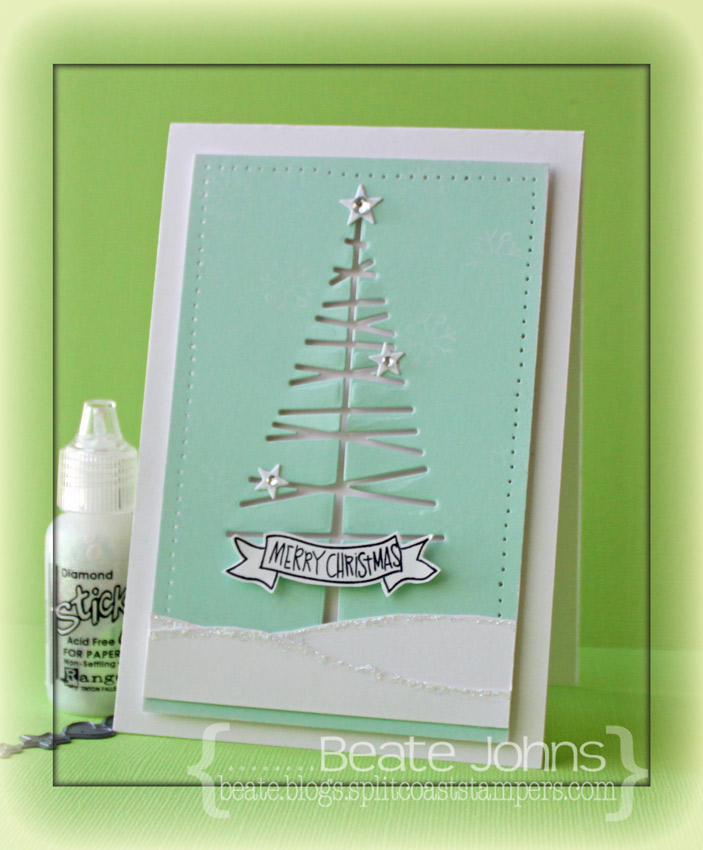
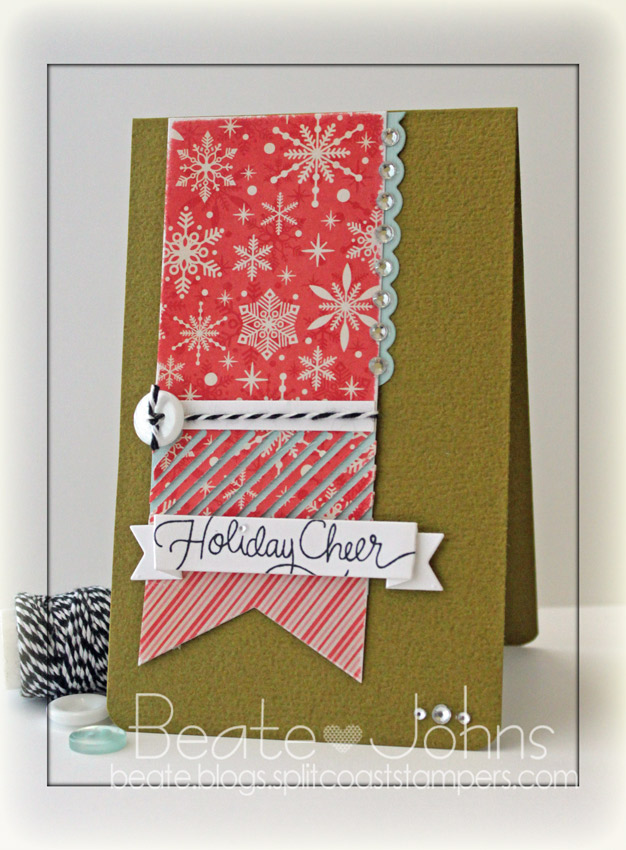
I created my card a while ago for a Featured Stamper Challenge on Splitcoaststampers. I started with a 3 1/2″ x 11″ piece of Neenah Solar White cardstock, folded in half. The top right and bottom left corners were rounded and the background stamp from Simon Says Stamp exclusive Music 2 My Ears stamp set was stamped on the left hand side in Key Lime VersaMagic Ink.

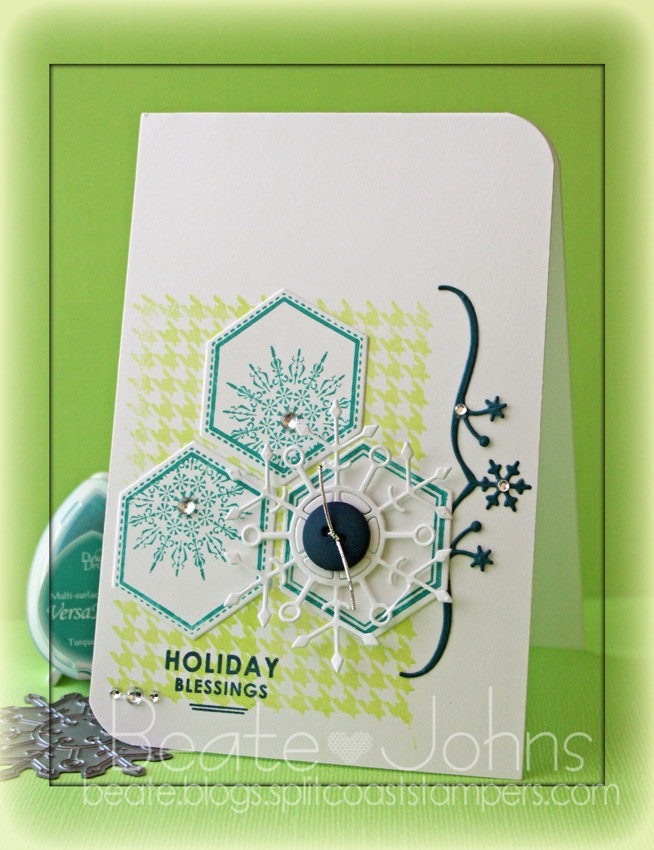
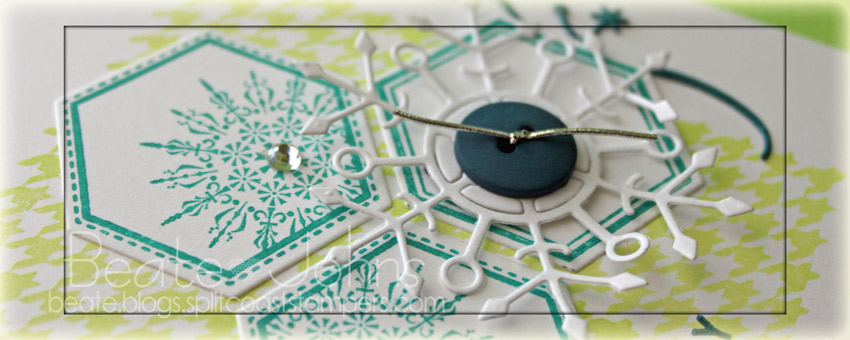
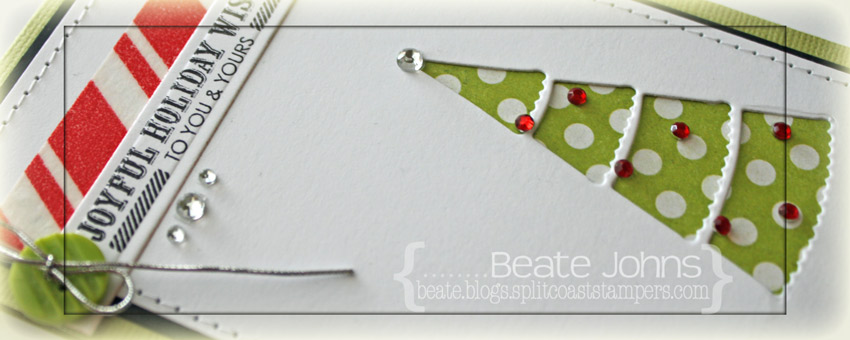
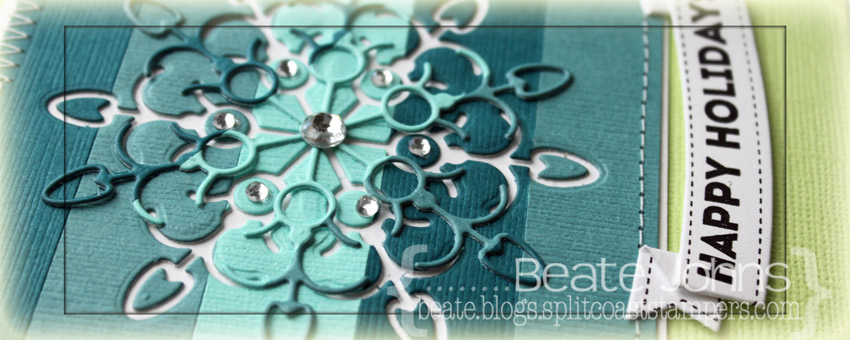
More white cardstock was cut with one of the Holiday Labels dies. Two of the Hexagons were stamped with the snowflake hexagon from the Holiday Labels stamp set in Turquoise Gem VersaMagic Ink, on with the Hexagon outline stamp. The hexagons were adhered over the stamped background. A snowflake was cut out of white cardstock with the Faceted Snowflake die, topped with a button that was tied on with silver cord and adhered to the empty hexagon.

Blue Calipso Fourz Bazzill cardstock was cut with the Snowflake Bracket die and adhered to the right hand side next to the Hexagons. A sentiment from the Holiday Label set was stamped in Ocean Depth VersaMagic ink to the lower left corner. Rhinestones from a Sleek Strips Silver Rhinestone pack finish off the card.

Check out my fellow Crafty Friends for more  inspiration:

    Thanks so much for looking! I hope you have time to join us in the challenge. It’s easy and fun! Come back Monday and Tuesday for more CAS inspiration!!!  Have a wonderful week!
    Hugs and smiles


I have another Clean and Simple card to share with you that is mostly made with supplies from the new Simon Says Stamp December card kit. I created the card for the current CAS(E) this sketch challenge. I will also enter it into the current Simon Says Stamp Challenge, because the current one is anything goes! One lucky entry will win a $50 shopping spree!!!

I started by cutting two red papers of Pink Paislee Sidewalks patterned paper (included in kit) in 2″ wide strips. The bottom was cut with one of MFT’s Fishtail Flags Die-namics die and the center was cut with Simon Says Stamp Air Vent die. Sea Salt Bazzill cardstock (included in kit) was adhered behind the vent and a 1/4″ strip of white cardstock was adhered above. A white button was tied on to the side of that paper strip with Beetle Black twine.


A 2 1/2″ long strip of Sea Salt cardstock was cut with MFT’s small scalloped border die and adhered to the top right of the strip. Rhinestones from a Sleek Strip Silver Rhinestones pack were adhered next to each scallop. The banner strip was adhered to the card base, 3 1/2″ x 11″ piece of green Bazzill cardstock (included in kit), folded in half. The bottom corners were rounded.

A sentiment from Merry Everything (included in kit) was stamped in Tuxedo Black Memento Ink on a piece of Neenah Solar White cardstock that had been cut with a small folded  Banner die.  It was adhered slightly off center underneath the vent die cut. A tiny rhinestone was adhered as the dot over the i and three rhinestones from the Sleek strip pack were adhered on the bottom right corner to finish off the card.

Thanks so much for stopping by! Have a wonderful day!
Hugs and smiles

I recently got the new Simon Says Stamp December card kit in the mail and couldn’t wait to play with it. I had missed the deadline of the latest CAS(E) this sketch, but I wanted to create a card with it anyway. It definitely works for the current Simon Says Stamp Challenge, because the current one is anything goes! You could win a $50 shopping spree if you enter!!! And with me being broke because I ordered a new camera, 2 lenses, wireless memory card and kids presents on Black Friday, that would be wonderful!

I started by cutting the right side of a 3″ x 5″ piece of white cardstock (from kit) with the Simon Says Falling Stars die. Packing tape was adhered behind the stars and Sterling Glitter was rubbed over it.  A sentiment from Merry Everything stamp set (included in kit) was stamped in Tuxedo Black Memento Ink on the right side of the cardstock piece.

The card base is a 3 1/2″ x 11″ piece of Neenah Desert Storm cardstock (included in kit) folded in half. A 2″ x 3 1/2″ piece of Pink Paislee Sidewalk patterned paper (included in kit) was taped to the lower half of the card base and silver cord was tied around the card base. A wooden button (included in the kit) was adhered to the left hand side of the white layer to finish off the card.

Thanks so much for stopping by! Have a wonderful day! I know mine will be! My new camera is scheduled to arrive today!!!
Hugs and smiles

I created this card a few weeks ago for a CASE study challenge.  For this one I paired 3/4″ x 3 1/4″ wide strips of different colored blue Bazzill cardstock were adhered to a slightly bigger white base. Clouds were cut out with Flat Bottom Cloud Die-namic dies.

The layer was adhered to the card base, a 3 1/2″ x 11″ piece of Neenah Solar White cardstock, folded in half. The bottom corners were rounded. A sentiment from Simon Says Stamps On Edge stamp set was stamped underneath the colored cardstock layers in Tuxedo Black Memento Ink.

White cardstock was cut with the Simon Says Stamp die Always and adhered right on the edge of the colored cardstock edge.  Black Doodlebug Twine was tied right under that edge and topped with a button. Faux Stitching was added to the colored cardstock with a white gel pen. Three rhinestones from a Sleek Strips Silver Rhinestones finish off the card.

Thanks so much for stopping by! Have a wonderful day.
Hugs and smiles

I created this card a while ago for an inspiration challenge on Splitcoast.  I started with a 3″ x 5″ piece of Neenah Solar White cardstock . The bottom two corners were rounded and the Petite Christmas Tree was cut in the lower right corner. Carta Bella’s Merry & Bright patterned paper was adhered behind the tree cut out and the layers were stitched to a slightly bigger piece of black cardstock.

White cardstock was cut and embossed with a Spellbinders Nested Pennants die and a sentiment from the new Small Folded Banners Holidays was stamped over it in Jet Black Archival ink. A button was tied on to the right edge with silver cord before it was adhered to the upper left edge. Red striped washi tape was adhered over it.

Silver Rhinestones were adhered under the sentiment and on top of the tree. Baby Bling red rhinestones were added to the tree to finish off the card.

Thanks so much for stopping today! Have a wonderful day!
Hugs and smiles

Today’s Holiday Blitz tutorial is written by Susan Culotti. She shows us how to create a flip top box (like it’s used for cigarettes or crayons). I shot the video and created this box as a sample.

My box base is a piece of Kraft cardstock. The patterned paper used to decorate the box is from Carta Bella’s Winter Fun patterned paper. Holiday Apothecary Labels stamps and dies were used to dress up the box.  Rhinestones from Sleek Strips Silver Rhinestones finish off the box.

Here is a video for the visual learner:
[youtube]https://www.youtube.com/watch?v=5M9mODY5weM[/youtube]

Thanks so much for stopping by! Have a wonderful day!
Hugs and smiles

I created this card for a Way to Use it Challenge (no fall colors) and a CASE study challenge.  I just LOVED the card we had to case and it made me create not just one but several cards. For this one I paired 3/4″ x 3 1/4″ wide strips of different colored blue Bazzill cardstock were adhered to a slightly bigger white base. I used the new Simon Says Stamp Curvy Snowflake die to cut a negative image in the center.  The edges were stitched and the snowflake die cut was adhered over the negative cut.

The layers were adhered to the card base, a 3 3/4″ x 10″ piece of Limeade Bazzill cardstock, folded in half. The bottom corners were rounded.

A piece of Solar White cardstock was cut and with Holiday Folded Banner die. The sentiment and frame is from the same named Simon Says Stamps exclusive stamp set and was stamped on the banner with Jet Black Archival ink. The banner was adhered to the lower right edge of the snowflake panel. Rhinestones on the snowflake and next to the banner finish off the card.

Thanks so much for looking! Have a wonderful day!
Hugs and smiles

P.S.: Today’s Holiday Blitz tutorial on Splitcoaststampers was created by Theresa Momber. She shows you how to turn a circle die cut into a darling basket.


I received my Holiday Card Kit from Simon Says Stamp and had to play with it right away. I made two quick cards with it. I can’t wait to color the cute Gnome that comes in the stamp set. I am sure I will get to that soon.  For the first one I started by cutting the Mod tree in a 3 1/4″ x 5″ piece of Shallows paper (came in the kit). The edges were sanded and the side and top edge pierced.

Two 3 1/4″ strips of white cardstock were torn, adhered to the lower part of the layer and the edges were topped with Diamond Stickles.  The layers were adhered to the card base with foam adhesive squares, a 3 3/4″ x 11″ piece of white cardstock (from kit), folded in half. More white cardstock was cut with the Holiday Shapes die. Three stars were added to the tree and topped with a rhinestones.

A sentiment from Gnome for the Holidays (included in the kit) was stamped in the banner outline from the same set, cut out and adhered under the tree to finish off the card.

For my second card I stamped the label image from Gnome for the Holidays in Jet Black Archival ink on white cardstock, that had been cut with Simon Says Stamps exclusive Apothecary Label dies.  A little silver glitter brad (included in kit) was added on the top of the label.

Part of a Doodlebug Francy Frills cardstock sticker (included in the kit) was adhered to a 1 3/8″ x 5″ piece of Aspen Frost Basic Grey (one sheet of each design included in the kit)  paper strip. Both were adhered to a 3 1/4″ x 5″ piece of the same paper kit. Black Doodlebug Twine (from the November kit) was tied around the layers and topped with a button  before the layers were adhered to the card base, a 3 3/4″ x 11″ piece of white cardstock, folded in half.

Faux stitching was added with a white gel pen. The tiny holly image from Gnome for the Holidays was stamped in Tuxedo Black Memento Ink on Neenah Solar White cardstock and colored with Copic Markers (R24, R29, R39, YG93, YG97). The imag was cut out and adhered to the lower right of the label to finish off the card.

There is only a limited amount of those card kits available. I am glad I got mine!

Thanks so much for stopping by! Have a wonderful day! It’s Friday!!!! Wohoo
Hugs and smiles

Last Friday the Free For All Challenge at Splitcoaststampers was to create a card with negative die cut shapes. I had a lot of fun with it and created four cards!!! That is pretty amazing for me. Usually I get two cards done per day, tops. But I had so much fun, I just couldn’t stop.

For this card I started with a 3″ x 5″ piece of Neenah Solar White cardstock. The bottom corners were rounded and the Meadow Rue die was cut out in the center of the cardstock. The layer was adhered to a 3/16″ bigger piece of black cardstock and the edges were stitched.

The layers were adhered to the card base, 3 1/2″ x 11″ piece of Seasalt Canvas Bazzill cardstock, folded in half. A sentiment from Simonsaysstamp’s Handwritten Sentiment stamp set was stamped on a  7/8″ wide strip white cardstock with in Jet Black Archival ink. The right edge was cut banner style and a green button was tied on to the upper left side of the strip with Linen Thread. The sentiment strip was adhered to the card with foam adhesive squares. Three rhinestones from a Sleek Strips Silver Rhinestones finish off the card.

Thanks so much for stopping by! Have a wonderful day!
Hugs and smiles

Today Splitcoast is posted a product review on Xyron‘s new 1″ Mini Sticker Maker and the new glue stick. I used both products on a card I created for last week’s Free For All Challenge.

I had recently discovered Freckled Fawn Washi tape and was eager to use it on a card. For this card, I covered a 3 1/2″ x 4 3/4″ piece of Neenah Solar White cardstock with three different tapes. The edges were stitched and one of SimonSaysStamp  Talk Bubbles die was used to cut a window on the lower right hand corner.

A sentiment from SimonSaystamps For the Record was stamped in Jet Black Archival ink on Solar White cardstock. It was adhered (with Xyron Glue stick) behind the window before the layers were adhered to a 3/16″ bigger piece of black cardstock. A border was drawn with aCopic Multiliner on the inside edge of the talk bubble.

Hearts were cut out of black cardstock with the Holiday Shapes die. Three were adhered to the upper left hand side and one little red baby bling rhinestone was added to the biggest heart. The layers were adhered to the card base, a 4 1/4″ x 11″ piece of Kraft cardstock folded in half with  foam adhesive squares. A border was doodled around the big layer to finish off the card.

If you haven’t checked out Freckled Fawn yet, get yourself something to drink, sit in a comfortable chair and go and check it out. It’s Washi Tape heaven!!! Their tapes are so pretty and I love how they staged their product photos. If you like their product, please go and like Freckled Fawn and Simonsaysstamp on facebook. Freckled Fawn was sweet enough to sponsor a little Washi Tape giveaway.

To enter be eligible for the drawing, just leave a comment under this post AND like Freckled Fawn on facebook. I will pick a winner with the help of random.org  this Saturday! You will love this tape. Good luck with the drawing!!!

P.S.: When you go to the Freckled Fawn Facebook page, please post that I sent you. This way I know you were there and liked them. Thank you!

Thanks so much for stopping by! Have a wonderful day!
Hugs and smiles

© 2012 fresh & fun Suffusion theme by Sayontan Sinha