tcpwaleoftimetentwide.jpg

Remember a few month back, SCS Technique Lover challenge was to create a tent card. That was such a cute idea, I thought it would be nice to have a tutorial for it in our resource section. So that’s the tutorial I wrote for Splitcoast today.

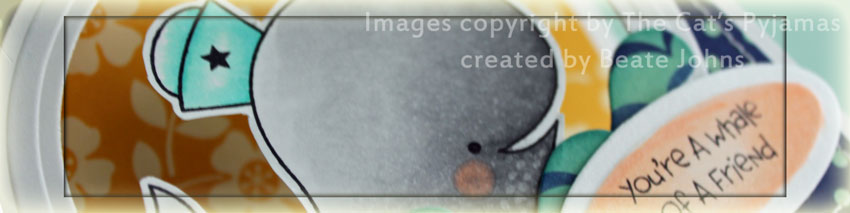
For my image I picked The Cat’s Pajama’s new set called A Whale of a Time. I stamped the cute big guy in Tuxedo Black Memento Ink on the new Xpress it paper from Copic. I received a few sheets at CHA and can’t wait to order more. It blends as well as the Neenah cardstock, but the ink doesn’t feather as much. Good stuff!

The whale was colored with Copic Markers (N0, N1, N3, N5, BG11, BG13, E01) and cut out. I saw Leigh O’Brien add little spots of texture on the bottom of the whale and I thought that was a cute idea. I totally cased that from her. To add those little dots, just hold your Blender Pen down a bit. The clear solution of the pen will “push” the colored ink away….leaving small white dots. For more texture tips with Copic Markers check this tutorial on SCS.

tcpwhaleoftimetent.jpg

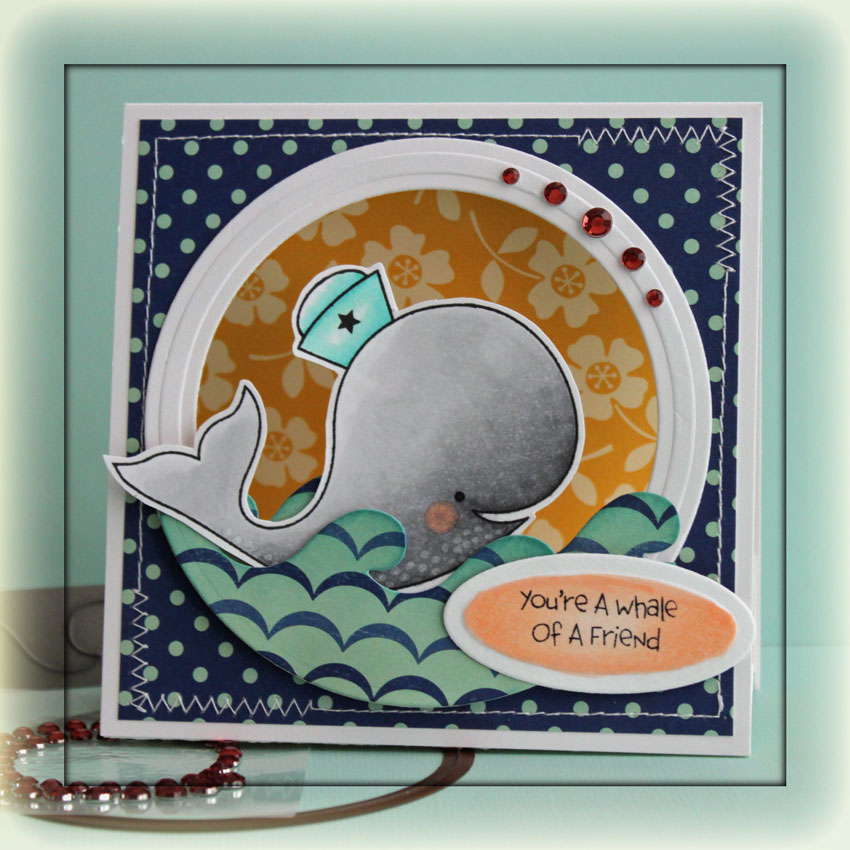
My card base is a 4 1/4″ x 8 1/2″ piece of Neenah Solar White cardstock folded in half. A 4″ square of Seaside October Afternoon paper (my 1/2 stack is almost gone….I need it to be available in stores so I can get more!!!) was stitched to the card front and a window was cut with Classic Circle Nestabilities. Next I cut and embossed  a frame with Circle Nestabilities and adhered it over my window. Waves were cut with the new Wave CutUps die out of Seaside October Afternoon paper, then cut to match my window and adhered to the lower part of the frame. My sweet Whale was taped in between my waves.

The sentiment is from the same set. It was stamped on Neenah Solar White cardstock with Tuxedo Black Memento Ink and cut out with Petite Oval Nestabilities. The inner part of the die cut was colored with E01 and E00 Copic Markers. Lippy Red Kaisercraft Rhinestones finish off the card.

Here is a video for the visual learner:

[youtube]https://www.youtube.com/watch?v=XmYe-ktM5YE[/youtube]

Thanks so much for stopping by! Have a wonderful day
Hugs and smiles

tcpgrownupcupcakewide.jpg

I am so excited that The Cat’s Pajama’s is now a member company on Splitcoast! I love the darling images and the hilarious sentiments. I saw that you were supposed to make a cupcake card for the Crazy4Challenges and thought of this darling stamp right away.

The image was stamped with Black Soot Distress Ink on Neenah Solar White Cardstock and colored  with Copic Markers (R22, R24, R29, E02, E04, YR12, YR15, YR16, YR21, YR31, Y32, Y35, W00, W01, W3, B0000, YG03, YG05) and cut it out with Classic Circle Nestabilities. The image was then layered on a slightly bigger black circle and a Scalloped Octangle cut out of Stampin’ Up!’s Cherry Cobbler Cardstock. Stardust Stickles was added to the frosting of the cupcake on my (dirty) snow.

tcpgrownupcupcakebeate.jpg

The card base is a 5 1/4″ x 10 1/2″ piece of Textured Old Olive cardstock folded in half. A  4 3/4″ X 2 1/4″ Strip of Pretty Please paper (My Mind’s Eye) was cut with Jumbo Scallop Borderabilities and adhered to a 4 3/4″ square of the same paper pack. the layers were then stitched to a 4 15/16″ square of Whisper White cardstock. Thin white zic zac ribbon was adhered where the horizontal strip ended before Seafoam Organdy ribbon was tied around the layers.

The sentiment was stamped with Black Soot ink on Neenah Solar White cardstock and cut with Classic Oval Nestabilities. Kaisercraft Clear Rhinestones on the border stamp from the set finish off the card front.

tcpgrownupcupcakeinside.jpg

The inside of the card is very simple. A 2″ x 4 15/16″ strip of Pretty Please My Minds Eye paper was cut and embossed with the Jumbo Scallop Borderabilities. A 3/8″ Cherry Cobbler strip was adhered to the the top of the layer and then stitched to a 4 15/16″ square of Whisper White cardstock. Happy Birthday was stamped on the Cherry strip with Black Distress ink and three small clear Rhinestones were added to the left.

Thanks so much for stopping by! Have a wonderful day!
Hugs and smiles

tcp29againboxwide.jpg

Today’s tutorial on SCS is written by Wendy Weixler, Wendybell on SCS. She created a darling All-in-One Box with Template for us. The box comes together pretty fast. I used some of my favorite patterned paper and a super cute sentiment and stamp from The Cat’s Pajamas for my sample.

tcp29againaioboxbeate.jpg

My Box base is created from Chocolate Chip cardstock. The patterned paper strip on the bottom measures 2 1/4″ x 9 1/4″, the small strip on top measures 1/2″ x 9 1/4″. Both are from the Weathervane collection from October Afternoon. I added some stitching (I can’t help myself! Everything looks better stitched to me) and taped the box together with Scor-Tape.

The sentiment and the image are both from You Say it’s Your Birthday set. I LOVE that sentiment. I think that’s what all my birthday cards should say from now on. LOL They were stamped in Rich Cocoa Memento Ink on Neenah Classic Cream cardstock. The sentiment was cut out with Circle Nestabilities, layered on a Kiwi Kiss circle and then on a Chocolate Chip layer that had been cut with Label 9 Nestabilities. The sentiment layer was airbrushedwhile the circle die was still on top with Copic Marker BG10.

The image was cut out, the present paper pieced with the same paper used for the thin strip on the box top and a bit color was added with Copic Markers (Y17, BG10). Yellow Stickles was added to the bow and the polka dots on the present. Before the image and sentiment were adhered to the box with dimensionals, I added a cream silk ribbon bow on the upper edge of the box. To finish the box off and add just a tad more sparkle, I added Tiny Twinkles to the cat’s collar and the upper right edge of the sentiment.

Thanks so much for stopping by! Have a wonderful day. Hugs and smiles

tcpblowtlc276wide.jpg

Can you believe I just recently got my first The Cat’s Pajamas stamps? They are so cute and the sentiments are hilarious! I used the set Blow for a technique challenge a couple of weeks ago. We were to make a personalized card with one of our favorite techniques. Rick was having a tough week ahead of him, the inside of his Miata got soaked after a horrendous rain storm here in Ohio and he was stressing about getting us a rental home in Florida the following week (nothing like booking at the last minute).

tcpblowtlc276cps170.jpg

The image was stamped on Neenah White cardstock in Tuxedo Black Memento Ink. The image was stamped again on Eclipse tape, cut out and taped over the original image. The main image was cut out with Label 8 Nestabilities. The die was left on and the panel was sponged with Tumbled Glass and just a little Peeled Paint Distress ink on the bottom. The masks were taken off and the image was colored with Copic Markers (E25, E27, E29, E30, E31, E33, E35, E51, E53). Stardust Stickles were added over the Dandelion flower as well as the little spots on the mushrooms.

The card base is a 5″ x 10″ piece of Kraft cardstock folded in half. The edges of the card front as well as the inside of the card were sponged with Antique Linen Distress ink. the edges of a 4 3/4″ square of Weathervane October Afternoon Paper were sanded, sponged with Antique Linen and stitched to a 3/16″ bigger piece of White cardstock. The horizontal strip of paper is also from the Weathervane collection. It measures 1 1/2″ x 3 3/4″ and was sanded and sponged as well. A strip of cork was cut with Scallop Die-namic die. It was stitched to the October afternoon strip. Retired SU ribbon was tied around it before the layers were adhered to the card base. The image was adhered over the strip with dimensionals.

Two Basic Grey buttons were stitched to the upper right hand of the card. The sentiment made me smile when I first saw it. What a fun greeting! It was stamped on Neenah White cardstock with Tuxedo Black Ink, cut out with Petite Oval Nestabilities and sponged with Tumbled Glass and Peeled Paint ink.

tcpblowtlc276inside.jpg

The image was kept really simple. A 1 3/4″ x 4 11/16″ strip of Weathervane paper was sanded, sponged and then stitched to a 4 11/16″ White cardstock square. The bigger of the small mushrooms was stamped directly on the patterned paper strip and colored with the same Copic Markers used in the front.

Thanks so much for stopping by! Have a wonderful day! Hugs and smiles

© 2012 fresh & fun Suffusion theme by Sayontan Sinha