Today a new product review was posted on Splitcoaststampers. It is for Spellbinders new M-Bossabilities embossing folders. Needless to say I love them (what Spellbinders product do I not love?). To show off the folders, I created a quick and easy tutorial on how to create a Faux Letterpress look.

The background was created with the new Elegance M-Bossibilities folder. It was inked with Cantaloupe Memento Ink andNeenah Solar White cardstock was embossed with the folder. It was cut down to a 2 15/16″ square, which was then stitched to a piece of Solar White cardstock, cut and embossed with the largest of the Fleur De Lis Square Nestabilities dies. The card base was cut out of the same cardstock with the same die and the card front was adhered on top.

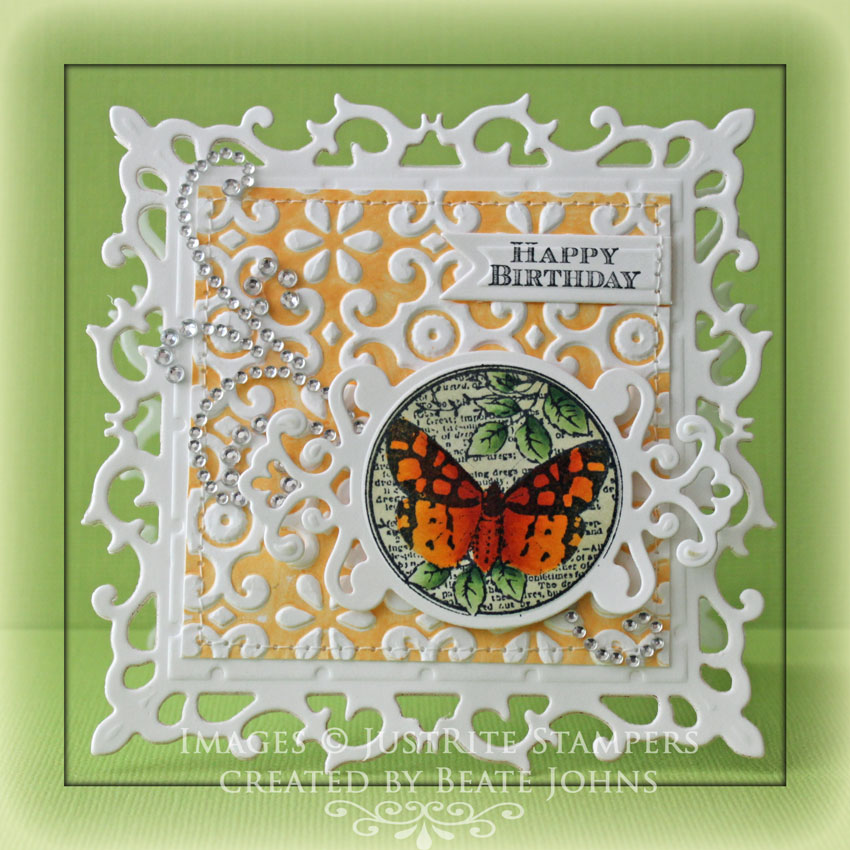
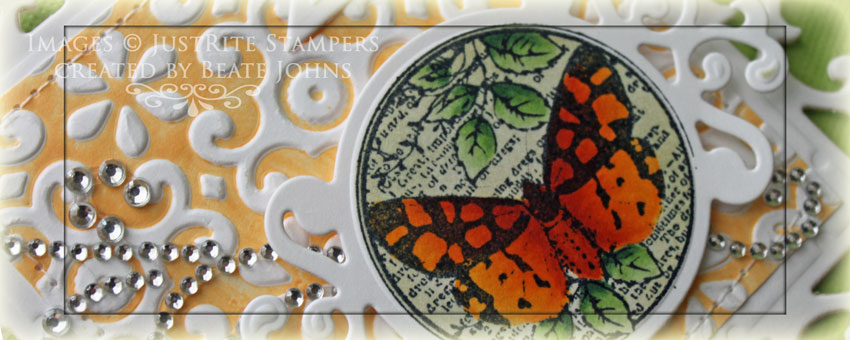
An image from JustRite Stampers Botanical Butterflies was stamped in Tuxedo Black Memento Ink on a piece of white cardstock, cut and embossed with a Parisian Accent die. The image was colored with Copic Markers (Butterfly: Y17, YR15, YR18    Leaves: G40, G43, G46) and sponged with Old Paper Distress ink. The image layer was adhered to the lower right of the card base with dimensionals.

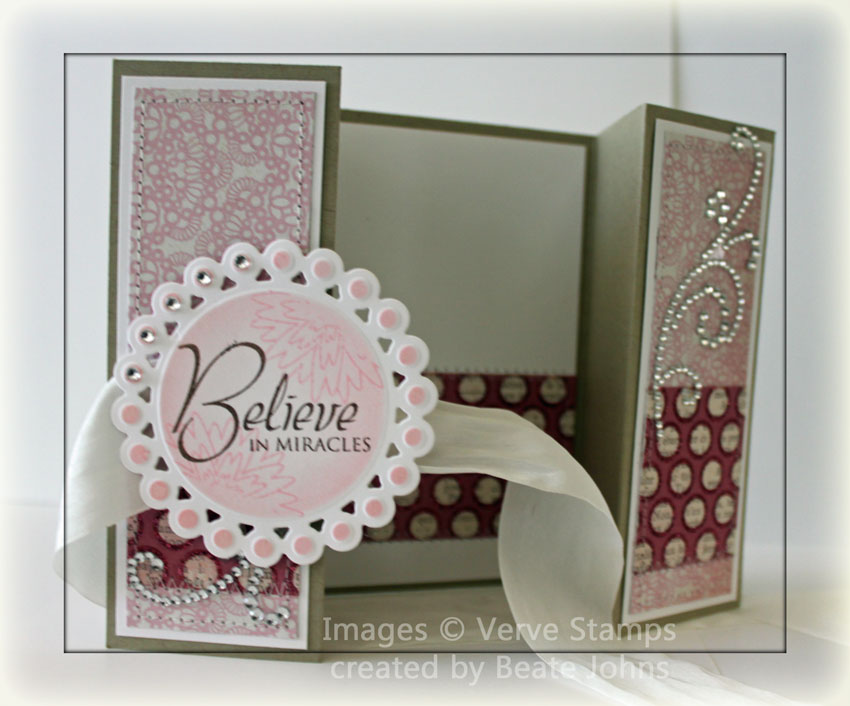
A sentiment from Fleur De Lis Label 20 stamp set was stamped in black on white cardstock that had been cut and embossed with a Nested Lacey Pennants die. Parts of a Finesse Rhinestone Swirl finish off the card. I made this card into a birthday card I can enter it into JustRite Stampers current Birthday Bash Challenge.  You still have an entire week to enter the challenge for a chance to win JustRite stampers stamp sets.

Here is a video for the visual learner:

[youtube]https://www.youtube.com/watch?v=45XWgbAOKqw[/youtube]


Random.org picked #175 as the winner for my latest candy. That is Patty J. Come back next Sunday for another drawing. I still have ways to go before my “extras” are gone. 🙂

Whimsy’s newest magazine is out. You can find it here.  Inside you will find a sneak peek of the Debuet Release of Elisabeth Bell images, great projects with other Whimsy stamps and a step by step tutorial on how I create my masked clouds.

There is a new product review on SCS today. We got to play with Design Memory Crafts Mixed Media Sampler (Faber-Castell products). After checking their blog and finding this cool card, I wrote a tutorial for the technique for SCS. My sample is a lot more subdued then Jill Foster‘s, but I still like it. Those Pastel Pencils are a lot of fun.

I started by cutting a piece of black cardstock with a Classic Square Nestabilities die. Flowers from Verve’s Great Friend were stamped in Embossing Ink and embossed with silver embossing powder. The flowers were colored with PITT Pastel Pencils and the edges were smudged with a white gelato stick.

The card base was embossed with the Elegance M-Bossibilities folder and the image panel was adhered over it with dimensionals. A piece of Solar White cardstock was cut and embossed with a Tailor-Made Classic Keyhole die. A sentiment was stamped over it in Tuxedo Black Memento Ink and the right edge was cut straight. It was adhered to the lower right hand side of the image. It was topped with a black button, tied with Lemondrop twine.

Here is a video for the visual learner:

[youtube]https://www.youtube.com/watch?v=4hBX8RSC9EQ[/youtube]

Thanks so much for stopping by! Have a wonderful day!
Hugs and smiles

Remember this box from last week?

I wrote a tutorial for Splitcoast for that box and it came out today. Check here for step by step instructions on how the box was created.

Here is a video for the visual learner:

[youtube]https://www.youtube.com/watch?v=ShIz7gS_-jk[/youtube]

Thanks so much for stopping by! Have a wonderful day
Hugs and smiles

Today’s tutorial on Splitcoast is for the Herringbone technique. It’s a  great way to get rid of your small patterned paper strips. For my sample I used an the Itty Bitty Unity image called Roly Poly Winter Joy. I had it colored since the CHA Supershow. It had been stamped with Tuxedo Black Memento Ink on Neenah Solar White cardstock and colored with Copic Markers (not sure about the colors, sorry). The image was cut and embossed with a Petite Oval Nestabilities die. It was adhered to a piece of Canyon Brown cardstock, cut and embossed with a Scalloped Petite Oval Nestabilities die. The edges of the image oval were paper pierced.

The Herringbone background was created with MME Lime & Twist Life of the Party patterned paper. It measured 3 1/2″ x 4 3/4″. It was stitched to a 3/16″ bigger piece of Neenah Solar White cardstock. White Organdy Ribbon was tied around the layers. A Basic Grey button was tied over the bow with Iridescent Curling Ribbon.

A piece of white cardstock was cut and embossed with a Lace Doily Accent die. It was adhered behind the image layers were before those were adhered to the Herringbone layers with dimensionals. The Lace Doily die cut was covered with Stardust Stickles. A sentiment from the Roly Holy set was stamped in Tuxedo Black on a piece of white cardstock cut and embossed with a Classic Circle Nestabilities die. The inner part was airbrushed before the circle was adhered to a piece of Cherry Cobbler Cardstock cut and embossed with a Scallop Circle die. The edges of the sentiment circle were paper pierced before it was adhered under the bow.

The card base is a 5 1/2″ x 8 1/2″ piece of Core’dinations cardstock folded in half. The layers were adhered to the card base and parts of a Finesse Rhinestone swirl finish off the card front.

Here is a video for the visual learner:

[youtube]https://www.youtube.com/watch?v=AMbHmMdUTC8[/youtube]

Thanks so much for stopping by! Have a wonderful weekend!
Hugs and smiles

The current JustRite Stampers Challenge is easy. Make a Christmas Card or Tag.  The winner of the challenge will receive two sets of die sets from the JustRite store, three honorable mentions will oone die set! SWEET!!!

For my creation I started out stamping the biggest stamp from Musical Notes in Rich Cocoa Memento Ink on Classic White cardstock. One was cut out and embossed with the  second largest Label 20 Nestabilities die, the other with the third largest die. The ribbon and ornate embellishments of the image were colored with Copic Markers (R24, R27, R29, YR21, YR23, YR24) before both labels were sponged with Vintage Photo Distress ink. A sentiment from the Christmas Nested Frames was stamped in Rich Memento Ink in the center of the smaller label before that layer was adhered to the larger label with dimensionals.

A piece of MME Lost & Found Christmas was cut and embossed with a Label 21 Nestabilities die. The edges were sanded and then cut at the embossed line. A piece of Kraft cardstock was cut and embossed with the same die. The edges of both the cardstock and paper layers were sponged with Vintage Photo Distress ink before the layers were stitched on top of each other.Red Seam Binding (Stampin’ Up!) was tied around the layers. The bow was topped with a button, tied on with Linen Thread.

Another piece of Lost & Found Christmas paper was cut and embossed with the second smallest Grand Label 23 Nestabilities die. The edges were sanded and cut off at the embossed line. A piece of Kraft cardstock was cut and embossed with the same die. The edges of both the cardstock and paper layer were sponged with Vintage Photo before the layers were stitched together. The sentiment layers were adhered to this layer with dimensionals. Cream Baby Bling Pearls finish off this section.

Now I had to decide if I should make it into a card and just cut a base for it, of into something else. I thought it would look great as a box. I took pictures while making the box for step by step instructions. If you are interested how I made this, click on more.

Thanks so much for stopping by!
Have a wonderful day!
Hugs and smiles

Continue reading »

A couple of month ago Joanne ran a Technique Challenge called Layered cards. It had a great response and we had a lot of requests for a tutorial for that card after that challenge. So today we are posting the Telescoping Card in the resource section.

For my sample I used stamps from The Greeting Farms Clearly Christmas Stamp set. The images were stamped on Neenah Solar White cardstock with Rich Cocoa Memento Ink and colored with Copic Markers (Sleigh: R24, R27, R29, R39, E97, E99, E37   Stars: Y15, Y17, E97). The images were cut with Classic Circle Nestabilities and first sponged with Antique Linen Distress ink
, then a bit with Vintage Photo Distress ink.

I left a large part of the Sleigh circle open to write a note in and stamped snowflake images from Clearly Christmas with Antique Linen over the open areas. The gifts from the sleigh were stamped twice on different paper from Echo Parks Season’s Greetings. The gifts were shaded with Copic Markers (YG21, YG25, YG17, B000, B02), cut out and adhered over the main image. Stardust and Yellow Stickles were added to the sleigh image.

The sleigh circle was first stitched to a slightly bigger Canyon Brown cardstock circle, then to a piece of cardstock, cut and embossed with a Beaded Circle Nestabilities die.

The tree image was first stitched to a Kraft cardstock circle, then on a piece of Cherry Cobble cardstock (Stampin’ Up!) cut and embossed with a Jumbo Circle Nestabilities die and lastly on an Echo Park Season’s Greeting Paper circle.

For the top layer the sentiment circle was first layer on Kraft cardstock circle, then on a patterned paper circle and lastly on a piece of Neenah Solar White cardstock cut and embossed with a smaller Beaded Circle Die. Stardust Stickles was added over the snowflake and Baby Bling Rhinestones were added on each bead but one, that holds the brad connecting it to the medium size circle layers.

Here is a video for the visual learner:

[youtube]https://www.youtube.com/watch?v=ik-t2AXlZSo[/youtube]

Thanks so much for stopping by! Have a wonderful day!
Hugs and smiles

Today’s tutorial is for a fun fold I called Side Spring card. Instructions were posted back in 2005 in a forum post on SCS and a recent post from Dawn reminded me of it.

For my card I started out with a 5 1/2″ x 8 1/2″ piece of Kraft cardstock. The patterned paper is from the Echo Park Victoria Garden Paper pack. The strip on the left hand side measures 1 1/4″ x 4 1/2″. A sentiment from The Greeting Farm’s new Clear Set Build-a-Onesie Boy was stamped with Tuxedo Black Memento Ink directly on to the paper strip. Part of a Finesse Silver Rhinestone Swirl was adhered over to sentiment.

For the main image I stamped the onesie image on a piece of Neenah Solar White cardstock, colored it with Copic Markers (RV0000, RV10, N0, N1) and cut it out. A piece of white cardstock was cut and embossed with one of the Eyelet Square Nestabilities dies. A 2 3/8″ square of Victoria Garden paper was stitched to it after the corners were rounded. The image was adhered to the square with dimensionals. Three Silver Baby Bling Rhinestones on the left corner finish off the card front.

For the inside a 5/8″ x 4 5/16″ long patterned paper strip was adhered to a 2 9/16″ x 4 5/16″ piece of white cardstock. A small image from the same set was stamped to the right hand side of the strip with Tuxedo Black Memento ink.

Here is a video for the visual learner:

[youtube]https://www.youtube.com/watch?v=7nMekwqD3XE[/youtube]

Have a wonderful day! Thanks so much for stopping by!
Hugs and smiles

Today’s tutorial on Splitcoast is for the Double Z-Fold card. It looks like a Gatefold card closed, but has another fold to it when you open it up. I think it’s a great fold for invitations.

My card base is a 5 1/4″ x 12″ piece of Textured Kraft cardstock scored at 2″, 4″, 8″ and 10″. 1 1/2″ x 4 3/4″ pieces of My Mind’s Eye Lost & Found Two Blush paper were stitched to a 1/4″ bigger piece of Neenah Solar White cardstock before they were adhered to the card base panels.A Rhinestone swirl was cut apart. Part was adhered to the upper right, the rest to the lower left of the card base.

A piece of white cardstock was cut and embossed with one of the Beaded Circle Nestabilities dies. It was sponged with Spun Sugar Distress ink before a sentiment from Verve Believe Stamp set was stamped in its center with Rich Cocoa Memento ink. A medium sized flower was stamped over the panel twice with Spun Sugar for a more textured look.

White Silk Ribbon was tied around the card before the sentiment panel was adhered with dimensionals. Baby Bling Rhinestones on the upper left hand side of the sentiment panel finish off the card front.

The inside is very simple. A 2″ x 3 3/4″ strip of Blush Paper was stitched to a 3 3/4″ x 5″ piece of white cardstock.

Here is a video for the visual learner:

[youtube]https://www.youtube.com/watch?v=f616k3NoKGU[/youtube]

Thanks so much for stopping by! Have a wonderful day!
Hugs and smiles

I got the idea for this weeks tutorial from Ellen Hutson. She posted a similar one several years ago. I thought it was a great card idea and wanted to share it with all of you and have it in the SCS resource section. You use 4 circle die cuts to create a Petal Card.

For my sample I cut and embossed the four circles out of black cardstock with the largest of the Beaded Circle Nestabilities dies. 2 circles were cut and embossed with a smaller Classic Circle Nestabilities die out of Glowing Authentique Patterned Paper. The patterned paper circles were cut in half and sanded before one half was stitched to each of the four Beaded circles. The circles were scored in half and adhered with glue dots.

A piece of Crochet Lace was stitched to a 2″ x 10″ strip of Authentique Paper before it was adhered around the card as a belly band. Gold Organdy Ribbon was tied around the band. A Muse Token was tied around the bow with Linen Thread and topped with a button.

An image from Crafty Secrets Halloween Creative Scraps was cut with a Classic Oval Nestabilities die. The edge of the image was sanded before it was first adhered to a slightly bigger black cardstock oval, then to a Scallop Oval layer cut and embossed out of Classic Cream Neenah cardstock. A sentiment ticket from the  same Creative Scraps was cut out and attached to the image layer with a Mini Paper Clips. A small button was stitched underneath the sentiment.

For the inside of the card I cut and embossed another piece of Classic Cream cardstock with a Classic Circle Nestabilities die. A strip of Authentique paper was stitched to the layer after the edges had been sponged with Antique Linen Distress ink.

Here is a video for the visual learner:

Thanks so much for stopping by! Have a wonderful day!
Hugs and smiles

© 2012 fresh & fun Suffusion theme by Sayontan Sinha