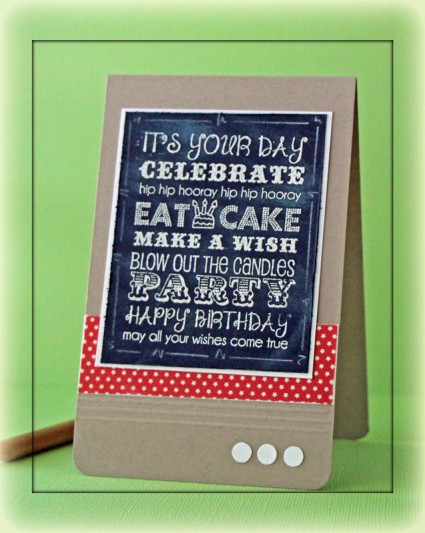
Today’s  Chalkboard tutorial on Splitcoaststampers was created by the wonderful Amy Rohl. I created the video for the technique and this is the sample I created for it.

The card measures 3 1/2″ x 5 1/2″ and was created out of Kraft cardstock. The bottom corners were rounded and some score lines were added with my Scor-Pal.

Taylored Expressions Graphic Birthday Greetings sentiment was stamped in Snow Cap Pigment ink on black cardstock. It was embossed with white embossing powder. The edges were distressed and the layer was adhered to white cardstock. A border was added with a white chalk pencil.

A piece of an old Pink Paislee paper pack was added above the score lines before the image was adhered to the card base. Three 1/4″ white circle punch outs on the bottom right corner finish off the card.

Here is a video for the visual learner:

[youtube]https://www.youtube.com/watch?v=zj1fVfmU5fs[/youtube]

I created this card also as a sample for my Hope You Can Cling to Challenge on Splitcoaststampers. It is the fourth year of our annual card drive to create cards for the MD Anderson Cancer center in Houston. Participate in challenges, send your cards to the hospital and you might win  great prizes from some of your favorite stamp companies. I hope you have time to join us.

Thanks so much for stopping by! Have a wonderful day.
Hugs and smiles

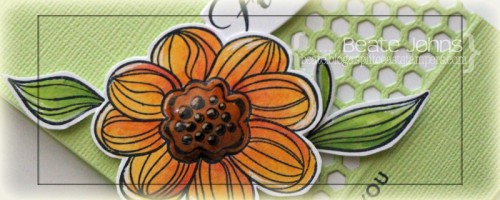
Today’s tutorial on Splitcoaststampers is written by a Simon Says Stamp Design Team Member, Kathy Racoosin. She shows us how to shade with the help of Distress Markers and a Dove Blender Pen.

For my sample I used Simon Says Stamp exclusive dies (Apothecary Labels 2, Hexagon Border) and stamp set (Forever & Always).

Here is a video for the visual learner:

[youtube]https://www.youtube.com/watch?v=My9xWbwiMtA[/youtube]

Thanks so much for looking! Have a wonderful day!
Hugs and smiles


Yesterday we posted a new tutorial and a new Product Focus on Splitcoaststampers. The tutorial was a basic one on Inking with Markers. The product review goes hand in hand with the tutorial and is about the Distress Markers.

[youtube]https://www.youtube.com/watch?v=1mQc_9S5PQs[/youtube]

My son is coming home for Labor Day. I am so excited and can’t wait to cook all his favorite food!  🙂

Today’s tutorial on Splitcoast is written by Janet Yates. She shows how to dress up a plain old lollipop into a broom. Here is a video I shot for it:

[youtube]https://www.youtube.com/watch?v=YzRUwVIkJRM[/youtube]

I hope you had a wonderful summer. I sure did. My oldest started college last week. He loves it. I am glad he took to it so well. I still have to get used to the fact that I don’t see him every day.

Hugs and smiles

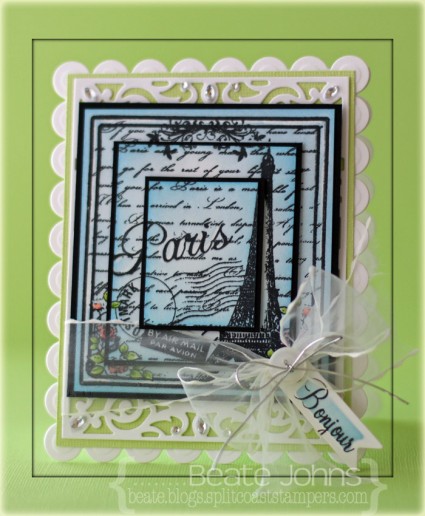
Yesterday’s tutorial on Splitcoaststampers was written by Joan Ervin. She showcased the Triple Stamping technique. It’s an easy way to add dimension to your card.

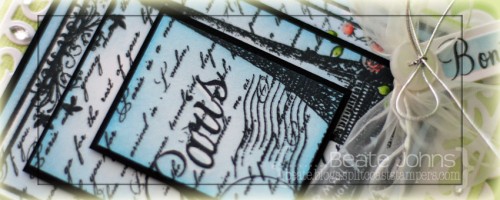
I created a card with that technique with the beautiful Sweet ‘n Sassy Stamp To Paris with Love.  I started by cutting three pieces of Neenah Solar White cardstock in rectangles ( 3 1/2″ x 3 15/16″, 2 1/2″ x 2 15/16″ and 1 1/2″ x 1 15/16″). The layers were adhered on top of each other with repositionable adhesive and the image was stamped over it in Tuxedo Black Memento Ink.  The flowers of the image were colored with Copic Markers (R11, R12, R22, YG01, YG03, YG17).  The frame and the flowers were colored with white crayon before the edges were sponged with Summer Sky and Bahama Blue Memento Ink. Each layer was adhered to a 3/16″ bigger piece of black cardstock.

The layers were stacked on top of each other with foam adhesive squares.  A piece of Solar White cardstock was cut and embossed with a die from the new Spellbinders Filigree Delight set and adhered to a piece of Limeade Bazzill cardstock. The image layers were adhered over it with more foam adhesive squares and May Arts ribbon was tied around the lower part.

More white cardstock was cut and embossed with a tag die from the new Charmed I’m Sure Spellbinders die set. A sentiment from the set was stamped on it with Tuxedo Black ink and the center was sponged with Summer Sky Memento ink. The tag was tied to the bow and a button with silver cord.

The layers were adhered to a card base cut and embossed out of white cardstock with a Grand Rectangle Nestabilities die. Rhinestones from Want2Scrap finish off the card.

Here is a video for the visual learner:

[youtube]https://www.youtube.com/watch?v=8YWHeJtM6vQ[/youtube]

Thanks so much for stopping by! Have a wonderful day!
Hugs and smiles

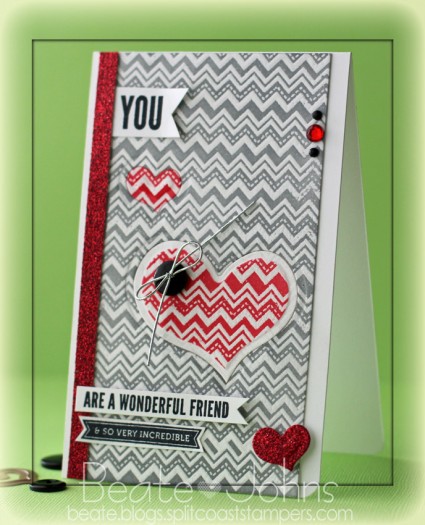
Today’s tutorial on Splitcoaststampers is for a technique I first saw Jennifer McGuire use. It combines dies and embossing resist to create unique backgrounds. We call it Puzzle Piece Resist.

For my card I started with a 3″ x 5 1/2″ piece of Neenah Solar White cardstock. I stamped the zig zag background stamp from Simon Says Very Special stamp set in VersaMark all over the cardstock and embossed it with clear embossing powder.

Two heart dies from a new Spellbinders die set (Hearts One) were cut and embossed out of the background. The hearts were removed and the big background was sponged with London Fog Memento Ink. The big heart was sponged with the die on with Ladybug Memento Ink, the little one was sponged after the die was taken off.


The background was adhered to the card base, a 3 1/2″ x 11″ piece of cardstock, folded in half. The right hand corner of the card was rounded.  Before the big heart was adhered back into the background, a button was tied on with silver cord. The small heart was adhered back to the background as well.

A sentiment from Very Special was stamped in Tuxedo Black Memento Ink on white cardstock and cut out. Two sentiments from the new stamp set You were stamped also in black ink on white cardstock and cut out. A 1/4″‘ x 5 1/2″ strip of red Glimmer Paper (Stampin’ Up!) was adhered to the left hand side of the background strip before the sentiment pieces were adhere next and over the glimmer strip.

Red glimmer paper was cut and embossed with the small heart die. The heart was adhered to the lower right of the background strip. Red and black rhinestones on the upper right hand side finish off the card.

Here is a video for the visual learner:

[youtube]https://www.youtube.com/watch?v=M9s0jtJi7yk[/youtube]

Thanks so much for stopping by! Have a wonderful day!
Hugs and smiles

Today’s tutorial on Splitcoaststampers is written by the amazing Eva Doblias. She shows us how easy it is to use Twinkling H2O’s. She couldn’t create a video, so I shot one showing how to use the paints to create a watercolor wash background.

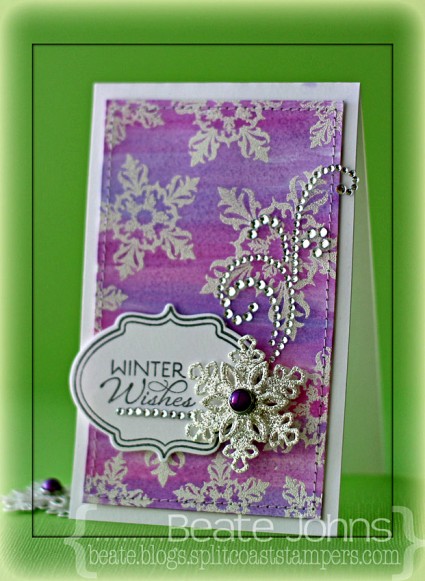
I started by stamping snowflakes from Verve’s Glad Tidings in VersaMark ink on a 3″ x 5″ piece of white cardstock.  They were embossed with white embossing powder before I used blue and purple Twinkling H2O’s for the waterwash. Once the paper dried, I stitched the edges of that layer.

A piece of white cardstock was cut with the Vintage Oval Frame die and the stamp with the same name was stamped over it with Starlite Black Brilliance Ink. A sentiment from Glad Tidings was stamped in the center.

Silver glimmer paper was cut and embossed with the two smallest dies from Spellbinders Create-A-Flake Four, layered on top of each other and connected with a Recollections brad (Michaels). The snowflake was adhered to the right hand side of the sentiment layer. Rhinestones from a Sleek Strips Silver Rhinestone package were added underneath the sentiment. The sentiment layer was adhered to the lower left of the background layer before the background was adhered to the card base. Part of a Finesse Rhinestone Swirl finishes off the card.

Here is a video for the visual learner:

[youtube]https://www.youtube.com/watch?v=oSWBfnl_wSo[/youtube]

Thanks so much for stopping by! Have a wonderful day!
Hugs and smiles

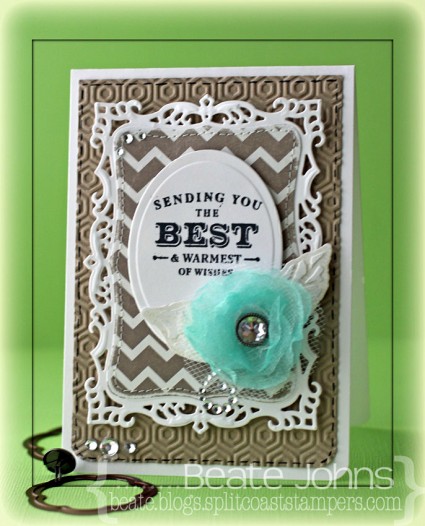
Today’s tutorial on Splitcoaststampers is written by the wonderful Susan Roberts. She shows us how to create a flower by cutting and melting ribbon pieces. It’s perfect for winter, when my hands seem to be cold all the time. 🙂

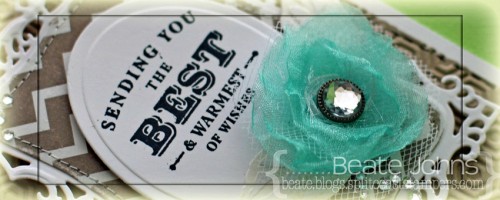
For my sample I used ribbon and tulle bought at Hobby Lobby. Both were cut with the two smallest Blossom Nestabilities® dies, heated and stuck together with a decorative brad.

A sentiment from Simon Says Stamp Apothecary Labels was stamped in Tuxedo Black Memento Ink on Neenah Solar White cardstock that had been cut and embossed with the second largest of the Classic Oval SM Nestabilities® dies.

Two pieces of Fancy Pants Country Boutique Paper were cut and embossed with the single leaf dies from the Bitty Blossoms Shapeabilities® die set. The leaves were sanded before they were adhered under the ribbon flower, who was in turn adhered to the lower half of the sentiment oval.

Another piece as well as more Neenah Solar White cardstock was cut and embossed with the second largest Decorative Label Eight Nestabilities® die. The patterned paper was sanded and cut on the embossed edge before it was stitched to the white die cut. The sentiment panel was adhered to the center of the fancy panel with foam adhesive squares.

The bottom corners of a 3 1/2″ x 5 1/4″ piece of Kraft cardstock were rounded and a faux stitched border was added with a black gel pen. The layer was then embossed with the So Trendy M-Bossabilities ® folder. It was adhered to the card base, a 3 3/4″ x 11″ piece of Solar White cardstock, folded in half with the bottom corners rounded. Rhinestones finish off the card.

Here is a video for the visual learner:

[youtube]https://www.youtube.com/watch?v=ajo7y88Rf3Q[/youtube]

Thanks so much for stopping by! Have a wonderful day!
Hugs and smiles

I have another video post to share with you on the Spellbinders Paper Arts blog. The coming week is all about Nestabilities®. Nestabilities started my love for Spellbinders products. Once the original shapes came out I was hooked. In the video I talk a bit about some of my favorite techniques you can do with Spellbinders dies and show how to create this telescoping image.

I hope you have time to stop by, check it out and tell me what you think. I would love to hear from you!  Have a wonderful weekend!
Hugs and smiles

Patti, you asked for it. Here is a video for the visual learner on how to just emboss your Spellbinders die shape into your cardstock:

[youtube]https://www.youtube.com/watch?v=RRUoXVNuhF0[/youtube]

Have a wonderful Friday! Hugs and smiles

© 2012 fresh & fun Suffusion theme by Sayontan Sinha