Today’s tutorial on Splitcoaststampers is written by Judy Maddigan and super fun. My little Santa cracked me up wobbling back and forth. I hope you try it out.
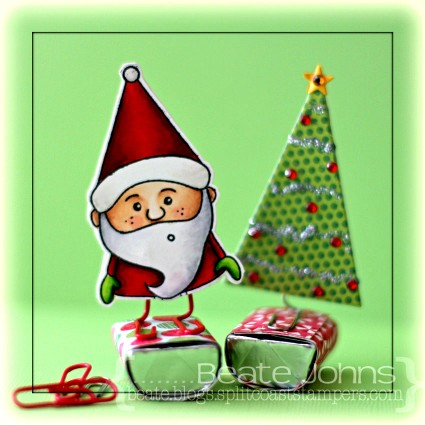
I made two samples. One really simple one with pieces cut out of Carta Bella Merry & Bright paper cut with Simon Says Stamp exclusive Christmas Trees dies. The tree was decorated with Silver Stickles and Red Baby Bling Rhinestones.  A tiny star was cut out of Desert Marigold Fourz Bazzill paper with another die from the Holiday Trees set.

The santa (from Simon Says Stamp Gnome Sweet Gnome ) was a bit more tricky, since the stamp comes only with his face, not the back.  I stamped it twice in Tuxedo Black Memento Ink on Neenah Solar White cardstockand cut them out. I flipped one over and traced the lines from the front to the back, leaving off his face and his thumbs.
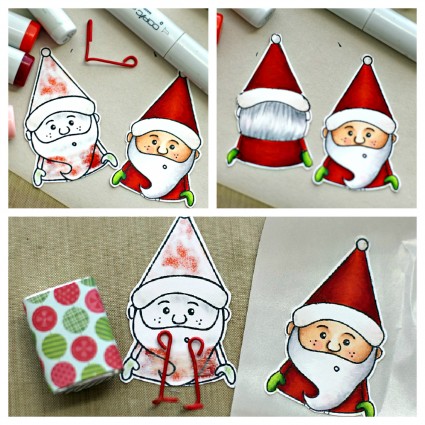
The images were then colored with Copic Markers (Red: YR09, R24, R29, R39    Mittens: YG01, YG03, YG17    Beard/Hair: N0, N1, N3   Hat trim: W00, W1   Skin: E50, E21, E34, R20). Red paperclips that had been unbend and reshaped were adhered to the inside of the back with Scor-Tape. The front was run through my Xyron and adhered over the back, hiding the paper clip ends. The Santa as well as the tree were adhered to a covered Hershey’s Nugget with Glossy Accents.

Here is a video what these little rockers do: They crack me up, especially that little Santa Gnome.

[youtube]https://www.youtube.com/watch?v=-dLGB22EbVY[/youtube]

And here is a video on how to create the rocker for the visual learner:

[youtube]https://www.youtube.com/watch?v=7CR8qa_D_c8[/youtube]

Thanks so much for stopping by! Have a wonderful day!
Hugs and smiles

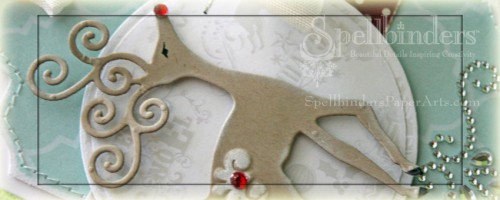
I have a new video to share with you on the Spellbinders Paper Arts blog today.  I love the reindeer image from Frosty Forms Spellbinders™ Shapeabilities® and used it along with a Label Twenty-Eight Spellbinders™ Nestabilities® die to create my tag.

I hope you have time to check out the entire tag and video, especially about the video. I bought a new tripod (since my plastic one was a little fragile for the new arm) and Tripod extender arm to create videos that are filmed directly above my hands. I love how much better it looks. Let me know what you think.

Thanks so much for looking! Have a wonderful weekend!
Hugs and smiles

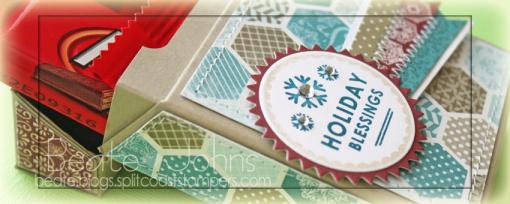
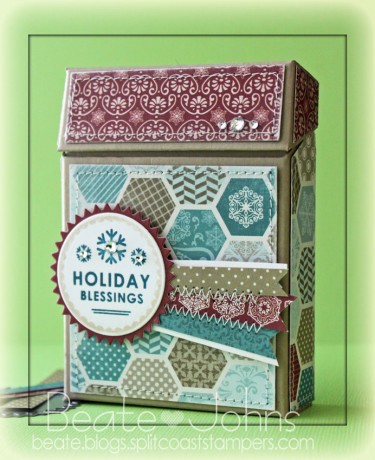
Today’s Holiday Blitz tutorial is written by Susan Culotti. She shows us how to create a flip top box (like it’s used for cigarettes or crayons). I shot the video and created this box as a sample.

My box base is a piece of Kraft cardstock. The patterned paper used to decorate the box is from Carta Bella’s Winter Fun patterned paper. Holiday Apothecary Labels stamps and dies were used to dress up the box.  Rhinestones from Sleek Strips Silver Rhinestones finish off the box.

Here is a video for the visual learner:
[youtube]https://www.youtube.com/watch?v=5M9mODY5weM[/youtube]

Thanks so much for stopping by! Have a wonderful day!
Hugs and smiles
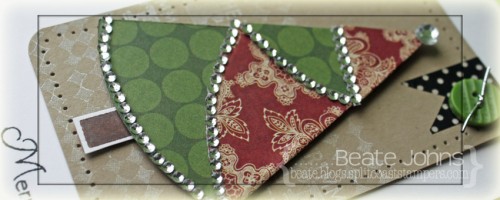
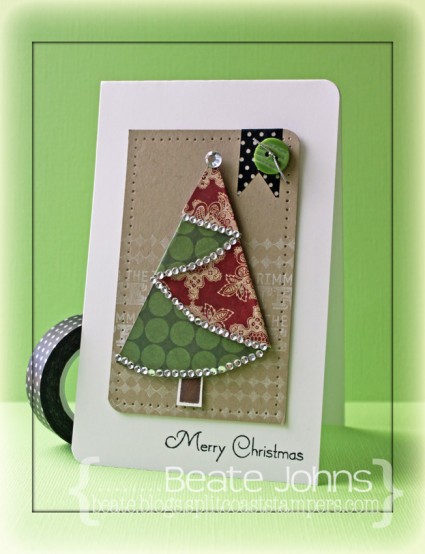
I created a quick tutorial on how to fold half circles into a Christmas tree for today’s tutorial on Splitcoaststampers.  I started out by cutting a circle out of Teresa Collins Christmas Cottage with the smallest of the Grand Circle Nestabilities die.  The circle was cut in half, folded and decorated with rhinestones.

A stamp from the Lollipop Treat stamp set was stamped in Jumbo Java VersaMagic Ink on Neenah Solar White cardstock. It was cut out and adhered under the tree.

The upper right and lower left corner of a 3″ x 5″ piece of Kraft cardstock were rounded. The bottom was stamped with a background stamps from the Lollipop Treat set and a sentiment from  Document It – December in Moonlight White Brilliance Ink. The edges were pierced before the Christmas tree was adhered with foam adhesive squares.

A piece of black polka dotted Washi Tape was adhered to the top right corner of the kraft cardstock. It was topped with a button, tied on with silver cord. The layer was adhered to the card base, a 3 1/2″ x 11″ piece of white cardstock. A sentiment from Christmas Ornaments was stamped to the lower right edges of the card with Tuxedo Black Memento Ink.

Here is a video for the visual learner:

[youtube]https://www.youtube.com/watch?v=7u8oJd3g384[/youtube]

Thanks so much for stopping by! Have a wonderful day!
Hugs and smiles
Today’s tutorial on Splitcoast is written by the wonderful Stacy Morgan. She is showing us how to create little treat holder that look like Hershey’s Kisses. I shot the video and create a Halloween treat holder…What else but a Halloween project can I showcase today, right?

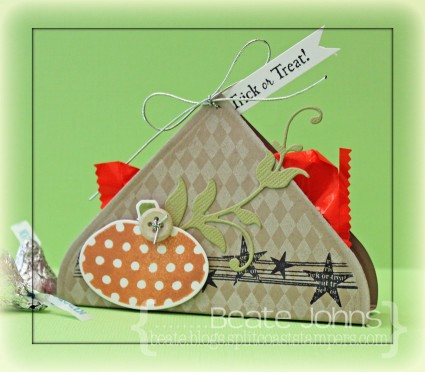
I started by cutting two hearts out of Kraft cardstock with the largest of the Classic Heart Nestabilities dies. They were first stamped with the smallest Distressed Diamonds background in Cloud White VersaMagic Ink. Once that dried, I stamped the star banner from Primitive Pumpkins over it in Jet Black Archival ink.

A pumpkin was cut out of Neenah Solar White cardstock with one of the Primitive Pumpkin Die-namic dies, and one of the pumpkins was stamped over it in Tea Leaves and Pumpkin Spice VersaMagic Ink. Lizard Bazzill Textured Cardstock was cut with the Flourish Die-namics die. The flourish and the pumpkin were adhered to the treat holder front and a button was tied to the pumpkin with silver cord.

A sentiment of the Primitive Pumpkins set was stamped in Jet Black Archival Ink on a white strip of cardstock and tied on to the Hershey’s Kiss with more silver cord.


Here is a video for the visual learner:

[youtube]https://www.youtube.com/watch?v=gpXJFFNNEfo[/youtube]

Thanks so much for stopping by! Have a wonderful Halloween!
Hugs and smiles

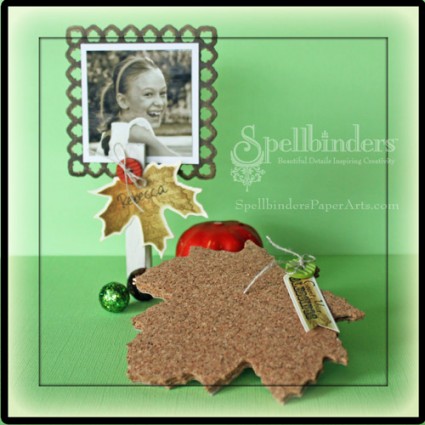
It’s my turn to post a Savvy Saturday video on the Spellbinders blog. I created a place card holder and shaped coaster to dress up the Thanksgiving table.

I hope you have time to check out the post on the Spellbinders blog, watch the video and tell me what you think.

Have a wonderful weekend!
Hugs and smiles

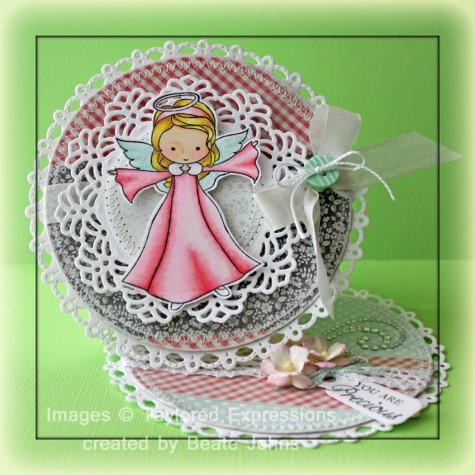
My card today is a multi-tasking card. It is a sample in this week’s tutorial for the Twisted Circular Easel card, a fun variation of the Easel card tutorial that was already in our resource section. It is also a sample for the new Spectrum Noir Marker review on SCS and a sample for Lydia’s HYCCT challenge, which was to create a card that showcases your style.

I started by stamping Taylored Expressions Moka Angel image Tuxedo Black Memento Ink on Neenah Solar White cardstock. It was colored with Spectrum Markers (Dress: PP1, PP3, PP5 Skin: FS2, FS3, FS 6 (cheeks), TN2 Wings: BT1, BG2) and cut out.  A piece of white cardstock was cut and embossed with a Vintage Lace Motif die. A piece of My Mind’s Eye Be Happy paper was cut and embossed with a Standard Circle Nestabilities die. The edges were sanded before the circle was stitched to the Vintage Lace circle.  The angel was adhered over the circles with foam adhesive squares. Stardust Stickles was added over the wings and the halo.

My Mind’s Eye Honey patterned paper was cut and embossed with the smallest Grand Circle Nestabilities die. The edges were sanded and stitched. Seam binding was tied around the layer. The bow was topped with a button, tied on with embroidery thread and the layers were adhered to a piece of white cardstock, cut and embossed with the smallest of the Grand Decorative Circle dies.  The image circles were adhered to the card front center with foam adhesive squares.

The inside of the card was also decorated with Honey patterned paper that had been cut and embossed with a Grand Circle Nestabilities die. White Crochet Ribbon was adhered around the horizontal strip before the layers were stitched.  White cardstock was cut and embossed with a tag die from the new Back to the Basic tag dies. A sentiment from Moka Angel was stitched on it with Jet Black Archival ink. Flowers and part of a Finesse Rhinestone Swirl finish off the card.

Here is a video for the visual learner:

[youtube]https://www.youtube.com/watch?v=1RoUVh0l8yM[/youtube]

Thanks so much for stopping by! Have a great day!
Hugs and smiles

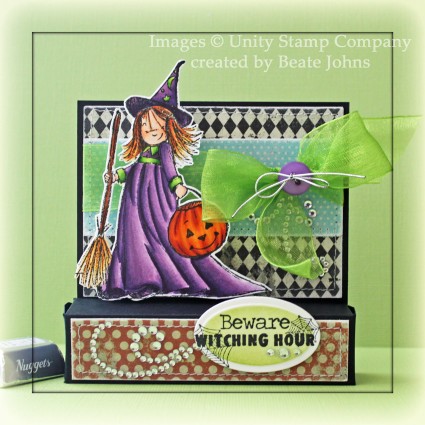
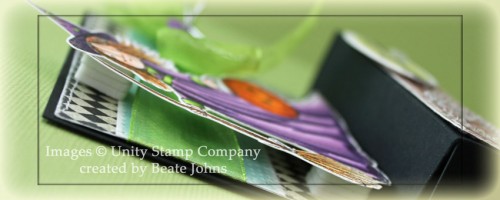
Today’s tutorial was written by the wonderful Patti Gilliam. She is sharing on how to create a darling little box, with a flat back, that allows you display your artwork. I popped my Witch up on four dimensional adhesives, so the box part acts like a stage for her to stand on.

To begin with I stamped Phyllis Harris darling A Tiny Witch in Tuxedo Black Memento Ink on Neenah Solar White cardstock and  colored her with  Copic Markers (Skin: E000, E00, E01, BV10    Hair: Y23, E97, E99   Dress: V12, V15, V17, V09, YG01, YG03, YG17   Broom: E33, E39, YR21, YR23, YR27   Pumpkin: YR12, YR15, YR04, YR27). The witch was cut out and set aside.

The box base was created out of black cardstock. Two pieces of Echo Park Mischievous Patterned Paper were cut to a 3 13/16″ length. The blue strip measures 1 3/8″, the black piece 2 7/8″. Both pieces were sanded before the blue strip was adhered over the bigger black piece and the edges were stitched. May Arts Ribbon was tied around the blue strip and the bow was topped with a button, tied on with a silver cord.

The layered paper was adhered to the back of the box with Scor-Tape and the Witch was adhered over the ribbon. I stacked 4 foam adhesive squares on top of each other so my witch would stand off a bit.

A 7/8″ x 3 13/16″ strip of Mischievous paper was sanded and stitched before it was adhered to the front. A sentiment from the set was stamped in black ink on white cardstock that had been cut and embossed with one of the insert dies from Fancy Framed Tag One set. The center was sponged with Pear Tart Memento Ink before the oval was adhered to the right hand side of the box part. Three rhinestones from a Sleek Strips Silver Rhinestones pack were adhered underneath the sentiment and part of a Finesse Rhinestone Swirl was added next to the sentiment and under the bow.

Here is  video for the visual learner:


I hope you try it out!! This is a fun and super easy box. Thanks so much for stopping by!
Hugs and smiles

P.S.: I hope you are subscribed to Splitcoaststampers Weekly Inkling. Simon Says Stamp has a discount code in there for subscribers. 25% off!!!

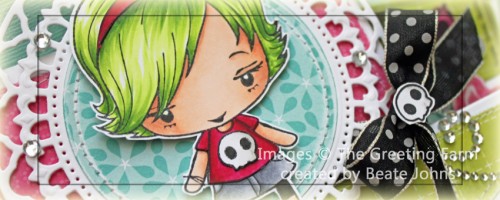
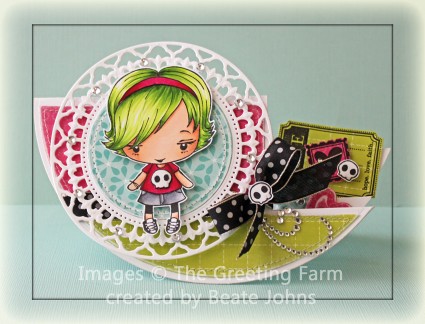
Today’s tutorial on Splitcoaststampers is for a Side Step card variation, the Circular Side Step card. For my sample I stamped the darling Ebony from The Greeting Farm in Tuxedo Black Memento Ink once on Neenah Solar White cardstock, once on pink paper from Echo Parks Summer Days collection. The shirt and head band were colored on the patterned paper, the rest on the white cardstock with Copic Markers (Hair: YG01, YG03, YG17   Skin: E000, E00, E01, E11   Shirt/Headband: RV25, RV29, RV69   Skirt: C3, C5, C7   Skull: W00, W1). The headband and shirt were cut out and adhered to the image stamped on cardstock, which was then cut out as well.

White cardstock was cut and embossed with the largest Splendid Circle die and blue patterned paper from Summer Days with the third largest  Standard Circle Nestabilities die. The patterned paper was sanded, then stitched to the Splendid Circle center. Ebony was adhered over the circles with dimensional adhesive.

The card base was cut and embossed out of white cardstock with the second largest Grand Circle Nestabilities die. Patterned paper strips from the Summer Days paper pack were adhered together, cut and embossed with that same circle die. The edges were sanded and then the paper was cut on the embossed edge. For the cuts on the right hand side I placed the paper over the card base and used a stylus to trace the cut lines. Next I cut 1/8″ along that traced line. The edges were stitched before the paper was adhered to the card front. Ribbon was tied around the edge of the first step and tied into a bow. A skull from the shirt was stamped again on white cardstock, cut out and adhered over the bow. The image was adhered over the big part of the card base with dimesional adhesive and part of a Finesse Rhinestone Swirl was adhered under the bow.

The tag and postage image from Tea-rrific clear stamp image were stamped in black ink on Summer Days paper and cut out. They were adhered on top of each other with another skull image and taped the the back step of the card.

In the center two pieces of Summer Days paper were cut and embossed with the bigger heard from the new Folk Art die set. The edges were sanded. The hearts were adhered to the center step and topped with two of the bigger rhinestones from a Sleek Strips Silver Rhinestones pack.

Here is a video for the visual learner:

[youtube]https://www.youtube.com/watch?v=HlALbWF4MRc[/youtube]

Thanks so much for stopping by! Have a wonderful day!
Hugs and smiles
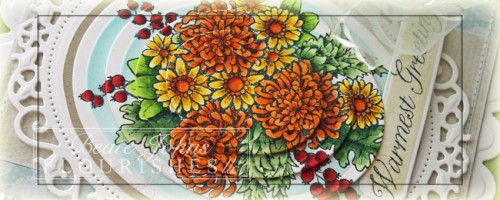
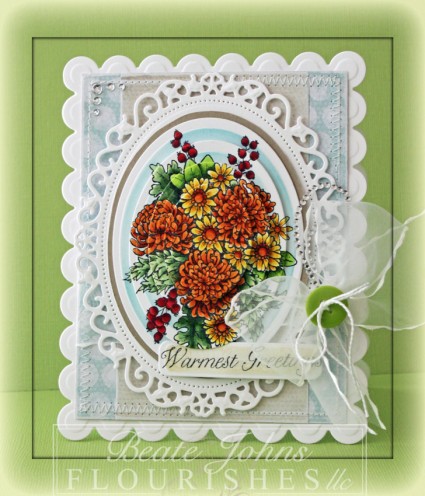
I created this card as a sample for Wednesday’s tutorial on Splitcoaststampers. I thought the bouquet from Autumn Blossoms would work great for the Telescoping Image Technique.

The image was stamped twice in Tuxedo Black Memento Ink on white cardstock. The images were colored with Copic Markers (Y13, Y15, Y17, YR12, YR16, YR18, G20, G21, G24 ,G28, YG11, YG13, YG17, R24, R27, R39) and cut and embossed with Classic Oval LG dies. The edges of the larger ovals were sponged with Tumbled Glass Distress ink before the layers were adhered on top of each other with dimensional adhesive. The ovals were then adhered to Kraft cardstock that was hand cut into a slightly larger oval layer. All layers were adhered to white cardstock, cut and embossed with the Floral Oval Nestabilities die.

Pieces of patterned paper were cut and embossed with the second smallest Grand Rectangle Nestabilities die. The edges were sanded and stitched before Sheer ribbon was tied around the layer and through one of the Floral Oval openings of the frame.  The bow was topped with a button, tied on with embroidery thread.

A sentiment from Autumn Blossom was stamped on white cardstock, cut and embossed with one of the insert dies from the Fancy Framed Tags One dies. The raised part was sponged with Antique Linen Distress ink.

The layers were adhered to a card base, cut out of white cardstock with the second smallest Grand Scallop Rectangle Nestabilities die. Part of a Finesse Rhinestone Swirl over the bow and a few single Rhinestones on the top right finish off my card.

Here is a video for the visual learner:

[youtube]https://www.youtube.com/watch?v=xbBTf55aRKs[/youtube]

Check out what my fellow design team member have created today:

Thanks so much for stopping by! Have a wonderful weekend
Hugs and smiles

© 2012 fresh & fun Suffusion theme by Sayontan Sinha