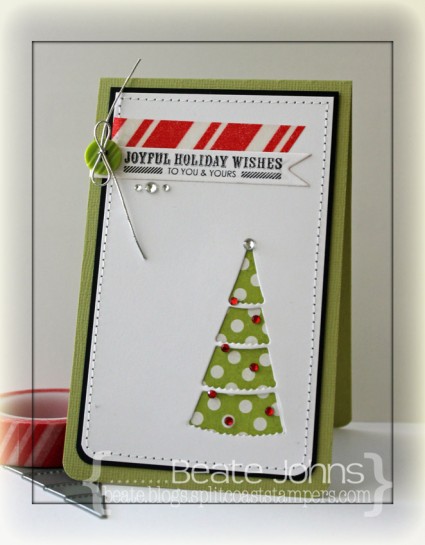
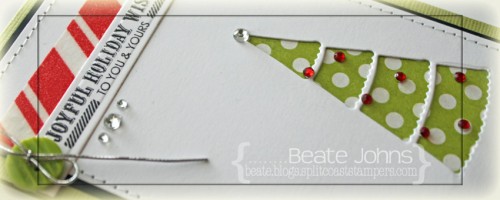
I created this card a while ago for an inspiration challenge on Splitcoast.  I started with a 3″ x 5″ piece of Neenah Solar White cardstock . The bottom two corners were rounded and the Petite Christmas Tree was cut in the lower right corner. Carta Bella’s Merry & Bright patterned paper was adhered behind the tree cut out and the layers were stitched to a slightly bigger piece of black cardstock.

White cardstock was cut and embossed with a Spellbinders Nested Pennants die and a sentiment from the new Small Folded Banners Holidays was stamped over it in Jet Black Archival ink. A button was tied on to the right edge with silver cord before it was adhered to the upper left edge. Red striped washi tape was adhered over it.

Silver Rhinestones were adhered under the sentiment and on top of the tree. Baby Bling red rhinestones were added to the tree to finish off the card.

Thanks so much for stopping today! Have a wonderful day!
Hugs and smiles

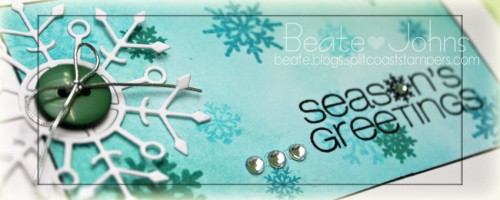
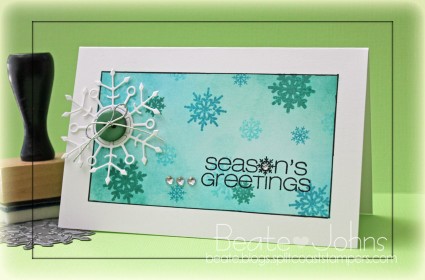
Today’s featured new CAS-ual Fridays Stamps set is called Snowflake Greetings. As the name says it has quite an assortment of snowflakes as well as greetings. My card was created out of  5 1/2″ x 7″  piece of Neenah Solar White cardstock. It was folded in half and  a 3/4″ border was masked off with Eclipse Tape.

The center of the card was sponged with Evergreen Bough and Broken China Distress inks. Snowflakes were stamped with those same colors as well as Tumbled Glass Distress ink.

A border was drawn with a Copic Multiliner and a sentiment was stamped in the lower right corner of the sponged area with Jet Black Archival Ink.  Three rhinestones from Sleek Strip Silver Rhinestones were adhered to the left of the sentiment.

White cardstock was cut with the Faceted Snowflake die. A green button was tied on with silver cord before the snowflake was adhered to the upper right hand corner of the sponged area.

Make sure you check the CAS-ual Fridays Stamp blog to see more samples created with the new set.  Thanks so much for stopping by! Have a wonderful day!

Hugs and smiles

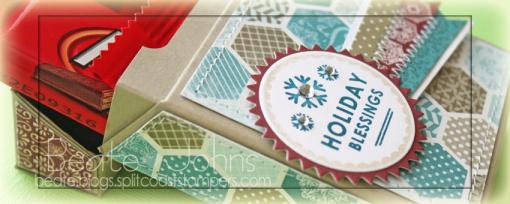
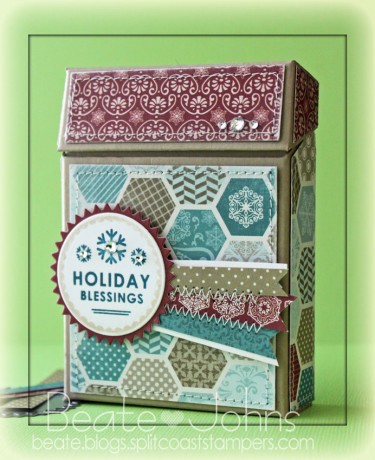
Today’s Holiday Blitz tutorial is written by Susan Culotti. She shows us how to create a flip top box (like it’s used for cigarettes or crayons). I shot the video and created this box as a sample.

My box base is a piece of Kraft cardstock. The patterned paper used to decorate the box is from Carta Bella’s Winter Fun patterned paper. Holiday Apothecary Labels stamps and dies were used to dress up the box.  Rhinestones from Sleek Strips Silver Rhinestones finish off the box.

Here is a video for the visual learner:
[youtube]https://www.youtube.com/watch?v=5M9mODY5weM[/youtube]

Thanks so much for stopping by! Have a wonderful day!
Hugs and smiles

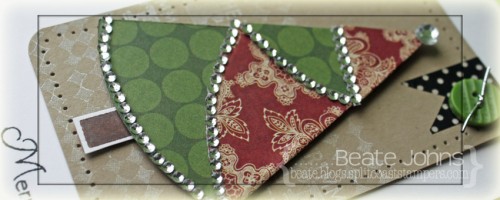
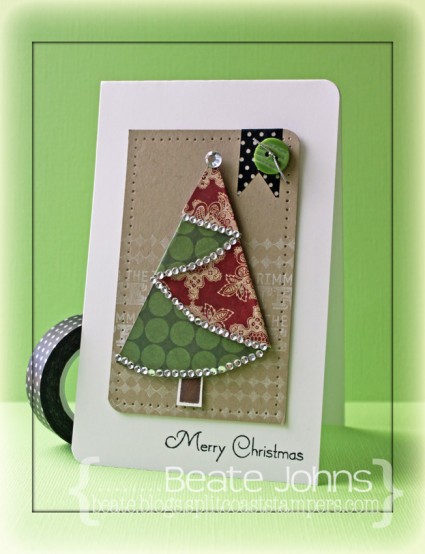
I created a quick tutorial on how to fold half circles into a Christmas tree for today’s tutorial on Splitcoaststampers.  I started out by cutting a circle out of Teresa Collins Christmas Cottage with the smallest of the Grand Circle Nestabilities die.  The circle was cut in half, folded and decorated with rhinestones.

A stamp from the Lollipop Treat stamp set was stamped in Jumbo Java VersaMagic Ink on Neenah Solar White cardstock. It was cut out and adhered under the tree.

The upper right and lower left corner of a 3″ x 5″ piece of Kraft cardstock were rounded. The bottom was stamped with a background stamps from the Lollipop Treat set and a sentiment from  Document It – December in Moonlight White Brilliance Ink. The edges were pierced before the Christmas tree was adhered with foam adhesive squares.

A piece of black polka dotted Washi Tape was adhered to the top right corner of the kraft cardstock. It was topped with a button, tied on with silver cord. The layer was adhered to the card base, a 3 1/2″ x 11″ piece of white cardstock. A sentiment from Christmas Ornaments was stamped to the lower right edges of the card with Tuxedo Black Memento Ink.

Here is a video for the visual learner:

[youtube]https://www.youtube.com/watch?v=7u8oJd3g384[/youtube]

Thanks so much for stopping by! Have a wonderful day!
Hugs and smiles

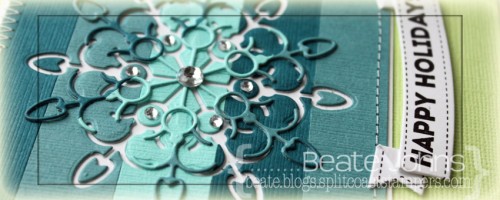
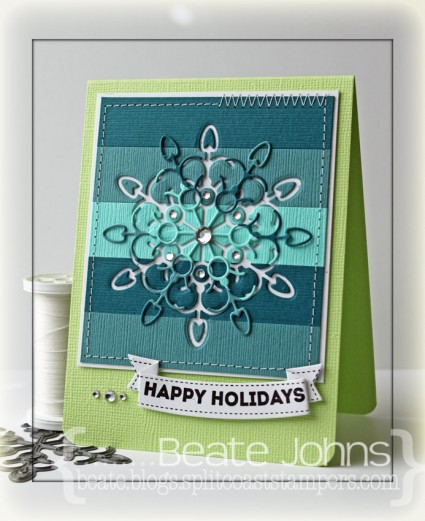
I created this card for a Way to Use it Challenge (no fall colors) and a CASE study challenge.  I just LOVED the card we had to case and it made me create not just one but several cards. For this one I paired 3/4″ x 3 1/4″ wide strips of different colored blue Bazzill cardstock were adhered to a slightly bigger white base. I used the new Simon Says Stamp Curvy Snowflake die to cut a negative image in the center.  The edges were stitched and the snowflake die cut was adhered over the negative cut.

The layers were adhered to the card base, a 3 3/4″ x 10″ piece of Limeade Bazzill cardstock, folded in half. The bottom corners were rounded.

A piece of Solar White cardstock was cut and with Holiday Folded Banner die. The sentiment and frame is from the same named Simon Says Stamps exclusive stamp set and was stamped on the banner with Jet Black Archival ink. The banner was adhered to the lower right edge of the snowflake panel. Rhinestones on the snowflake and next to the banner finish off the card.

Thanks so much for looking! Have a wonderful day!
Hugs and smiles

P.S.: Today’s Holiday Blitz tutorial on Splitcoaststampers was created by Theresa Momber. She shows you how to turn a circle die cut into a darling basket.


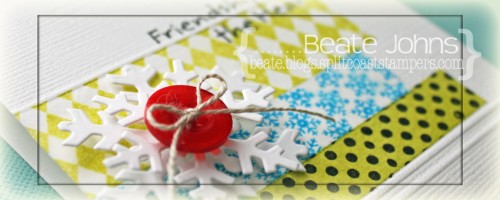
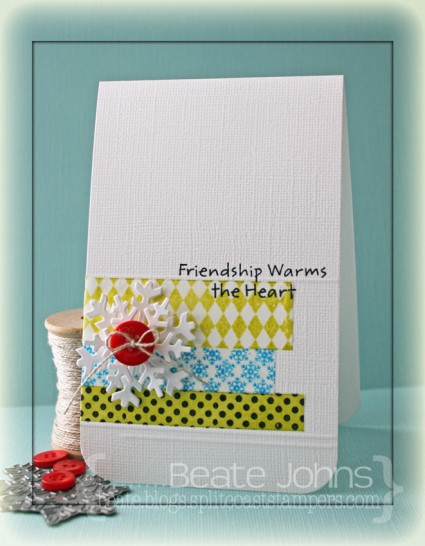
I created this card for a Featured Stamper challenge last month. Cheryl has such a wonderful gallery, I wanted to case another card of hers. This time I chose this CAS washi tape card.  I created my Washi Tape strips out of Tissue Stock from Canvas Corp. I cut strips in different sizes.

The biggest strip was stamped with the the smallest diamond images from Distressed Diamonds stamp set in Pear Tart Memento Ink. The thin strip was stamped with the snowflake background from Christmas Ornaments in Bahama Blue Memento Ink.  The last strip was sponged with Pear Memento Ink and stamped with a background stamp from By the Numbers in Jet Black Archival ink.

The card base is a 3 1/2″ x 11″ piece of textured Whisper White Stampin’ Up! cardstock folded in half. The bottom corners were rounded. A line was scored at 3/4″ on the bottom. Then the Faux Washi tape strips were adhered with a Xyron glue stick. Another line was scored right above the tissue strips, as well a partial strip 1/8″ under the lower score line.

A sentiment from Merry Kissmas was stamped on the right hand side partially on, partially off the highest tissue paper strip.  Neenah Solar White cardstock was cut with the two largest Let it Snowflake die-namic dies. They were stacked with foam adhesive squares and topped with a button.

Thanks so much for stopping by today! Have a wonderful day!
Hugs and smiles


P.S.: Today’s Holiday Blitz Tutorial on Splitcoaststampers was written by the wonderful Clare Buswell. She is showing how to create a pierced Luminaria.  I hope you have time to check it out!

Today starts our 6th annual Holiday Blitz week on Splitcoaststampers! Every day for the next week a new tutorial will be published with cute Holiday ideas. Check here to find the project galleries (with links to the tutorials) from the previous Holiday Blitz weeks.

The first tutorial was created by the wonderful Deb Felts. Check out here Tiny Triangle Box tutorial.

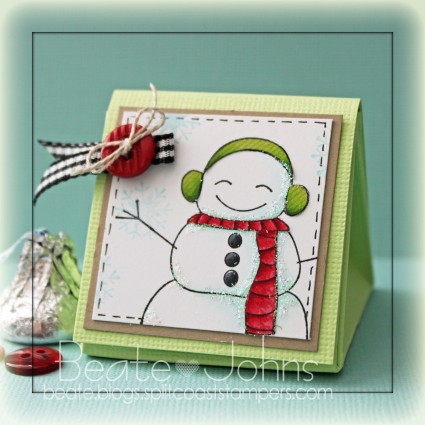
My box base was created out of Limeade Canvas Bazzill cardstock. An image from Taylored Expressions The Cool Crowd was stamped in Tuxedo Black Memento Ink on a 2 11/16″ square of Neenah Solar White cardstock. The image was stamped again on patterned paper from Carta Bella’s Merry & Bright Paper pack. Pieces were cut out and adhered to the image on the white cardstock square. The image was colored with Copic Markers (R32, R35, R39, YG01, YG03, YG17, C5, C7, C9, BG10, BG11) and a border was doodled with a Copic Multiliner. A few snowflake from The Cool Crowd were stamped on the layer with Sea Breeze VersaMagic ink.

The layer was first adhered to a 1 3/4″ square of Kraft cardstock before it was adhered to the box base. Some glitter was added to the snowman and gingham ribbon was tied to a button with Linen Thread and adhered to the upper left side of the image.

Thanks so much for stopping by! Have a wonderful day!
Hugs and smiles

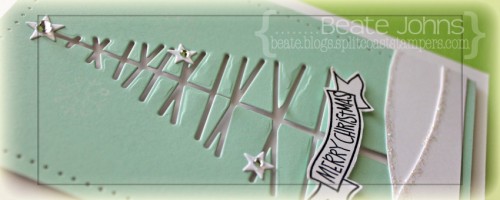
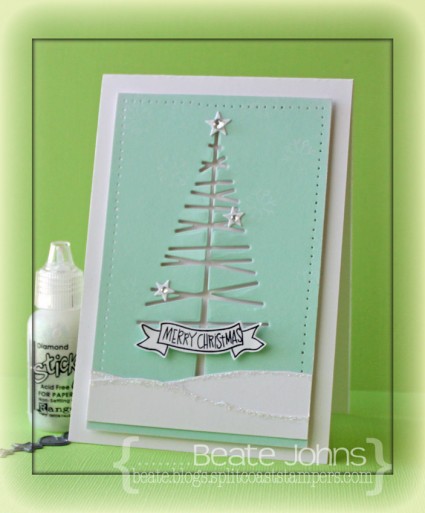
I received my Holiday Card Kit from Simon Says Stamp and had to play with it right away. I made two quick cards with it. I can’t wait to color the cute Gnome that comes in the stamp set. I am sure I will get to that soon.  For the first one I started by cutting the Mod tree in a 3 1/4″ x 5″ piece of Shallows paper (came in the kit). The edges were sanded and the side and top edge pierced.

Two 3 1/4″ strips of white cardstock were torn, adhered to the lower part of the layer and the edges were topped with Diamond Stickles.  The layers were adhered to the card base with foam adhesive squares, a 3 3/4″ x 11″ piece of white cardstock (from kit), folded in half. More white cardstock was cut with the Holiday Shapes die. Three stars were added to the tree and topped with a rhinestones.

A sentiment from Gnome for the Holidays (included in the kit) was stamped in the banner outline from the same set, cut out and adhered under the tree to finish off the card.

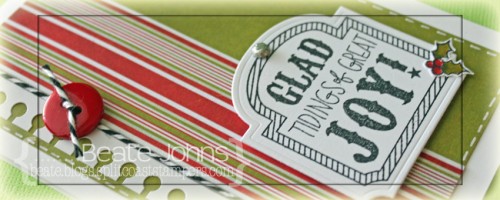
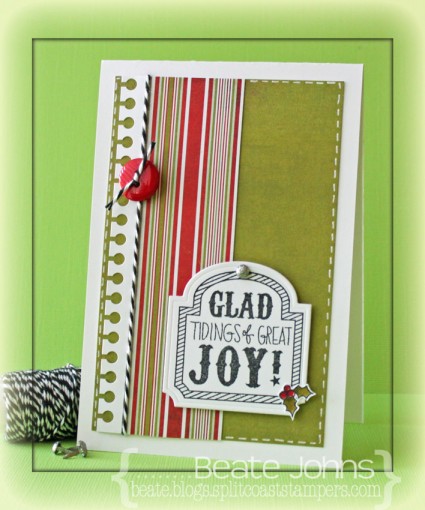
For my second card I stamped the label image from Gnome for the Holidays in Jet Black Archival ink on white cardstock, that had been cut with Simon Says Stamps exclusive Apothecary Label dies.  A little silver glitter brad (included in kit) was added on the top of the label.

Part of a Doodlebug Francy Frills cardstock sticker (included in the kit) was adhered to a 1 3/8″ x 5″ piece of Aspen Frost Basic Grey (one sheet of each design included in the kit)  paper strip. Both were adhered to a 3 1/4″ x 5″ piece of the same paper kit. Black Doodlebug Twine (from the November kit) was tied around the layers and topped with a button  before the layers were adhered to the card base, a 3 3/4″ x 11″ piece of white cardstock, folded in half.

Faux stitching was added with a white gel pen. The tiny holly image from Gnome for the Holidays was stamped in Tuxedo Black Memento Ink on Neenah Solar White cardstock and colored with Copic Markers (R24, R29, R39, YG93, YG97). The imag was cut out and adhered to the lower right of the label to finish off the card.

There is only a limited amount of those card kits available. I am glad I got mine!

Thanks so much for stopping by! Have a wonderful day! It’s Friday!!!! Wohoo
Hugs and smiles

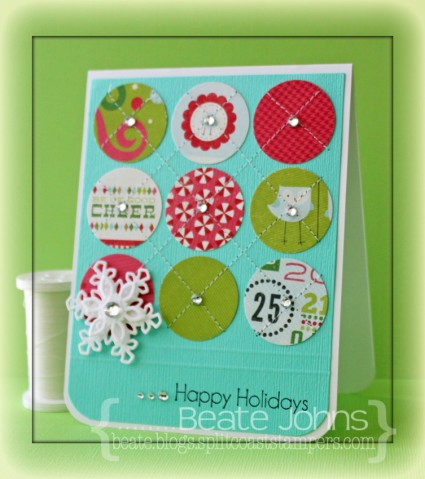
I created this card for last week’s Featured Stamper challenge. I loved this layout from Cheryl’s card and decided to use it and just change it a tiny bit. I changed the colors, the direction of the stitching and made it a Christmas card.

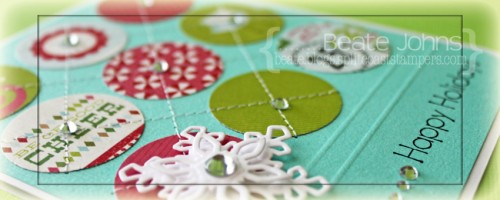
I was too lazy to cut and emboss 9 circles with my Circle Nestabilities, so I used my 1 1/4″ circle punch to cut circles out of Carta Bella’s Merry & Bright patterned paper. They were adhered to the top of a 4 1/8″ x 5 1/4″ piece of Patina Bazzill Cardstock.  Two lines were scored at the 4 1/8″ and 4 3/8″ with my Scor-Buddy. Lines were stitched diagonally through the circles and the bottom corners were rounded.


A sentiment from Taylored  Expressions Very Merry stamp set was stamped on the bottom right corner of the cardstock with Jet Black Archival ink. The layer was adhered to the card base, a 4 1/4″ x 11″ piece of Neenah Solar White cardstock, folded in half.  White cardstock was cut and embossed with two small Create a Flake 4 Spellbinders dies. They were adhered together with more foam adhesive square. A rhinestone was added to the center of the flake. It was adhered to the lower left circle. More rhinestones from a Sleek Strips Silver Rhinestones were adhered in the center of each circle and to the left of the sentiment to finish off the card.

Thanks so much for stopping by! Have a wonderful weekend!
Hugs and smiles

Taylored Expressions is hosting a Holiday Hoopla today and I’m excited to be a part of it. You should have arrived here from Sankari‘s blog.  If you didn’t (or if you get lost along the way) you can head back to the beginning at Taylor’s blog for the full list of participants. There are 22 designers showcasing Christmas/Winter/Holiday stamps sets from TE with samples that include all sorts of projects from cards to gifts and beyond!  We want to inspire you to get your holiday crafting and card making into high gear!  Be sure to stick with me all the way to the end of the post to get a coupon code for 25% off holiday stamp sets at Taylored Expressions!


The set I’m showcasing is Tag You’re It. It’s great to create fast Christmas gift tags.

For my sample I wanted to show a quick and easy gift idea with Taylor’s Tag You’re Are It! stamp set. I stamped the Penguin tag in Tuxedo Black Memento Ink on Neenah Solar White cardstock. The image was cut out and colored with Copic Markers (YG61, YG63, R08, R27, R29, YR15).
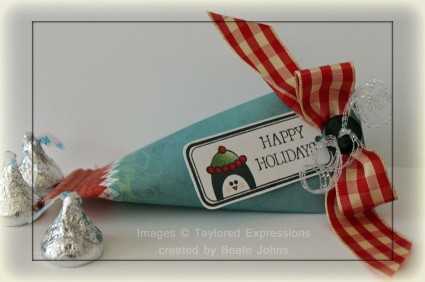
A sour cream container was created with a 4 1/2″ x 5″ piece of Bo Bunny Blitzen paper. A bow was tied with gingham ribbon with the help of the Bow-Easy. Curling Ribbon was used to tie the tag to the bow and the bow to the container.

Here is a video on how to create a sour cream container for the visual learner:

[youtube]https://www.youtube.com/watch?v=QsgcPQCTe8M[/youtube]

Creating for this hop caused to me to go back and look at some of my previous creations and I wanted to share one of those with you today too.  You can find it here.

Are you getting in the mood to stamp?  Be sure to check out Taylor’s 12 Days of A Handmade Christmas Video Series for lots of easy gift ideas.

Now, who loves a SALE? Use Coupon Code HOOPLA2011 to get 25% off the following holiday stamp sets (released in 2009 and 2010) at Taylored Expressions now through November 2:


Christmas Blessings, Enjoy!, From the Heart, Hangin’ Out –  At the North Pole, Holiday Wonder, Home Sweet Home, Keeping Tabs, Merry Little Cocktail, Penguin Pals, Season’s Sweetings, Sparkle & Cheer, Tag Treats , Tag You’re It, Take Note – Holidays , Wings of Joy, Winter Wonderland.

The coupon code is case sensitive. Follow these instructions to apply the discount to your order:


1. Add the desired stamp sets from the above list to your shopping cart.

2. Insert the coupon code into the Promotional Code box.

3. Click the Update Cart button.  Your discount should now be applied.

4. Proceed to checkout to finalize and submit your order.

Now hop on over to Danielle Lounds for the next sample. Thanks so much for stopping by! Have a wonderful day.
Hugs and smiles

© 2012 fresh & fun Suffusion theme by Sayontan Sinha