

I had a great time in Richmond helping Colleen with her Copic Certification class. During the morning I had time to color. I had brought this darling new Elf Bell Mouse stamp created by Meljen for Whimsy Stamps. That stamp is so much fun to color. How can you not love that face? LOL
I stamped the image in Tuxedo Black Memento Ink on X-Press It blending card and colored it with Copic Markers (Bell: Y32, Y35, Y38, E97, E99, Ears/Tail: E01, E02, E04, Body: N1, N3, N5, N7, Shoes/hat: YG00, YG03, YG25, YG17, G28, Hat/Bow: R24, R27, R29, R39), cut and embossed it with Classic Circle Nestabilities and airbrushed the center with Copic Marker BG01. The image was layered on black cardstock cut and embossed with the largest Classic Scallop Circle Nestabilities die. To finish the main image off I added Cosmo Crystal Crafty Sparkles to the hat and Chunky Crystal Crafty Sparkles as snow underneath the mouse.
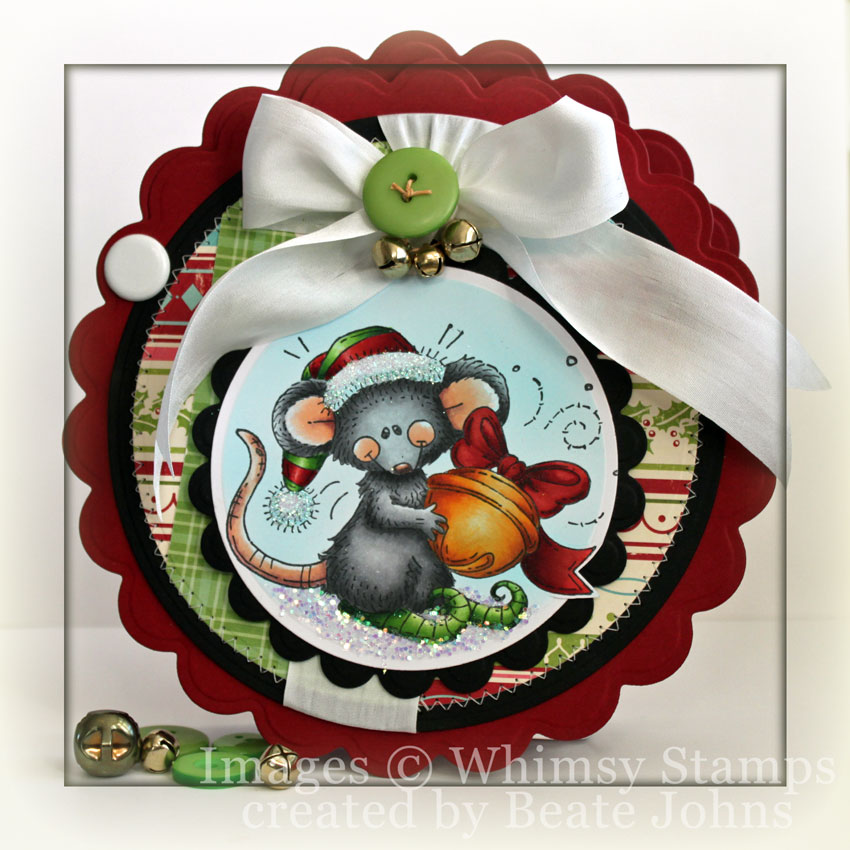
The mouse image is a pretty big, so after layering it on the biggest Classic Circle Nestabilities, I knew it was time to unpack my Grand Circle and Grand Scallop Circle Nestabilities. I am so excited to own the new Grand Calibur and some of the new big dies. I cut a circle of Good Cheer Tinsel October Afternoon paper with the third smallest of the Circle Grand Nestabilities die and then cut a 3″ wide strip of Very Merry – Write the Cards OA paper with the same die. The layers were adhered and stitched to black cardstock cut with the next size up Circle Grand Nestabilities. White May Arts Silk Ribbon was tied into a bow around the center and topped with a Basic Grey Button and tiny bells I still have from my quilting days (used them on quilted Christmas stockings).
The card base was created out of two 7 1/4″ squares of Cherry Cobbler Cardstock. It was cut with the second largest Scallop Circle Grand Nestabilities die. The other layers were adhered to the base with Scor-Tape.
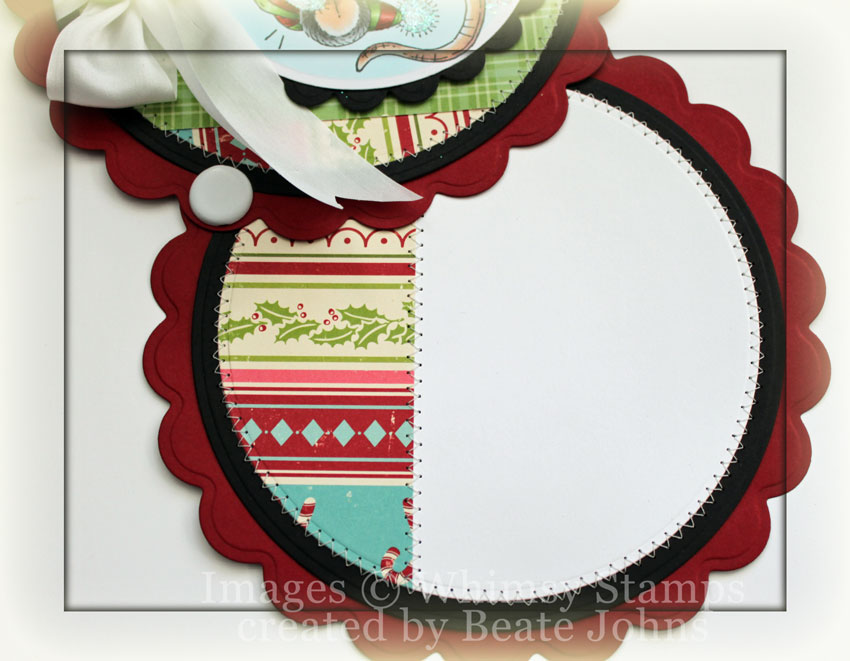
I kept the inside of the card pretty simple. Another black circle topped with Neenah White cardstock and a strip of Good Cheer Tinsel October Afternoon paper. Since the circles were too big to cut an attached card base (by folding cardstock in half and cutting the card that way), I thought it would be cute to have the card attached with a big brad so the card front swings open to reveal the inside. I just wish I had a fancier brad for that then plain old white.
Thank you so much for stopping by! Have a wonderful day! Hugs and smiles


