Today’s tutorial on Splitcoaststampers is written by Judy Maddigan and super fun. My little Santa cracked me up wobbling back and forth. I hope you try it out.

I made two samples. One really simple one with pieces cut out of Carta Bella Merry & Bright paper cut with Simon Says Stamp exclusive Christmas Trees dies. The tree was decorated with Silver Stickles and Red Baby Bling Rhinestones.  A tiny star was cut out of Desert Marigold Fourz Bazzill paper with another die from the Holiday Trees set.

The santa (from Simon Says Stamp Gnome Sweet Gnome ) was a bit more tricky, since the stamp comes only with his face, not the back.  I stamped it twice in Tuxedo Black Memento Ink on Neenah Solar White cardstockand cut them out. I flipped one over and traced the lines from the front to the back, leaving off his face and his thumbs.
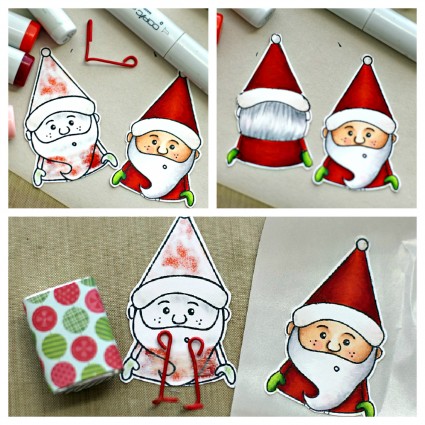
The images were then colored with Copic Markers (Red: YR09, R24, R29, R39    Mittens: YG01, YG03, YG17    Beard/Hair: N0, N1, N3   Hat trim: W00, W1   Skin: E50, E21, E34, R20). Red paperclips that had been unbend and reshaped were adhered to the inside of the back with Scor-Tape. The front was run through my Xyron and adhered over the back, hiding the paper clip ends. The Santa as well as the tree were adhered to a covered Hershey’s Nugget with Glossy Accents.

Here is a video what these little rockers do: They crack me up, especially that little Santa Gnome.

[youtube]https://www.youtube.com/watch?v=-dLGB22EbVY[/youtube]

And here is a video on how to create the rocker for the visual learner:

[youtube]https://www.youtube.com/watch?v=7CR8qa_D_c8[/youtube]

Thanks so much for stopping by! Have a wonderful day!
Hugs and smiles

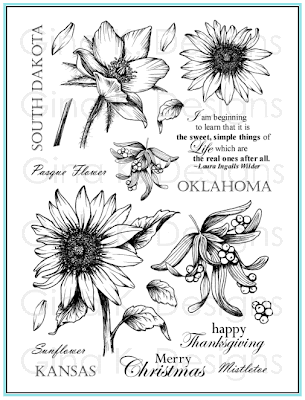
Today I am joining in as a special guest of Melanie Muenchinger in the Gina K Designs October Inspiration blog hop, showcasing the newest stamp set from Gina K Designs, Stately Flowers 5. Stately Flowers 5 is the fifth in a series of hand drawn official state flowers, and is available for purchase in both premium quality clear photopolymer and red rubber.
This set includes flowers for Oklahoma, South Dakota, and Kansas, but the mistletoe and sunflower have been specifically grouped together with all your upcoming fall and winter holiday cardmaking needs in mind, and the sentiments to match!


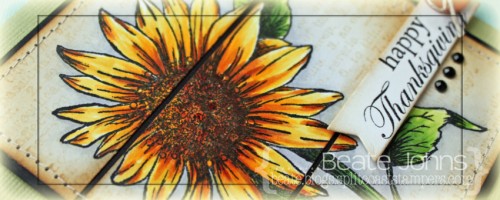
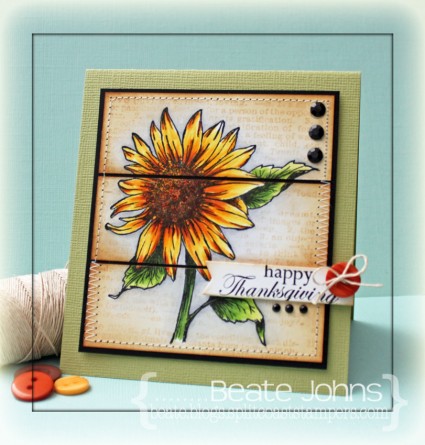
I am excited to be hopping with Melanie today. For my first card I started with by stamping the sunflower in Tuxedo Black Memento Ink on 3 1/2″ x 3 3/4″ piece of white cardstock. It was colored with Copic Markers (Y13, Y15, Y17, E97, E99, YG21, YG25, YG63, YG67, C00, C1, BV20). The image was masked, then a background was stamped over it in Antique Linen Distress ink. The image was cut in three 1 1/4″ wide strips and the edges were sponged with Antique Linen and Vintage Photo Distress ink.

I ran the strips through my Xyron and adhered them to a slightly bigger piece of black cardstock. The edges of the layers were stitched. The layers were adhered to the card base with foam adhesive squares, a 4 1/4″ x 9 1/2″ piece of Lizzard Bazzill cardstock folded in half.

A sentiment from the set was stamped on a piece of white cardstock, cut with one of the Sentiment Strip Die-namic dies. The edges were lightly sponged with Vintage Photo Distress Ink. A button was tied to the upper right hand side of the sentiment strip. The strip was then adhered to the lower right side of the card. Black Rhinestones finish off the card.

I created a second card with that set with last week’s Color Challenge on SCS.

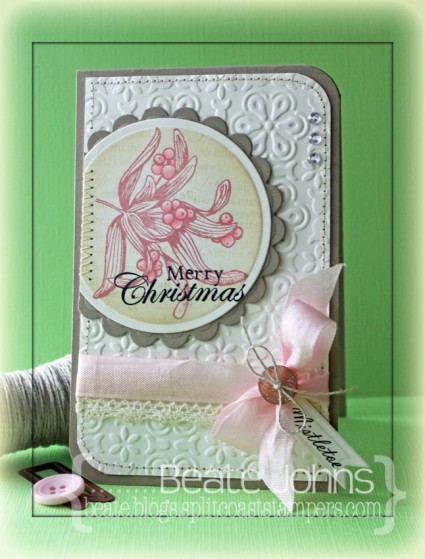
I started by stamping the Mistletoe image in Pink Petunia VersaMagic ink on Neenah Natural White cardstock. It was cut and embossed with a Standard Circle Nestabilities die. The die was kept over the cardstock, the image was masked and the bigger sentiment was stamped over the circle with Antique Linen Distress ink. The edges were sponged with the same color. The image was adhered to a piece of Kraft cardstock, cut and embossed with a Scallop Circle Nestabilities die. Part of the right side was cut off and the edge was stitched.

A 3 1/4″ x 5 1/4″ piece of Natural White cardstock was embossed with the Elegance M-Bossabilities folder. The bottom left and top right corner  were rounded before the edges of the layer were stitched and the circle layer was adhered to the top left. A sentiment was stamped on to the circle layer with Versafine ink.

May Arts Crochet Ribbon was adhered to the lower part of the layer. Pink Seam binding was tied above it.  A Spellbinders Pennant die was used to cut and emboss more Natural White cardstock. The word Mistletoe was stamped on it before it was tied to the bow with Linen thread and a button. Everything was adhered to the card base, a 3 1/2″ x 11″ piece of Kraft cardstock, folded in half. Three rhinestones on the top right edge finish off the card.

Be sure to visit the illustrator of Stately Flowers 5,
today for more samples with her set,
as well as inspiration from the lovely talented 
who is also guest designing this month!
For a full link list of participating designers,

Thanks so much for stopping by! Have a wonderful day!
Hugs and smiles
© 2012 fresh & fun Suffusion theme by Sayontan Sinha